

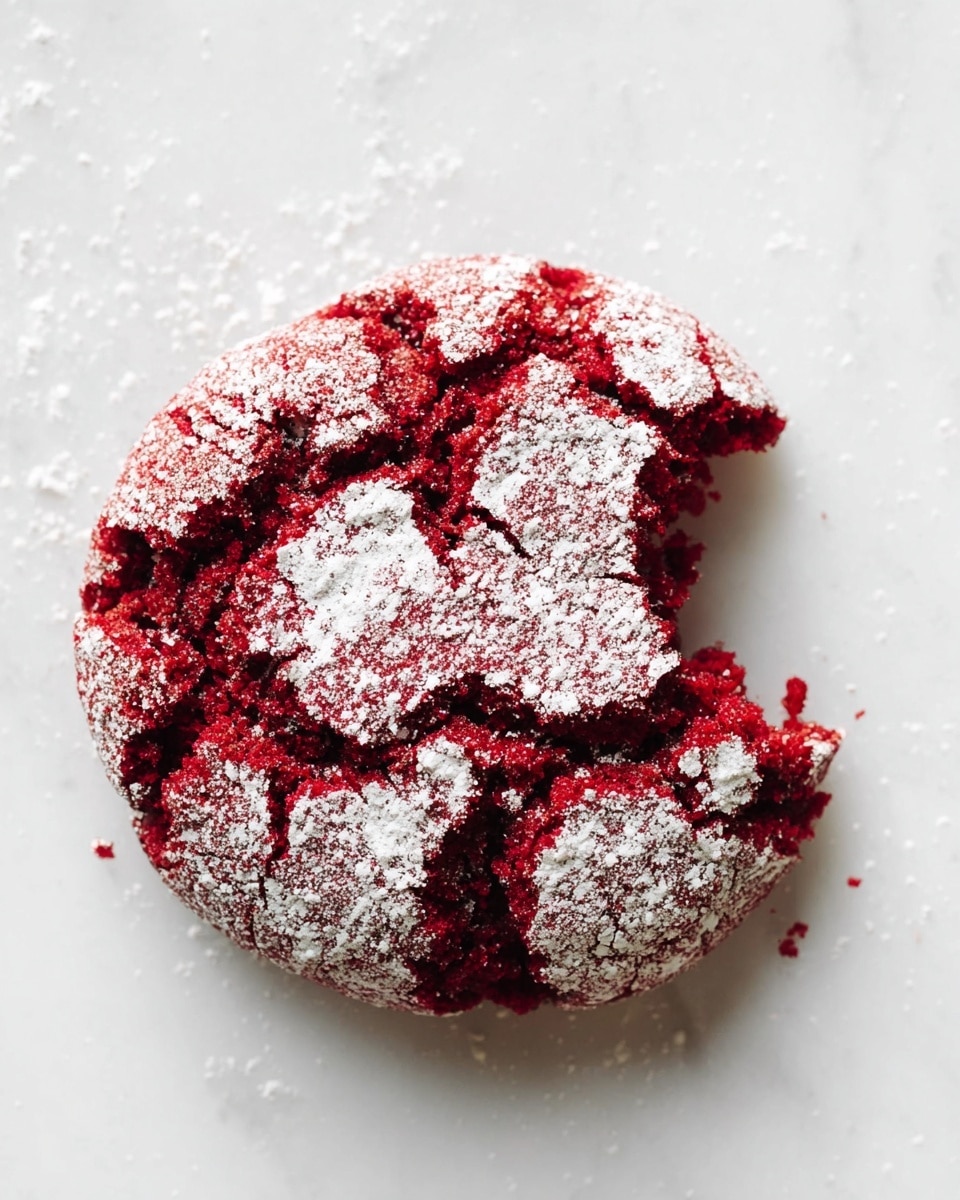
I’m so excited to share this Fudgy Red Velvet Crinkle Cookies Recipe with you because it’s one of those treats that hits all the right notes — fudgy, soft, and just a little bit chewy, with that classic red velvet color that looks stunning against the snowy white crinkle sugar. These cookies are the perfect balance between a brownie and a cookie, making them an irresistible snack or dessert anytime you want a little indulgence.
What I love most about this Fudgy Red Velvet Crinkle Cookies Recipe is how easy it is to make without a mixer, which means less cleanup and a more hands-on experience that’s actually fun. Whether you’re baking for a holiday, a special occasion, or just a cozy afternoon at home, these cookies always bring smiles and that little bit of wow factor when you bite into them.
Why You’ll Love This Recipe
- No Mixer Needed: Perfect for when you want a simple, hands-on baking experience without extra gadgets.
- Fudgy Texture: You’ll find these cookies satisfy your chocolate cravings with that rich, brownie-like softness.
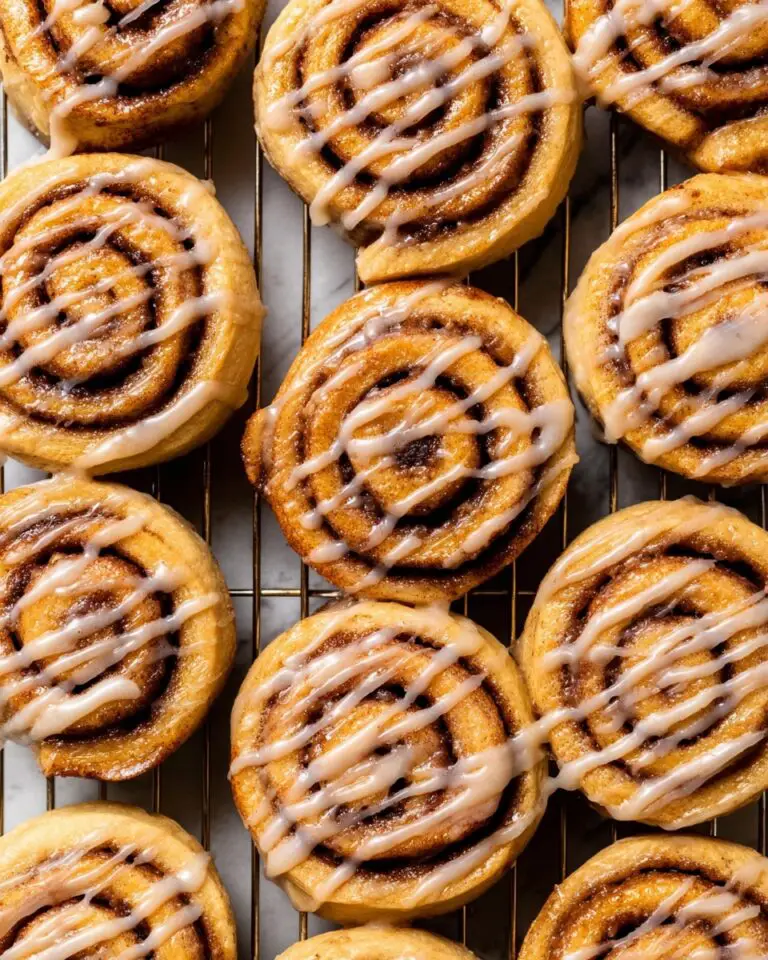
- Show-Stopping Look: The crinkle effect and bright red color make these cookies a festive hit for any occasion.
- Make-Ahead Friendly: The dough chills beautifully, making them ideal for prepping in advance and baking fresh later.

Ingredients You’ll Need
The ingredients for these Fudgy Red Velvet Crinkle Cookies come together to create that perfect balance of chocolate and classic red velvet flavor, with a texture that’s fudgy but melts in your mouth. Each ingredient plays a role in achieving that signature look and taste, so picking quality basics makes a big difference.
- All-purpose flour: The foundation for structure—make sure it’s fresh for best results.
- Baking powder: Helps the cookies puff up just right without being cakey.
- Baking soda: Works subtly with the acidity to tenderize the dough.
- Granulated sugar: Adds sweetness and helps with the crinkle coating.
- Light brown sugar: For a touch of moisture and depth of flavor.
- Eggs and egg yolks: Provide richness and help bind the dough without using heavy butter creams.
- Canola oil: Keeps cookies tender and fudgy without heaviness.
- Red Velvet Bakery Emulsion or red food coloring: Essential for that iconic red velvet color and subtle flavor—emulsion adds extra depth!
- Pure vanilla extract: Balances and enhances the chocolate and red velvet flavors.
- Salt: A little salt heightens all the sweet flavors beautifully.
- Unsalted butter: Melted with chocolate for a luscious fudgy base.
- Semisweet or bittersweet chocolate: Gives the rich chocolate kick that balances the sweet and tangy red velvet taste.
- Cocoa powder: Adds intense chocolate flavor and that perfect dark contrast.
- Confectioners’ sugar: For that classic crinkle cookie coating and a hint of sweetness.
Variations
I love how flexible this Fudgy Red Velvet Crinkle Cookies Recipe can be — sometimes I tweak it just a bit depending on the season or who I’m baking for. Don’t be shy about making it your own with a few fun twists!
- Nutty Twist: Adding chopped pecans or walnuts gives a delightful crunch — my family adores this variation especially around the holidays.
- Dairy-Free Version: Swap butter for coconut oil and use dairy-free chocolate chips; I tried this for a friend and the texture stayed just as fudgy.
- Spiced Red Velvet: A pinch of cinnamon or cayenne pepper adds cozy warmth—perfect for chilly days or gift-giving.
How to Make Fudgy Red Velvet Crinkle Cookies Recipe
Step 1: Mix Your Dry Ingredients
Start by whisking the flour, baking powder, and baking soda in a small bowl. This ensures everything is well combined and free of lumps, which helps the cookies bake evenly. A little prep here goes a long way to avoid dense spots in your cookies.
Step 2: Whisk Your Sugars and Eggs
In a larger bowl, whisk together the granulated and brown sugars with the eggs, egg yolks, canola oil, red velvet emulsion (or red food coloring), vanilla extract, and salt. You’ll want this mixture to be smooth and a little glossy — that rich combination is what makes these cookies moist and fudgy without a mixer.
Step 3: Melt Butter and Chocolate, Add Cocoa
On low heat, melt the butter and chocolate in a small saucepan, stirring frequently so nothing burns or sticks. When smooth, remove from heat and whisk in the cocoa powder until fully combined — about 45 seconds. This step layers in that deep chocolate fudge flavor and thick texture you’ll love.
Step 4: Combine Everything and Chill
Pour the warm chocolate-butter mixture into your egg and sugar bowl and whisk it together until smooth. Carefully fold in the flour mixture with a rubber spatula, mixing gently until just combined. The dough will be quite sticky — that’s normal. Cover it and chill the dough for at least 6 hours or overnight; chilling is key for that fudgy texture and helps with handling.
Step 5: Prep and Bake the Cookies
Preheat your oven to 350°F (180°C) and line your baking pans with parchment paper. Mix the confectioners’ sugar with the remaining granulated sugar in a small bowl for rolling. Using a cookie scoop or tablespoon, portion out about 1½ tablespoons of dough per cookie, rolling each ball carefully in the sugar mixture. Because the dough is sticky, dropping the dough ball into the sugar first before rolling makes it easier to handle.
Place eight cookies per sheet pan, and bake one pan at a time, rotating halfway through. You’ll want to watch for edges that are just set and cookies that are puffed but still soft in the center, usually after 12 to 14 minutes. Let them cool on a wire rack and watch your family disappear into cookie bliss!
Pro Tips for Making Fudgy Red Velvet Crinkle Cookies Recipe
- Chill Time is Essential: I learned the hard way that skipping the chilling leads to spreading cookies that don’t hold their shape.
- Use a Cookie Scoop: It really helps portion out sticky dough quickly and keeps your cookies uniform in size.
- Watch Your Oven: Bake one sheet pan at a time and keep an eye on the edges — ovens vary, and fudgy cookies can go from perfect to overdone fast.
- Rolling Technique: Drop dough balls into sugar first, then gently roll — this prevents frustrating sticky fingers and keeps the crinkle effect intact.
How to Serve Fudgy Red Velvet Crinkle Cookies Recipe
Garnishes
I usually keep garnishing simple with just a light dusting of extra confectioners’ sugar if I want to dress them up for company. Sometimes, a drizzle of cream cheese glaze adds a tangy contrast that makes the cookies feel extra special — perfect if you’re baking for a festive brunch or party.
Side Dishes
These fudgy cookies go beautifully with a glass of cold milk or a steaming hot cup of coffee or spiced chai. For a dessert platter, I love pairing them alongside mini cheesecakes, fresh berries, or even bite-sized brownies to impress your guests with variety.
Creative Ways to Present
For holiday gatherings, I like to stack these cookies in a clear glass jar with red and white ribbons for a charming gift presentation. Another fun idea is arranging them in a circle on a platter with dollops of whipped cream or cream cheese frosting—everyone loves to grab a cookie from a beautiful display!
Make Ahead and Storage
Storing Leftovers
I store leftover cookies in an airtight container at room temperature, usually layered between sheets of parchment paper to keep them from sticking together. They stay soft and fudgy up to three days, but honestly, they rarely last that long around here!
Freezing
You can absolutely freeze the dough or baked cookies. When freezing dough, I scoop and roll balls in sugar first, then freeze them on a baking sheet before transferring to a container. This way, I can pop them right into the oven later without thawing too long. Baked cookies freeze well too — just thaw at room temp before serving.
Reheating
To reheat, I warm them in a low oven (around 300°F) for 5 minutes or so to revive that fresh-baked softness. Alternatively, a quick 10-second zap in the microwave works in a pinch but can sometimes make the edges a little cakey if you’re not careful.
FAQs
-
Can I use regular red food coloring instead of Red Velvet Bakery Emulsion?
Yes, you can substitute regular red food coloring if needed. The emulsion adds a little more flavor depth plus the vibrant red hue, but regular food coloring will still give you the signature red color in these cookies.
-
Why do the cookies need to chill for so long?
Chilling solidifies the fats and firms up the dough, which stops the cookies from spreading too much in the oven. It’s also crucial for developing that fudgy texture and making the dough easier to handle since it’s quite sticky before chilling.
-
Can I swap cocoa powder for more melted chocolate?
While you could try, the cocoa powder helps with the crumb and chocolate intensity without adding extra fat. Using more melted chocolate might make the dough too soft or greasy, so I recommend sticking to the recipe measurements for best texture.
-
How do I know when the cookies are done baking?
Look for set edges that have puffed slightly while the centers remain soft. The cookies will continue to firm up as they cool, so avoid overbaking to keep them fudgy inside.
-
Can I make these cookies vegan?
It’s possible with some ingredient swaps, like using flax eggs instead of real eggs, vegan butter alternatives, and dairy-free chocolate. The texture might shift a bit, and you may need to experiment with chilling times, but it’s a fun challenge if you’re up for it!
Final Thoughts
This Fudgy Red Velvet Crinkle Cookies Recipe is truly one of my favorite go-to treats when I want to impress without the fuss. They’re easy enough for a casual weekend bake, but delicious enough to wow friends and family. I hope you enjoy the process and the results as much as I do — once you try these, I bet they’ll become a staple in your cookie rotation, just like in mine!
Print
Fudgy Red Velvet Crinkle Cookies Recipe
- Prep Time: 20 minutes
- Cook Time: 13 minutes
- Total Time: 6 hours 33 minutes
- Yield: 20 cookies
- Category: Dessert
- Method: Baking
- Cuisine: American
- Diet: Vegetarian
Description
These Fudgy Red Velvet Crinkle Cookies deliver a rich, chocolatey flavor with a beautiful red hue and a crackled sugar coating. Made without a mixer, this recipe is easy to follow and results in soft, chewy cookies with a fudgy center and a delicate crisp edge, perfect for holidays or special occasions.
Ingredients
Dry Ingredients
- 1 1/2 cups (213 grams) all-purpose flour
- 1 teaspoon baking powder
- 1/8 teaspoon baking soda
- 1/4 cup (25 grams) cocoa powder
- 1/2 teaspoon salt
Sugars
- 3/4 cup (150 grams) granulated sugar
- 3 tablespoons granulated sugar (for rolling)
- 1/2 cup (100 grams) light brown sugar
- 1/2 cup (60 grams) confectioners’ sugar
Wet Ingredients
- 2 large eggs plus 2 large egg yolks at room temperature
- 1 tablespoon canola oil
- 1 tablespoon Red Velvet Bakery Emulsion or red food coloring
- 1 teaspoon pure vanilla extract
Fat & Chocolate
- 4 tablespoons (57 grams) unsalted butter
- 3 ounces (85 grams) semisweet or bittersweet chocolate
Instructions
- Mix dry ingredients: In a small bowl, whisk together the all-purpose flour, baking powder, and baking soda until evenly combined.
- Combine sugars and eggs: In a large bowl, whisk together ¾ cup granulated sugar, light brown sugar, whole eggs, egg yolks, canola oil, Red Velvet Bakery Emulsion (or red food coloring), vanilla extract, and salt until smooth and homogeneous.
- Melt butter and chocolate: Place the unsalted butter and semisweet or bittersweet chocolate into a small heavy-bottom saucepan over low heat. Stir frequently to melt everything smoothly and avoid scorching. Once melted, remove from heat.
- Add cocoa powder: Off the heat, whisk the cocoa powder into the melted chocolate and butter mixture until thick and fully incorporated, about 45 seconds.
- Combine chocolate mixture and eggs: Pour the warm chocolate-butter mixture into the egg and sugar mixture, whisking until fully combined.
- Add flour mixture: Gently fold the flour mixture into the wet ingredients using a rubber spatula, mixing until just combined. Avoid overmixing.
- Chill dough: Cover the dough with plastic wrap and refrigerate for at least 6 hours or up to overnight to firm up and develop flavor.
- Prepare oven and trays: Adjust the oven rack to the middle position and preheat the oven to 350°F (180°C). Line three baking sheet pans with parchment paper.
- Mix rolling sugar: In a small bowl, combine the confectioners’ sugar and remaining 3 tablespoons granulated sugar to make the coating sugar mixture.
- Scoop and roll dough: Using a cookie scoop or spoon, portion out 1½ tablespoons of dough each. Rolling each dough ball in the sugar mixture to coat fully helps with handling sticky dough.
- Arrange and bake: Place eight cookie dough balls on each prepared sheet pan, spaced apart. Bake one sheet pan at a time in the preheated oven for 12 to 14 minutes, rotating the pan halfway through, until the edges are set and the cookies are puffed but still soft in the center.
- Cool: Transfer the sheet pans to wire racks and let the cookies cool completely to room temperature on the pans before removing to a storage container.
- Store: Keep cookies in an airtight container at room temperature for up to 3 days for best freshness.
Notes
- The dough is very sticky; a cookie scoop works best to portion it. Drop dough balls into the powdered sugar and then roll gently, making them easier to handle.
- If you don’t have a cookie scoop, refrigerate the dough for 15 minutes to make it easier to scoop and roll.
- This recipe is reprinted with permission from “Baking for the Holidays” by Chronicle Books.
Nutrition
- Serving Size: 1 cookie
- Calories: 140
- Sugar: 12g
- Sodium: 80mg
- Fat: 7g
- Saturated Fat: 3.5g
- Unsaturated Fat: 3g
- Trans Fat: 0g
- Carbohydrates: 18g
- Fiber: 1.5g
- Protein: 2g
- Cholesterol: 55mg


