
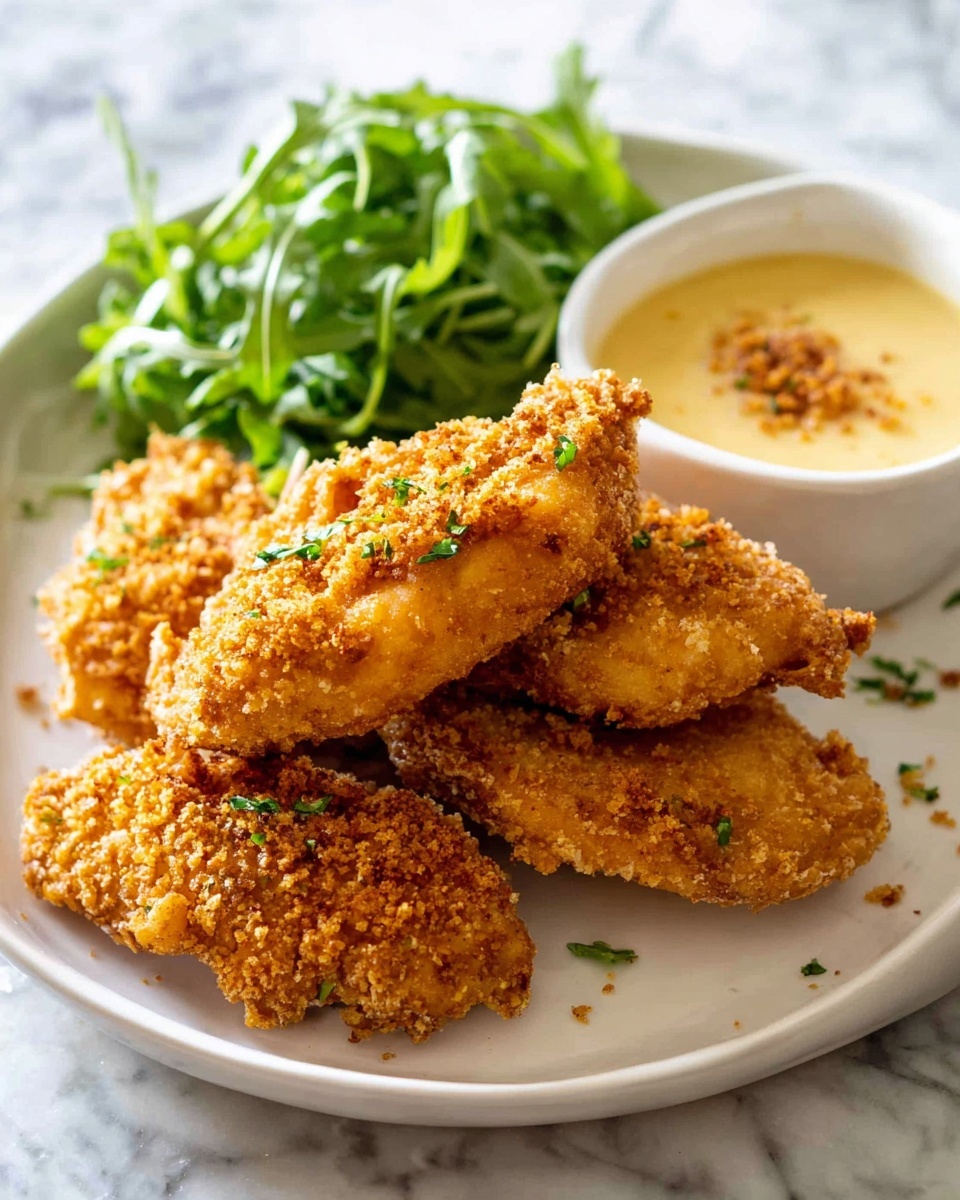
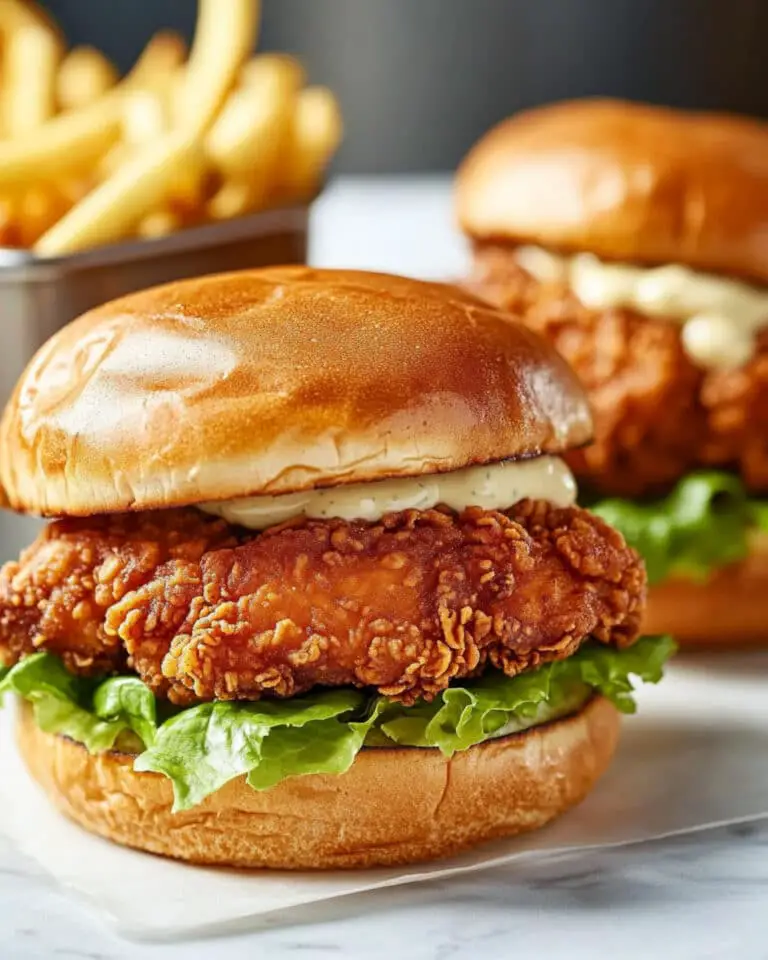
I absolutely love this Crispy Oven Baked Chicken Tenders Recipe because it gives you that satisfying crunch without the hassle or mess of deep frying. When I first tried baking chicken tenders with panko breadcrumbs, I was amazed how crispy and golden they turned out — just as good as my favorite takeout, but way healthier and easier to make at home. Whether you’re cooking for a quick weeknight dinner or feeding a hungry crowd, these tenders hit the spot every time.
You’ll find that this recipe is not only straightforward but also super customizable, which makes it a keeper in my kitchen. The combination of mayo and mustard in the batter adds a subtle tang and richness that keeps the chicken juicy inside, while the toasted panko breadcrumbs add the perfect crunch. Trust me, once you nail this Crispy Oven Baked Chicken Tenders Recipe, it’s going to become one of your go-to comfort foods.
Why You’ll Love This Recipe
- Healthy & Crispy: Achieves that classic crispiness using the oven, no frying needed.
- Super Juicy Inside: The mayo-mustard batter keeps the chicken tender and moist.
- Kid-Friendly & Crowd-Pleasing: Easy to make in batches, perfect for family dinners and snacks.
- Easy Meal Prep: You can prepare parts of it ahead to save time during busy days.

Ingredients You’ll Need
These ingredients work together to create that unbeatable crunchy crust and juicy inside. Make sure to grab good-quality panko breadcrumbs for the crunch factor, and don’t skip toasting them — it makes a big difference!
- Panko Breadcrumbs: Larger, lighter crumbs that toast up crispier than regular breadcrumbs.
- Egg: Helps the batter stick to the chicken and adds moisture.
- Mayonnaise: Adds richness and keeps the coating from drying out.
- Dijon Mustard: Provides a subtle tang that balances the flavors.
- Flour: Helps thicken the batter and coat the chicken evenly.
- Salt & Black Pepper: Essential seasonings to enhance flavor.
- Chicken Tenderloins: Naturally tender and perfect size; you can also slice chicken breasts if you prefer.
- Oil Spray: For toasting the panko and crisping the chicken in the oven.
Variations
I love experimenting with this Crispy Oven Baked Chicken Tenders Recipe because it’s super versatile. Once you get the basic technique down, you can easily switch up seasonings and dipping sauces to keep things fresh and exciting.
- Spicy Version: Add a pinch of smoked paprika, cayenne, or chili powder to the batter or breadcrumbs — it gives a little kick that my family adores.
- Herbed Crust: Mix dried herbs like oregano or thyme into the panko for an added flavor dimension.
- Gluten-Free: Swap panko for gluten-free breadcrumbs and use gluten-free flour to keep this safe for gluten sensitive friends.
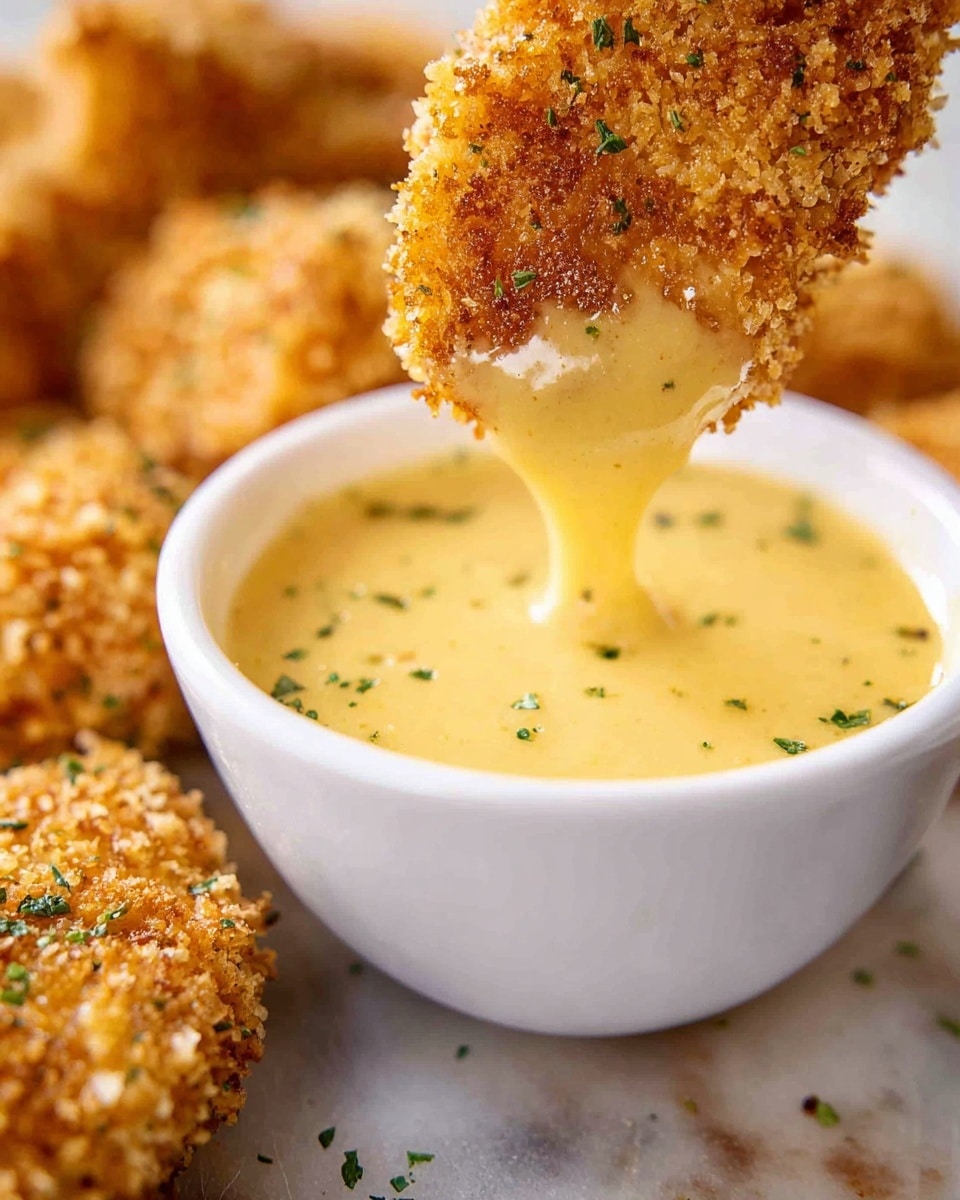
- Dipping Sauces: Try swapping classic honey mustard for ranch, BBQ sauce, or even a tangy sriracha mayo for variety.
How to Make Crispy Oven Baked Chicken Tenders Recipe
Step 1: Toast Your Panko for Extra Crunch
Start by preheating your oven to 200°C (390°F). Spread the panko breadcrumbs evenly on a baking tray and give them a quick spray of oil — I hold the spray vertically to avoid blowing the crumbs everywhere (a little tip I picked up!). Toast them in the oven for 3 to 5 minutes until golden and fragrant. This step amplifies the crunch and sets the stage for crispy, golden tenders.
Step 2: Whisk the Batter and Coat the Chicken
In a bowl, whisk together the egg, mayo, dijon mustard, flour, salt, and pepper until smooth. Add your chicken tenderloins and toss them well to coat evenly. The mayo and mustard in the batter are game changers — they infuse moisture and a subtle tang that’ll make each bite deliciously juicy.
Step 3: Crumb Your Chicken with Toasted Panko
Using tongs, pick up each piece of battered chicken and place it into the toasted panko bowl. Sprinkle extra breadcrumbs on top and press lightly to make sure they stick well. I love admiring my “clean fingers” at this point — once you get a good press, your chicken will have that beautiful crispy coat. Arrange them spaced on a rack set over a baking tray for even cooking.
Step 4: Spray, Season, and Bake to Perfection
Give your crumbed chicken a light spray of oil for extra browning, and sprinkle a tiny bit of salt if you like. Then bake for 15 minutes (or up to 20 minutes for larger pieces), keeping an eye out — any longer can dry the chicken out. You’ll know they’re ready when they’re golden and crispy on the outside, juicy on the inside.
Pro Tips for Making Crispy Oven Baked Chicken Tenders Recipe
- Toast Your Panko First: I discovered that toasting the crumbs before coating keeps them crunchy after baking — don’t skip this step!
- Use a Rack for Baking: Placing tenders on a wire rack lets air circulate and crisps all sides evenly without sogginess.
- Hold the Spray Vertically: Spraying oil straight down stops the panko from flying off the tray during toasting.
- Don’t Overbake: Keep watch during the last few minutes to avoid drying out your chicken — moist tenders are everything!
How to Serve Crispy Oven Baked Chicken Tenders Recipe
Garnishes
I usually sprinkle freshly chopped parsley or chives on top to add a pop of color and freshness. A squeeze of lemon juice right before serving also brightens the flavors wonderfully and balances the richness of the coating.
Side Dishes
My favorite sides with these chicken tenders are crispy oven fries or sweet potato wedges, and a crisp garden salad. Sometimes I’ll whip up a quick coleslaw or steamed green beans to round out the meal — the crunchy tenders pair so well with lighter, fresh sides.
Creative Ways to Present
For parties or a fun twist, I like serving these in a basket lined with parchment paper alongside a trio of dipping sauces like honey mustard, ranch, and spicy sriracha mayo. Kids especially love it when I stick decorative toothpicks in the tenders—it turns dinner into a little celebration.
Make Ahead and Storage
Storing Leftovers
I store leftover chicken tenders in an airtight container in the fridge for up to 2 days. They keep their great crunch if you reheat them properly — no soggy nights here! Just make sure to cool them completely before storing to avoid condensation.
Freezing
I’ve found it’s best to freeze the chicken tenders *before* breading, by coating them in batter and freezing them raw (but not crumbed) in a single layer on a tray, then moving to a freezer-safe bag. Crumbing after thawing works better to keep that crunch intact. Freezing crumbed tenders usually results in soggier crumbs after baking.
Reheating
To reheat, pop your tenders back into a 200°C (390°F) oven for just 3-5 minutes. This quick blast heats them through and revives the crispiness better than the microwave ever could. I steam veggies or reheat sides at the same time for a speedy meal.
FAQs
-
Can I use chicken breasts instead of tenderloins for this recipe?
Absolutely! You can slice chicken breasts into strips about 2/3 inch thick lengthwise to mimic tenderloins. Just watch the baking time—thicker pieces might need a couple extra minutes to cook through, but the process is essentially the same.
-
What makes panko breadcrumbs better than regular breadcrumbs for this recipe?
Panko breadcrumbs are larger, flakier, and lighter than regular breadcrumbs. This texture allows them to crisp up better and stay crispier after baking, which is exactly what you want in a crispy oven baked chicken tenders recipe.
-
Can I prepare this recipe ahead of time?
Yes! You can mix the chicken into the batter and store it in the fridge up to 2 days ahead. Crumbing is best done right before baking, but you can crumb them up to 24 hours ahead if needed. Just keep the crumbed chicken refrigerated until baking.
-
How do I keep the chicken tenders juicy and avoid drying out?
The key is not to overbake—15 minutes usually hits the sweet spot for medium-sized tenders. Also, the mayo and mustard in the batter help lock in moisture. Using a wire rack while baking keeps the coating crisp without steaming the chicken.
Final Thoughts
This Crispy Oven Baked Chicken Tenders Recipe holds a special place in my kitchen because it combines simplicity with serious flavor and texture. It’s the kind of recipe you can rely on when you want a quick, satisfying meal that everyone loves. Give it a go—you’ll be so glad you found this easy, healthy, and delicious way to enjoy crispy chicken tenders without frying.
Print
Crispy Oven Baked Chicken Tenders Recipe
- Prep Time: 15 minutes
- Cook Time: 15 minutes
- Total Time: 30 minutes
- Yield: 3 to 4 servings
- Category: Main Course
- Method: Baking
- Cuisine: American
Description
These Crispy Oven Baked Chicken Tenders are a healthier alternative to fried versions, featuring a crunchy panko breadcrumb coating and a tangy mustard mayonnaise batter. Perfectly baked in the oven for a golden, crisp texture, they are easy to make and serve with your favorite dipping sauces.
Ingredients
Breadcrumb
- 1 1/2 cups panko breadcrumbs
- Oil spray
Batter
- 1 egg
- 1 tbsp mayonnaise
- 1 1/2 tbsp dijon mustard (or other mustard)
- 2 tbsp flour
- 1/2 tsp salt
- Black pepper to taste
Chicken
- 500 g / 1 lb chicken tenderloins (or breast cut into 2/3″ / 1.5cm thick slices, lengthwise)
- Oil spray
Instructions
- Preheat the oven: Set your oven to 200°C (390°F) or 180°C (fan-forced) to ensure it’s hot enough for crisping up the chicken tenders.
- Toast the panko: Spread the panko breadcrumbs evenly on a baking tray. Spray lightly with oil vertically to avoid scattering. Bake for 3 to 5 minutes until they turn light golden. Once toasted, transfer breadcrumbs to a bowl for coating.
- Prepare the rack and baking tray: Place a wire rack on a baking tray to allow even air circulation around the chicken while baking, though this step is optional.
- Make the batter: In a bowl, whisk together the egg, mayonnaise, dijon mustard, flour, salt, and black pepper until fully combined. Add the chicken tenders to this batter and toss well to coat each piece thoroughly.
- Coat the chicken with panko: Using tongs, pick up a piece of battered chicken and place it into the toasted panko bowl. Sprinkle more panko on top and press down firmly to adhere the crumbs evenly, then transfer the coated chicken onto the prepared baking tray or rack. Repeat with all pieces.
- Spray and bake: Lightly spray the crumbed chicken with oil and optionally sprinkle a little extra salt. Bake in the preheated oven for about 15 minutes for medium-sized tenders or up to 20 minutes for larger pieces. Avoid overcooking as it can dry out the chicken.
- Serve immediately: Once baked to a crisp golden finish, remove the chicken tenders from the oven and serve hot. Pair with your choice of dipping sauces like honey mustard or ranch, and garnish with fresh parsley if desired.
Notes
- Panko breadcrumbs are Japanese-style breadcrumbs that are coarser than regular ones, providing a superior crunch. They are widely available in major supermarkets, typically in the Asian foods section.
- Honey Mustard Sauce: Combine 1/3 cup mayonnaise, 2 tbsp dijon mustard, 2 tbsp honey, 1-2 tsp lemon juice, salt, and pepper for a perfect dipping sauce.
- Ranch Sauce: Mix 1/4 cup mayonnaise, 1/4 cup sour cream, 2 tbsp milk, 1 tsp lemon juice or vinegar, and 1/4 tsp each of dried parsley, dill, chives, plus garlic powder, salt, and pepper. Fresh herbs can be substituted, using double the quantity.
- Make Ahead: Toast the breadcrumbs and coat the chicken in the batter, then refrigerate for up to 2 days. Crumb the chicken just before baking. Pre-crumbed chicken can be stored in the fridge for 24 hours. Avoid freezing raw.
- Reheating: Warm leftovers in the oven for 3-5 minutes at 200°C (390°F) until heated through.
Nutrition
- Serving Size: 248g
- Calories: 416
- Sugar: 2g
- Sodium: 973mg
- Fat: 12g
- Saturated Fat: 2g
- Unsaturated Fat: 8g
- Trans Fat: 0g
- Carbohydrates: 29g
- Fiber: 1g
- Protein: 42g
- Cholesterol: 163mg
