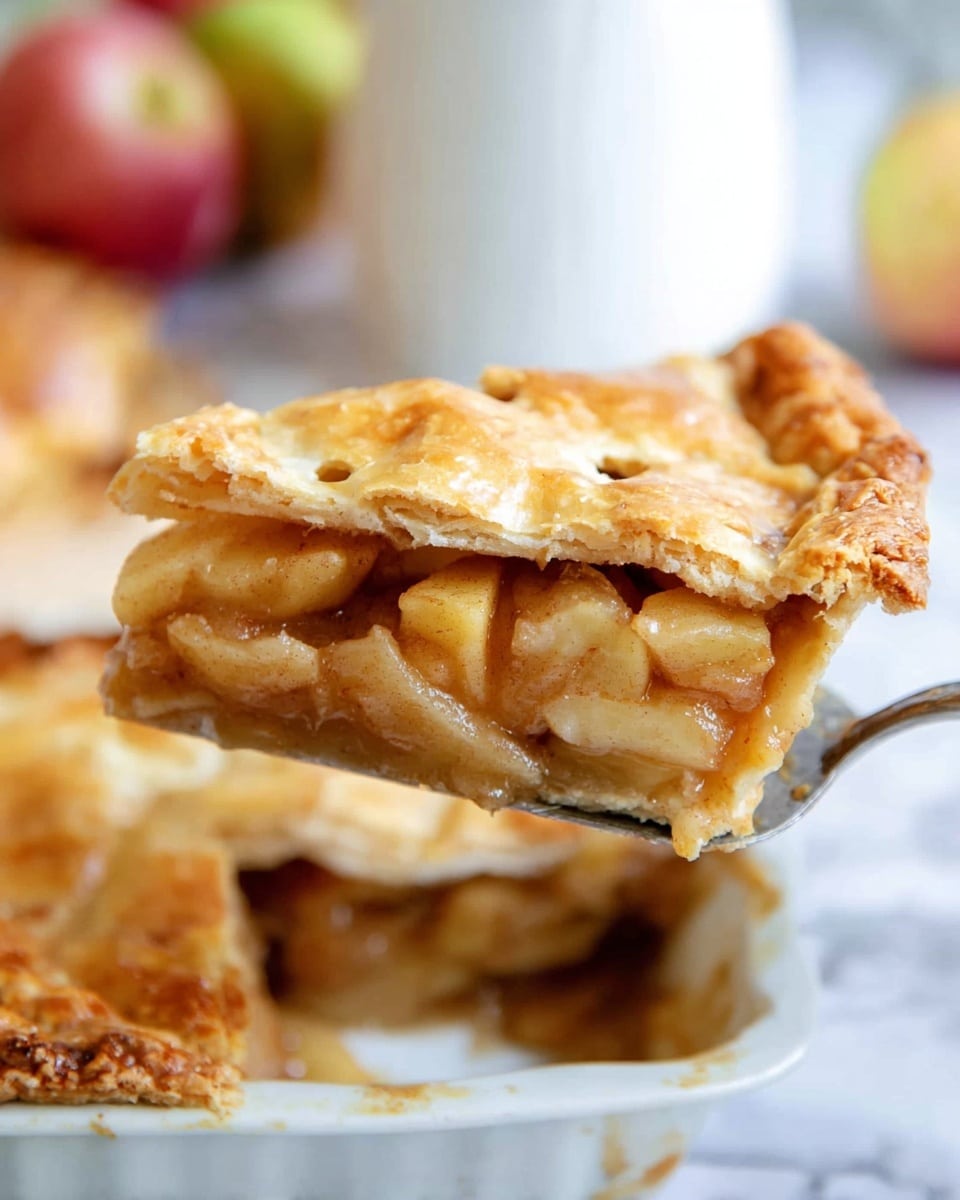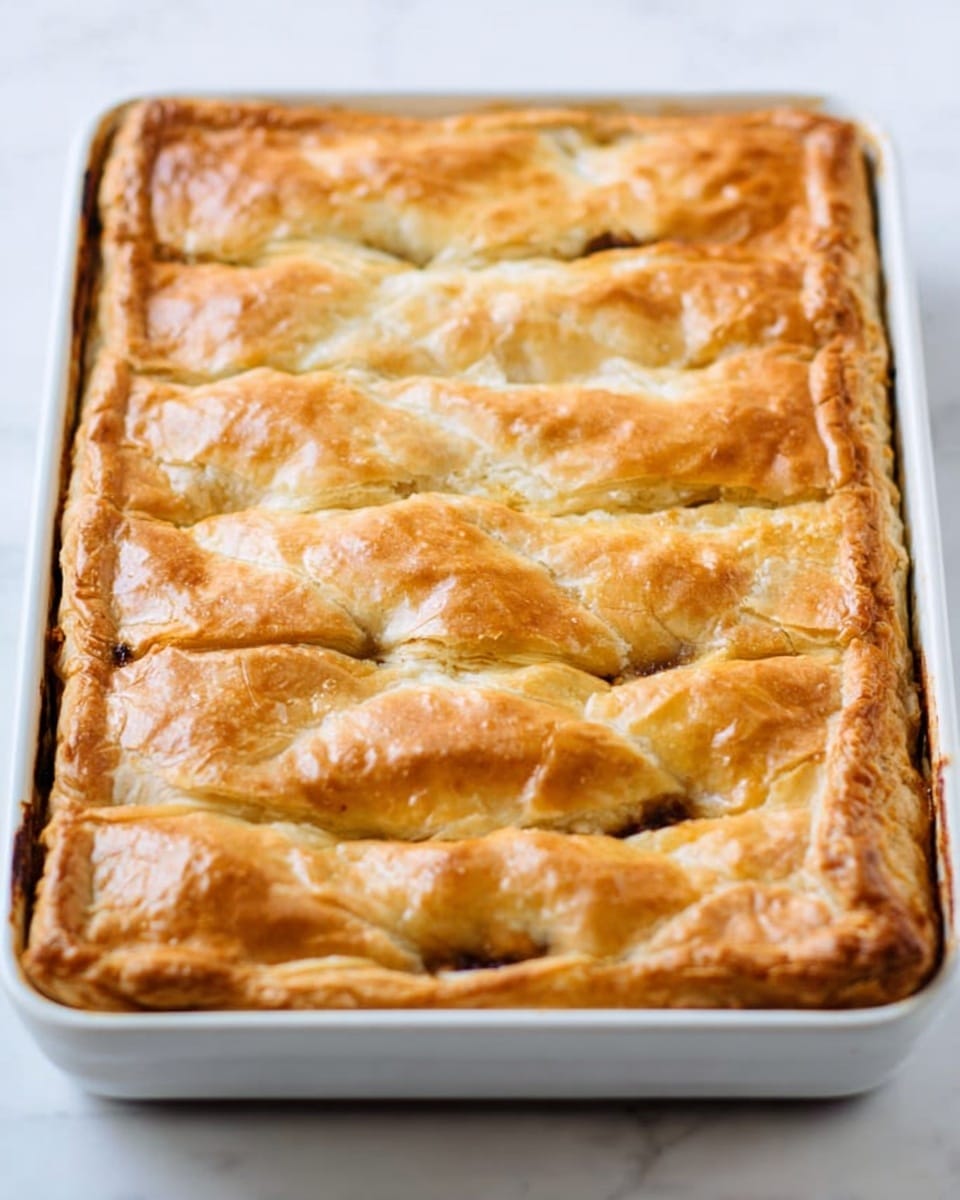
I’m so excited to share this Apple Slab Pie Recipe with you because it’s one of those desserts that just fills the house with that warm, cinnamon-spiced aroma and brings everyone to the kitchen for a slice. What makes this recipe special is its rustic charm and the generous slab shape that’s perfect for feeding a crowd. Whether you’re celebrating a family dinner, a potluck, or simply craving a comforting slice of apple pie, this slab pie won’t disappoint.
When I first tried this Apple Slab Pie Recipe, I was amazed at how the filling came out perfectly juicy but not soggy, and that tender, flaky crust was just the right thickness for every bite. You’ll find that it’s surprisingly easy to make, especially when you break down the steps and let the dough chill. Trust me, once you try this, it’ll become your go-to fall favorite!
Why You’ll Love This Recipe
- Feeds a Crowd Easily: The slab style means you get lots of generous slices perfect for gatherings or meal prep.
- Perfect Balance of Flavors: The cinnamon and nutmeg work beautifully with tart apples for that classic homemade pie taste.
- Rustic, Homey Look: You don’t have to fuss over perfect shaping—this pie looks beautifully rustic every time.
- Make-Ahead Friendly: You can prep the dough and filling in advance, which is a lifesaver on busy days.
Ingredients You’ll Need
The ingredients for this Apple Slab Pie Recipe come together to create a tender, flaky crust and an irresistible, spiced apple filling. Using a mix of shortening and cold butter gives the crust the best texture, and the lemon juice in the milk helps keep the apples bright and fresh-tasting.
- All-purpose flour: The base for the pie dough and thickening the filling; make sure it’s fresh for best results.
- Salt: Just a pinch to enhance the flavors in the crust.
- Shortening: Adds flakiness to the crust; I like to use it combined with butter for the best texture.
- Cold butter: Chilled and cubed so it creates flaky pockets as it bakes.
- Vegetable oil: Helps bind the dough and adds tenderness without heaviness.
- Milk: I use whole milk for richness; it’s mixed with lemon juice to mimic buttermilk which tenderizes the crust.
- Lemon juice: Keeps the apples from browning and adds a subtle brightness.
- Apples: Use a mix of tart and sweet apples, like Granny Smith and Fuji, for depth of flavor.
- Sugar: Sweetens the filling while also mixed in the crust dust for texture.
- Cinnamon and ground nutmeg: Classic warm spices that make this pie smell like fall in every bite.
- Egg (for egg wash): Gives the crust a gorgeous golden color and shine.
- Water: Mixed with egg for the wash to help it spread evenly.
Variations
I love mixing things up with the Apple Slab Pie Recipe depending on the season or who I’m serving. You can personalize this recipe by tweaking the filling spices or switching up the crust fats for different textures and flavors. Feel free to make this your signature pie!
- Spice it up: Sometimes I add a pinch of ground cloves or ginger for a warm twist that my family adores.
- Gluten-free crust: I’ve experimented with a gluten-free flour blend and while the texture differs slightly, it’s a fantastic option if you need to avoid gluten.
- Sweetener swaps: For a healthier spin, you can replace some sugar with maple syrup or honey, though you might need to reduce the liquid slightly.
- Adding nuts: Chopped pecans or walnuts sprinkled on the filling add a wonderful crunch and flavor contrast.
How to Make Apple Slab Pie Recipe
Step 1: Make the Perfect Pie Dough
Start by mixing the all-purpose flour and salt in a large bowl, then cut in the shortening and cold butter until the pieces look like small peas – this is the key to a flaky crust. Combine the milk and lemon juice in a small bowl, then add the vegetable oil. Pour this liquid mixture into the flour mixture and gently stir until the dough starts to come together. You might need to use your hands to bring it into a soft dough. Divide it into two discs, wrap them in plastic, and pop them in the fridge for about 30 minutes while you make the filling.
Step 2: Prepare the Apple Filling
While the dough chills, peel and chop your apples into small, even pieces so they cook uniformly. Toss them in a large bowl with sugar, flour, cinnamon, and nutmeg—this sweet and spicy combo is what makes the filling sing. I like to mix the filling a few minutes before rolling out the crust to let the flavors mingle, but not so long that the apples get soggy.
Step 3: Roll Out and Assemble Your Slab Pie
Preheat your oven to 400°F and if you have a pizza stone, place it in now. On a lightly floured surface, roll one disc of dough into a rustic 13×18” rectangle about ⅛” thick—don’t stress about making perfect edges, this rustic look is charming! Place this dough in a 10×15” jelly roll pan, letting the edges hang over the sides. Sprinkle a “crust dust” of sugar and flour over the dough to prevent sogginess. Pour the apple filling evenly over this base.
Step 4: Top and Seal the Pie
Roll out the second dough disc to the same size and place it on top of the apples. Fold the edges of both crusts back and tuck them neatly into the pan’s edges, then pinch or crimp the edges to seal. Cut several slits into the top crust so steam can escape while baking. Finally, brush the top lightly with an egg wash and sprinkle some sugar over it for that beautiful golden shine and a little crunch.
Step 5: Bake Until Golden and Bubbling
Bake the pie for 30 minutes, then tent it loosely with foil to prevent the crust from over-browning. Continue baking for another 20-25 minutes until the crust is a rich golden color and the filling bubbles at the slits. This bubbling is your sign that the filling is perfectly cooked. Let the pie cool for at least 2 hours before slicing to help everything set nicely—this step always amazes me because the filling becomes perfectly sliceable, not runny.
Pro Tips for Making Apple Slab Pie Recipe
- Use Mixed Apples: I discovered that combining tart and sweet apples gives the best flavor and texture balance.
- Keep Ingredients Cold: Cold butter and chilled dough make a flakier crust—don’t skip the fridge time!
- Don’t Overfill: Leaving a little space at the edges helps prevent juicy filling from bubbling over during baking.
- Let It Cool Fully: I used to slice too soon and ended up with a runny filling, but chilling really helps it set perfectly.
How to Serve Apple Slab Pie Recipe
Garnishes
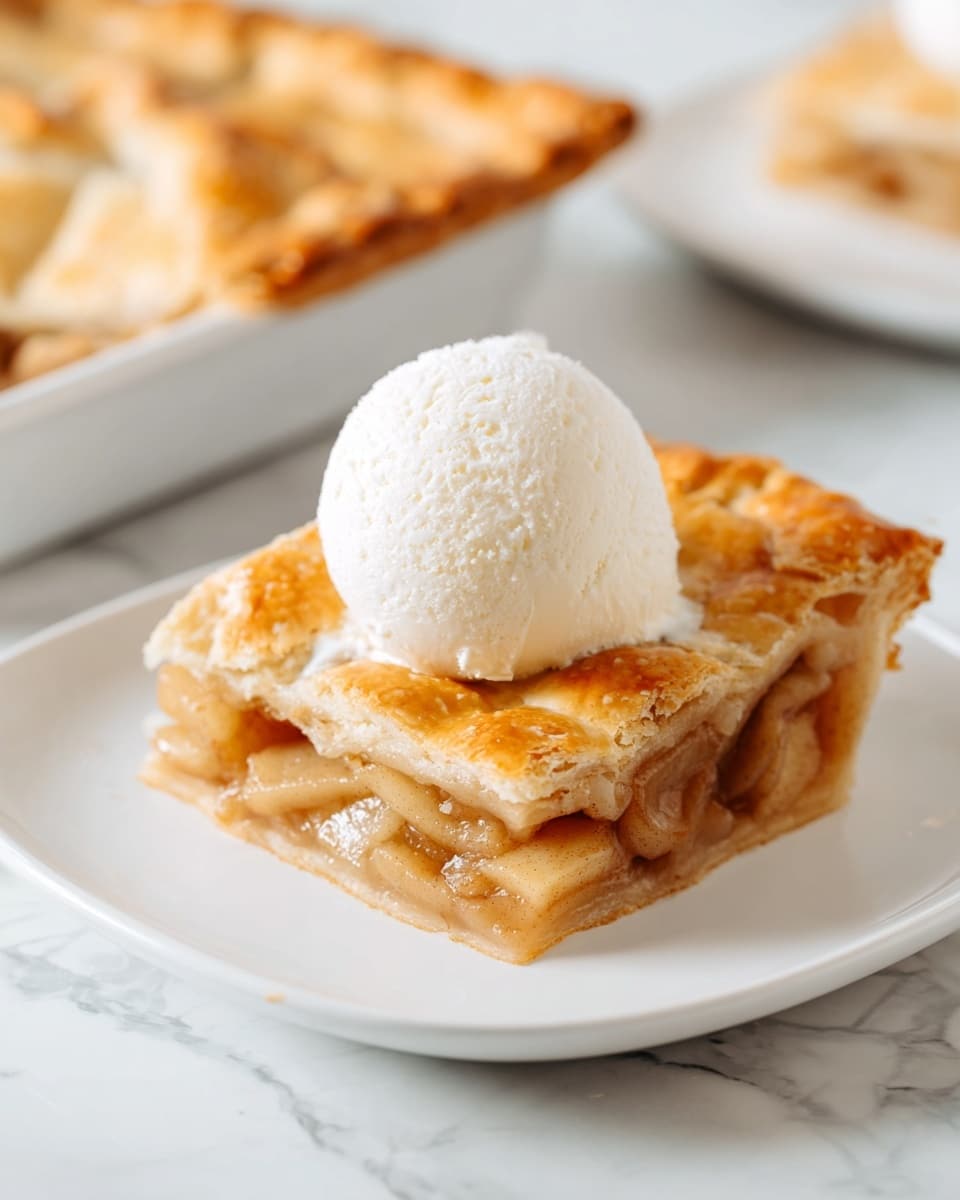
I love serving this Apple Slab Pie Recipe with a scoop of vanilla ice cream or a dollop of homemade whipped cream—both melt beautifully into the warm slice. For a little extra flair, a sprinkle of cinnamon sugar right before serving adds some sparkle and enhances the spice notes.
Side Dishes
This pie pairs wonderfully with a simple cup of hot coffee or spiced chai tea to balance the sweetness. If it’s part of a larger meal, I like to serve it alongside a crisp green salad for contrast or even a light cheddar cheese plate for a more savory, unexpected twist.
Creative Ways to Present
For holiday gatherings or special occasions, I’ve presented this slab pie on a beautiful wooden board with autumn leaves and candles around it for a cozy vibe. Cutting it into neat rectangles makes it perfect for buffet-style serving too. You can even serve it with little ramekins of caramel sauce on the side for extra indulgence!
Make Ahead and Storage
Storing Leftovers
I store leftover slab pie right in the pan, covered snugly with plastic wrap to keep the crust from drying out. It keeps wonderfully fresh for up to 3 days—although that rarely happens with my family around!
Freezing
If you want to freeze the pie, I recommend freezing it unbaked. Wrap it tightly in plastic and foil, then bake it from frozen, adding a bit of extra bake time. I’ve done this a few times for busy holidays—it saves so much stress!
Reheating
To reheat, I pop slices in a 350°F oven or toaster oven for 10-15 minutes until warm and crunchy again. Microwaving can make the crust soggy, so I avoid that when I want to preserve the texture.
FAQs
-
Can I use frozen apples for the Apple Slab Pie Recipe?
While fresh apples generally give the best texture, you can use frozen apples if you thaw and drain them well first to avoid excess moisture that might make the pie soggy.
-
How can I make the crust extra flaky?
Using a combination of shortening and cold butter, plus minimal handling of the dough, helps keep the butter pieces intact so your crust bakes up flaky and tender.
-
What is the best apple variety for this pie?
I recommend mixing tart apples like Granny Smith with sweeter types like Fuji or Honeycrisp for a balanced filling that isn’t too sweet or too tart.
-
Can I make this pie ahead of time?
Absolutely! You can prepare the dough and filling a day in advance, then assemble the pie just before baking for fresher results.
Final Thoughts
This Apple Slab Pie Recipe holds a special place in my kitchen because of its simplicity and how reliably it turns out. It’s one of those desserts that makes everyone smile, brings back comforting memories, and fills your home with warmth. I really hope you’ll give this rustic, delicious pie a try—you’ll love how satisfying and wholesome it feels to bake and share it with your loved ones.
Print
Apple Slab Pie Recipe
- Prep Time: 45 minutes
- Cook Time: 55 minutes
- Total Time: 3 hours 40 minutes
- Yield: 24 slices
- Category: Dessert
- Method: Baking
- Cuisine: American
Description
This classic Apple Slab Pie is a delightful twist on traditional apple pie, baked in a large rectangular sheet perfect for serving a crowd. Featuring a flaky homemade crust and spiced apple filling, it’s finished with a golden egg wash and sugar topping for a beautifully crisp and sweet finish. Ideal for family gatherings or potlucks, this recipe balances tart and sweet flavors with a satisfying texture.
Ingredients
Pie Crust
- 4 cups all-purpose flour
- 2 teaspoons salt
- 1 ¼ cups shortening
- ½ cup cold butter, cut into small cubes
- 1 Tbsp. vegetable oil
- ¾ cup milk
- 1 Tbsp. lemon juice
Apple Pie Filling
- 10-12 cups apples (about 4 pounds), peeled and chopped
- ⅔ cups sugar
- ¼ cup all-purpose flour
- 1 ½ teaspoons ground cinnamon
- ½ teaspoon ground nutmeg
Crust Dust
- 2 Tbsp. all-purpose flour
- 2 Tbsp. sugar
Egg Wash
- 1 egg, beaten
- 1 Tbsp. water
Instructions
- Prepare the Pie Crust: In a large bowl, mix 4 cups flour and 2 teaspoons salt. Cut in the shortening and cold butter until the mixture resembles small peas in size. Combine the milk and lemon juice in a small bowl, then add the vegetable oil and milk mixture to the flour mixture. Stir until a soft dough forms, using your hands if needed. Divide into two equal portions, shape into discs, wrap in plastic wrap, and refrigerate for about 30 minutes.
- Make the Apple Filling: Peel and chop the apples into small pieces. In a large bowl, sprinkle sugar, flour, cinnamon, and nutmeg over the apples. Toss gently until all the apples are evenly coated with the spices and flour mixture.
- Preheat Oven: Preheat your oven to 400°F (200°C). If you have a pizza stone, place it on the oven rack to preheat as well for a crispier crust.
- Roll Out the Bottom Crust: On a lightly floured surface, roll one dough disc into a rustic 13×18-inch rectangle about 1/8 inch thick. Place this dough into a 10×15-inch jelly roll pan, allowing the edges to hang over the sides.
- Add Crust Dust: Sprinkle a mixture of 2 tablespoons flour and 2 tablespoons sugar evenly over the bottom crust to help absorb juices and add a subtle crunch.
- Fill the Pie: Pour the prepared apple filling evenly over the bottom crust in the pan.
- Roll Out the Top Crust: Roll the second dough disc into a similar 13×18-inch rectangle with a rustic look. Place the top crust over the apple filling.
- Seal and Crimp Edges: Fold the edges of the top and bottom crusts together and tuck them into the jelly roll pan. Pinch or crimp the edges by hand or with a fork to seal the pie.
- Vent the Pie: Cut several slits into the top crust to allow steam to escape during baking and prevent bubbling over.
- Apply Egg Wash and Sugar: Lightly brush the top crust with the beaten egg wash (egg beaten with water) to encourage browning, then sprinkle with sugar for added sweetness and crunch.
- Bake the Pie: Bake uncovered in the preheated oven for 30 minutes. Then tent loosely with foil and continue baking for an additional 20-25 minutes until the top is golden and the filling is bubbling.
- Cool and Serve: Remove the pie from the oven and allow it to cool for at least 2 hours to set the filling before slicing into 24 generous portions.
Notes
- Storage: Store leftover pie in the pan covered with plastic wrap to keep fresh for up to 3 days.
- Baking Sheets: The recipe is optimized for light-colored baking sheets. Dark-colored sheets may require a shorter baking time to avoid excessive browning.
Nutrition
- Serving Size: 1 slice (1/24th of pie)
- Calories: 220 kcal
- Sugar: 18 g
- Sodium: 150 mg
- Fat: 11 g
- Saturated Fat: 4 g
- Unsaturated Fat: 5 g
- Trans Fat: 0 g
- Carbohydrates: 29 g
- Fiber: 3 g
- Protein: 2 g
- Cholesterol: 25 mg

