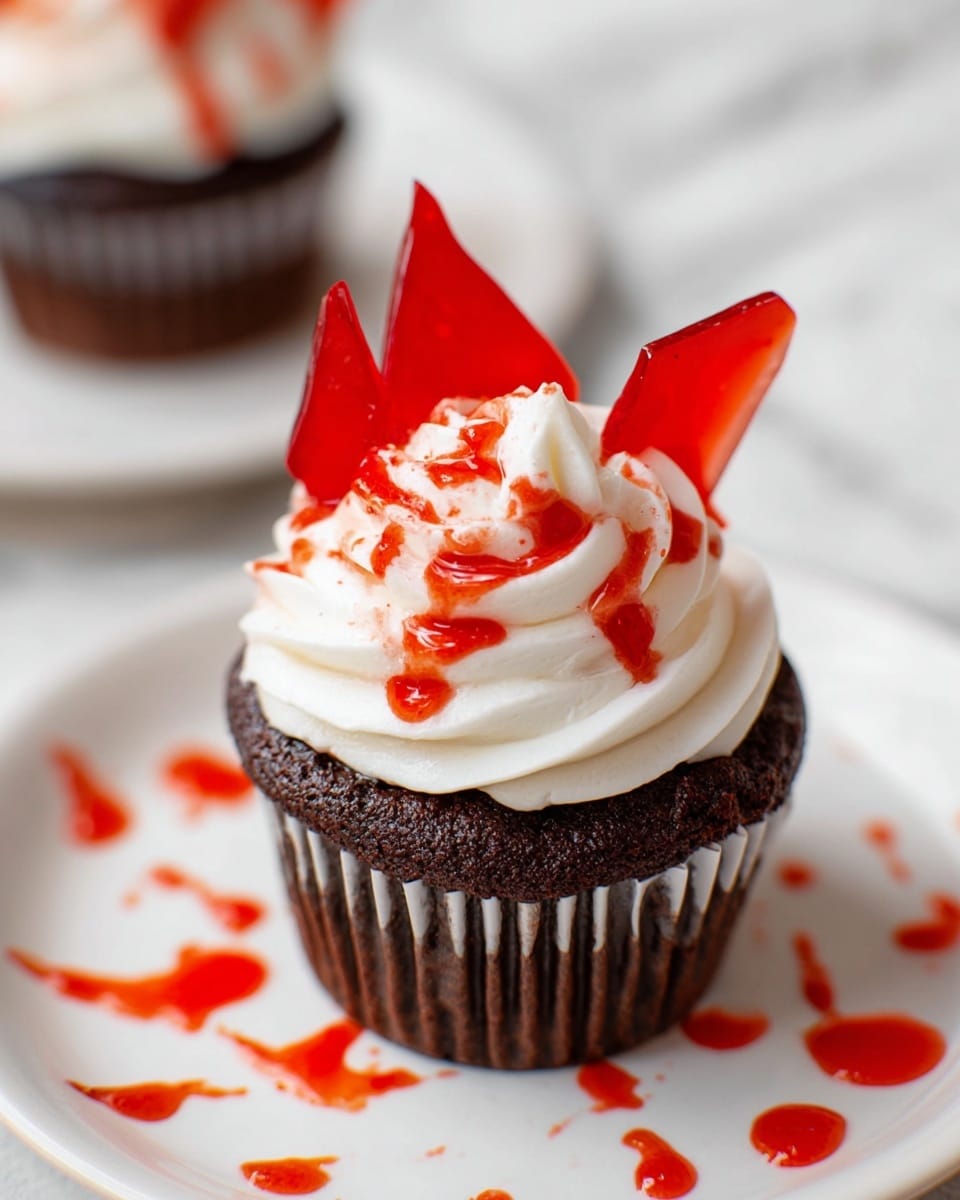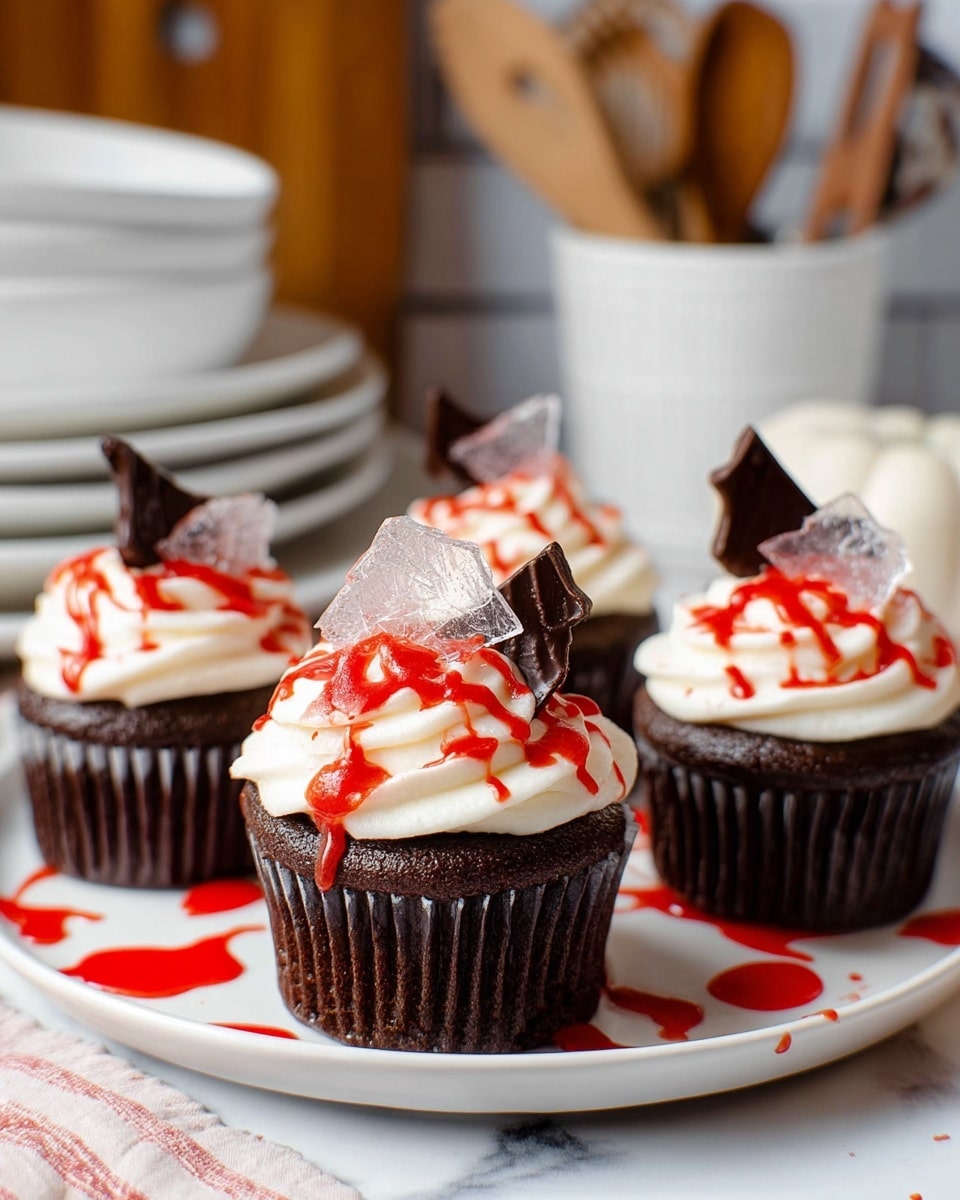
If you’re craving something spooky, sweet, and seriously show-stopping, then you’re going to love this Blood Drip Cupcakes Recipe. I absolutely love how these cupcakes combine rich chocolate malt flavors with that dramatic candy glass “blood” drip—you’ll find they’re perfect for Halloween parties, special occasions, or anytime you want to wow your guests with a little flair. Trust me, the first time I made these, my family couldn’t stop raving about them, and the process is easier than you might think. Stick around, and I’ll walk you through every step to get these perfect!
Why You’ll Love This Recipe
- Rich Flavor Blend: The combo of cocoa, malt powder, and coffee adds a deep, irresistible chocolate taste.
- Eye-Catching Presentation: The candy “blood” shards make these cupcakes look amazing and festive.
- Great for Beginners: Step-by-step guidance helps you master candy-making and cupcake baking with ease.
- Versatile for Any Occasion: Perfect for Halloween, themed parties, or anytime you want to impress guests.
Ingredients You’ll Need
This Blood Drip Cupcakes Recipe uses a thoughtful mix of ingredients that bring moistness, flavor, and the perfect structural balance. I always recommend using good-quality cocoa and fresh eggs for the best results. You’ll find malt powder adds a subtle nutty richness that really sets these cupcakes apart.
- All-purpose flour: Provides structure; make sure not to overmeasure to keep cupcakes tender.
- Unsweetened cocoa powder: Use a high-quality one for vibrant chocolate flavor.
- Malt powder: Adds a lovely malty aroma and depth; you can find it in most grocery store baking aisles.
- Sugar: Sweetens and helps keep the cupcakes moist.
- Instant coffee: Enhances the chocolate flavor without tasting like coffee.
- Baking soda and baking powder: Both are needed for the perfect rise and light texture.
- Kosher salt: Balances the sweetness and elevates flavor.
- Large eggs: For structure and richness; always bring them to room temperature before baking.
- Buttermilk: Keeps cupcakes tender and adds subtle tanginess.
- Unsalted butter (melted): Use good-quality butter for the best flavor.
- Pure vanilla extract: Adds warmth and enhances all flavors.
- Buttercream frosting: Creamy and sweet topping that balances the dark chocolate base.
- Light corn syrup: The key to making smooth, shiny candy glass.
- Sugar (for candy): Creates that iconic glassy, crackly “blood” shards.
- Cream of tartar: Helps stabilize the sugar syrup to prevent crystallization.
- Water: Combines with sugar to form syrup for the candy.
- Red food coloring gel: For that striking blood-red drip effect; gel works best for intensity.
Variations
I love tweaking this Blood Drip Cupcakes Recipe depending on the occasion. Sometimes I swap out the malt powder for extra cocoa to make it super intense, or add a splash of bourbon to the frosting for adult gatherings. You should feel free to personalize it to your taste and dietary needs!
- Vegan Variation: I’ve experimented with dairy-free butter and flax eggs, and it works well though the candy glass needs careful watching.
- Spicy Kick: Adding a pinch of cayenne or cinnamon in the batter adds a subtle warmth that surprises guests.
- Fruit Flavor: I’ve swapped vanilla with orange extract for a different twist that pairs beautifully with the chocolate base.
- Different Candy Colors: You can swap the red gel for other colors to match various themes—think green for St. Patrick’s Day blood!
How to Make Blood Drip Cupcakes Recipe
Step 1: Prep and Mix Your Cupcake Batter
First, go ahead and preheat your oven to 350°F (175°C). Line your cupcake pan with liners to make cleanup easy. Now for the fun part: in a large bowl (I like using my stand mixer with the whisk attachment), sift together your flour, cocoa, malt powder, sugar, instant coffee, baking soda, baking powder, and kosher salt. This dry mix not only guarantees even distribution but also helps avoid lumps.
Next, add in the eggs, buttermilk, melted butter, and vanilla extract. Beat everything together on medium speed for about 2 minutes until smooth and creamy. To keep the batter moist and tender, stir in 3/4 cup of boiling water last—this little trick really helps the cupcakes feel luscious and light. Be sure to mix just until combined.
Step 2: Bake the Cupcakes to Perfection
Fill your cupcake liners about two-thirds full with batter to give them room to rise. Pop them into the oven and bake for 18–22 minutes. You’ll know they’re done when a toothpick inserted into the center comes out clean or with just a few moist crumbs. Don’t overbake, or they’ll dry out—that’s a mistake I’ve made before! Once baked, transfer the cupcakes to a wire rack to cool completely; frosting warm cupcakes should always be avoided as it melts your pretty decorations.
Step 3: Craft the Candy Glass “Blood” Drip
This step might sound daunting, but it’s really rewarding. Line a baking sheet with foil and gather your candy ingredients: light corn syrup, sugar, cream of tartar, and water. Combine them in a small saucepan over medium-high heat, stirring until the sugar dissolves and the mixture starts to boil. Once boiling, stop stirring (a brush dipped in water helps wash down sugar crystals from the pan sides—this keeps your candy smooth).
Clip a candy thermometer to your pan and let the syrup cook until it reaches 300°F (hard crack stage). This ensures the candy will harden perfectly into shards. Carefully pour the hot mixture onto your foil-lined pan and let it cool and harden at room temperature for about an hour. When set, break it up into jagged shards—the “blood glass” that gives these cupcakes the wow factor.
Step 4: Assemble and Decorate
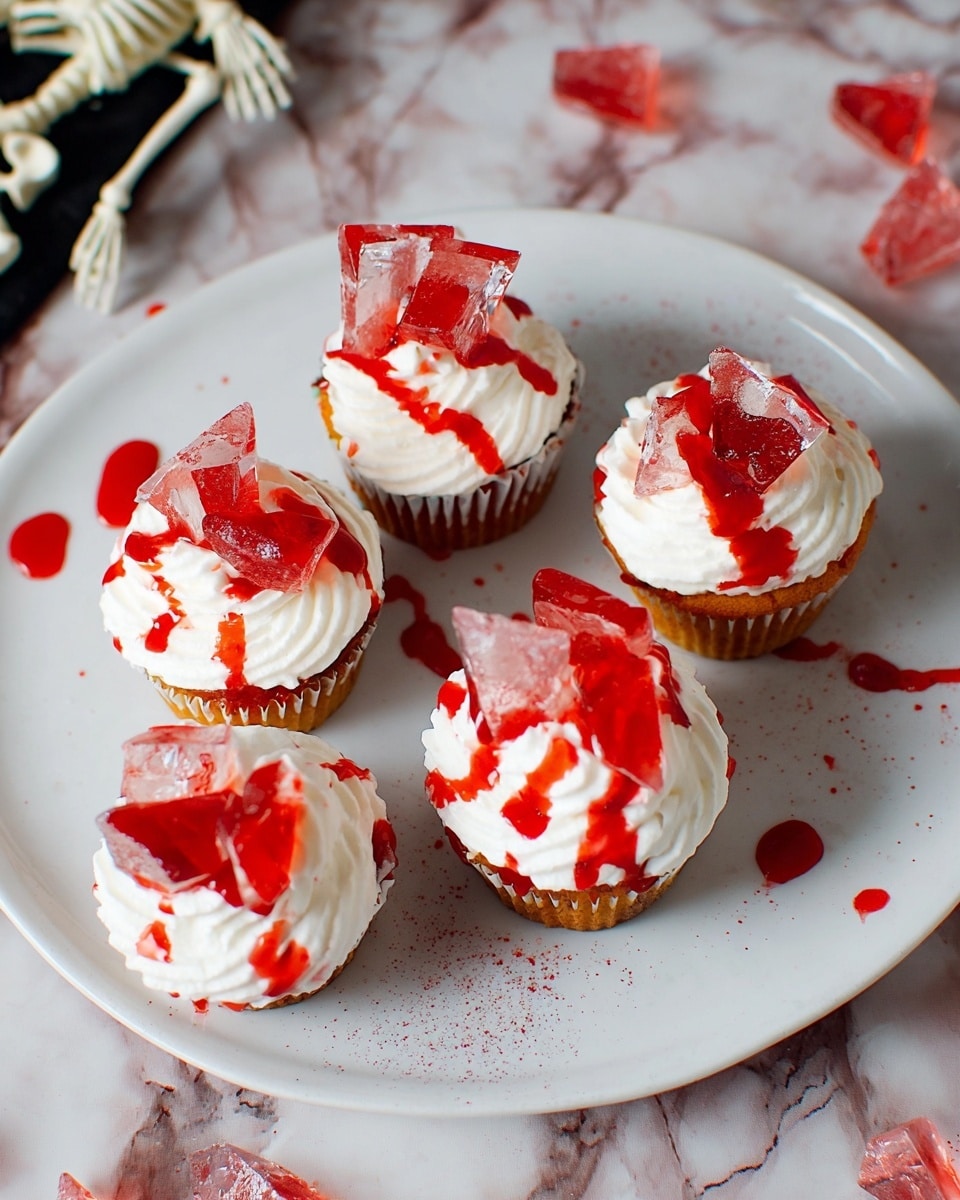
Once your cupcakes are cool, it’s frosting time! I love using a thick buttercream for a rich, creamy finish—pipe it generously on top. Then, press a piece of your candy glass right into the center of each cupcake so it stands tall and dramatic. To mimic dripping blood, take red food coloring gel and carefully pipe little drips down the sides of your frosting. I discovered this trick by accident, and it really made a difference in the final appearance. This step transforms simple cupcakes into an edible art piece!
Pro Tips for Making Blood Drip Cupcakes Recipe
- Perfect Batter Consistency: Adding boiling water last thins the batter, giving the cupcakes a moist, tender crumb every time.
- Avoiding Candy Crystals: Use a wet pastry brush to wash down sugar crystals in your saucepan to keep your candy glass smooth and clear.
- Red Food Gel Over Liquid: I prefer gel coloring because it gives that intense red without thinning out the frosting.
- Candy Glass Safety: Be careful pouring hot sugar syrup—it sticks like crazy and can burn. I learned the hard way, so always pour slowly and wear oven mitts!
How to Serve Blood Drip Cupcakes Recipe
Garnishes
When I serve these cupcakes, I keep it simple with a sprinkle of edible glitter or some black sugar crystals around the base—just to add an eerie sparkle. Fresh raspberries or dark cherries on the side also complement the chocolate flavor beautifully. And if you want, a little edible gold leaf on the candy shards gives a luxe touch that never fails to impress guests.
Side Dishes
Pair these dark, rich cupcakes with drinks like a cold glass of milk, spiced hot chocolate, or even a robust red wine (for adults). On the savory side, they go surprisingly well with a light cheese platter or garlic rosemary popcorn for an unexpected but delicious combo.
Creative Ways to Present
For Halloween parties, I’ve set up a “bloody dessert table” with these cupcakes displayed on black tiered stands and surrounded by fake cobwebs and small pumpkins. Another fun idea is to serve cupcakes individually in mini coffin-shaped boxes or wrapped with a ribbon and a spooky tag as favors. Presentation really takes these from delicious to unforgettable!
Make Ahead and Storage
Storing Leftovers
I store leftover cupcakes in an airtight container at room temperature for up to 2 days. If your kitchen is warm, pop them in the fridge but bring back to room temp before serving so the buttercream isn’t too firm. The candy shards tend to stay crisp for a couple of days but will soften if exposed to humidity.
Freezing
I’ve frozen unfrosted cupcakes successfully by wrapping them tightly in plastic wrap and foil, then thawing at room temperature before frosting. However, the candy shards don’t freeze well—they tend to crack or melt, so I recommend making the candy glass fresh when you plan to serve.
Reheating
If you want to warm your cupcakes slightly, I gently heat them in the microwave for about 10 seconds before frosting. Avoid warming after frosting so your “blood” drip doesn’t melt or smear.
FAQs
-
Can I make the candy glass ahead of time for Blood Drip Cupcakes?
Absolutely! The candy shards can be made up to a day in advance if stored in an airtight container at room temperature. Just make sure they’re completely cool and dry before storing to keep them crisp.
-
What if I don’t have malt powder for this recipe?
If malt powder isn’t handy, you can omit it or substitute with an equal amount of cocoa powder, but note you’ll lose that subtle nutty note it imparts. The cupcakes will still be deliciously chocolatey!
-
Is the red “blood” drip edible?
Yes! It’s made from red food coloring gel piped onto buttercream frosting, so it’s completely edible and safe. The candy shards are also edible sugar glass, but remember to warn little kids to be careful as the shards can be sharp.
-
Can I make these cupcakes gluten-free?
I haven’t tried the exact recipe gluten-free, but swapping in a gluten-free flour blend that measures cup for cup should work—just check the blend contains xanthan gum for structure. You might also want to bake a test cupcake to check texture before making a full batch.
Final Thoughts
This Blood Drip Cupcakes Recipe holds a special place in my heart because it’s the perfect mix of tasty and theatrical. It’s the kind of dessert that sparks conversation and brings smiles, whether for spooky season or a fun dinner party. I encourage you to give it a try—even if candy making scares you! Once you nail it, you’ll have a recipe your friends and family beg for year after year.
Print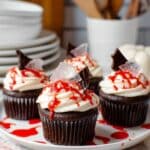
Blood Drip Cupcakes Recipe
- Prep Time: 25 minutes
- Cook Time: 22 minutes
- Total Time: 1 hour 50 minutes
- Yield: 16 to 18 cupcakes
- Category: Dessert
- Method: Baking
- Cuisine: American
Description
Blood Drip Cupcakes are decadent chocolate malt cupcakes topped with smooth buttercream frosting and finished with striking red candy shards and blood-like drips of red gel. Perfect for Halloween or any dramatic dessert occasion, these cupcakes blend rich cocoa, malt, and coffee flavors with a visually spooky and delicious presentation.
Ingredients
Cupcake Ingredients
- 1 1/4 cups all-purpose flour
- 1/2 cup unsweetened cocoa powder
- 1/4 cup malt powder
- 1 3/4 cups sugar
- 1 teaspoon instant coffee
- 1 teaspoon baking soda
- 1 teaspoon baking powder
- 1 teaspoon kosher salt
- 2 large eggs
- 1 cup buttermilk
- 2/3 cup unsalted butter, melted
- 2 teaspoons pure vanilla extract
- 3/4 cup boiling water
Buttercream Frosting
- 2 cups buttercream frosting (prepared or homemade)
Glass Candy Ingredients
- 1/2 cup light corn syrup
- 3 cups sugar
- 1/4 teaspoon cream of tartar
- 1 1/2 cups water
Garnish
- Red food coloring gel, for blood drip garnish
Instructions
- Preheat Oven and Prepare Pan: Preheat your oven to 350°F (175°C). Line a cupcake pan with cupcake liners and set aside.
- Mix Dry Ingredients: In a large bowl, using a hand mixer or stand mixer with a whisk attachment, combine the all-purpose flour, unsweetened cocoa powder, malt powder, sugar, instant coffee, baking soda, baking powder, and kosher salt. Mix well to distribute all ingredients evenly.
- Add Wet Ingredients and Combine: Add the eggs, buttermilk, melted unsalted butter, and pure vanilla extract into the dry mix. Beat on medium speed for about 2 minutes until the batter is well combined and smooth.
- Incorporate Boiling Water: Pour in 3/4 cup of boiling water and continue beating the batter until fully integrated, creating a thin, smooth batter.
- Fill Cupcake Liners and Bake: Pour the batter into each cupcake liner, filling about two-thirds full. Bake in the preheated oven for 18 to 22 minutes or until a toothpick inserted in the center of a cupcake comes out clean.
- Cool Cupcakes: Remove cupcakes from the oven and transfer them to a wire rack. Allow them to cool completely before frosting.
- Prepare Glass Candy: Line a baking sheet with foil. In a small saucepan over medium-high heat, combine light corn syrup, sugar, cream of tartar, and water. Stir until the mixture comes to a boil. Once boiling, clip a candy thermometer to the side of the pan and wash down any sugar crystals on the pan sides with a wet brush. Continue boiling until the mixture reaches 300°F (hard crack stage).
- Pour and Set Candy: Pour the hot candy mixture onto the prepared foil-lined baking sheet. Let it cool and harden for at least 1 hour until solid. Break the hardened sugar into shards to resemble glass.
- Assemble Cupcakes: Pipe buttercream frosting onto the cooled cupcakes generously. Insert shards of the glass candy into the center of each frosted cupcake for a dramatic effect.
- Create Blood Drip Finish: Using red food coloring gel, pipe blood-like drips onto the frosting to complete the spooky aesthetic of the Blood Drip Cupcakes.
Notes
- Ensure cupcakes have cooled completely before frosting to prevent melting the buttercream.
- Be cautious when working with hot sugar syrup; it can cause severe burns.
- If you don’t have malt powder, you can substitute with an equal amount of additional cocoa powder or instant coffee, but it will alter the flavor slightly.
- Use gel food coloring for a vibrant red ‘blood’ that won’t run.
- Store cupcakes in an airtight container at room temperature for up to 3 days; keep candy shards separate to maintain crispness.
Nutrition
- Serving Size: 1 cupcake
- Calories: 420 kcal
- Sugar: 45 g
- Sodium: 230 mg
- Fat: 18 g
- Saturated Fat: 10 g
- Unsaturated Fat: 7 g
- Trans Fat: 0 g
- Carbohydrates: 63 g
- Fiber: 3 g
- Protein: 4 g
- Cholesterol: 45 mg

