
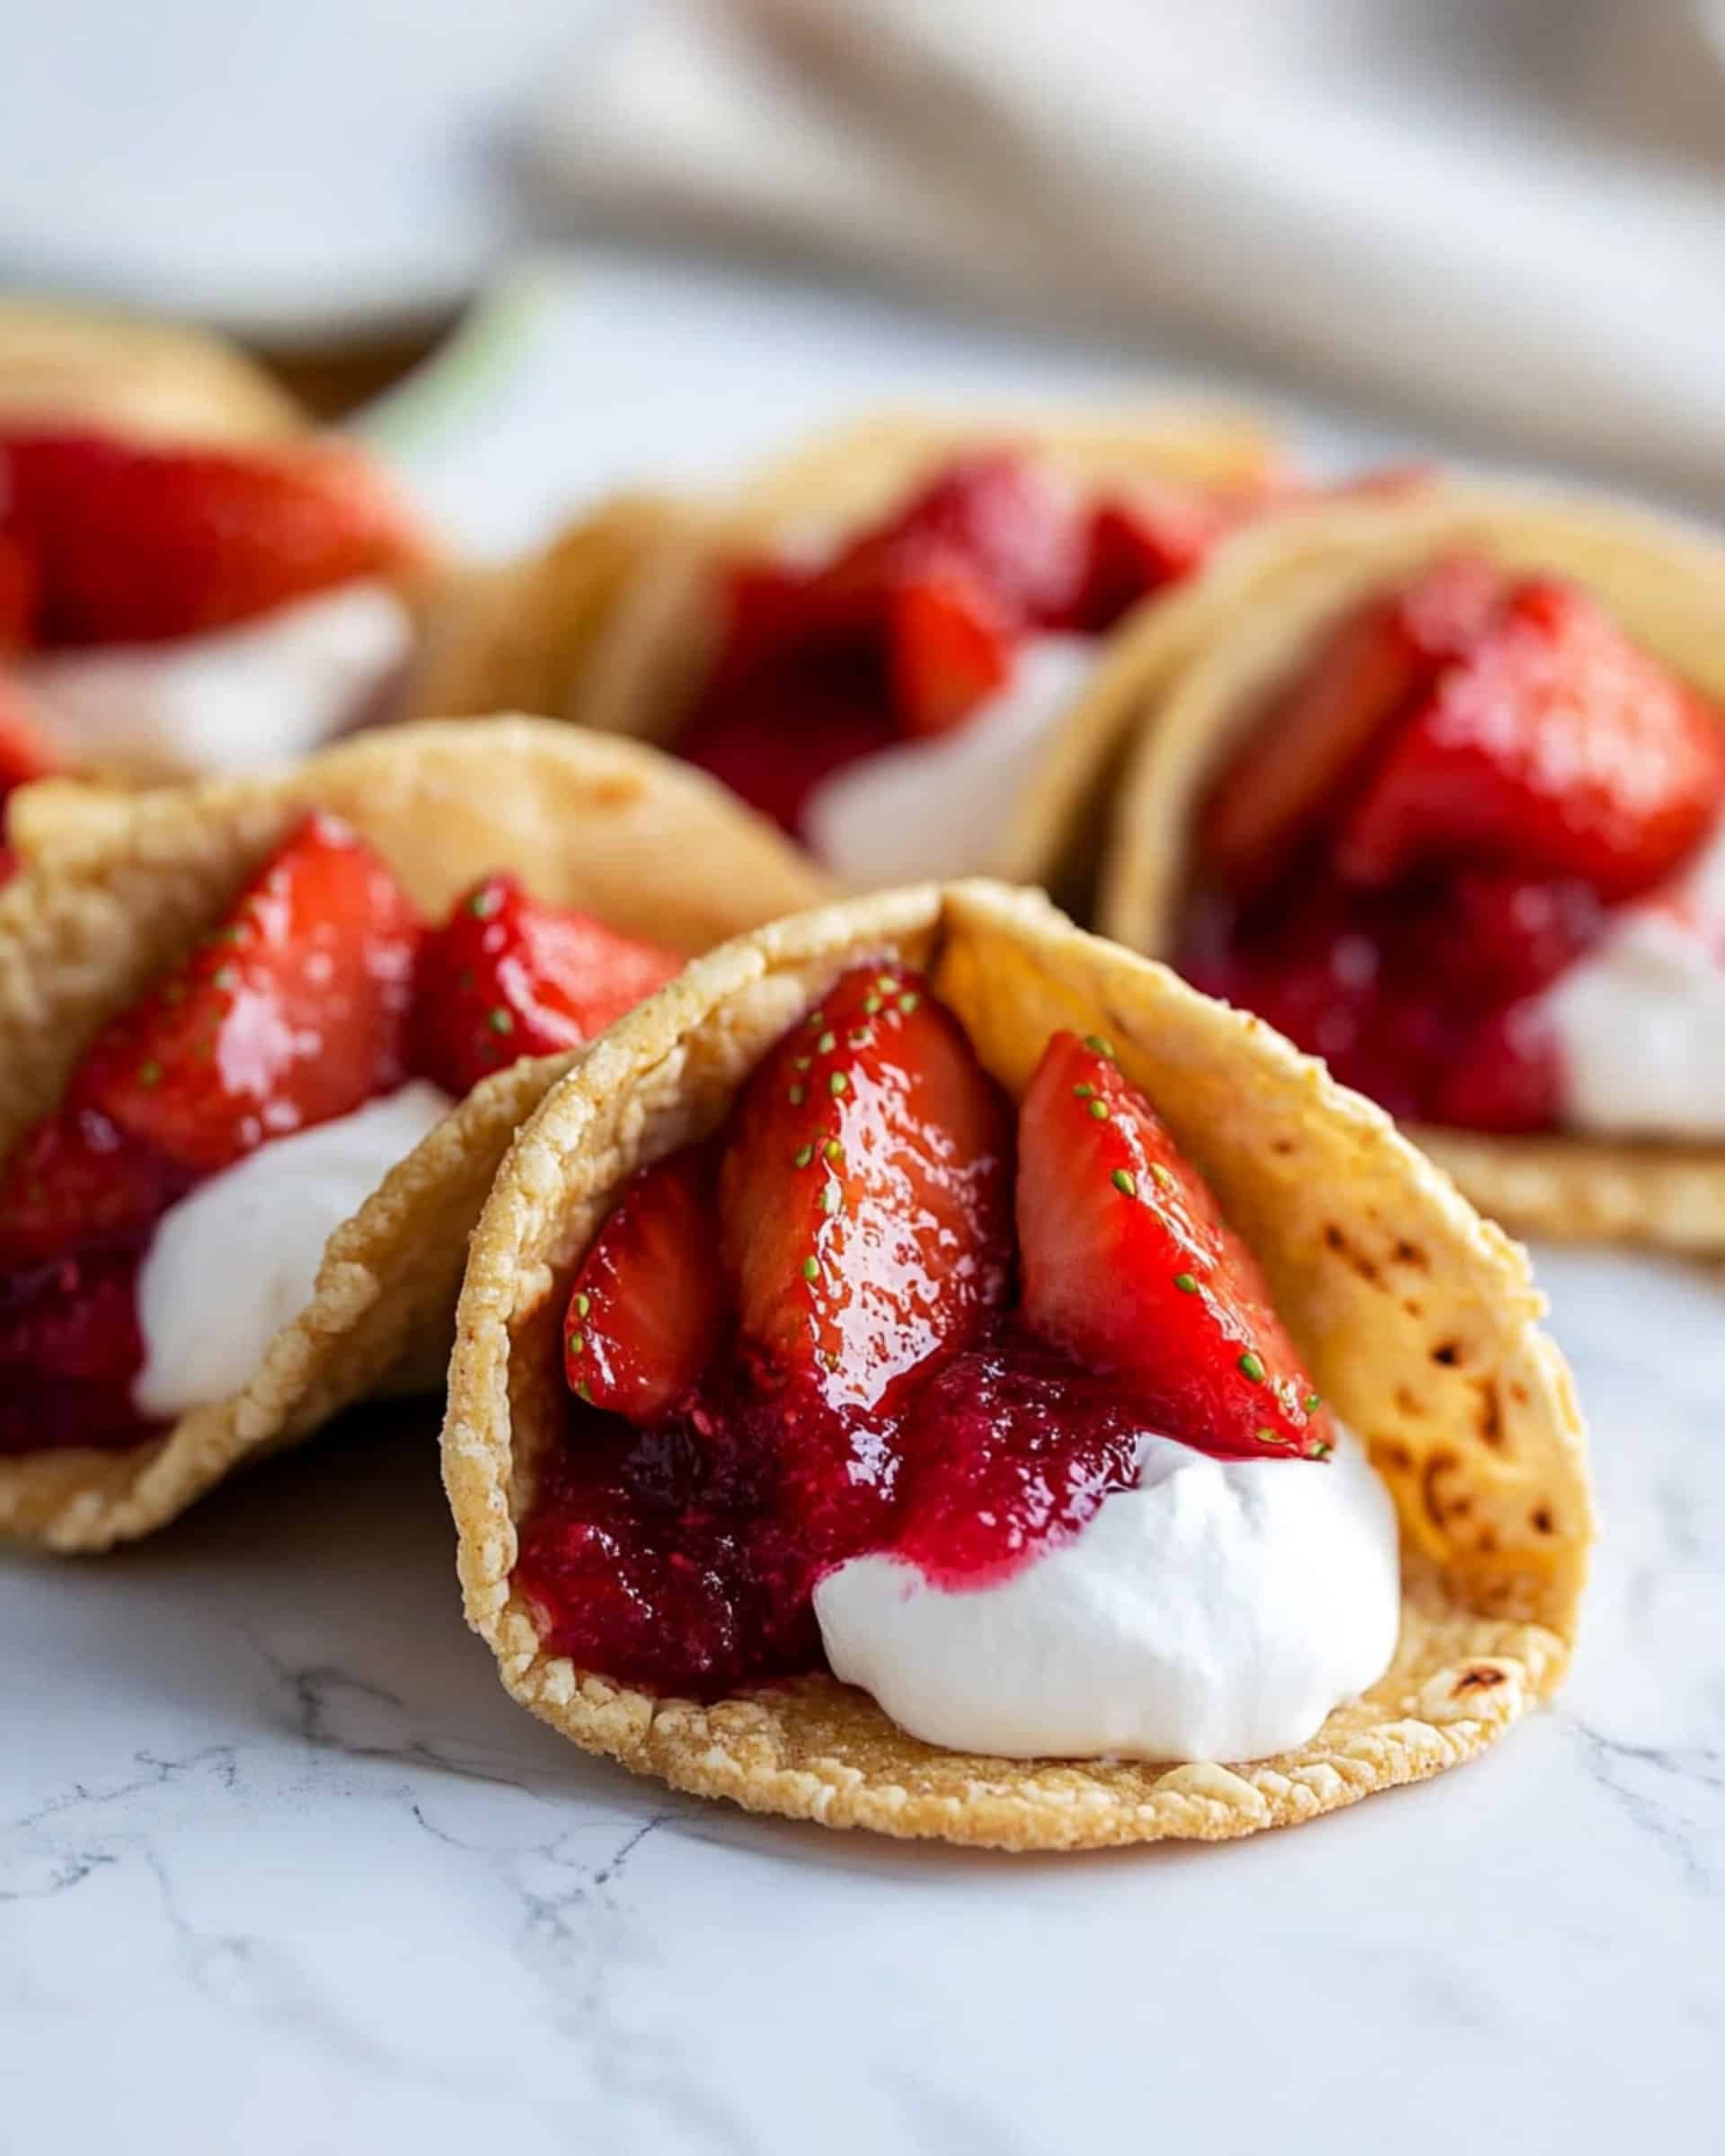
This delightful Cheesecake Tacos recipe transforms ordinary tortillas into crispy, graham cracker-coated shells filled with fluffy cheesecake and topped with fresh strawberries. It’s a creative dessert that combines the fun of tacos with the indulgence of cheesecake, perfect for impressing guests or treating yourself on a weeknight. Ready in just over 30 minutes, these sweet treats are as fun to make as they are to eat!
Why You’ll Love This Recipe
- No Baking Skills Required: Even if you’ve never made cheesecake before, these tacos are foolproof and require minimal baking expertise.
- Wow Factor: These dessert tacos look incredibly impressive but are surprisingly simple to create. Your friends will think you spent hours in the kitchen!
- Customizable: The basic concept works with countless flavor combinations, so you can adapt it to your favorite fruits or toppings.
- Make-Ahead Friendly: You can prepare the shells ahead of time and assemble just before serving, making this perfect for entertaining.

Ingredients You’ll Need
- Tortilla shells: These become the base of your dessert tacos. The flexibility of tortillas allows them to hold their shape when baked into taco forms.
- Graham cracker crumbs: Provides that classic cheesecake crust flavor and adds a delightful texture to the outside of your taco shells.
- Granulated sugar: Just a touch sweetens the graham cracker coating without overwhelming.
- Butter: Acts as the glue that helps the graham cracker crumbs stick to the tortillas and adds richness.
- Cream cheese: The star of any cheesecake! Make sure it’s at room temperature for the smoothest filling.
- Cheesecake instant pudding mix: A genius shortcut that adds authentic cheesecake flavor and helps stabilize the filling.
- Heavy whipping cream: Creates that light, fluffy texture we all love in a good cheesecake filling.
- Powdered sugar: Sweetens the filling while dissolving completely for a smooth texture.
- Vanilla extract: Enhances the cheesecake flavor with its warm, aromatic notes.
- Strawberries: Fresh berries add color, flavor, and a juicy contrast to the creamy filling.
- Strawberry glaze: Ties everything together with concentrated strawberry flavor and a beautiful sheen.
Note: You’ll find the complete list of ingredients, along with their exact measurements, in the printable recipe card at the bottom of this post.
Variations
Customize these cheesecake tacos to make them your own:
- Berry Bonanza: Swap strawberries for blueberries, raspberries, or a mixed berry blend with matching glaze.
- Chocolate Lover’s Dream: Add cocoa powder to the cheesecake filling and top with chocolate ganache and chocolate shavings.
- Caramel Apple: Top with sautéed cinnamon apples and a drizzle of caramel sauce.
- Tropical Twist: Use mango and passion fruit with a coconut-infused cheesecake filling.
- Nutty Delight: Sprinkle chopped toasted nuts (pecans, almonds, or pistachios) over your fruit topping for added crunch.
How to Make Cheesecake Tacos
Step 1: Prepare the Shells
Preheat your oven to 400°F. Mix graham cracker crumbs and sugar in a shallow dish. Using a 3¾-inch circle cookie cutter, cut three circles from each tortilla. Poke each circle several times with a fork on both sides to prevent bubbling. Brush both sides with melted butter, then coat thoroughly in the graham cracker mixture by pressing gently.
Step 2: Shape and Bake
Fold each coated tortilla circle in half, creating a taco shape with a defined seam in the middle. Turn a cupcake pan upside down and arrange the shells between the cups so they maintain their shape while baking. Bake for 11 minutes until the edges turn brown and become rigid. Leave them on the pan to cool completely – this ensures they hold their taco shape.
Step 3: Make the Filling
Beat room temperature cream cheese until smooth and creamy. Add pudding mix, half the heavy cream, powdered sugar, and vanilla extract, beating until well combined. Pour in the remaining cream and continue beating until the mixture becomes fluffy and light. Transfer this luscious filling to a piping bag fitted with a Wilton 1M tip for beautiful swirls.
Step 4: Prepare the Topping
Mix freshly chopped strawberries with strawberry glaze in a bowl until evenly coated. The glaze adds shine and intensifies the strawberry flavor.
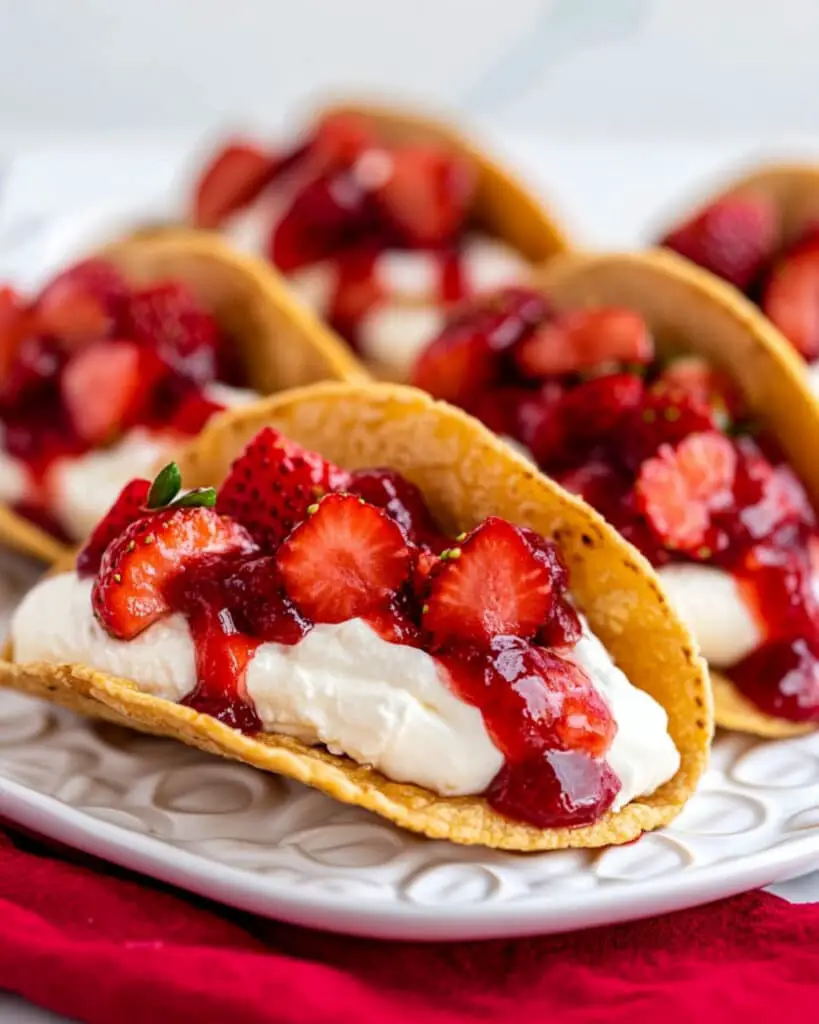
Step 5: Assemble
Pipe the cheesecake filling into each cooled taco shell using a continuous motion: start in the middle, pipe to one edge, back to center, to the opposite edge, and finish in the center. Top generously with the strawberry mixture.
Pro Tips for Making the Recipe
- Room Temperature Cream Cheese: Always use room temperature cream cheese to avoid lumps in your filling.
- Sturdy Shells: Don’t skip the fork-poking step – it prevents the tortillas from puffing up and losing their shape.
- Pipe With Confidence: A steady hand when piping creates the most attractive filling. Practice your technique on a plate first if you’re unsure.
- Cooling Patience: Allow the shells to cool completely before filling them. Hot or warm shells will cause the filling to melt.
- Assembly Timing: For the crispiest results, assemble these tacos shortly before serving. The shells can soften if they sit with the filling too long.
How to Serve
These cheesecake tacos are versatile enough for any occasion:
Dessert Bar:
Set up a build-your-own taco bar with pre-made shells and various toppings (different fruits, chocolate chips, crushed cookies, caramel sauce) for a fun interactive dessert.
Elegant Plating:
For a more sophisticated presentation, arrange three tacos on a plate with a dusting of powdered sugar, mint leaves, and extra berries on the side.
Party Perfect:
Serve on a tiered dessert stand for birthday parties, showers, or holiday gatherings – they’re guaranteed conversation starters!
Make Ahead and Storage
Storing Components
The taco shells can be made up to 3 days ahead and stored in an airtight container at room temperature. The cheesecake filling can be prepared 1-2 days in advance and kept refrigerated in a piping bag or sealed container.
Assembled Tacos
Once filled, the tacos are best enjoyed within 2-3 hours. After that, the shells may begin to soften from the moisture in the filling.
Freezing
The unfilled taco shells freeze beautifully for up to 1 month. Store them in a single layer in a freezer-safe container with parchment paper between layers. Thaw at room temperature before filling.
FAQs
-
Can I use store-bought hard taco shells instead of making my own?
While you could use pre-made hard taco shells in a pinch, the texture and flavor won’t be the same. The homemade graham cracker-coated tortilla shells are what make this dessert special. They’re crispier, tastier, and hold up better to the filling.
-
What if I can’t find cheesecake pudding mix?
If you can’t find cheesecake pudding mix, vanilla pudding mix is a good substitute. Add a little extra vanilla extract and a squeeze of lemon juice to mimic that tangy cheesecake flavor. Alternatively, you could use a tablespoon of sour cream for tanginess.
-
Can I make this recipe gluten-free?
Yes! Use gluten-free tortillas and gluten-free graham cracker crumbs (or crushed gluten-free cookies). Just make sure your pudding mix is also gluten-free, as some brands contain wheat starch.
-
How do I prevent my tacos from getting soggy?
To maintain maximum crispness, assemble just before serving. If making in advance, keep the components separate and put them together at the last minute. Also, make sure your strawberry topping isn’t too wet – drain excess liquid if necessary.
Final Thoughts
These Cheesecake Tacos are the perfect blend of creativity and simplicity in the kitchen. I love how they transform familiar ingredients into something completely unexpected and delightful. The contrast between the crisp, graham-coated shell and the creamy cheesecake filling creates a dessert that’s both texturally interesting and incredibly satisfying. Whether you’re looking to impress guests at your next gathering or just want to treat yourself to something special without hours of work, these dessert tacos deliver every time. Give them a try – I promise your sweet tooth will thank you!
Print
Cheesecake Tacos Recipe
- Prep Time: 20 minutes
- Cook Time: 11 minutes
- Total Time: 31 minutes
- Yield: 21 tacos
- Category: Desserts
- Method: Baking
- Cuisine: American
- Diet: Vegetarian
Description
Cheesecake Tacos feature crisp, graham cracker-coated tortilla shells filled with fluffy cheesecake cream and topped with luscious strawberries and glaze. This innovative dessert transforms classic cheesecake into a fun, grab-and-go taco perfect for parties or a unique sweet treat at home.
Ingredients
Shells
- 7 (9-inch) tortilla shells
- 1 cup graham cracker crumbs
- 1 1/2 tablespoons granulated sugar
- 1/3 cup butter, melted
Cheesecake Filling
- 8 ounces cream cheese, room temperature
- 3 tablespoons instant cheesecake pudding mix
- 1 cup heavy whipping cream, divided
- 1/2 cup powdered sugar
- 1 teaspoon vanilla extract
Topping
- 1/2 cup chopped strawberries
- 3/4 cup strawberry glaze
Instructions
- Prepare the Oven and Ingredients: Preheat your oven to 400°F (204°C). Get all your ingredients measured and ready before you begin for smooth preparation.
- Make the Shell Coating: In a shallow dish, combine the graham cracker crumbs and granulated sugar. Stir together to mix well.
- Create Shell Circles: Using a 3 ¾-inch circle cookie cutter, cut out 3 circles from each 9-inch tortilla shell. This will yield approximately 21 shells.
- Prevent Air Bubbles: Stab each tortilla circle 6 to 7 times on both sides with a fork to prevent them from puffing up during baking.
- Butter and Coat Shells: Brush each shell with melted butter. Then place into the graham cracker crumb mixture, gently pressing to coat both sides thoroughly.
- Shape and Bake the Shells: Fold each coated shell in half to form a taco shape, pressing a seam in the middle. Flip a cupcake pan upside down and stagger the shells between the cups, holding their shape. Bake shells for 11 minutes until the edges are golden brown and crisp.
- Cool the Shells: Remove the pan from the oven and leave the shells to cool in the upside-down cupcake pan. This helps them keep their taco shape.
- Prepare the Cheesecake Filling: In a large mixing bowl, beat the cream cheese until smooth using a hand mixer. Scrape down the sides as needed. Add in cheesecake pudding mix, ½ cup heavy cream, powdered sugar, and vanilla extract. Beat until combined, then add the remaining ½ cup of heavy cream and beat until mixture is smooth and fluffy.
- Pipe the Filling: Fill a piping bag (fitted with Wilton 1M or similar tip) with the cheesecake mixture. Pipe the filling into each cooled taco shell. Start piping from the center towards one edge, back to the center, and then to the other edge in a smooth flow. Repeat for all shells.
- Add the Topping: In a small bowl, combine the chopped strawberries with the strawberry glaze. Stir gently to coat the berries with glaze. Spoon this mixture on top of each filled taco.
- Serve: Serve the cheesecake tacos immediately for best flavor and texture.
Notes
- If strawberry glaze is unavailable, use strawberry pie filling mixed with fresh strawberries as a substitute.
- Ensure shells are cool before piping the cheesecake filling to prevent melting and sogginess.
- These tacos are best enjoyed fresh but can be stored (unfilled) for later assembly.
- Change up the fruit topping as desired—try blueberries, raspberries, or cherries for variety.
Nutrition
- Serving Size: 1 taco
- Calories: 185
- Sugar: 7g
- Sodium: 210mg
- Fat: 11g
- Saturated Fat: 6g
- Unsaturated Fat: 4g
- Trans Fat: 0g
- Carbohydrates: 19g
- Fiber: 1g
- Protein: 3g
- Cholesterol: 22mg


