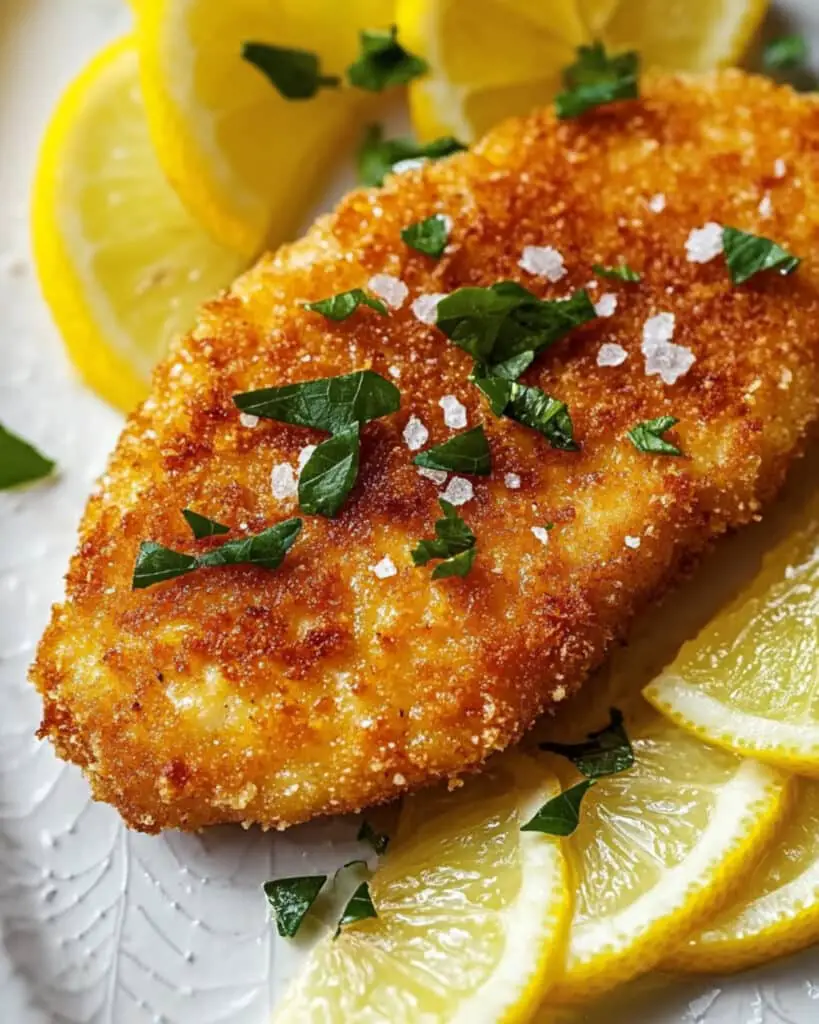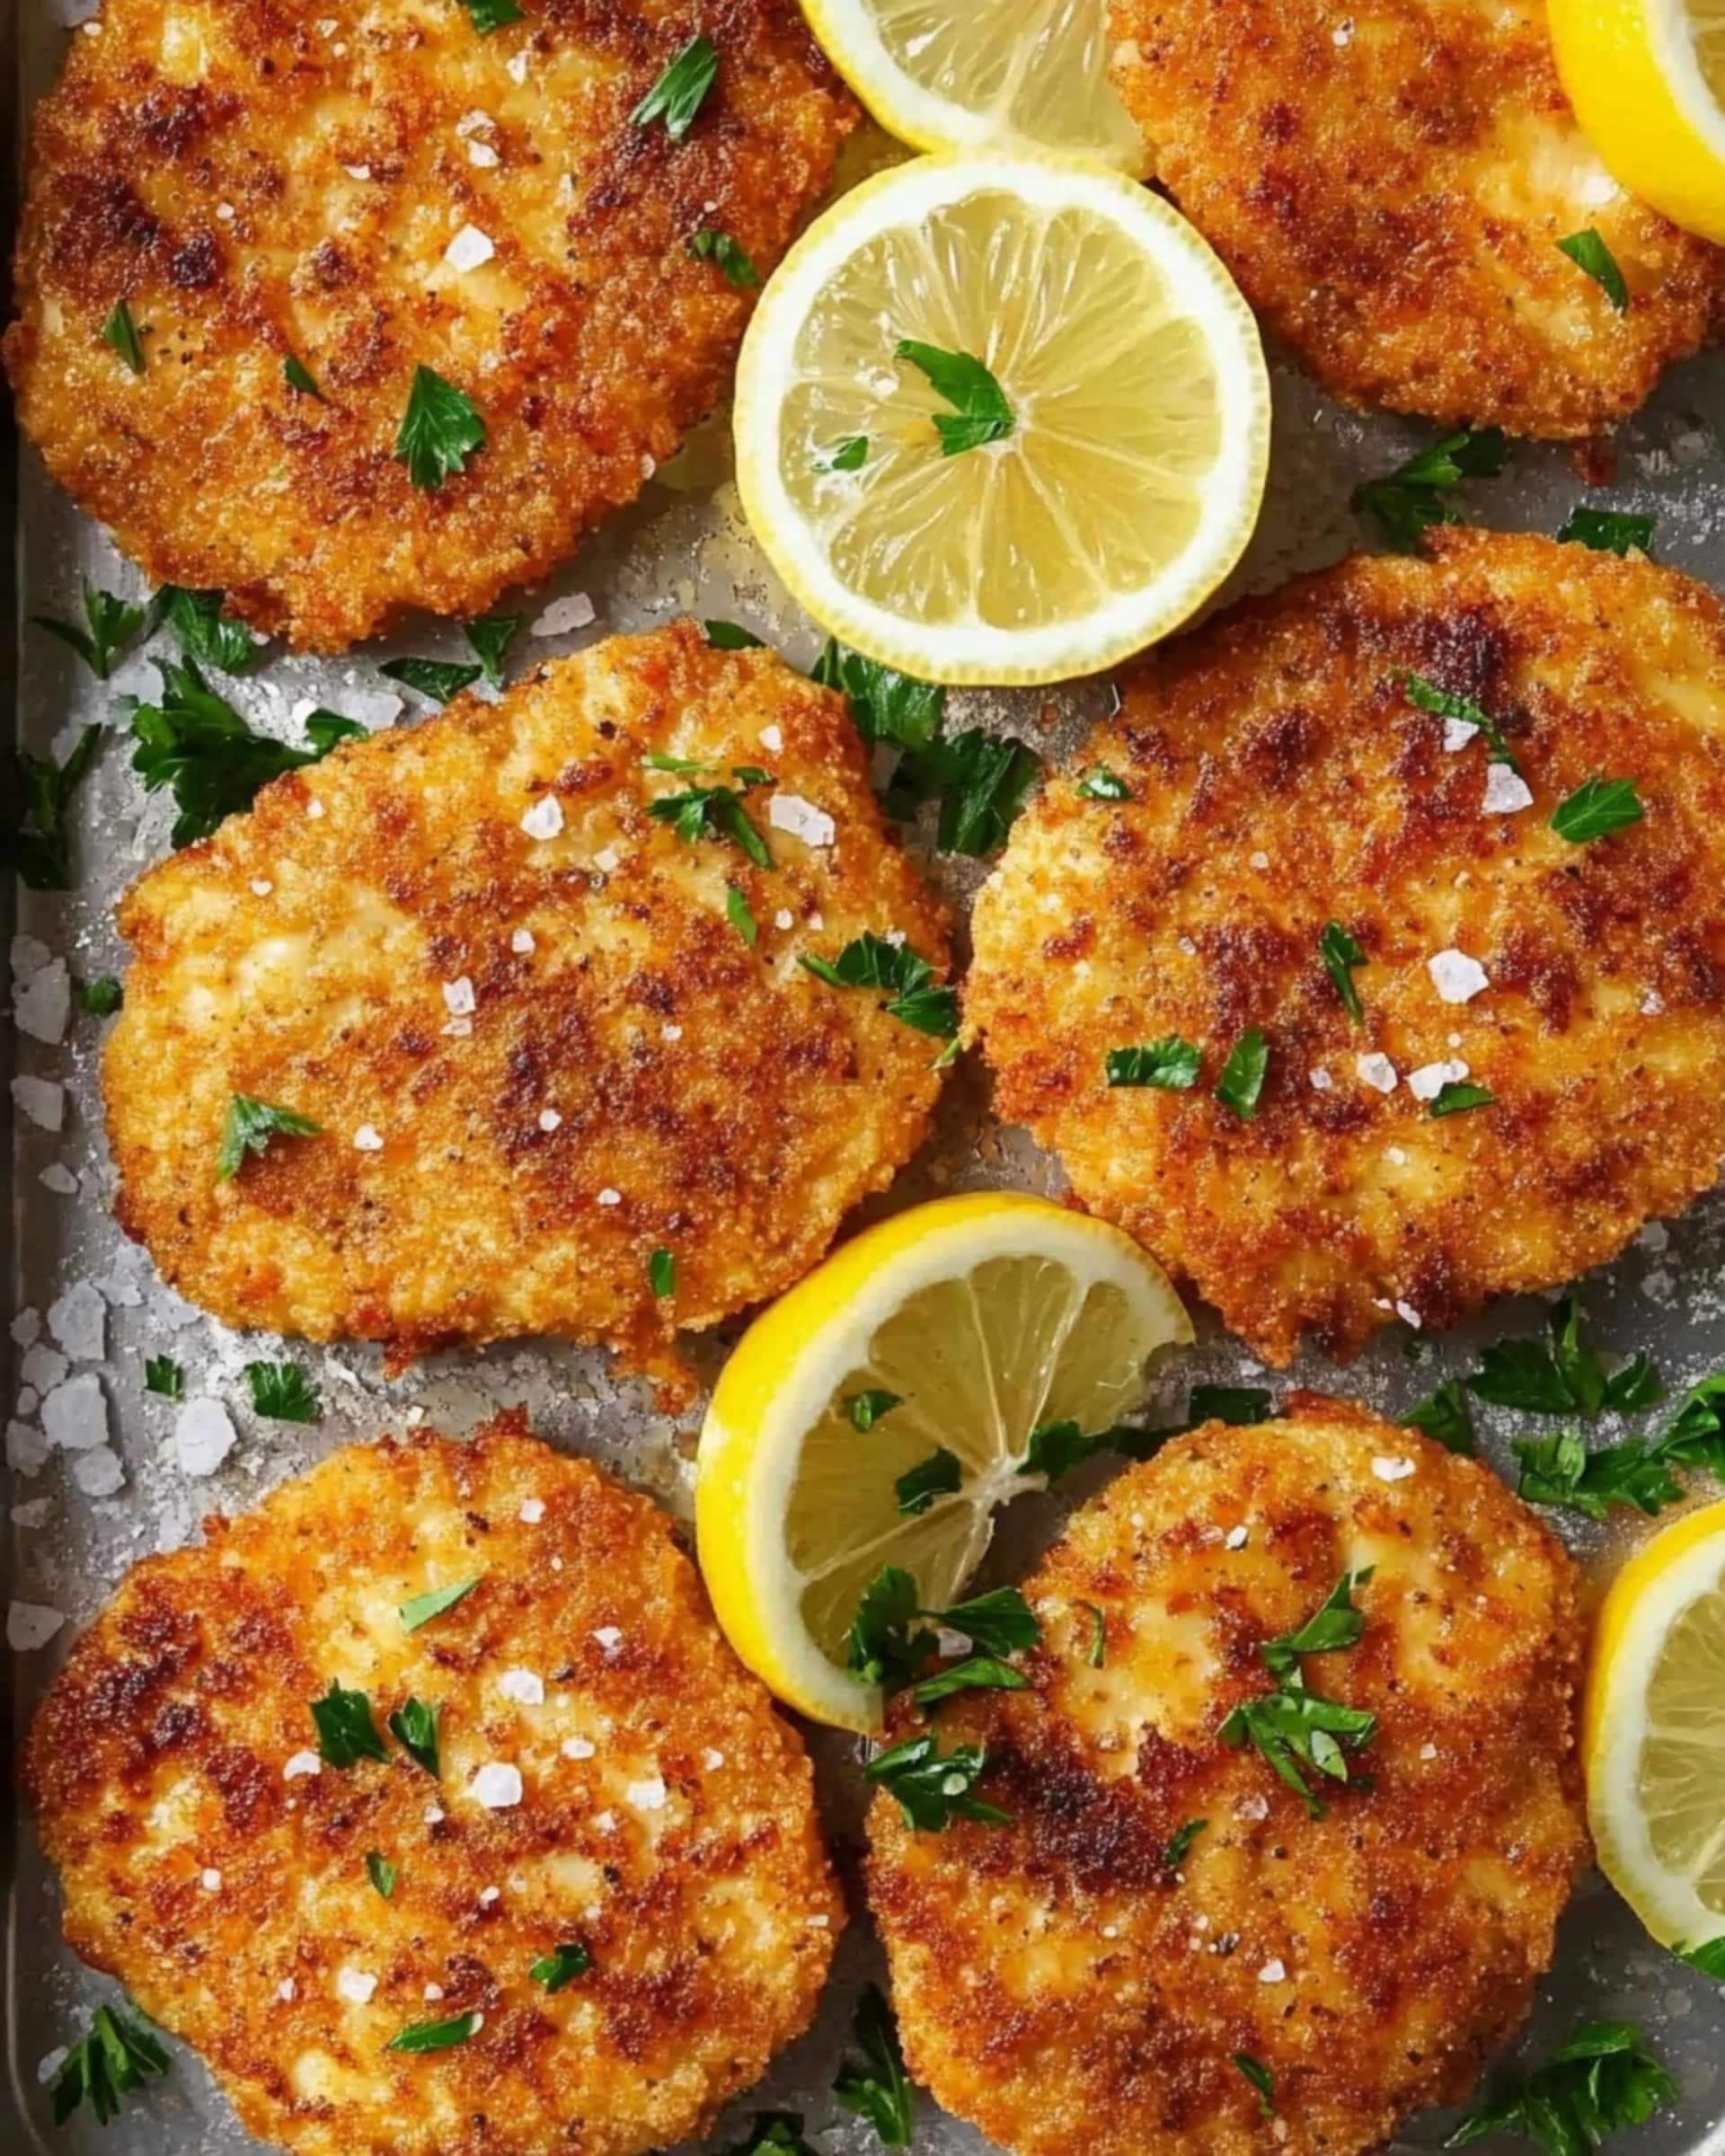
This incredibly crispy and juicy Chicken Milanese is a game-changer for dinner tonight! With a golden, crunchy coating on the outside and perfectly tender chicken inside, this Italian classic transforms simple ingredients into an extraordinary meal that’s ready in just minutes. Perfect for busy weeknights when you want something impressive without the fuss!
Why You’ll Love This Recipe
- Restaurant-Quality at Home: This dish brings the magic of your favorite Italian restaurant right to your kitchen—but better because you made it yourself!
- Quick Preparation: From start to finish, you’ll have this gorgeous meal ready in about 20 minutes, making it perfect for those evenings when you’re short on time but still want something special.
- Crowd-Pleaser: The crispy exterior and juicy interior create a texture combination that appeals to everyone at the table, including picky eaters.
- Versatile: Serve it with a simple side salad for a light dinner, or pair it with pasta for something more substantial—it works beautifully either way.
Ingredients You’ll Need
- Chicken breasts: The star of the show—they’ll be pounded thin to tenderize and cook evenly. Thinner pieces also mean more surface area for that delicious breading!
- Salt and pepper: Simple seasonings that enhance the natural flavor of the chicken. Don’t skimp here—proper seasoning makes all the difference.
- All-purpose flour: Creates the first layer of the breading station, helping the egg wash stick to the chicken. It also adds structure to the coating.
- Eggs: Acts as the glue that holds everything together. They create that crucial middle layer that helps the breadcrumb mixture adhere perfectly.
- Regular bread crumbs: Provides a fine texture base for the coating. The smaller crumbs fill in gaps and create an even layer.
- Panko bread crumbs: These Japanese-style bread crumbs are larger and airier than regular ones, creating extra crispiness and a beautiful texture contrast.
- Parmesan cheese: Adds a nutty, salty flavor that elevates the entire dish. Fresh-grated works best for maximum flavor impact.
- Oil: Used for frying, it helps create that golden exterior. Choose something with a higher smoke point like vegetable or canola oil.
- Butter: Adds incredible richness and color to the coating. The combination of butter and oil creates the perfect frying medium.
Note: You’ll find the complete list of ingredients, along with their exact measurements, in the printable recipe card at the bottom of this post.
Variations
Herb-Infused Milanese
Add 1-2 tablespoons of fresh herbs like chopped parsley, basil, or thyme to the breadcrumb mixture for a fragrant twist.
Lemon Parmesan Milanese
Mix 1 tablespoon of lemon zest into the breadcrumb mixture and serve with lemon wedges for a bright, citrusy version.
Spicy Chicken Milanese
Add 1/2 teaspoon of red pepper flakes or 1/4 teaspoon of cayenne pepper to the breadcrumb mixture for a pleasant heat.
Garlic Lover’s Milanese
Mix 2-3 cloves of minced garlic into the breadcrumb mixture, or add garlic powder for a milder flavor that still packs a punch.
How to Make Chicken Milanese
Step 1: Prepare the Chicken
Place chicken breasts between sheets of plastic wrap and pound them to an even thickness of about 1/4 inch. This ensures quick, even cooking and maximum tenderness. Season both sides with salt and pepper.
Step 2: Set Up Breading Station
Arrange three shallow dishes in a row. Place flour in the first bowl, whisked eggs in the second, and combine bread crumbs, panko, and parmesan cheese in the third bowl, mixing well.
Step 3: Bread the Chicken
Take each chicken breast and dip it first in the flour, coating completely and shaking off excess. Next, dip in the egg mixture, allowing excess to drip off. Finally, press into the breadcrumb mixture, ensuring an even coating and pressing gently so the crumbs adhere well.
Step 4: Cook to Golden Perfection
Heat oil and butter in a large skillet over medium heat until butter melts and starts to foam slightly. Add the breaded chicken (working in batches if needed to avoid overcrowding) and cook for about 3-5 minutes per side until golden brown and cooked through to an internal temperature of 165°F.
Step 5: Rest and Serve
Transfer cooked chicken to a paper towel-lined plate to absorb excess oil. Allow to rest for 2-3 minutes before serving to let the juices redistribute throughout the meat.
Pro Tips for Making the Recipe
- Pound Evenly: Make sure to pound the chicken to an even thickness—this ensures it cooks evenly and stays tender.
- Don’t Skip the Breading Order: The flour-egg-breadcrumb sequence is crucial for proper coating adhesion. Changing the order won’t give you that perfect crust.
- Temperature Matters: Keep your oil and butter at medium heat—too hot and the coating will burn before the chicken cooks; too cool and the coating will absorb too much oil and become soggy.
- Work in Batches: If cooking for a family, don’t overcrowd the pan. Cook in batches to maintain oil temperature and ensure even browning.
- Let It Rest: Allow the chicken to rest on paper towels for a few minutes after cooking—this keeps the coating crispy and lets the juices redistribute.
How to Serve
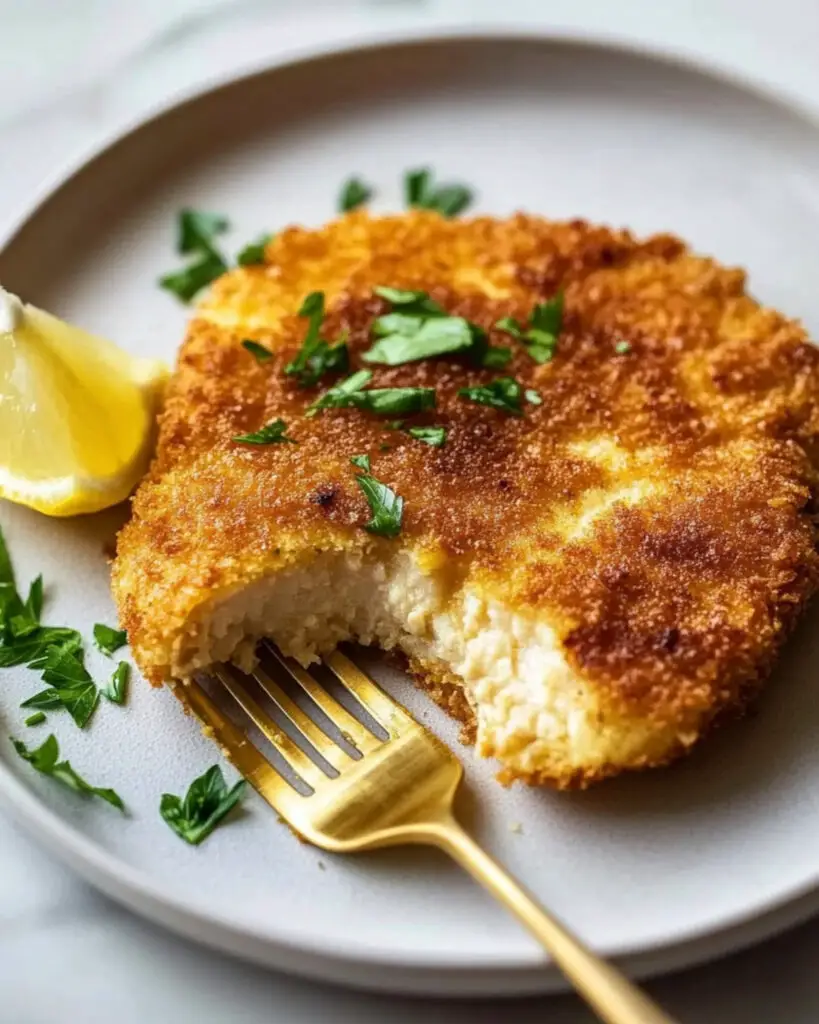
Classic Italian Style
Serve with a simple arugula salad dressed with lemon juice, olive oil, salt, and pepper. The peppery greens and bright dressing perfectly complement the rich, crispy chicken.
Family-Friendly Meal
Pair with buttered pasta or mashed potatoes and a side of steamed vegetables for a complete meal that satisfies everyone.
Sandwich Spectacular
Place between two slices of ciabatta with some garlic aioli, fresh tomatoes, and lettuce for an incredible sandwich that elevates lunch to a whole new level.
Upscale Dinner
Top with a small portion of dressed greens and shaved parmesan for an elegant presentation that looks straight from a restaurant kitchen.
Make Ahead and Storage
Storing Leftovers
Wrap cooled chicken breasts individually in plastic wrap or place them in an airtight container with parchment paper between layers to prevent sticking. Store in the refrigerator for up to 3-4 days.
Freezing
To freeze, wrap each cooled chicken breast tightly in plastic wrap, then aluminum foil, before placing in a freezer-safe container or bag. Label with the date and freeze for up to 6 months. This double-wrapping helps prevent freezer burn.
Reheating
For the crispiest results, place thawed chicken on a baking sheet lined with parchment paper and bake at 350°F (177°C) for 10-12 minutes until heated through. While you can use a microwave for speed, the chicken won’t maintain its crispy exterior.
Note: When reheating from frozen, add an additional 5-7 minutes to the baking time, or thaw overnight in the refrigerator before reheating for best results.
FAQs
-
Can I use chicken thighs instead of breasts?
Absolutely! Boneless, skinless chicken thighs make a delicious substitute. They’re naturally juicier but may need slightly longer cooking time. Pound them to an even thickness just like you would with breasts, and follow the same breading process.
-
How do I keep my breading from falling off during cooking?
The key is proper technique. Make sure your chicken is dry before starting the breading process, press the breadcrumbs firmly onto the chicken, and let the breaded chicken rest for 5-10 minutes before cooking. Also, resist the urge to move the chicken too much in the pan—let it form a crust before flipping.
-
What can I use instead of panko if I don’t have any?
Regular breadcrumbs can work in a pinch, though your coating won’t be quite as crispy. For a similar texture, try crushing cornflakes or even crackers into coarse crumbs. Another option is to take day-old bread, toast it until very dry, and pulse it in a food processor.
-
Can I bake this instead of pan-frying?
Yes! For a lighter version, place breaded chicken on a wire rack set over a baking sheet, spray with cooking oil on both sides, and bake at 425°F (220°C) for about 15-20 minutes, flipping halfway through. While it won’t be quite as golden as the fried version, it’ll still have a nice crunch.
Final Thoughts
This Chicken Milanese recipe brings together simplicity and spectacular flavor in one perfect package. The contrast between the crispy, savory exterior and the juicy, tender chicken creates a dish that feels special enough for company but simple enough for a Tuesday night. Give it a try—I’m convinced it might just become your new go-to chicken recipe when you want something that feels a little fancy without the fuss!
Print
Chicken Milanese Recipe
- Prep Time: 10 minutes
- Cook Time: 10 minutes
- Total Time: 20 minutes
- Yield: 4 servings
- Category: Main-course
- Method: Frying
- Cuisine: Italian
- Diet: Halal
Description
Chicken Milanese is a classic Italian dish featuring tender chicken breasts coated in a crispy golden crust made from breadcrumbs, panko, and parmesan cheese. This easy-to-prepare main course is perfect for a quick weeknight dinner, offering restaurant-quality flavor in under 30 minutes.
Ingredients
-
Main Ingredients
- 4 chicken breasts
- 1/2 teaspoon salt
- 1/4 teaspoon pepper
- 1 cup all-purpose flour
- 2 large eggs, whisked
- 1/2 cup bread crumbs
- 1 cup panko bread crumbs
- 1/2 cup parmesan cheese
- 1 tablespoon oil
- 2 tablespoons unsalted butter
Instructions
- Prepare the Chicken: Pound the chicken breast fillets with a meat mallet until they are of even thickness. Season both sides of the chicken with salt and pepper to ensure balanced flavor.
- Set Up Dredging Stations: In three separate bowls, place the flour in the first, whisk the eggs in the second, and combine the bread crumbs, panko, and parmesan cheese in the third. This setup makes the breading process easy and organized.
- Bread the Chicken: Dip each chicken breast first into the flour, shaking off excess, then into the whisked eggs, again shaking off excess, and finally into the bread crumb mixture. Press the crumbs and cheese into the chicken firmly so the coating adheres well. Repeat with all chicken breasts.
- Cook the Chicken: Add the oil and butter to a large skillet or pan and heat over medium heat. Once hot, place the breaded chicken breasts in the skillet and cook for 7-10 minutes, turning once, until both sides are golden and the meat is cooked through.
- Drain and Serve: Remove the cooked chicken from the pan and place on a plate lined with paper towels to drain excess oil. Serve immediately for the crispiest texture.
Notes
- To store: Wrap the cooled chicken tightly in plastic wrap and refrigerate for up to 3 to 4 days.
- To reheat: Bake chicken breasts on a parchment-lined baking sheet at 177°C (350°F) for 10-12 minutes, or until heated through. Microwaving is also possible but results in less crispy chicken.
- To freeze: Place wrapped chicken in an airtight container or freezer-safe bag and freeze for up to 6 months. Defrost before reheating.
- Pounding chicken ensures even cooking and crispiness.
- For a lighter version, bake instead of pan-frying.
Nutrition
- Serving Size: 1 chicken breast
- Calories: 410
- Sugar: 1g
- Sodium: 550mg
- Fat: 18g
- Saturated Fat: 6g
- Unsaturated Fat: 9g
- Trans Fat: 0g
- Carbohydrates: 25g
- Fiber: 1g
- Protein: 39g
- Cholesterol: 180mg

