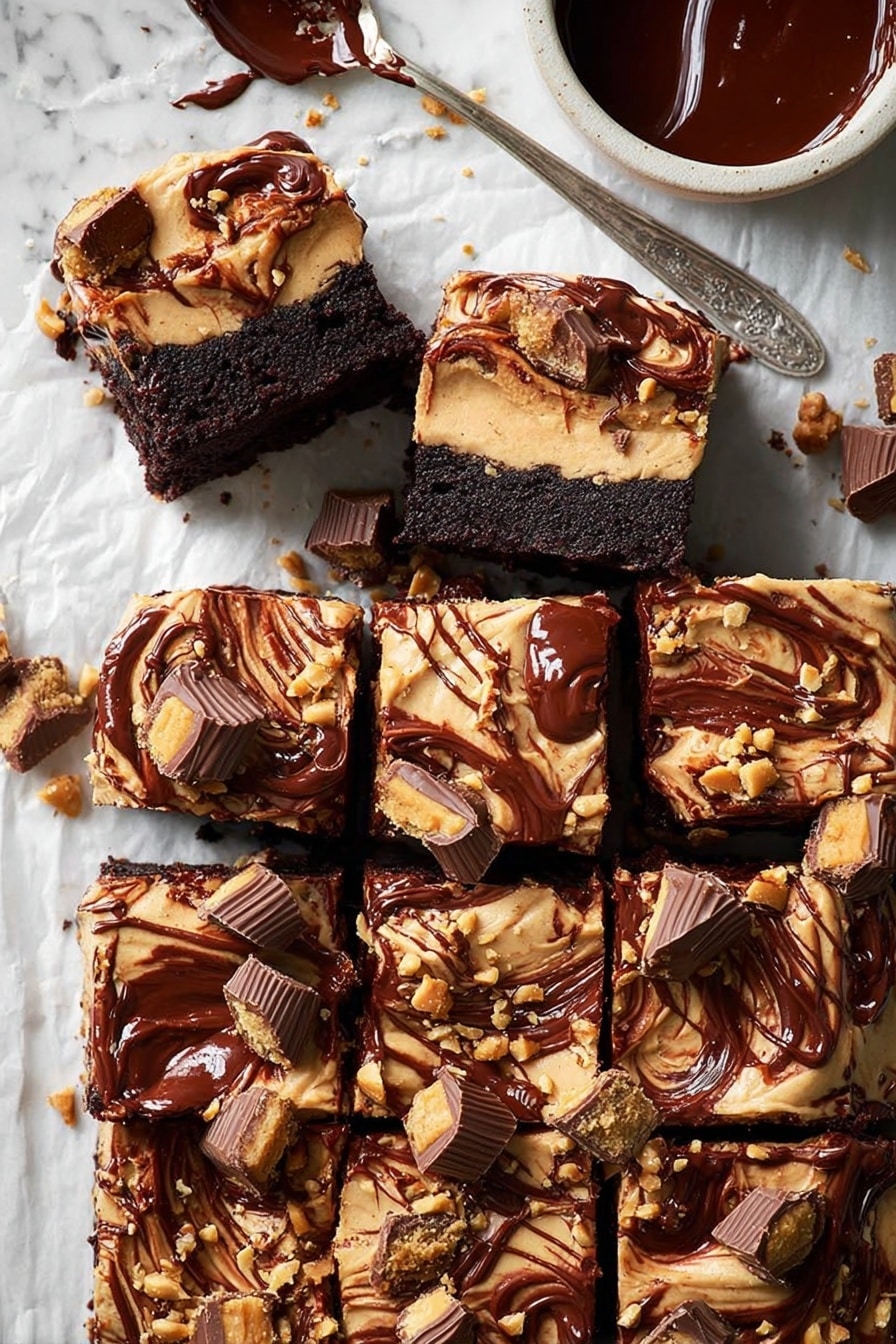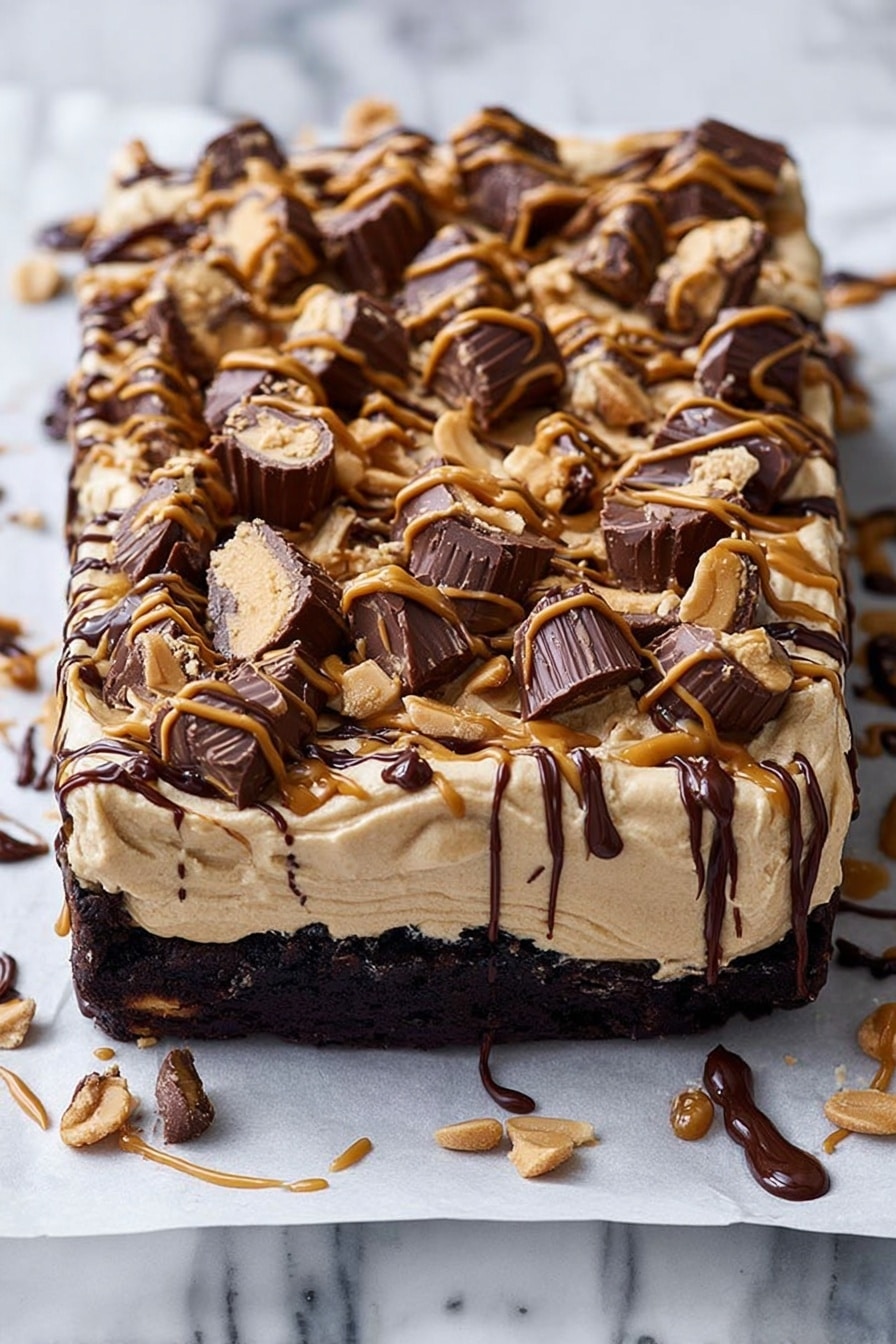
If you’re anything like me, you want a show-stopping dessert that’s both crowd-pleasing and easy to make. That’s why this Chocolate Peanut Butter Cake for a Crowd Recipe has become a go-to in my kitchen. It’s rich, moist, and packed with that unbeatable combo of chocolate and peanut butter — perfect for birthdays, potlucks, or any time you want everyone talking about your baking skills. Stick with me, and I’ll share all my tips so this cake turns out absolutely perfect for you!
Why You’ll Love This Recipe
- Easy to Make: Even if you’re not a baker, this recipe guides you every step of the way.
- Feeds a Crowd: Perfectly sized to serve 20-25 people, so no one leaves hungry.
- Delicious Flavor Combo: The peanut butter frosting balances sweet chocolate cake beautifully.
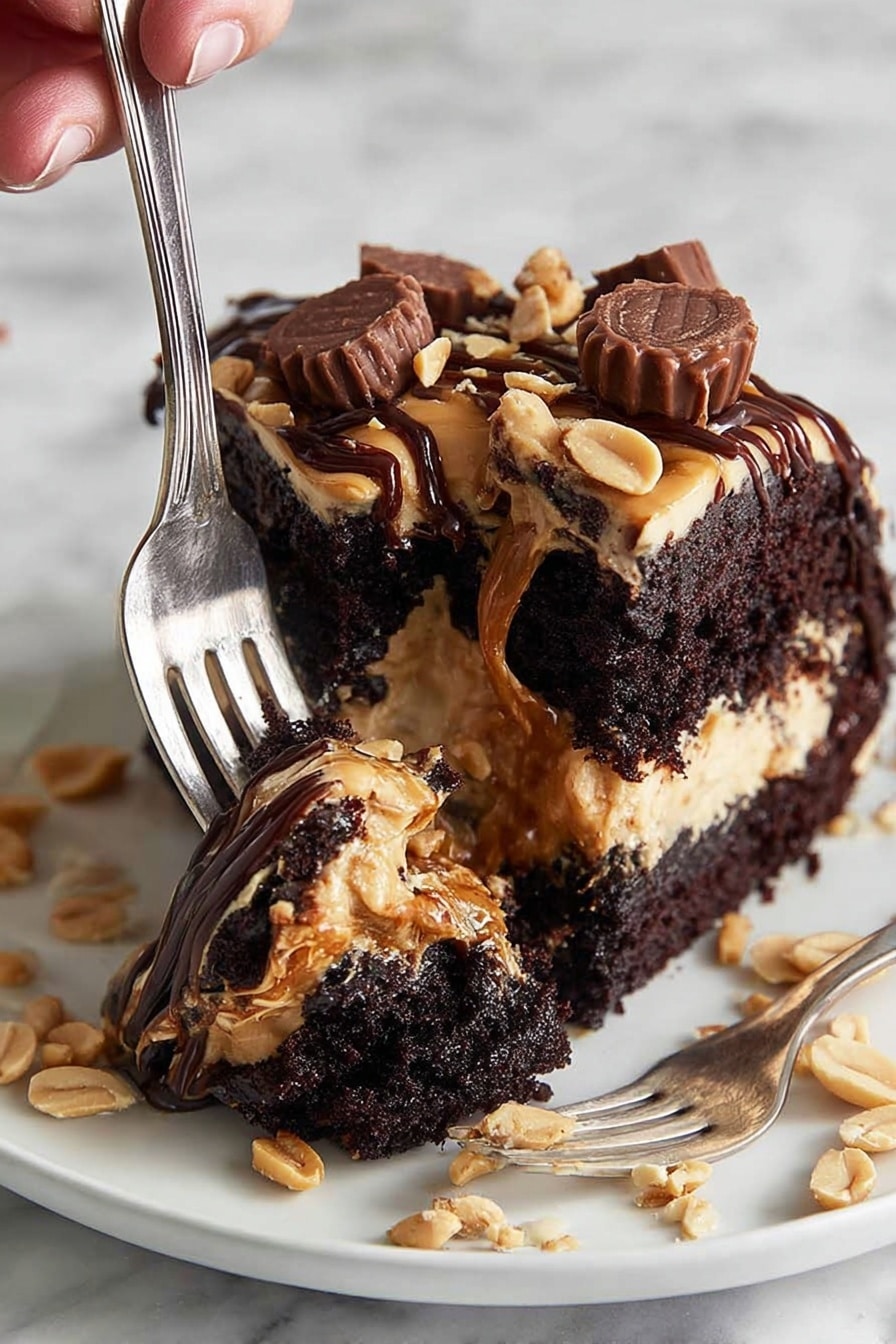
- Showstopper Presentation: Topped with Reese’s and drizzled chocolate, it’s as gorgeous as it is tasty.
Ingredients You’ll Need
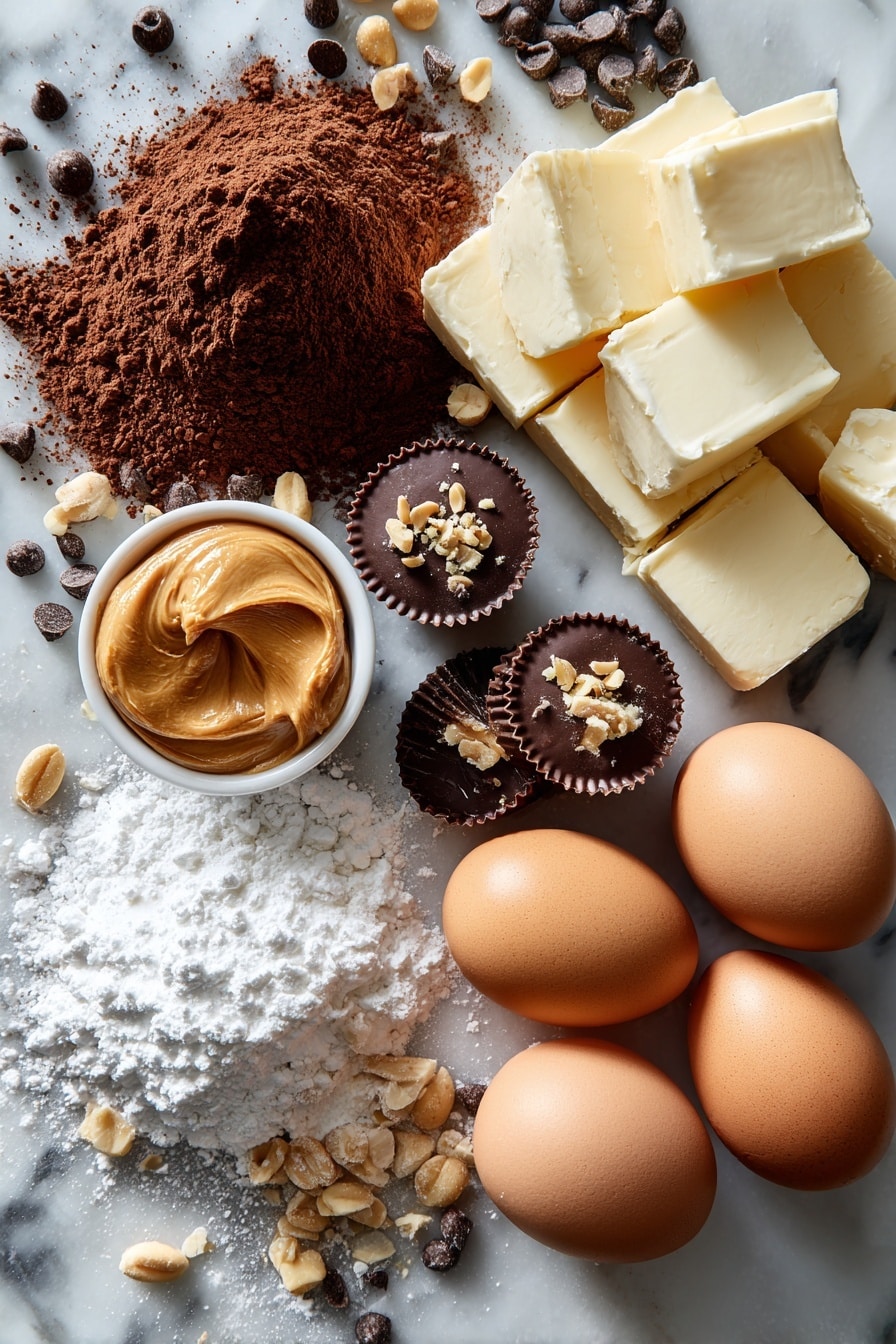
I love how straightforward the ingredient list is for this Chocolate Peanut Butter Cake for a Crowd Recipe. Each component plays a simple but essential role, from the cocoa powder that gives the cake its deep chocolate flavor to the smooth peanut butter that makes the frosting irresistibly creamy. Here are a few tips on picking the best ingredients.
- Flour: Plain or all-purpose flour works perfectly to give this cake structure without being too heavy.
- Cocoa Powder: Use unsweetened cocoa powder for the richest chocolate notes; Dutch-processed can be used if you like an even smoother taste.
- Baking Powder & Baking Soda: Both help the cake rise — don’t skip or substitute these! Fresh baking soda is key.
- White Sugar: I prefer caster or superfine sugar for smooth batter, but regular granulated works too.
- Salt: Cooking or kosher salt enhances the chocolate flavor and balances the sweetness in frosting — yes, it’s important!
- Eggs: Large eggs give richness and moisture — make sure they’re at room temperature for best mixing.
- Milk: You can use either low or full-fat milk, depending on what you have; full fat gives a little extra richness.
- Vegetable Oil: Stick to neutral oils like canola or sunflower to keep focus on the chocolate-peanut flavor.
- Vanilla Extract: Pure vanilla extract adds a subtle depth that rounds out the flavor.
- Instant Coffee Powder (optional): A secret enhancer that makes the chocolate pop without tasting like coffee.
- Boiling Water: This is key to “bloom” the chocolate, making the cake ultra-moist and tender.
- Unsalted Butter: Softened butter for the frosting helps keep it light and fluffy.
- Soft Icing Sugar: Sifted powdered sugar ensures a smooth frosting free of lumps.
- Smooth Peanut Butter: Use a spreadable type — not the pure stuff — for the best frosting texture.
- Milk & Salt (for frosting): These balance the peanut butter’s flavor and adjust consistency.
- Chocolate Chips or Melts: Semi-sweet chocolate chips for the drizzle give a professional finish.
- Cream: Use thickened or heavy cream to create a glossy ganache drizzle.
- Warmed Peanut Butter: Makes the drizzle nice and fluid for an easy decorative touch.
- Mini Reese’s Peanut Butter Cups: The crown jewels for topping — they add texture and the ultimate peanut butter kick.
- Salted Peanuts: Finely chopped for a little crunch and salty contrast.
Variations
One of the best parts about this Chocolate Peanut Butter Cake for a Crowd Recipe is how flexible it is. I’ve tried a few tweaks here and there, and I encourage you to experiment based on what your crowd loves or dietary needs. Don’t be afraid to make it your own!
- Peanut Butter Swap: If someone you’re serving has a peanut allergy, I once swapped in almond butter, and while it changes the flavor, it still kept that creamy frosting vibe.
- Gluten-Free Version: Using a 1:1 gluten-free flour blend works well here; the cake stays moist and tender.
- Extra Chocolate: Adding an extra 1/4 cup of cocoa powder makes the chocolate flavor more intense if you like it rich and dark.
- Decor Twist: Try swapping minis for chopped peanut brittle or crushed pretzels on top for added crunch and fun texture.
How to Make Chocolate Peanut Butter Cake for a Crowd Recipe
Step 1: Preheat and Prepare Your Pan
Start by preheating your oven to 180°C (350°F). I love using a 23 x 33 cm (9 x 13 inch) metal cake pan because it bakes evenly and perfectly holds this batch size. Grease the pan well with butter, then line it with parchment paper, leaving an overhang on the sides. That way, you can lift the cake out easily once it’s cooled — trust me, you’ll thank yourself later when serving time comes!
Step 2: Mix the Dry Ingredients
In a large bowl, sift together the flour, cocoa powder, baking powder, baking soda, sugar, and salt. This step ensures your cake doesn’t have any lumps and combines those rising agents evenly. When I first tried skipping sifting, the texture wasn’t quite as smooth — don’t skip this part!
Step 3: Combine Wet Ingredients
In a different bowl, beat the eggs lightly then whisk in the milk, oil, vanilla extract, and instant coffee powder if you’re using it. The coffee powder is my personal trick — it amps up the chocolate flavor without adding any bitterness. When I first added it, people asked if the cake had espresso—such a fun surprise!
Step 4: Mix Wet and Dry Together, Then Add Boiling Water
Pour the wet mixture into the dry ingredients and stir just until combined. The batter will be thick but smooth. Now, slowly add the boiling water while stirring gently — it will thin the batter and “bloom” the cocoa, making the cake unbelievably moist and rich. It sounds odd, but it’s magic in baking!
Step 5: Bake and Cool
Pour the batter into your prepared pan and spread it evenly. Bake for about 45 minutes, but start checking at 40. Insert a toothpick in the center — if it comes out with a few moist crumbs (not wet batter), it’s done. Let the cake cool fully in the pan on a wire rack. Cooling is key, especially before frosting, or your frosting will melt!
Step 6: Make the Peanut Butter Frosting
Beat the softened butter until fluffy, then gradually add sifted icing sugar, peanut butter, salt, and a splash of milk. Whip until light and creamy — I like to taste as I go to get the balance just right. The hint of salt makes all the difference here; it stops the frosting from being too sweet. If it’s too stiff, add a teaspoon more milk to get spreadable consistency.
Step 7: Frost the Cake
Use a spatula to spread a thick, even layer of frosting over the cooled cake. Since it’s such a large cake, take your time — frosting a crowd-sized cake can be a workout, but it’s worth every swipe!
Step 8: Prepare the Chocolate and Peanut Butter Drizzle
Melt chocolate chips and cream together until smooth and glossy. Warm peanut butter in the microwave to make it pourable, then mix gently. Drizzle both over the cake in a decorative pattern — I usually do zig-zags or a free-form drizzle. This step is where the cake starts looking like you just walked out of a bakery window.
Step 9: Add the Finishing Touches
Top with mini Reese’s Peanut Butter Cups and halved minis, then sprinkle finely chopped salted peanuts for that crunch and salty contrast. This is my favorite part — it’s like edible confetti and adds a bit of wow factor your friends will love. Chill the cake slightly before serving to let the frosting set.
Pro Tips for Making Chocolate Peanut Butter Cake for a Crowd Recipe
- Don’t Skip the Boiling Water: This step makes the cake ultra-moist and really intensifies the chocolate flavor—you’ll notice the difference immediately.
- Room Temperature Ingredients: I always make sure eggs, milk, and butter are at room temp so they combine more smoothly and the texture is lighter.
- Use the Parchment Overhang: That extra paper makes lifting the cake out a breeze—especially with a big slab like this one.
- Frost After Full Cooling: If the cake is even slightly warm, the frosting will melt and slide right off—patience pays off here!
How to Serve Chocolate Peanut Butter Cake for a Crowd Recipe
Garnishes
I’m all about presentation, so I love topping the cake with mini Reese’s Peanut Butter Cups and chopped salted peanuts because they add that perfect sweet-salty crunch. If you’re feeling fancy, a few edible gold flakes or a dusting of cocoa powder also work beautifully. For kids’ parties, colorful sprinkles on top can bring a playful touch.
Side Dishes
This rich cake pairs nicely with lighter accompaniments. I often serve it with fresh strawberries or raspberries to cut through the sweetness. A dollop of lightly whipped cream or vanilla ice cream on the side also balances the richness perfectly. For coffee lovers, a strong black coffee or espresso is an excellent match.
Creative Ways to Present
For large celebrations, I’ve arranged the cake on a wooden board surrounded by whole peanuts and extra chopped Reese’s cups for a rustic look. Another time, I layered individual slices in clear glass jars for cute, grab-and-go servings at a picnic. Even casual potlucks get a little luxe when you serve the cake with a drizzle of warm peanut butter sauce on top!
Make Ahead and Storage
Storing Leftovers
I usually store leftover cake tightly wrapped with plastic wrap and an airtight lid in the fridge. It stays fresh for up to 4 days, but I warn you — the leftovers rarely last that long in my house! Let it come to room temperature before serving again so the frosting softens up beautifully.
Freezing
If you want to make this ahead of time, the cake freezes great without frosting, wrapped well in plastic and foil. When you’re ready to serve, thaw overnight in the fridge, then frost and decorate fresh. I’ve found that freezing the fully frosted cake isn’t ideal as the frosting texture can change.
Reheating
Reheating isn’t usually necessary for this cake, but if you prefer it slightly warm, take individual slices and microwave for 10-15 seconds. This softens the frosting and makes the chocolate chips extra melty. Just don’t overdo it or the frosting will get too soft and lose its shape.
FAQs
-
Can I make this Chocolate Peanut Butter Cake for a Crowd Recipe dairy-free?
Yes! To make a dairy-free version, substitute the butter with a dairy-free margarine or coconut oil, and use a plant-based milk like almond or oat milk. Just make sure your chocolate chips and peanut butter don’t contain dairy. The texture might be slightly different, but it will still be delicious!
-
What’s the best way to slice this cake for a crowd?
Since this cake is rich, I recommend cutting smaller slices — think around 2 x 2 inches. That way, everyone can enjoy the indulgence without feeling overwhelmed. Using a sharp serrated knife and wiping it clean between cuts makes slicing neater.
- Can I prepare the frosting in advance?
Absolutely! The peanut butter frosting can be made a day ahead and refrigerated. Before using, let it come to room temperature and give it a quick whip to restore its fluffiness. This actually saves you time on busy baking days.
-
Why add instant coffee powder to the recipe?
The instant coffee powder isn’t for a coffee flavor, but it enhances and deepens the chocolate taste, making your cake more vibrant and complex. It’s a simple trick I picked up from a pro baker and never skip now.
Final Thoughts
I absolutely love how this Chocolate Peanut Butter Cake for a Crowd Recipe turns out every single time — it’s rich, moist, and bursting with flavors that come together like a dream. Making it always feels like a little celebration in my kitchen, and watching my friends’ eyes light up when they try a slice never gets old. You don’t need to be an expert baker to nail this, and I’m confident you’ll love it just as much as I do. So next time you need to impress a crowd, give this recipe a go — your guests will thank you, and you might just become the star baker of your crew!
Print
Chocolate Peanut Butter Cake for a Crowd Recipe
- Prep Time: 30 min
- Cook Time: 45 min
- Total Time: 195 min
- Yield: 20 – 25 servings
- Category: Dessert
- Method: Baking
- Cuisine: American
Description
A rich and decadent Chocolate Peanut Butter Cake perfect for large gatherings. This recipe combines a moist chocolate cake with fluffy peanut butter frosting, topped with Reece’s Peanut Butter Cups and a drizzle of melted chocolate and peanut butter. Ideal for serving 20 to 25 people, it’s a crowd-pleasing dessert that balances sweetness with a touch of salt to enhance the flavors.
Ingredients
Dry Ingredients
- 1 3/4 cups plain / all purpose flour
- 3/4 cup unsweetened cocoa powder
- 1 1/2 tsp baking powder
- 1 1/2 tsp baking soda (bi-carb soda)
- 2 cups white sugar (or caster/superfine sugar)
- 1 tsp cooking / kosher salt
Wet Ingredients
- 2 large eggs
- 1 cup milk (low or full fat)
- 1/2 cup vegetable oil (or plain flavoured oil like canola, grapeseed, rapeseed, sunflower)
- 2 tsp vanilla extract
- 2 tsp instant coffee powder (optional)
- 1 cup boiling water
Frosting and Toppings
- 250g / 2 sticks unsalted butter, softened
- 4 cups (500 g) soft icing sugar / powdered sugar, sifted
- 1/2 cup (120 g) smooth peanut butter (spread, not pure)
- 1/4 tsp cooking/kosher salt
- 1 tbsp milk
- 1/2 cup chocolate chips or melts (US: semi sweet chips)
- 2 tbsp cream (thickened/heavy or pure, not low fat)
- 3 tbsp peanut butter, warmed to runny
- 120g / 4 oz mini Reece’s Peanut Butter Cups
- 10+ miniature Reece’s Peanut Butter Cups, halved
- 1/4 cup salted peanuts, finely chopped
Instructions
- Preheat and Prepare Pan: Preheat the oven to 180°C (350°F) or 160°C for fan-forced ovens. Grease a 23 x 33 cm (9 x 13 inch) metal cake pan with butter, then line it with baking paper with an overhang to make it easy to lift out after baking. For round cakes, refer to notes for size adjustments.
- Mix Dry Ingredients: In a large bowl, sift together the flour, cocoa powder, baking powder, baking soda, sugar, and salt to combine evenly.
- Add Wet Ingredients: Add eggs, milk, vegetable oil, vanilla extract, and instant coffee powder (if using) to the dry ingredients. Mix well until smooth and fully combined.
- Incorporate Boiling Water: Carefully pour in the boiling water and stir until the batter is smooth and thin. This step enhances the chocolate flavor (‘blooms’ the cocoa).
- Bake the Cake: Pour the batter into the prepared cake pan. Bake in the preheated oven for 45 minutes or until a toothpick inserted in the center comes out clean. Remove from oven and allow the cake to cool completely in the pan on a wire rack.
- Prepare Frosting: Beat the softened unsalted butter until creamy. Gradually add the sifted icing sugar, followed by the smooth peanut butter, salt, and 1 tbsp milk. Continue beating until the frosting is fluffy and well combined.
- Make Chocolate Ganache Drizzle: In a small saucepan, gently melt the chocolate chips with the cream over low heat, stirring continuously until smooth. Remove from heat and stir in 3 tbsp warmed peanut butter until fully combined.
- Assemble the Cake: Remove the cooled cake from the pan using the paper overhang. Spread the peanut butter frosting evenly over the top of the cake.
- Decorate: Arrange the mini Reece’s Peanut Butter Cups over the frosted cake. Drizzle the peanut butter chocolate ganache over the top. Finish by sprinkling the finely chopped salted peanuts and halved miniature Reece’s Peanut Butter Cups.
- Serve: Slice into 20 to 25 portions and serve. The cake is rich, so small slices are recommended for best enjoyment.
Notes
- Recipe VIDEO available for step-by-step visual guidance.
- This cake is wonderfully rich and perfect for feeding a large crowd—serves approximately 20 to 25 people, up to 30 with smaller slices.
- The unsweetened cocoa powder combines with boiling water to intensify the chocolate flavor by blooming the cocoa.
- For round pans, adjust size to approximately two 23cm (9 inch) round cake pans.
- The frosting includes a touch of salt to balance the sweetness and enhance the peanut butter flavor.
- The instant coffee powder is optional but helps deepen the chocolate notes.
Nutrition
- Serving Size: 1 slice (approximate)
- Calories: 395 kcal
- Sugar: 41 g
- Sodium: 258 mg
- Fat: 21 g
- Saturated Fat: 8 g
- Unsaturated Fat: 11 g
- Trans Fat: 0.3 g
- Carbohydrates: 51 g
- Fiber: 2 g
- Protein: 5 g
- Cholesterol: 38 mg

