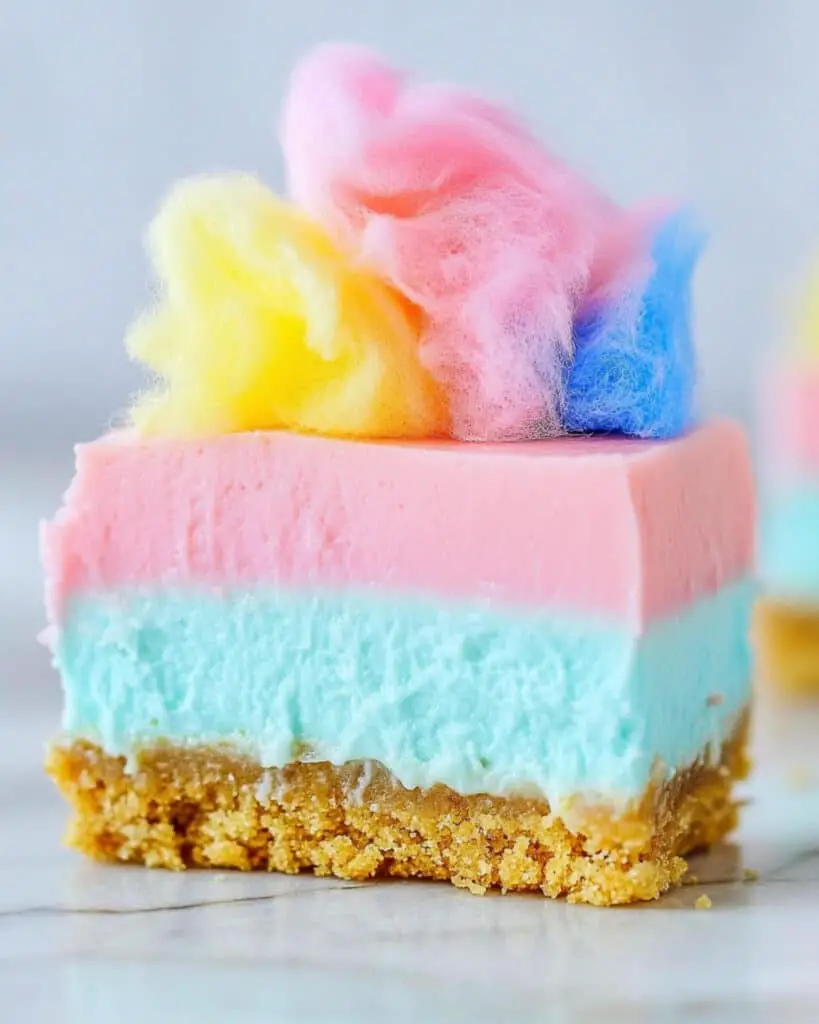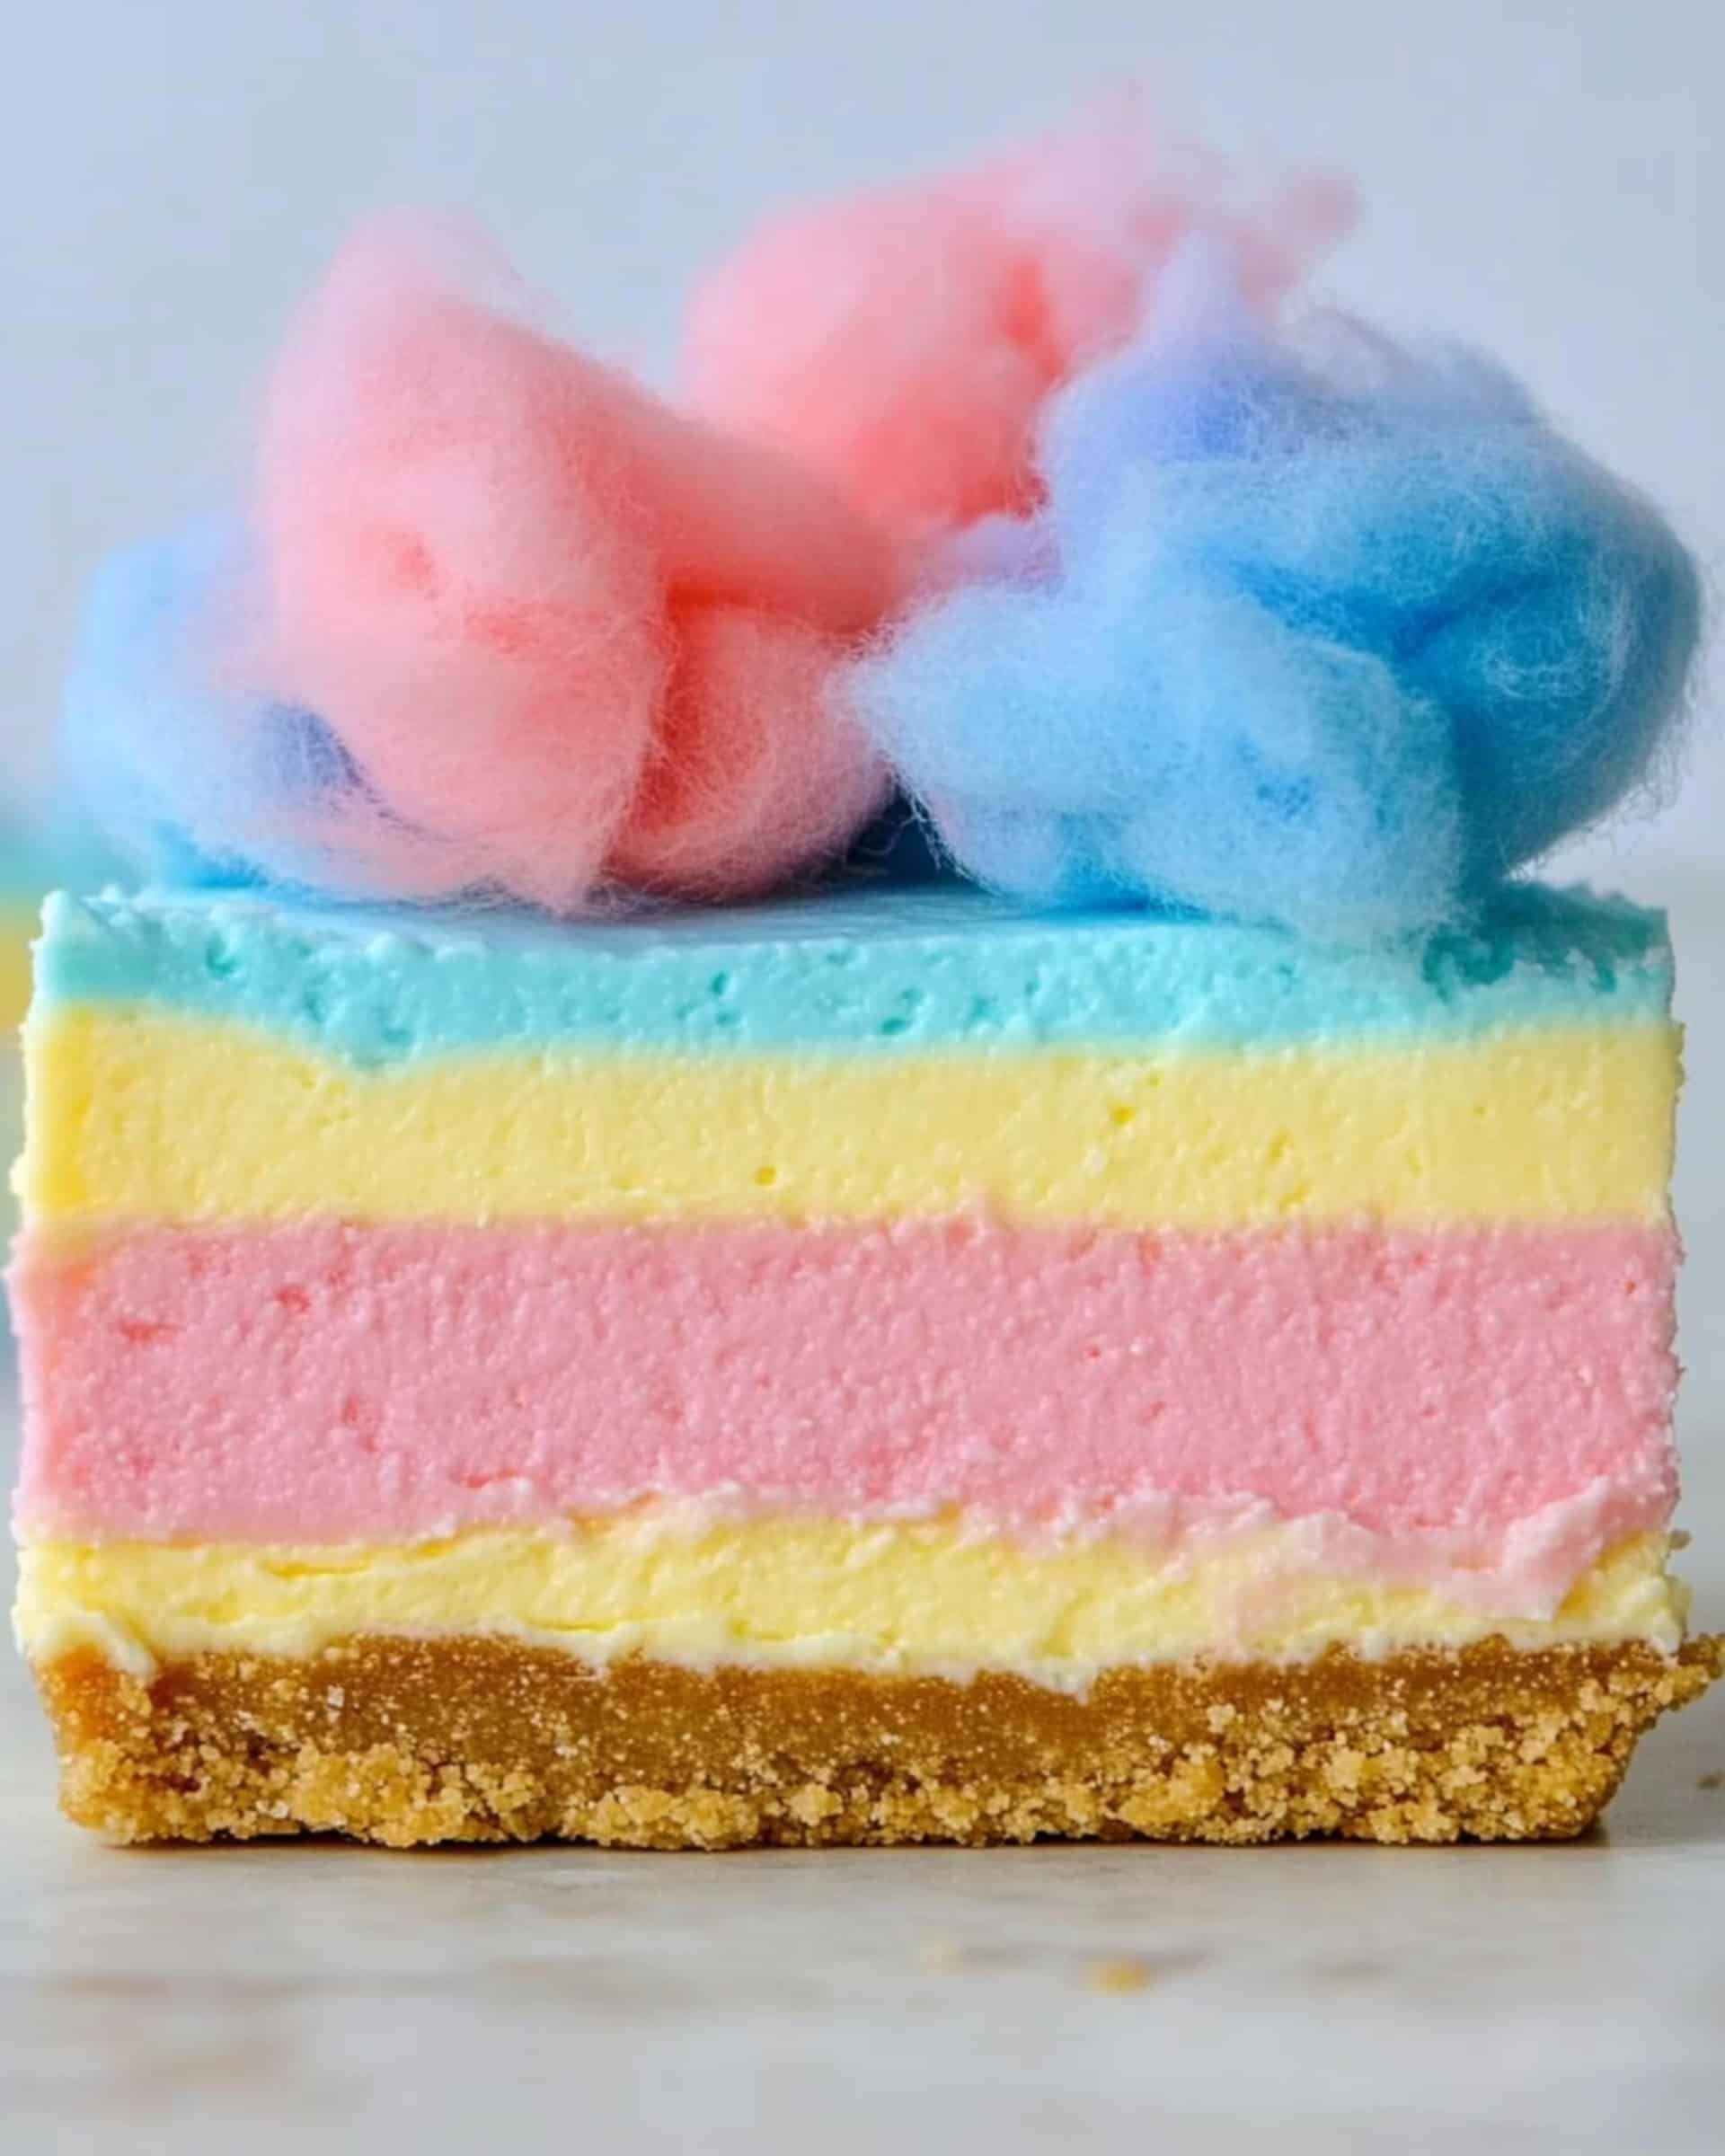
Imagine a dreamy cheesecake that tastes just like a childhood carnival—playful, colorful, and absolutely irresistible. That’s the magic of this Cotton Candy Cheesecake. With beautifully vibrant layers reminiscent of classic cotton candy and a cloud of real cotton candy on top, this no-bake dessert is equal parts delightful and decadent. Despite its eye-catching looks, it’s unbelievably easy to prepare—perfect for busy weeknights, special occasions, or whenever you want to bring a little whimsy to your table.
Why You’ll Love This Recipe
- Eye-Catching and Fun: Those gorgeous blue, pink, and yellow layers will wow anyone who sees them—not to mention the puffy crown of cotton candy!
- No Oven Necessary: Forget the baking drama—this cheesecake sets up beautifully in the freezer, making cleanup and prep a breeze.
- Simple Ingredients: No fancy tricks here—just a handful of grocery store staples and a few JELLO packets bring this showstopper to life.
- Fast to Prepare: Most of the time is just waiting for it to chill, so you’ll be free to go about your evening.
- Customize It Your Way: You control the flavors and colors, so you can be as bold or subtle as you like. Perfect for themed parties, celebrations, or a surprise treat.
Ingredients You’ll Need
Here’s what you’ll want on hand, plus a friendly pointer or two to make life easier:
- Graham Crackers: For the crust—the classic crunchy base! Try to get them as fine as possible for a smooth, even crust.
- Sugar: A touch added to both the crust and the filling to bring out the sweetness of every layer.
- Butter: Melted and mixed with the crumbs to hold the crust together. Unsalted works great, but salted butter adds a hint of extra flavor!
- Cream Cheese: The creamy backbone of your cheesecake—let it come to room temperature so it blends smoothly.
- Heavy Cream: Whipped up, it makes the filling light, airy, and almost mousse-like.
- JELLO—Berry Blue, Cherry, Lemon: These add both flavor and color. Yes, you’ll use both the powder and the prepared (cooled) liquid!
- Water: For dissolving the JELLO flavors—make sure it’s boiling for best results.
- Cotton Candy: The crowning touch! Grab a tub or two from the store. Be generous with your topping; this is not a place to hold back!
Tip: Line your pans with parchment for effortless release—no stuck-on cheesecake here.
Note: You’ll find the complete list of ingredients, along with their exact measurements, in the printable recipe card at the bottom of this post.
Variations
Want to make this special creation even more personal? Here are a few ideas:
- Switch the Flavors: Try raspberry, strawberry, lime, or even grape JELLO for a different color palette or taste vibe.
- Go Lighter or Brighter: Adjust the amount of JELLO powder to make your colors pastel and subtle, or deep and dramatic.
- Mini Cheesecakes: Use muffin tins lined with cupcake liners for individual treats—adorable for parties!
- Gluten-Free: Use gluten-free graham crackers or cookies for the crust.
- Add Toppings: Top with fresh berries, sprinkles, or even edible glitter before the cotton candy for extra flair.
How to Make Cotton Candy Cheesecake
Step 1: Prep the Crust
- Crush graham crackers into fine crumbs (a blender or food processor works wonders).
- Stir in sugar and melted butter until it forms loose, wet sand.
- Press the mixture into your parchment-lined springform pans, pressing firmly for a solid base.
- Pop the pans into the freezer to set while you whip up the filling.
Step 2: Make the Fluffy Filling
- Pour heavy cream and a spoonful of sugar into a mixer. Start on medium until it thickens, then crank it to high until you get beautiful stiff peaks.
- Scoop the whipped cream into a bowl and refrigerate.
- In another bowl, beat softened cream cheese until absolutely smooth. Don’t rush this step—lumps are not invited!
- Add the sugar and blend again, making sure everything is creamy.
- Gently fold in the whipped cream until fully mixed. Give it a quick chill in the fridge while you move on to the color layers.
Step 3: Create the Colorful Layers
- Boil a cup of water. While it heats, place 1 tablespoon each of Berry Blue, Cherry, and Lemon JELLO powder in their own bowls (ramekins work well).
- Pour a third of the boiling water into each bowl and stir so each JELLO completely dissolves. Use separate spoons—no color cross-contamination!
- Let these liquids cool to room temperature (but don’t let them set).
- Split your cheesecake filling into three bowls. Pour each cooled JELLO liquid into its own bowl of filling, mixing well for a uniform color and flavor.
- If needed, add a bit more JELLO powder to boost the intensity.
Step 4: Assemble and Layer
- Start with the blue layer: Spoon it into the chilled crusts and smooth the tops. Freeze until firm—about 45 minutes.
- Keep the cherry and lemon fillings chilled while the first layer sets.
- Add the cherry layer next, freeze again, then finish with lemon.
- Once all three layers are stacked, freeze the whole cheesecake for at least four hours (overnight is ideal for best slicing).
Step 5: Decorate and Serve
- Release the cheesecake from the pan, gently removing the parchment.
- Top each cheesecake with a mountain of fluffy, fresh cotton candy right before serving for that true carnival effect.
Pro Tips for Making the Recipe
- Room Temp Cream Cheese: Be patient—cold cream cheese makes lumpy filling!
- Go Bold with Color: Don’t be shy about the JELLO. The more you use, the brighter and more “cotton candy-ish” your layers.
- Freeze Between Layers: It’s essential for sharp, defined stripes—don’t rush this!
- Dress Up Last Minute: Add cotton candy just before serving; it melts if left in the fridge.
- Parchment Paper is Key: Lining your pans guarantees a smooth release (and beautiful slices).
How to Serve
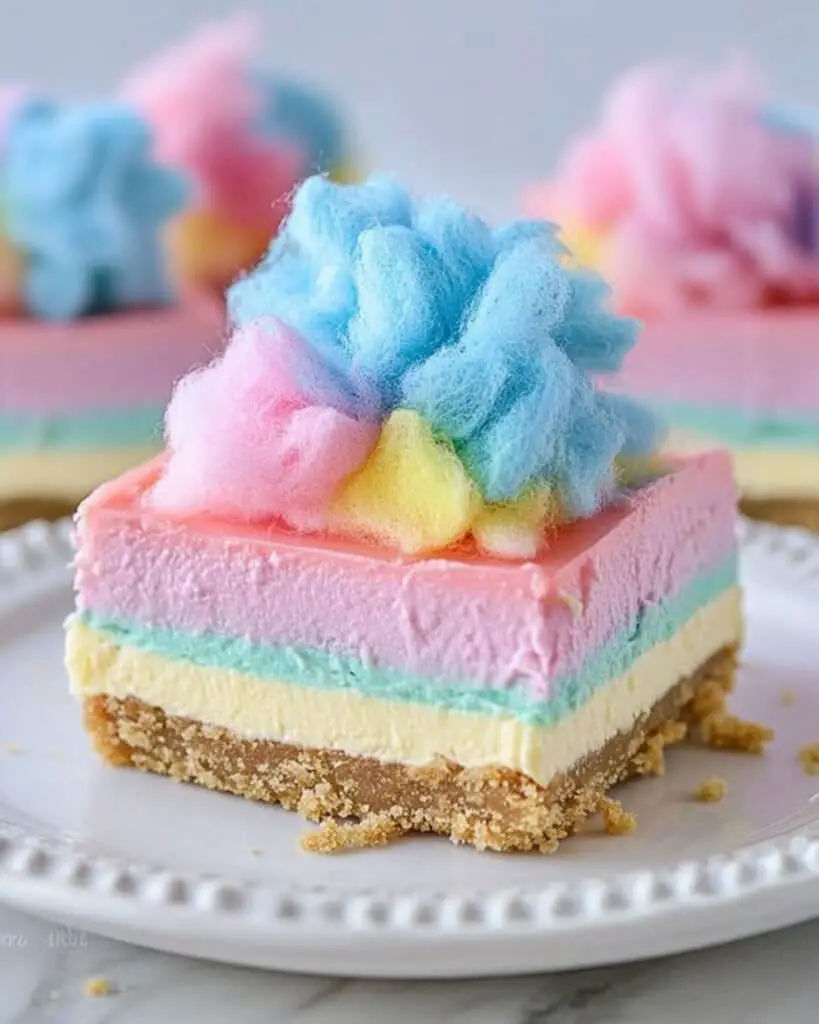
Slice this cheesecake with a warm, dry knife for clean cuts, and serve immediately while the cotton candy is fluffy and dramatic. Pair it with a mug of hot coffee or milk for pure comfort, or team up with a sparkling lemonade for a playful, party-ready vibe. For birthdays, holidays, or whenever you want to be the “fun dessert” person—this is the showpiece to bring out.
For an extra treat, scatter rainbow sprinkles or edible glitter around the edge before topping with cotton candy. Go wild—the more whimsical, the better!
Make Ahead and Storage
Storing Leftovers
This no-bake cheesecake keeps beautifully. Store any leftovers (minus the cotton candy) in an airtight container in the fridge for up to 4 days.
Freezing
Want to prep ahead? Freeze the cheesecake without the cotton candy, well-wrapped, for up to two months. Let it thaw slightly at room temperature before serving.
Reheating
No need! This cheesecake is best enjoyed cold and creamy from the fridge or after a short thaw from the freezer.
FAQs
-
Can I use different brands or flavors of gelatin instead of JELLO?
Absolutely! Feel free to swap in your favorite flavored gelatin products—just be mindful of the sweetness and color so your cheesecake stays vibrant and fun.
-
Can I make this cheesecake ahead for a party?
Yes, and you should! It needs time to freeze (at least four hours, ideally overnight), so it’s perfect for making ahead. Just leave the cotton candy off until right before serving for best effect.
-
What do I do if I don’t have springform pans?
No worries at all! You can use a deep cake pan lined very well with parchment, making sure to overhang the edges for easy lifting. Just go slow when removing to avoid smashing your layers.
-
How do I prevent the cotton candy from melting?
Cotton candy is sensitive to moisture, so add it right before serving. If you’re serving outdoors or on a humid day, keep it covered until the very last second for the ultimate wow factor.
Final Thoughts
If you’re looking for a dessert that dazzles, delights, and dishes up a taste of pure fun, this Cotton Candy Cheesecake is it. The brilliant colors, sweet creamy layers, and whimsical topper guarantee smiles every time. It’s so simple to make, so much fun to share—why wait for the carnival to come to town? Give this cheesecake a whirl and let your kitchen be the happiest place on earth tonight!
Print
Cotton Candy Cheesecake Recipe
- Prep Time: 30 minutes
- Cook Time: 0 minutes
- Total Time: 4 hours 30 minutes
- Yield: 6 servings
- Category: Desserts
- Method: No-cook
- Cuisine: American
- Diet: Vegetarian
Description
This Cotton Candy Cheesecake is a whimsical no-bake dessert layered with fruity, brightly colored JELLO flavors and topped with fluffy cotton candy. Featuring a buttery graham cracker crust and a smooth, creamy filling, it’s a visually striking treat perfect for parties and celebrations.
Ingredients
For the Crust
- 2 sleeves graham crackers, crushed into fine crumbs
- 1 heaping tablespoon sugar
- 1 stick butter, melted
For the Filling
- 4 (8-ounce) packages cream cheese, softened
- 1 cup heavy cream (to whip)
- 1 cup sugar
For the JELLO Layers
- 1 tablespoon JELLO – Berry Blue (plus more, as needed for color)
- 1 tablespoon JELLO – Cherry (plus more, as needed for color)
- 1 tablespoon JELLO – Lemon (plus more, as needed for color)
- 1 cup water (for dissolving JELLO, divided into thirds)
For the Topping
- Cotton candy (for garnish)
Instructions
- Prepare the Crust: Using a blender, pulse the graham crackers until they form fine crumbs. Transfer the crumbs to a mixing dish, add sugar and melted butter, and mix thoroughly. Press this mixture into parchment-lined springform pans and place them in the freezer to firm up.
- Whip the Cream: In a medium bowl, combine the heavy cream and 1 tablespoon of sugar. Beat on medium speed until the mixture thickens, then increase to high speed and whip until stiff peaks form. Set the whipped cream aside in the refrigerator.
- Mix the Cream Cheese: In a separate large bowl, beat the softened cream cheese until smooth. Add the remaining sugar and mix until fully incorporated.
- Combine Cream Layers: Gently fold the cold whipped cream into the cream cheese mixture, blending until completely mixed. Place this cheesecake base back in the refrigerator to stay cool.
- Prepare JELLO Mixtures: Add 1 tablespoon each of Berry Blue, Cherry, and Lemon JELLO powder to three separate ramekins. Boil 1 cup of water, then pour 1/3 cup into each ramekin. Stir each until dissolved using separate spoons to avoid mixing flavors. Let the mixtures cool to room temperature, but not set.
- Color the Cheesecake Filling: Divide the cheesecake filling evenly into three bowls. To each bowl, add a cooled JELLO flavor, stirring well. Add more JELLO powder for a deeper color if desired, ensuring the powder is fully dissolved.
- Layer the Cheesecake: Remove the crusts from the freezer and pour the blue filling layer evenly into the prepared pans. Return pans to the freezer for 45 minutes or until the layer is set. Keep the other two fillings in the refrigerator.
- Add Remaining Layers: When the first layer is set, gently add the cherry layer, freeze to set, then repeat with the lemon layer, freezing each before adding the next. For best results, freeze the assembled cheesecakes for an additional four hours or overnight.
- Finish and Serve: To serve, release the cakes from the springform pans and carefully peel off the parchment. Just before serving, top the cheesecakes generously with cotton candy for a playful finish.
Notes
- Use parchment paper to help easily remove the cheesecake from the pan.
- Allow each JELLO-cheesecake layer to fully set before adding the next for clean, defined layers.
- Add the cotton candy topping only before serving to prevent it from dissolving.
- You can adjust the amount of JELLO powder for more vibrant colors and flavor intensity.
Nutrition
- Serving Size: 1 slice (1/6 of cake)
- Calories: 530
- Sugar: 44g
- Sodium: 410mg
- Fat: 34g
- Saturated Fat: 19g
- Unsaturated Fat: 13g
- Trans Fat: 0g
- Carbohydrates: 52g
- Fiber: 1g
- Protein: 8g
- Cholesterol: 125mg

