
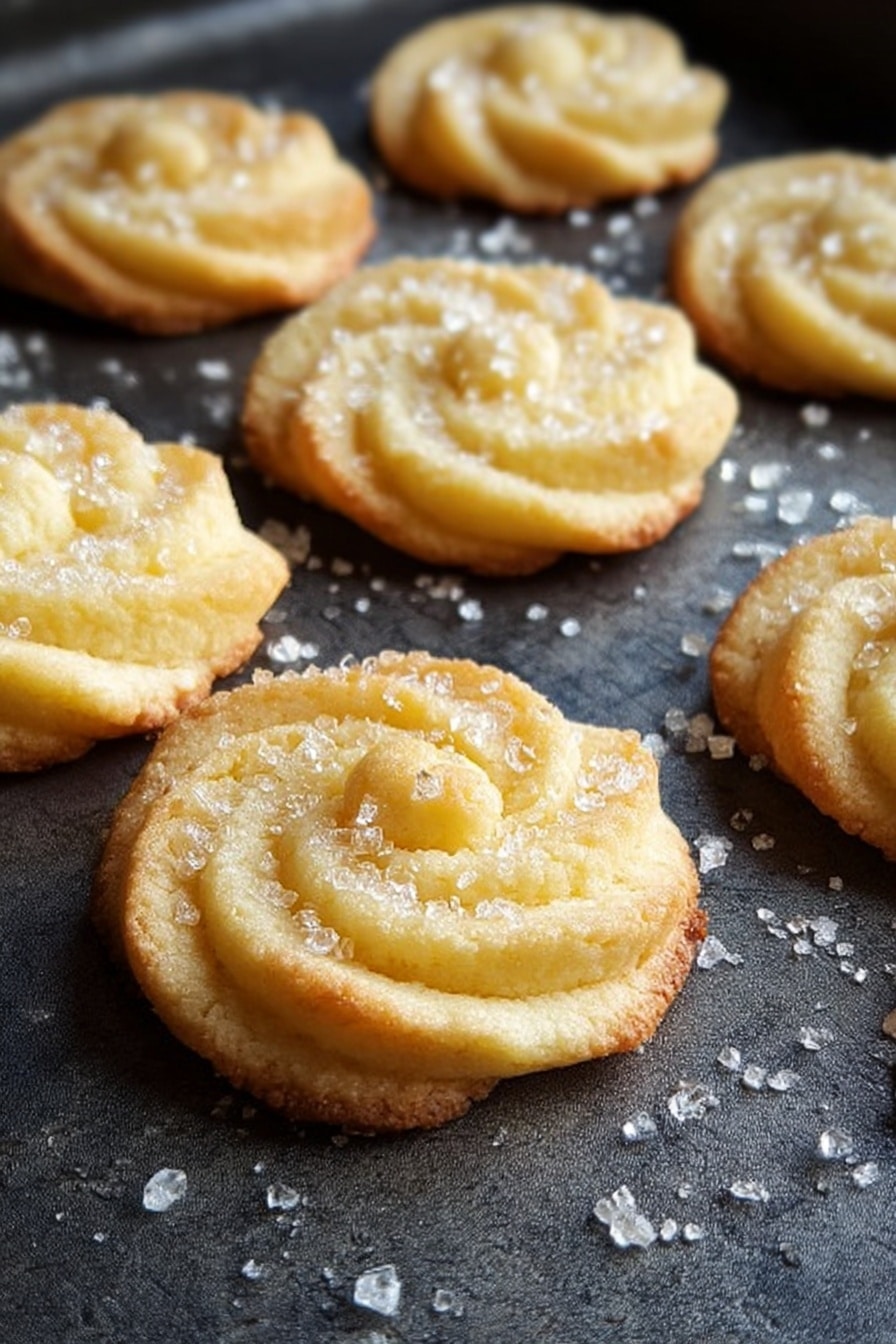
If you’re craving something buttery and melt-in-your-mouth delicious, you’re in for a treat with this Danish Butter Cookies Recipe. I absolutely love how simple ingredients come together to create these delicate, crisp little cookies that my whole family goes crazy for. Stick around, because I’ll share all my favorite tips to help you nail this recipe perfectly every time!
Why You’ll Love This Recipe
- Simple Ingredients: You only need a handful of basics, making it easy to whip up anytime.
- Perfect Texture: Crispy edges and a tender, buttery center that just melts in your mouth.
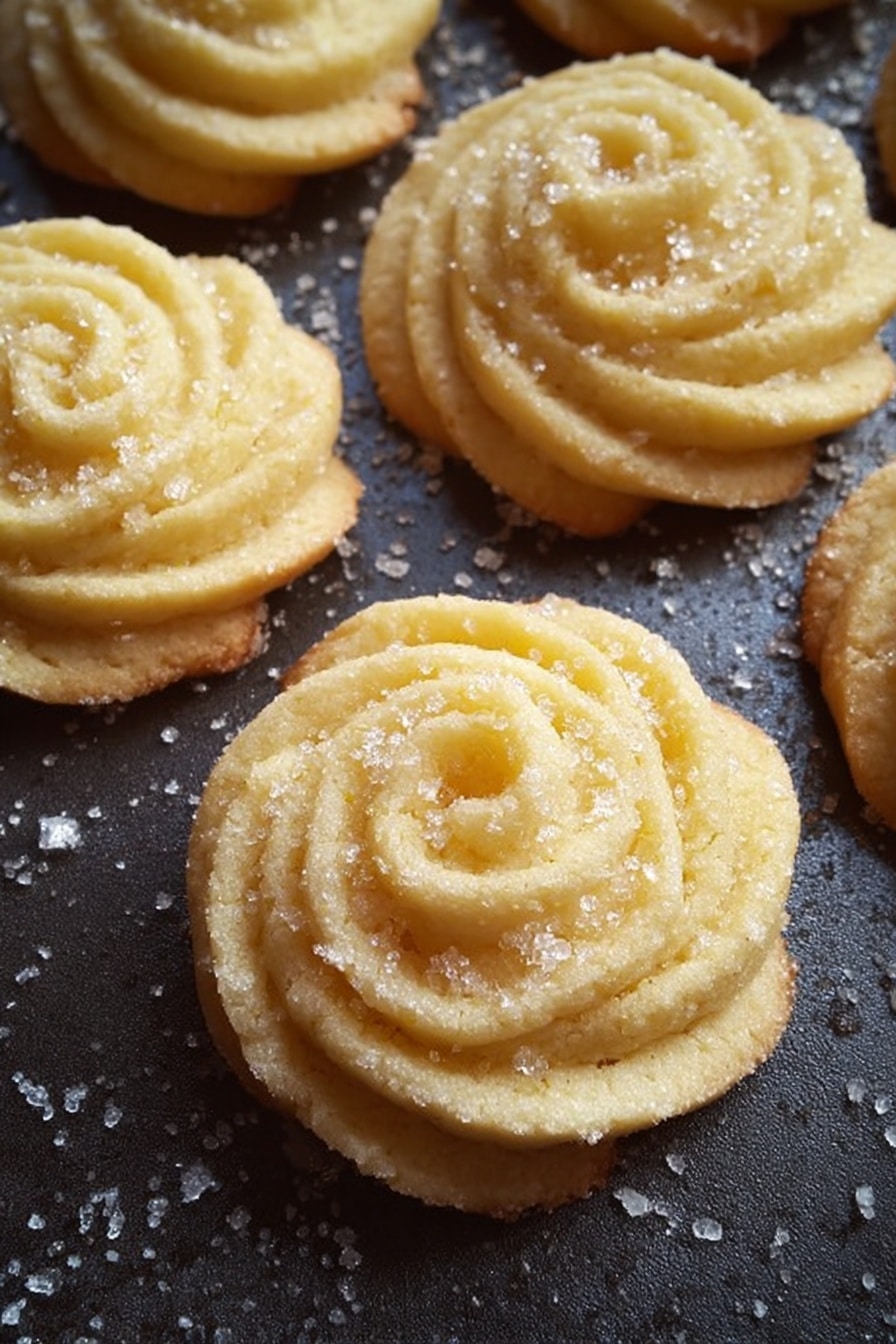
- Beautiful Presentation: Piped shapes make these cookies look professional with minimal effort.
- Versatile and Fun: Customize with toppings or add a drizzle of chocolate – the possibilities are endless!

Ingredients You’ll Need
These ingredients are straightforward but crucial for that authentic buttery flavor and crisp texture. I like to use cake flour when I have it because it keeps the cookies extra tender, but all-purpose flour works just fine too.
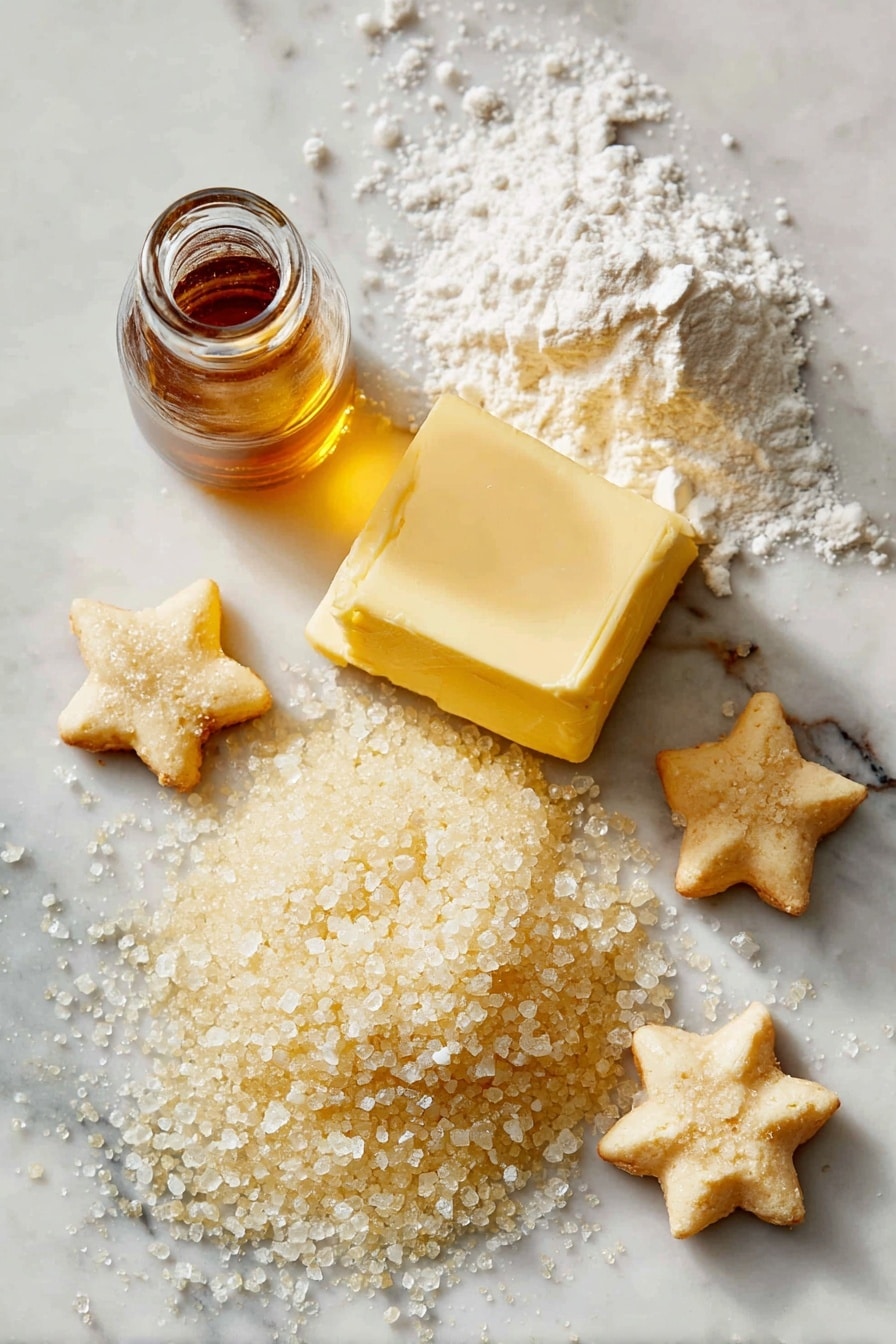
- Butter: Make sure it’s softened to room temperature (not melted!) for creamy mixing.
- Powdered sugar: This keeps the dough smooth and helps the cookies stay tender.
- Vanilla extract: A splash adds warm, comforting flavor that pairs beautifully with buttery cookies.
- Cake flour or all-purpose flour: Cake flour gives a lighter texture, but all-purpose is a convenient and reliable stand-in.
Variations
I love experimenting with this Danish Butter Cookies Recipe by adding different twists. It’s so forgiving that a little change here and there can totally elevate the experience — so don’t be shy to make it your own!
- Chocolate-dipped cookies: After baking, dip the cooled cookies halfway in melted dark or white chocolate for a decadent touch. My kids adore this version during holidays!
- Almond or lemon zest: Stir a teaspoon of finely ground almonds or lemon zest into the dough for a fresh, nutty, or citrusy note.
- Gluten-free option: Try a gluten-free cake flour blend instead of regular flour, and you’re still set for amazing texture.
- Sprinkle with coarse sugar: For extra sparkle and crunch, add a sprinkle of turbinado or sanding sugar before baking – looks beautiful and tastes great.
How to Make Danish Butter Cookies Recipe
Step 1: Soften the Butter and Cream It Right
First things first, pull your butter out of the fridge at least an hour before you start so it’s nice and soft but not melted. This step is key to getting that fluffy texture when you cream it with the powdered sugar and vanilla. I use my stand mixer, but a handheld mixer works just as well—beat them together for about 5 to 8 minutes until it lightens in color and feels fluffy. Trust me, this is where the magic begins!
Step 2: Gently Fold in the Flour
Next, sift your flour to avoid lumps, then add it in thirds. Using a spatula, fold it gently into your butter mixture so you keep all the lightness. If you rush this part, you could overwork the dough and end up with tougher cookies. The dough will be soft but should come together smoothly.
Step 3: Pipe Your Cookies Like a Pro
Here’s a step that makes all the difference for gorgeous cookies: roll your dough into a log on plastic wrap, then place it in a piping bag fitted with a star tip. I discovered this trick when I wanted neat, uniform shapes without rolling or cutting. If your dough feels stiff or hard to pipe, add a tablespoon of warm milk to soften it slightly—this little hack totally saves the day without messing with the texture.
Step 4: Chill Before Baking
After piping your cookies onto a lined baking sheet, pop them in the fridge for 30 minutes. This chill time is crucial — it firms up the dough so your cookies don’t spread too much in the oven and keep that pretty piped shape. I sometimes sprinkle granulated sugar on top for a subtle crunch before baking.
Step 5: Bake to Golden Perfection
Bake at 300°F (150°C) for about 15 minutes or until you see the edges turn a light golden color. Be patient here—baking at a lower temperature helps keep them crisp but tender inside. Once out of the oven, let them cool on the baking sheet for 10 minutes before moving them. This resting time helps the cookies firm up just right.
Pro Tips for Making Danish Butter Cookies Recipe
- Soft Butter is Key: Never skip letting the butter come fully to room temp; it creams better and creates fluffier cookies.
- Take Your Time Folding Flour: Gently folding prevents toughness—rushing this step always cost me texture before I learned this.
- Use a Piping Bag for Uniformity: Piping the dough gives you that gorgeous Scandinavian look and is so much easier than shaping by hand.
- Don’t Skip the Chill: Refrigeration is a game-changer for holding shape during baking and avoiding flat cookies.
How to Serve Danish Butter Cookies Recipe
Garnishes
I usually keep these cookies simple with a light dusting of granulated sugar before baking, but sometimes I spread a thin layer of melted chocolate after cooling and sprinkle crushed nuts on top. It adds a lovely festive touch without overpowering the buttery flavor.
Side Dishes
These cookies pair beautifully with a steaming cup of black coffee or robust tea. For a fun twist, try serving alongside a bowl of fresh berries or a dollop of lightly whipped cream to balance the richness.
Creative Ways to Present
For special occasions, I love arranging these cookies in a pretty tin with layers of parchment paper and tied with a ribbon for gifts. You can also create cookie towers on a cake stand for holiday parties — it instantly makes your kitchen feel festive and inviting!
Make Ahead and Storage
Storing Leftovers
Once completely cooled, store your Danish butter cookies in an airtight container at room temperature. I’ve found they keep fresh and crisp for up to a week, making them great for baking ahead of time.
Freezing
You can freeze the dough log before piping or the baked cookies themselves. Wrap tightly in plastic wrap and store in a freezer-safe bag. When I freeze the dough, I thaw it in the fridge overnight and pipe fresh cookies straight after.
Reheating
To refresh stored cookies, I pop them in a warm oven (about 275°F) for 3–5 minutes to crisp them up lightly without drying them out. It’s a neat little trick to bring back that just-baked texture.
FAQs
-
Can I use salted butter for this Danish Butter Cookies Recipe?
You can, but I recommend using unsalted butter so you can control the saltiness of your cookies. If you only have salted butter, reduce any additional salt accordingly and be mindful that the flavor might be slightly different.
-
Why is chilling the dough important before baking?
Chilling the dough firms it up, which helps the cookies maintain their piped shape and prevents them from spreading too much in the oven. This step ensures you get those signature crisp edges with delicate centers.
-
Can I substitute the vanilla extract with something else?
Sure! Almond extract or citrus zest can also add interesting flavors, but vanilla is classic because it complements the buttery richness perfectly. If you use a substitute, start with a smaller amount as some extracts are stronger.
-
How do I know when the cookies are done baking?
Look for the edges to turn lightly golden while the centers remain pale. The baking time is a bit longer and lower temperature than typical cookies, so patience is key. Overbaking can dry them out.
Final Thoughts
This Danish Butter Cookies Recipe has become one of my favorite go-to bakes because of how reliably buttery and tender it turns out. I remember the first time I made them—the joy of piping out those pretty shapes and sharing them fresh from the oven with friends was unbeatable. You’ll enjoy the ease and classic taste too, and I really think once you try it, it’ll become a staple in your cookie repertoire like it did in mine. Happy baking, friend!
Print
Danish Butter Cookies Recipe
- Prep Time: 15 minutes
- Cook Time: 15 minutes
- Total Time: 58 minutes
- Yield: 14 cookies
- Category: Dessert
- Method: Baking
- Cuisine: Danish
Description
Classic Danish Butter Cookies that are light, crisp, and delightfully melt-in-your-mouth. Made with just four simple ingredients, these tender cookies feature a delicate texture and buttery flavor, perfect for any occasion.
Ingredients
Basic Ingredients
- ½ cup butter (at room temperature)
- ½ cup powdered sugar
- 1 teaspoon vanilla extract
- 1 cup cake flour OR all-purpose flour
Instructions
- Prepare Butter: Remove the butter from the refrigerator at least one hour before baking to soften. It should be soft to the touch but not melted, ensuring easier creaming and better texture in the dough.
- Cream Butter Mixture: Using a handheld or stand mixer, cream together the softened butter, powdered sugar, and vanilla extract for 5 to 8 minutes. Continue until the mixture is light in color and fluffy in texture to incorporate air and achieve the classic cookie crumb.
- Incorporate Flour: Sift the flour to avoid lumps. Gradually add ⅓ cup of flour at a time, folding gently into the creamed butter mixture with a spatula. Continue until all the flour is fully incorporated and the dough is smooth.
- Shape Dough: Transfer the dough onto a sheet of plastic wrap and roll it into a log. Cut a small hole at one end of the plastic wrap and place it into a piping bag fitted with a 1M open star piping tip for classic piping shapes.
- Pipe Cookies: Pipe the dough onto a baking sheet lined with a silicone mat or parchment paper. If the dough feels too stiff to pipe smoothly, add a tablespoon of warm milk to soften it before piping.
- Chill Piped Dough: Refrigerate the baking sheet with piped cookies for 30 minutes. This step firms up the dough, preventing spreading and helping the cookies hold their beautiful shape during baking.
- Add Sugar Topping (Optional): Before baking, optionally sprinkle granulated sugar on top of the piped cookies for added sweetness and a slight crunch.
- Bake Cookies: Preheat the oven to 300°F (150°C / 148°C fan). Bake the cookies for about 15 minutes or until the edges turn a light golden color, revealing that the cookies are perfectly baked.
- Cool and Store: Remove the baking sheet from the oven and allow the cookies to cool on the sheet for 10 minutes. Once cooled, store the cookies in an airtight container to maintain their crispness.
Notes
- The use of cake flour results in a lighter and more tender cookie, but all-purpose flour works well as a substitute.
- Softened butter is crucial for creaming; avoid melted butter as it changes the dough texture.
- If dough is difficult to pipe, adding warm milk softens it without affecting the flavor.
- Refrigerating the piped dough helps cookies retain their shape and prevents spreading.
- Sprinkling granulated sugar on top before baking adds a pleasant texture contrast and subtle sweetness.
- Store cookies in an airtight container to maintain crispness for several days.
Nutrition
- Serving Size: 1 cookie
- Calories: 47 kcal
- Sugar: 3 g
- Sodium: 9 mg
- Fat: 1 g
- Saturated Fat: 1 g
- Unsaturated Fat: 0 g
- Trans Fat: 0 g
- Carbohydrates: 9 g
- Fiber: 0 g
- Protein: 0.5 g
- Cholesterol: 1 mg


