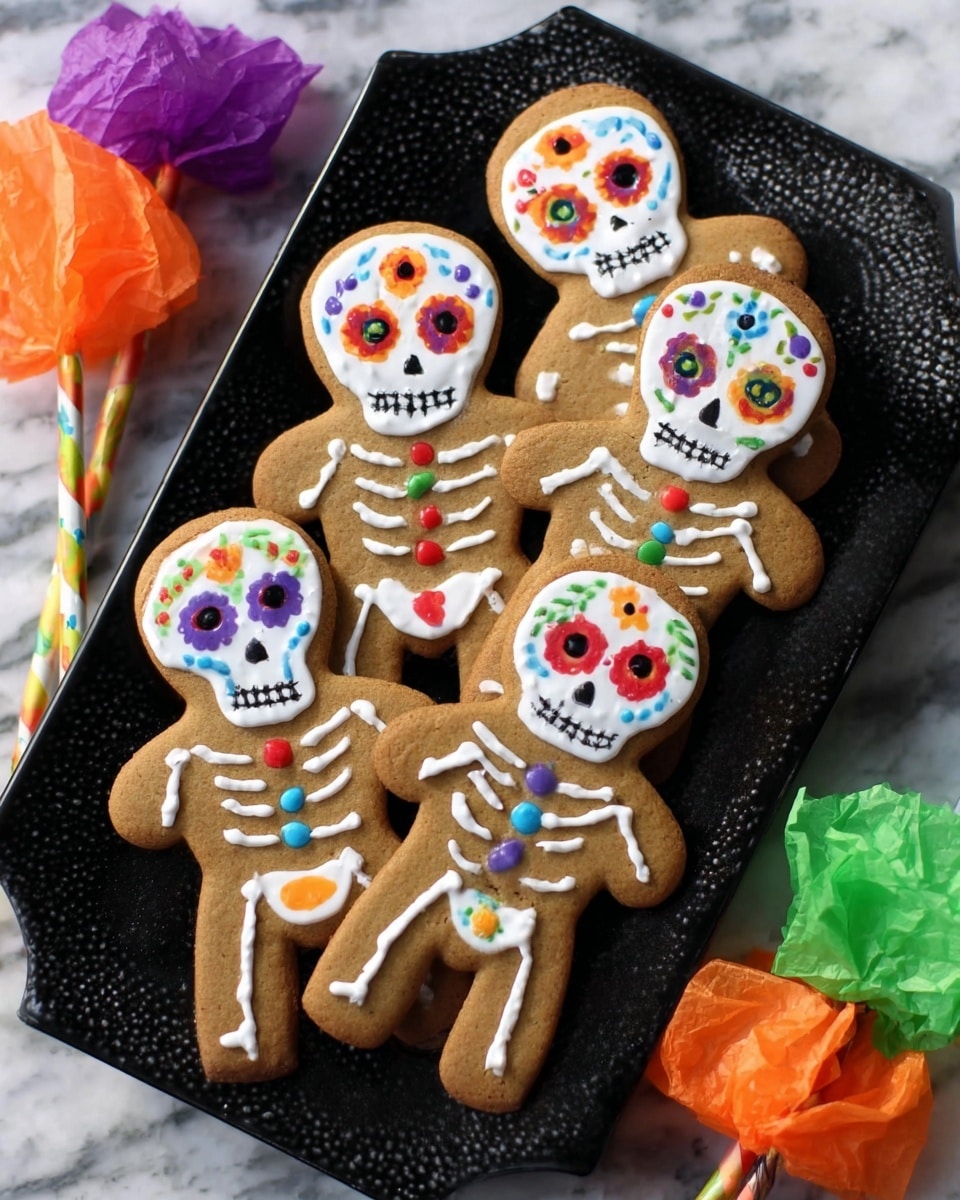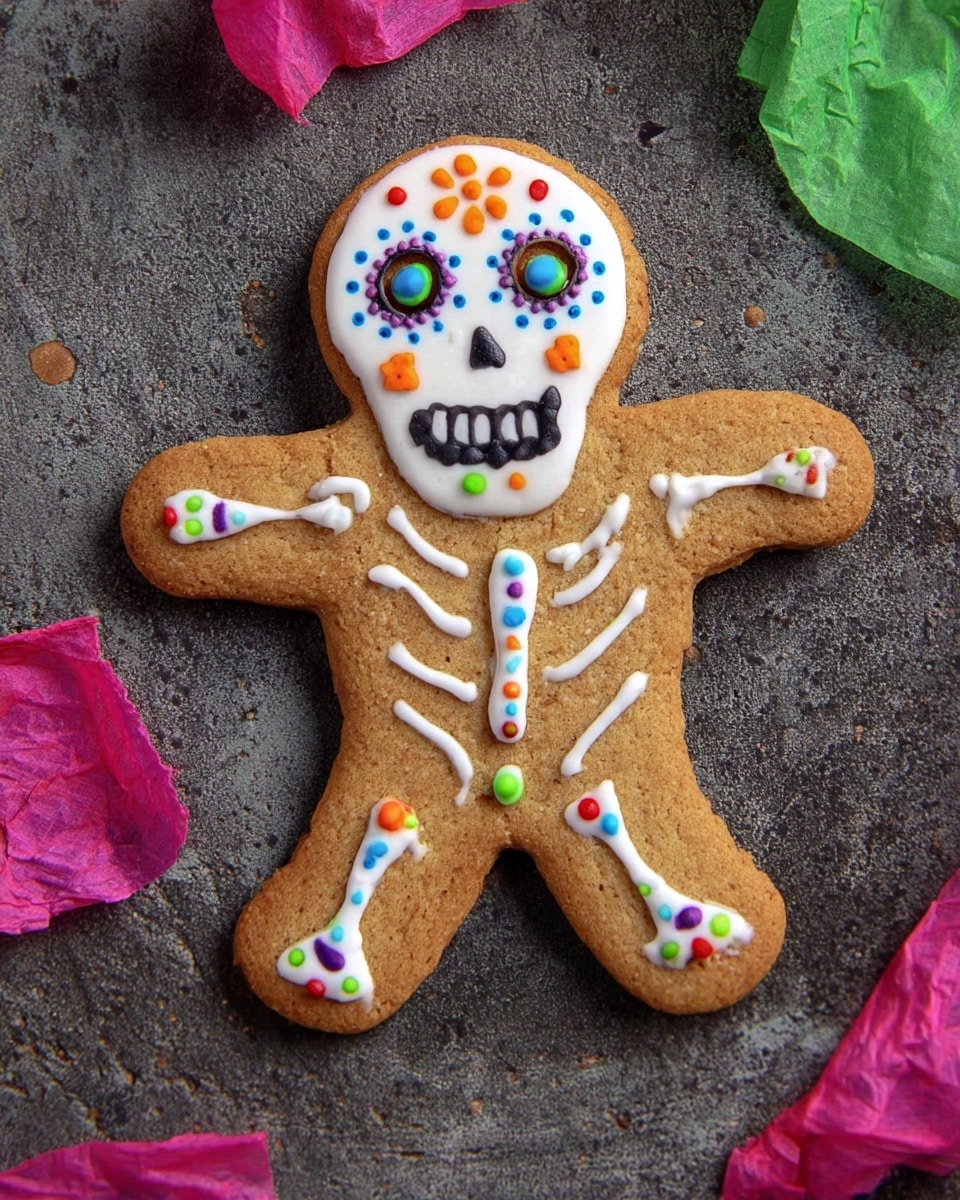
If you’re on the hunt for a fun, festive, and downright delicious treat to celebrate Dia de los Muertos, you’ve got to try this Day of the Dead Skeleton Cookies Recipe. These cookies are more than just sweet – they’re a beautiful way to honor tradition with a playful twist. I absolutely love how these come out crunchy yet tender, with that hint of anise and cinnamon that really makes them special. Plus, decorating them is a creative blast, especially if you want to get the whole family involved!
Why You’ll Love This Recipe
- Perfect Balance of Flavors: The anise and cinnamon add just the right touch of warmth without overpowering the cookies.
- Fun and Festive Decoration: Decorating skeleton shapes with royal icing and food markers turns cookie time into an exciting art project.
- Simple Ingredients, Amazing Results: You probably already have what you need in your pantry, making this recipe super accessible.
- Great for Sharing: These cookies make a fantastic gift or a centerpiece for your Day of the Dead celebration.
Ingredients You’ll Need
The ingredients in this Day of the Dead Skeleton Cookies Recipe come together to create a dough that’s flavorful yet easy to work with. I always recommend using fresh spices to really get that aromatic punch, and choosing unsalted butter so you control the saltiness.
- All-purpose flour: The foundation of your dough; provides structure but keep it light with proper measuring.
- Salt: Just a pinch to balance sweetness and enhance flavors.
- Baking powder: Helps cookies rise slightly for a tender crumb.
- Unsalted butter: Room temperature for ease of creaming; makes the cookies rich and tender.
- Granulated sugar: Sweetens the dough and helps with texture and browning.
- Anise extract or anise seeds: This is the secret star flavor I love—adds a subtle, licorice-like note.
- Cinnamon: Adds warmth and complements the anise beautifully.
- Egg: Binds the dough and adds moisture.
- Orange juice: Gives a hint of citrus brightness and helps make the dough pliable.
Variations
I love to jazz up this Day of the Dead Skeleton Cookies Recipe with small tweaks depending on the occasion or who’s joining me in the kitchen. You’ll find that swapping out extracts or adding your own favorite spices can make these cookies feel uniquely yours.
- Spice it up: When I want a warmer flavor, I add a pinch of ground cloves or nutmeg—it gives the dough a cozy holiday vibe.
- Gluten-free version: I’ve tried using a gluten-free flour blend, and while texture changes a bit, the cookies still hold their shape and taste amazing.
- Vegan twist: Swap butter for vegan butter and the egg for a flaxseed egg; they’re still tasty but a little softer.
- Natural food coloring: Add natural food coloring to royal icing to keep decorations vibrant without artificial dyes.
How to Make Day of the Dead Skeleton Cookies Recipe
Step 1: Whisking the Dry Ingredients
Start by whisking together the all-purpose flour, salt, and baking powder in a medium bowl. This simple step ensures that your rising agent is evenly distributed throughout the flour, avoiding any uneven texture. I always love doing this first because it keeps me organized and speeds up the next steps.
Step 2: Creaming Butter and Sugar
In a large bowl, beat the room temperature butter and granulated sugar with a mixer until the mixture is light and fluffy. This usually takes about 3-4 minutes. Creaming incorporates air, which helps give the cookies a tender yet sturdy texture. I learned early on that rushing this step made my cookies flat and dense, so don’t skimp here!
Step 3: Adding Flavors and Egg
Next, mix in the anise extract (or anise seeds if you prefer some texture) and cinnamon. Then beat in the large egg until smooth. That spice combo is what gives these skeleton cookies a signature Mexican flavor that feels nostalgic and festive. You’re going to love that subtle kick!
Step 4: Incorporating Orange Juice
Slowly pour in the orange juice while mixing. This brightens the dough and helps it come together more easily while adding a fruity note that complements the spices. I sometimes zest a little orange peel here for an even more intense flavor – totally optional but a nice touch.
Step 5: Combining Wet and Dry Ingredients
Gradually add the flour mixture to the wet ingredients, mixing just until a dough forms. If it feels sticky, sprinkle in a bit more flour, but try not to overdo it to keep the cookies tender. I find that chilling the dough at this point really helps make rolling and cutting out skeleton shapes a breeze.
Step 6: Chilling the Dough
Divide the dough into two equal disks and wrap each in plastic wrap. Refrigerate for at least 30 minutes – overnight is even better. This step is key because it firms up the dough, making it much easier to roll out without sticking or tearing when you’re cutting your skeleton shapes. I never skip this, especially when I want perfect details.
Step 7: Rolling and Cutting Skeleton Shapes
On a lightly floured surface, roll one disk of dough to about 1/4 inch thickness. Use skeleton-shaped cookie cutters or your favorite Day of the Dead themed cutters to cut your cookies. Place them spaced out on a parchment-lined baking sheet. Pro tip: keep your cutters and rolling pin lightly floured to prevent sticking and tearing.
Step 8: Baking
Heat your oven to 350°F (175°C). Bake the cookies for 10-12 minutes, keeping an eye on the edges – you want them lightly golden but not browned. I find that this baking time yields a perfect crunchy outside while keeping the inside just tender enough for that melt-in-your-mouth experience.
Step 9: Cooling
Let the cookies cool on the baking sheet for a few minutes before transferring them to a wire rack to cool completely. Handling them too soon can cause breakage, and allowing them to cool fully is crucial for icing later on.
Step 10: Decorating with Royal Icing and Food Markers
Prepare royal icing according to package instructions, aiming for a thick but spreadable consistency. Thin if needed with a few drops of water. Transfer to a piping bag with a small tip to outline the skeletons’ ribs, skull, and bones. After the icing sets completely (a few hours or overnight), use colored food markers to add details and brighten designs. This little step brings the Day of the Dead skeletons to life and is my favorite part – so creative and satisfying!
Pro Tips for Making Day of the Dead Skeleton Cookies Recipe
- Chill That Dough Right: Refrigerating the dough overnight helps prevent shrinking and cracking while rolling and baking.
- Use Plastic Wrap Smartly: Wrap dough disks tightly to avoid drying out, which can cause cracking and brittle cookies.
- Steady Piping Motion: When decorating with royal icing, keep your hand steady and use gentle pressure for clean lines.
- Avoid Overbaking: Cookies continue to firm up as they cool; take them out when edges are just golden to keep them tender inside.
How to Serve Day of the Dead Skeleton Cookies Recipe
Garnishes
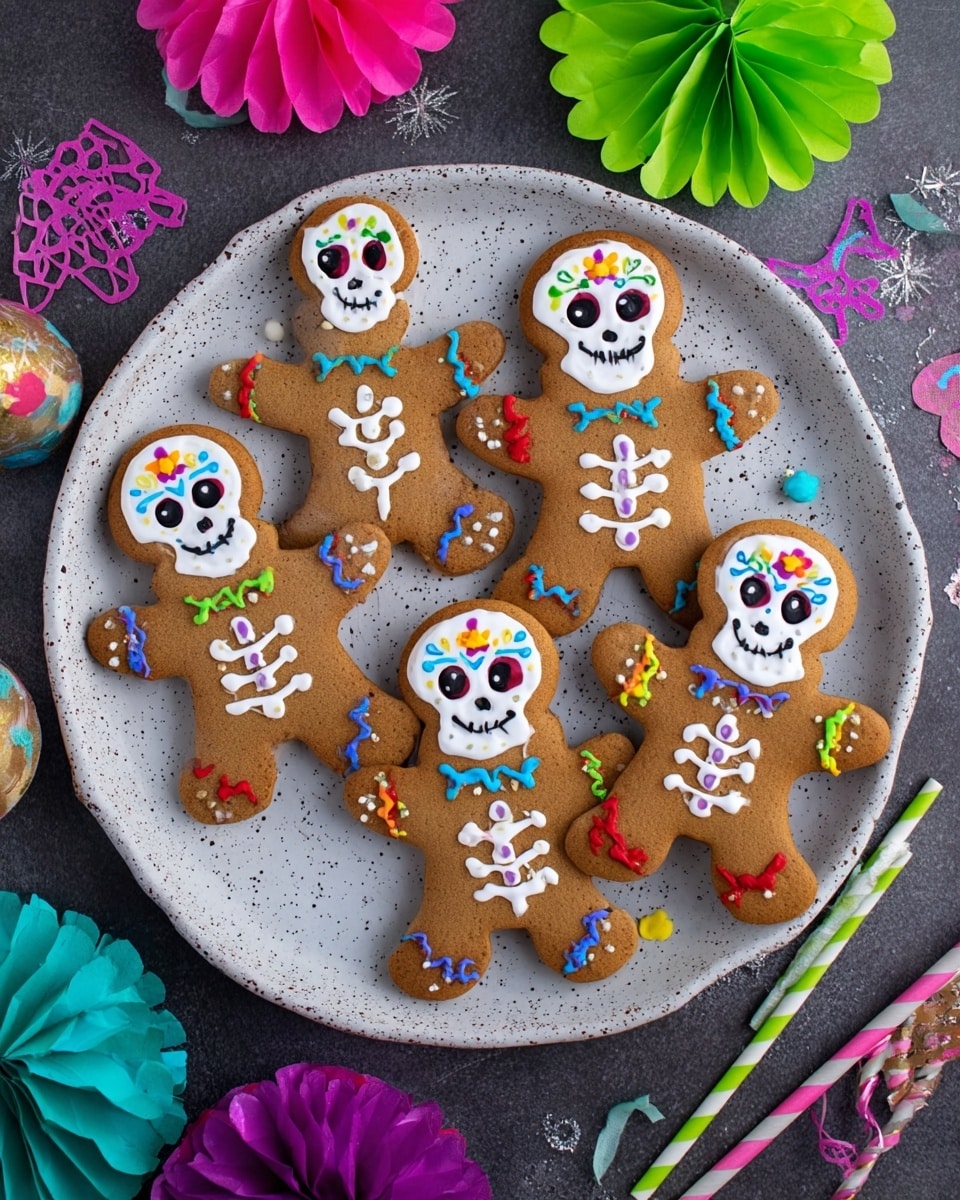
I like to serve these skeleton cookies with a sprinkle of edible glitter or a dusting of powdered sugar just before guests arrive – adds a touch of magic! Some fresh marigold petals on the platter create an authentic Day of the Dead vibe and look stunning alongside the colorful cookies.
Side Dishes
Pair your cookies with warm drinks like hot chocolate or spiced tea—that’s a combo my family can’t get enough of. You could also offer traditional Mexican beverages like horchata or café de olla to make your celebration extra special.
Creative Ways to Present
For parties, I like to arrange skeleton cookies upright by using mini easels or decorating trays lined with tissue paper in bright colors. Gift boxes decorated with a ribbon and a little sugar skull sticker also make these cookies a charming homemade gift to share with friends and neighbors.
Make Ahead and Storage
Storing Leftovers
Once fully decorated and dry, store your skeleton cookies in an airtight container at room temperature. I usually layer them between sheets of parchment paper to prevent sticking and keep details intact. They stay fresh for up to a week, which makes them perfect for prepping ahead.
Freezing
If you want to make these in advance, you can freeze the plain, baked cookies before decorating. Wrap them tightly in plastic wrap and place them in a freezer-safe container. When you’re ready, thaw at room temperature before piping icing. I recommend freezing undecorated dough as well for best results.
Reheating
These cookies are best enjoyed at room temperature, but if you prefer them a bit warm, pop them in the oven for just 3-5 minutes at 300°F, careful not to melt the icing. Reheating helps refresh their softness without losing that delightful crunch.
FAQs
-
Can I make the dough ahead and freeze it?
Absolutely! This Day of the Dead Skeleton Cookies Recipe dough freezes beautifully. Just wrap the dough disks tightly in plastic wrap and place them in a freezer-safe bag or container. When ready to bake, thaw overnight in the fridge and proceed with rolling and cutting your cookies.
-
What can I use if I don’t have anise extract?
If you can’t find anise extract, you can substitute with a teaspoon of anise seeds crushed lightly or even a splash of vanilla extract for a different but still delicious flavor profile. The key is the subtle licorice taste that anise provides, but the cookies still taste great without it.
-
How do I make perfect skeleton cookie shapes?
Using cookie cutters designed for skeletons or Day of the Dead shapes makes this easier. Make sure your dough is well chilled and rolled evenly to about 1/4 inch thickness. If your dough sticks, lightly flour your cutters and work surface. For extra detail, pipe outlines with royal icing after baking.
-
Can I skip the food markers and just use icing?
You can! Royal icing alone can create beautiful skeleton designs if you pipe carefully. However, food markers add fine detail with ease, especially for intricate Day of the Dead motifs. It’s totally up to your preference and how much decorating time you want to invest.
Final Thoughts
This Day of the Dead Skeleton Cookies Recipe has become one of my favorite ways to celebrate and share tradition in such a sweet way. I love how approachable it is for bakers of all levels while still feeling festive and special. Whether you’re baking with kids, gifting to friends, or just treating yourself, these cookies bring smiles and color to any celebration. I hope you have as much fun making and decorating them as I do—now go ahead, roll up your sleeves, and get ready to create some edible art that honors this beautiful holiday.
Print
Day of the Dead Skeleton Cookies Recipe
- Prep Time: 20 minutes
- Cook Time: 12 minutes
- Total Time: 1 hour 5 minutes
- Yield: 24 cookies
- Category: Dessert
- Method: Baking
- Cuisine: Mexican
Description
Celebrate Día de los Muertos with these charming and easy-to-make Skeleton Cookies. Crisp buttery cookies flavored with anise and cinnamon are cut into festive shapes, baked to perfection, and decorated with royal icing and colorful food markers to create intricate skeleton designs. Perfect for sharing at parties or giving as seasonal gifts.
Ingredients
For the Cookies
- 2 1/2 cups all-purpose flour
- 1/2 teaspoon salt
- 1/2 teaspoon baking powder
- 1 cup (2 sticks) unsalted butter, at room temperature
- 1 cup granulated sugar
- 1 teaspoon anise extract or anise seeds
- 1 teaspoon cinnamon
- 1 large egg
- 1/4 cup orange juice
For the Decoration
- Royal icing (prepared according to package instructions)
- Colored food markers for decorating
Instructions
- Mix Dry Ingredients: Whisk together the flour, salt, and baking powder in a medium-sized bowl and set aside.
- Cream Butter and Sugar: In a separate large bowl, beat the butter and sugar until the mixture is creamy and light in color.
- Add Flavorings: Mix in the anise extract and cinnamon until well combined with the butter-sugar mixture.
- Incorporate Egg: Beat in the egg until the mixture is smooth and fully integrated.
- Add Orange Juice: Slowly add the orange juice to the wet mixture while continuing to mix until everything is well combined.
- Form Dough: Gradually add the dry ingredients to the wet mixture, mixing until a dough forms. If too sticky, add a little extra flour.
- Chill Dough: Divide the dough into two equal portions, shape into disks, wrap in plastic wrap, and refrigerate for at least 30 minutes or overnight to firm up.
- Roll and Cut Dough: Roll out one disk on a lightly floured surface to about 1/4 inch thickness. Use cookie cutters to cut out skeleton shapes and place them on a parchment-lined baking sheet.
- Preheat Oven: Preheat the oven to 350°F (175°C).
- Bake Cookies: Bake the cookies for 10–12 minutes or until edges turn lightly golden.
- Cool Cookies: Remove from oven and cool on the baking sheet for a few minutes, then transfer to a wire rack to cool completely.
- Repeat Rolling and Cutting: Repeat the rolling, cutting, and baking process with the second disk of dough.
- Prepare Royal Icing: Make the royal icing as per package directions, adjusting the consistency by adding a few drops of water until it resembles thick yogurt for easy piping.
- Pipe Icing Designs: Transfer icing to a piping bag with a small round tip and pipe the head, rib cage, and bones onto cooled cookies.
- Set Icing: Allow the royal icing to dry and harden for several hours or overnight to create a smooth surface for decorating.
- Decorate with Food Markers: Use colored food markers to add intricate details and vibrant designs on the hardened icing.
- Dry Decorated Cookies: Let the decorated cookies dry completely to set the food marker ink before handling or storing.
Notes
- Chilling the dough is essential to prevent spreading during baking and to make rolling easier.
- If you don’t have anise extract, anise seeds or a small amount of licorice extract can be used for similar flavor.
- Ensure royal icing is thick enough to hold its shape but soft enough to pipe smoothly.
- Food markers are edible and perfect for adding fine details on royal icing once it has dried.
- Store cookies in an airtight container at room temperature for up to a week.
Nutrition
- Serving Size: 1 cookie
- Calories: 95
- Sugar: 9g
- Sodium: 65mg
- Fat: 1g
- Saturated Fat: 0g
- Unsaturated Fat: 1g
- Trans Fat: 0g
- Carbohydrates: 20g
- Fiber: 0g
- Protein: 2g
- Cholesterol: 9mg

