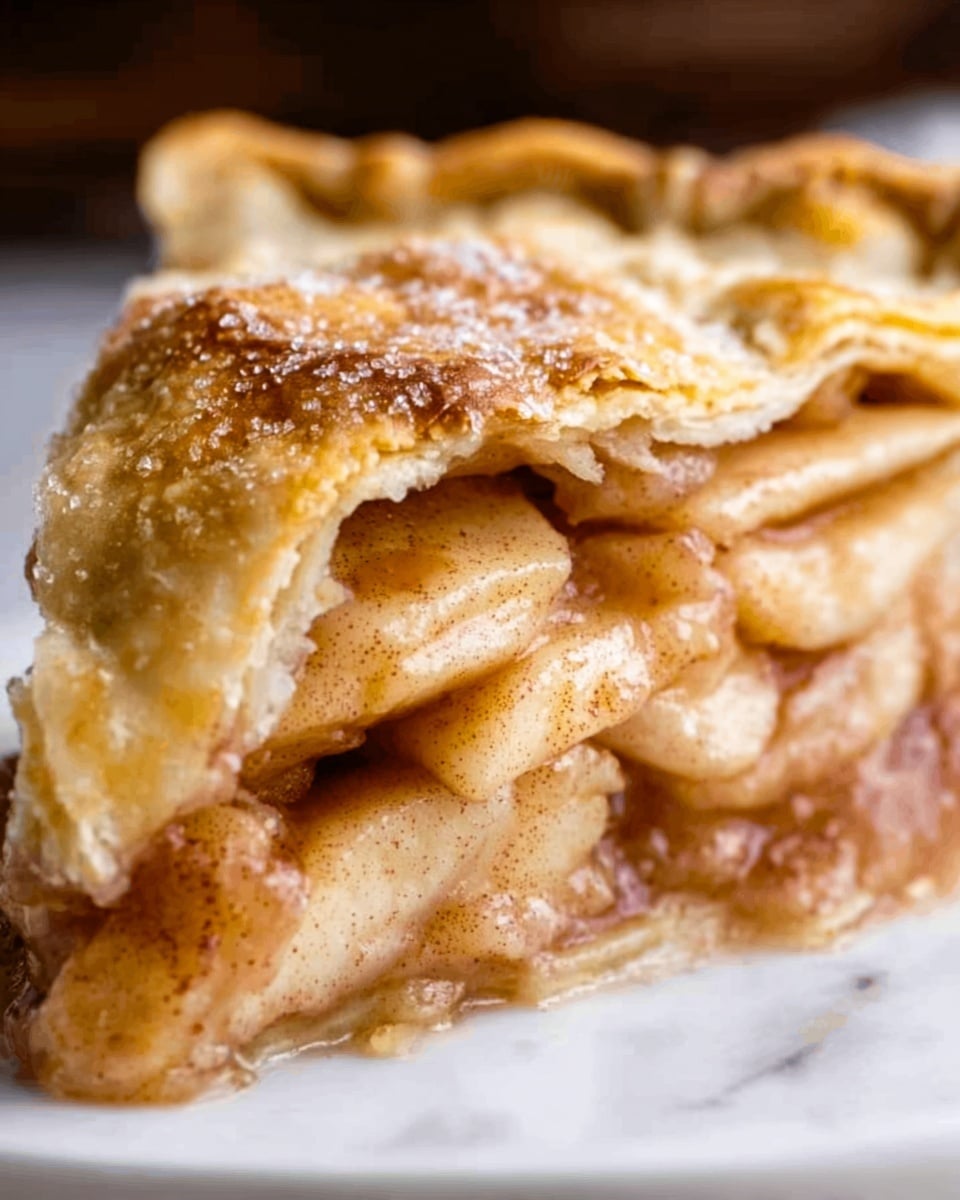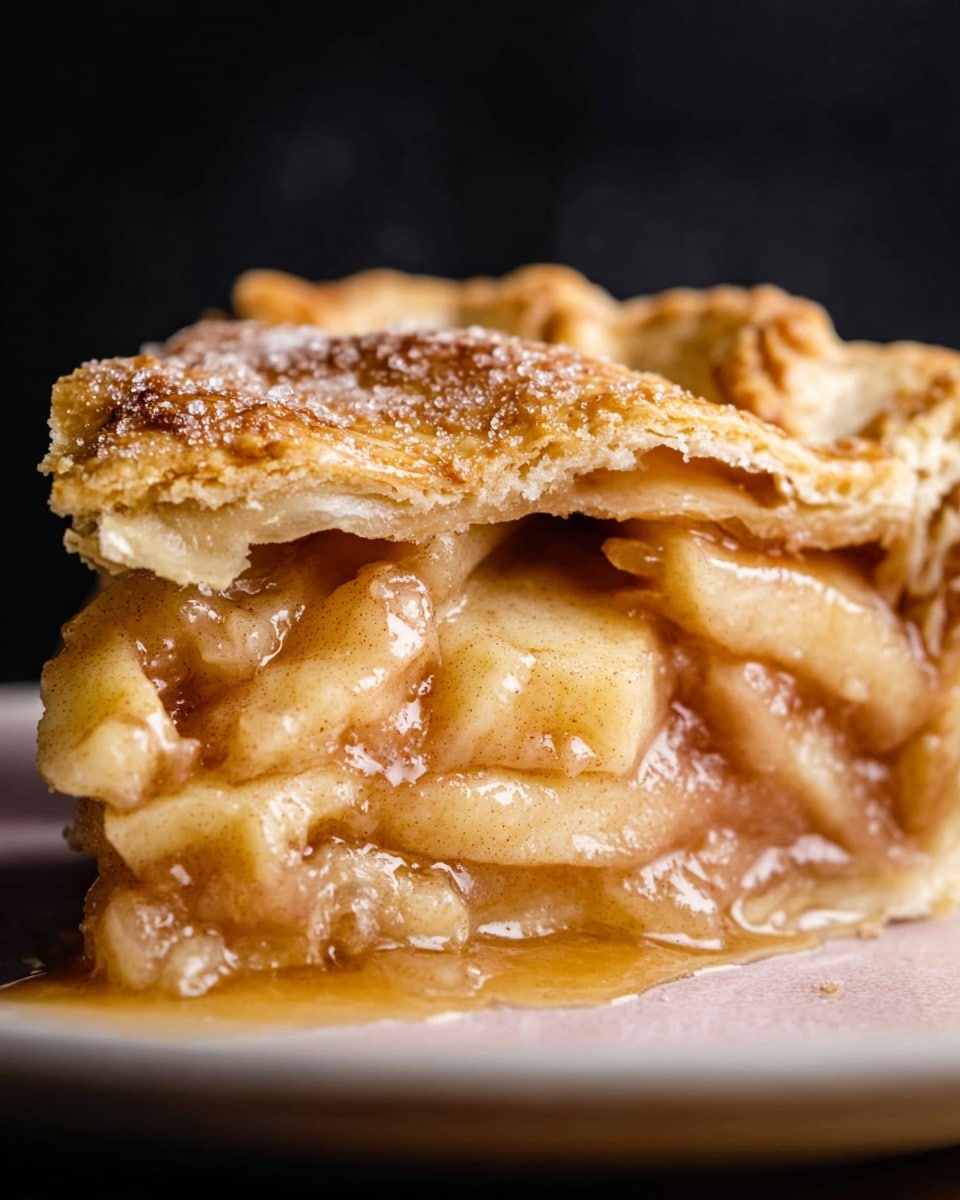
I absolutely love how this Easy Apple Pie Recipe turns out every single time—there’s just something magical about biting into a perfectly flaky crust filled with tender, cinnamon-spiced apples. When I first tried this recipe, I was amazed how simple it was to create a classic dessert that feels like it came from a grandma’s kitchen rather than a complicated cookbook. You’ll find that this pie works beautifully for everything from cozy fall evenings to festive holiday dinners where everyone is craving a slice of warmth and nostalgia.
What makes this Easy Apple Pie Recipe truly special is how it balances the tartness of Granny Smith apples with just the right amount of sweetness and spice, topped off with a golden, buttery crust that practically melts in your mouth. If you’ve ever struggled with soggy bottoms or bland fillings, I discovered some tricks here that really help the pie shine. By the end, you’ll have a show-stopping dessert that’s not only delicious but genuinely easy to make from scratch.
Why You’ll Love This Recipe
- Simple Ingredients: Uses pantry staples and fresh apples for an accessible, fuss-free dessert.
- Classic, Perfect Texture: Flaky crust with soft, spiced apple filling every time.
- Great for Any Occasion: From casual family dinners to holiday celebrations, it impresses every crowd.
- Proven Tips Included: I share tricks that help you avoid soggy crust and get that golden top.
Ingredients You’ll Need
These ingredients come together so well because they balance sweetness, spice, and tartness with a buttery crust that holds everything neatly without turning soggy. When shopping, look for firm Granny Smith apples for great texture and acidity that brightens the filling.
- Pie crusts: Homemade or store-bought works; homemade tends to be flakier and richer.
- Granny Smith apples: Their tartness cuts through the sweetness and holds shape while baking.
- Granulated sugar: Adds sweetness and helps thicken the juice slightly.
- Light brown sugar: Brings a subtle molasses flavor that deepens the filling taste.
- All-purpose flour: Helps thicken the filling, keeping it from being watery.
- Ground cinnamon: A classic spice that pairs perfectly with apples.
- Ground nutmeg: Adds warmth and complexity in small amounts.
- Lemon juice and zest: Brightens the flavor and prevents apples from browning.
- Egg (for egg wash): Gives the crust a glossy, golden finish.
- Sanding sugar (optional): Adds a pretty sparkle and slight crunch on top.
Variations
I love to shake things up sometimes by adding a twist to this Easy Apple Pie Recipe. Don’t hesitate to customize it to suit your taste or dietary needs—the pie is very forgiving and still turns out amazing with slight changes.
- Spiced Up: Try adding a pinch of ground cloves or cardamom for a festive spice note I discovered that pairs beautifully with apples.
- Sweetener Swap: Replace brown sugar with maple syrup or honey for natural sweetness—I’ve done this when I ran out of sugar, and it adds lovely depth.
- Gluten-Free: Use a gluten-free pie crust and substitute flour in filling with cornstarch; the pie still bakes wonderfully.
- Apple Mix: Combine Granny Smith with Fuji or Honeycrisp apples to get varied textures and sweetness.
How to Make Easy Apple Pie Recipe
Step 1: Prepare Your Pie Crust
Start with chilled dough for your pie crust, whether homemade or store-bought. I like to let mine rest for about 5-10 minutes at room temperature before rolling it out so it’s more pliable and easier to handle without tearing. Roll one disc into about a 12-inch circle, ensuring it’s around ⅛ inch thick for that classic flaky texture. Gently lay it into your deep dish pie plate, pressing down carefully without stretching.
Step 2: Mix the Apple Filling
In a large bowl, toss your peeled and sliced Granny Smith apples with granulated sugar, brown sugar, all-purpose flour, cinnamon, nutmeg, lemon juice, and lemon zest. Be generous with the lemon zest—it really brightens the flavor in a way I didn’t expect the first time I made this pie. Make sure your apples are evenly coated so the filling cooks uniformly and stays perfectly spiced.
Step 3: Fill and Assemble the Pie
Pour your apple mix into the crust-lined pie plate, but remember to discard any excess juices at the bottom of the bowl—that’s a trick I learned to avoid a soggy crust. Then roll your second pie dough disc and carefully place it over the apples. Trim the edges cleanly, fold them under, and crimp to seal. Don’t forget to cut at least four slits in the top crust to allow steam to escape which helps keep your crust crisp and prevents bubbling over.
Step 4: Bake with Care
Brush the top crust with beaten egg for a beautiful golden sheen and sprinkle with sanding sugar if you like a bit of sparkle and added crunch—my family always looks forward to this final touch. Protect the edges of your pie with a foil shield during the first 25 minutes of baking at 400°F to prevent burning, then reduce heat to 375°F and bake for another 30-35 minutes. You’ll want to bake until the crust is golden brown and the filling is bubbly—this step always makes me anxious, but watching the juices bubble is my favorite sign that it’s almost ready.
Once out of the oven, patience is key—let the pie cool at least 3 hours for the filling to set so slices cut cleanly and hold their shape.
Pro Tips for Making Easy Apple Pie Recipe
- Use Tart Apples: Granny Smith apples hold their shape well and give that signature tang that balances the sweet filling.
- Keep Dough Cold: Chilled dough leads to flakier crust—warm dough makes the crust tough and harder to work with.
- Discard Excess Juices: Pouring off extra liquid from the filling prevents soggy crust, something I used to overlook and regret!
- Vent the Top Crust Well: Cuts let steam escape, so your pie won’t get soggy or explode in the oven.
How to Serve Easy Apple Pie Recipe
Garnishes
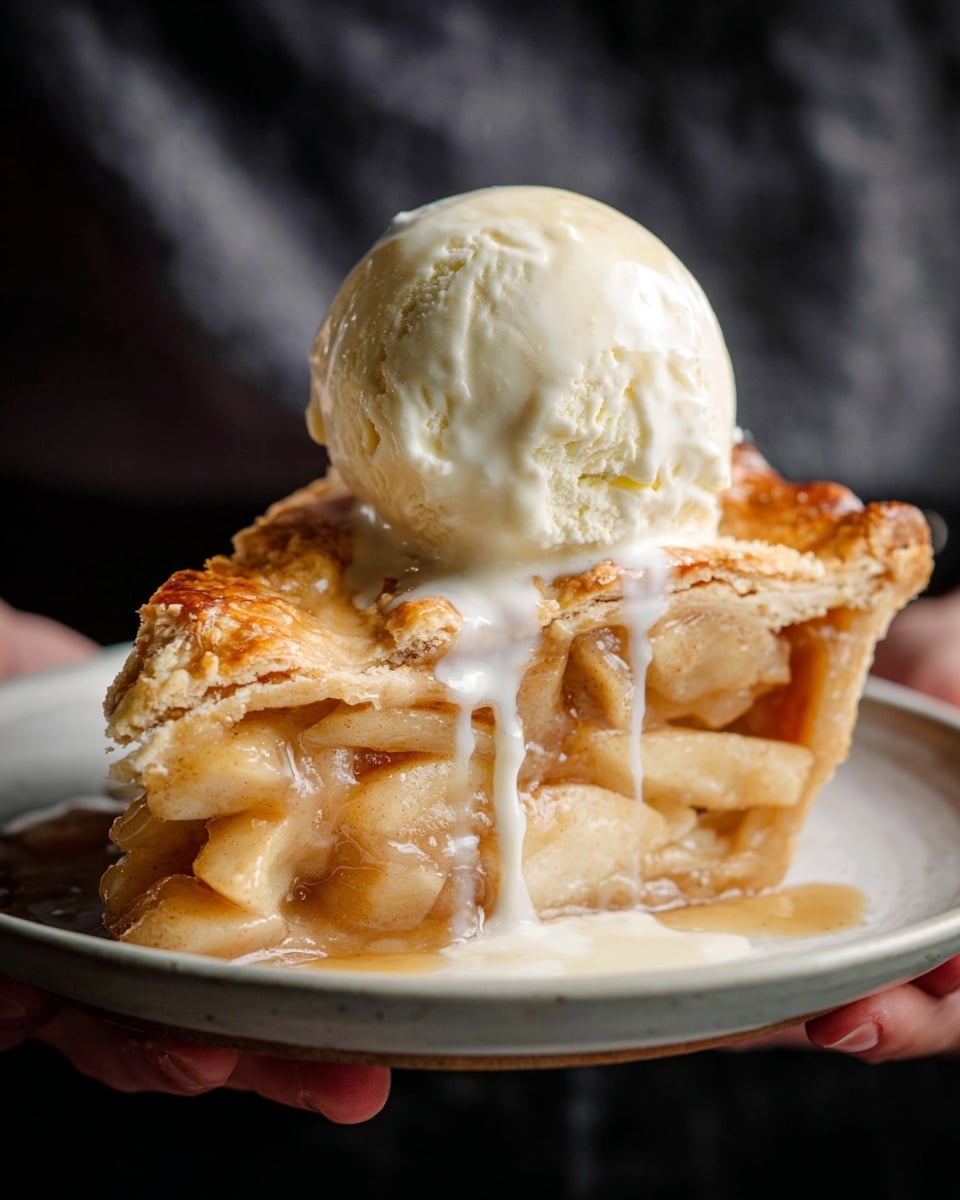
I love serving this apple pie just as it is or with a scoop of classic vanilla ice cream—there’s nothing like the cream melting over a warm slice. Sometimes I add a sprinkle of cinnamon or a drizzle of caramel sauce to take it over the top, which everyone raves about at family gatherings.
Side Dishes
Apple pie pairs beautifully with a hot cup of coffee or a glass of cold milk. For a cozy dessert spread, I’ll also serve it alongside whipped cream or even a sharp cheddar cheese slice, a classic that’s surprisingly delicious and adds a savory contrast.
Creative Ways to Present
For Thanksgiving or special occasions, I’ve decorated the top crust with leaf-shaped cutouts or a lattice pattern to make the pie extra festive. You could also use mini pie dishes to make individual portions that are adorable and perfect for serving guests.
Make Ahead and Storage
Storing Leftovers
After enjoying a few slices, I wrap the pie tightly in plastic wrap and store it in the fridge. It stays fresh for up to 4 days, and the flavors actually deepen overnight. Just be sure to keep it covered to prevent the crust from drying out.
Freezing
I sometimes freeze leftover pie by wrapping it carefully in foil and placing it in a freezer-safe container. It freezes well for up to 2 months, and when I’m ready, I let it thaw overnight in the fridge before reheating.
Reheating
To warm up leftover pie while keeping the crust crisp, I heat it in a 350°F oven for about 15-20 minutes. Avoid microwaving if you want to preserve texture because it can make the crust soggy.
FAQs
-
Can I use a store-bought pie crust for this Easy Apple Pie Recipe?
Absolutely! While I love the flavor and texture of homemade crust, using a good-quality store-bought pie crust will still give you a delicious pie and save time. Just follow the package directions for handling and thawing before assembly.
-
What type of apples should I use?
Granny Smith apples are perfect for this recipe due to their tartness and firmness, which hold up well during baking. You can mix them with sweeter varieties like Fuji or Honeycrisp to balance flavors if you like.
-
How do I prevent the crust from getting soggy?
One of the best ways is to discard any excess juices from the apple mixture before filling the crust, and make sure to cut vents in the top crust so steam can escape. Also, chilling your dough and using a pie shield on the edges during baking helps keep your crust crisp and golden.
-
Can I make this pie ahead of time?
Yes! You can prepare the pie a day before baking. Just assemble it, cover tightly, and refrigerate. Bring it to room temperature before baking to ensure even cooking.
Final Thoughts
This Easy Apple Pie Recipe has become a staple in my kitchen because of how effortlessly it delivers that classic, comforting flavor we all crave. I encourage you to give it a try—it’s a recipe you’ll return to year after year and impress everyone at your table. Baking this pie feels like sharing a little piece of home, and then tasting it makes the whole experience incredibly rewarding. Trust me, once you master this easy recipe, you’ll feel so proud serving up those golden slices full of sweet, cinnamon-spiced apples.
Print
Easy Apple Pie Recipe
- Prep Time: 1 hour 15 minutes
- Cook Time: 1 hour
- Total Time: 2 hours 15 minutes
- Yield: 8 servings
- Category: Dessert
- Method: Baking
- Cuisine: American
Description
This easy apple pie recipe features a flaky, buttery crust filled with a spiced mixture of Granny Smith apples, cinnamon, and nutmeg, creating a classic dessert perfect for any occasion. With a combination of granulated and light brown sugar and a touch of lemon juice and zest, this pie balances sweet and tart flavors beautifully. The pie is baked until golden brown, making it irresistibly delicious and aromatic.
Ingredients
Pie Crust
- 2 (9″) pie crusts
Filling
- 7 large Granny Smith apples, peeled, cored, and sliced into 1/2 inch slices
- 1/2 cup granulated sugar
- 1/2 cup light brown sugar, loosely packed
- 2 tablespoons all-purpose flour
- 1 teaspoon ground cinnamon
- 1/8 teaspoon ground nutmeg
- 1 tablespoon lemon juice
- Zest of half a lemon
Finishing
- 1 large egg, lightly beaten (for egg wash)
- 2 tablespoons sanding sugar (optional)
Instructions
- Prepare the Pie Crust: Start by preparing or using store-bought flaky pie crusts. If making your own, chill the dough for at least 1 hour before rolling out. This ensures a tender, flaky crust.
- Preheat Oven: Place the oven rack in the center position and preheat your oven to 400°F (204°C).
- Mix Apple Filling: In a large bowl, combine the sliced apples with granulated sugar, light brown sugar, all-purpose flour, ground cinnamon, ground nutmeg, lemon juice, and lemon zest. Toss well to evenly coat all the apple slices.
- Roll Out Bottom Crust: Remove one pie crust disk from the fridge and let it rest at room temperature for 5-10 minutes. On a lightly floured surface, roll it into a 12″ circle about ⅛” thick. Carefully place the crust into a deep dish 9-inch pie plate, pressing it gently to fit the plate.
- Add Filling: Spoon the apple filling evenly over the bottom crust, making sure to discard any liquid that collects at the bottom of the bowl to avoid a soggy pie.
- Roll Out Top Crust: Roll out the second pie crust disk to the same thickness. Lay it over the apple filling. Trim any excess dough along the edges with a sharp knife.
- Seal Edges and Vent: Lift the edges where the two crusts meet and gently press to seal, then fold the edges under themselves neatly. Cut 4 slits into the top crust to allow steam to escape during baking. Place the pie on a baking sheet to catch drips.
- Apply Egg Wash and Sugar: Brush the entire surface of the top crust with the beaten egg wash to give it a shiny, golden finish. Sprinkle sanding sugar evenly over the top for added sweetness and texture.
- Protect Edges: Cover the edges of the pie crust with a pie shield or strips of foil to prevent over-browning during the first 25 minutes of baking.
- Bake: Bake the pie at 400°F (204°C) for 25 minutes. Then, carefully remove the pie shield and reduce the oven temperature to 375°F (190°C). Continue baking for an additional 30-35 minutes, or until the crust is golden brown and the filling is bubbling.
- Cool: Remove the pie from the oven and let it cool at room temperature for at least 3 hours to allow the filling to set for clean slices and best flavor.
Notes
- Using Granny Smith apples provides a perfect balance of tartness and holds its shape well during baking.
- Discarding excess apple juices prevents the crust from becoming soggy.
- Allowing the pie to cool completely before slicing ensures the filling sets properly.
- Protecting the crust edges with foil or a pie shield prevents burning while allowing the center to bake thoroughly.
- Optional sanding sugar adds a nice sparkle and subtle extra sweetness on the crust.
Nutrition
- Serving Size: 1 slice (1/8 of pie)
- Calories: 417
- Sugar: 46g
- Sodium: 189mg
- Fat: 12g
- Saturated Fat: 4g
- Unsaturated Fat: 7g
- Trans Fat: 1g
- Carbohydrates: 77g
- Fiber: 6g
- Protein: 4g
- Cholesterol: 23mg

