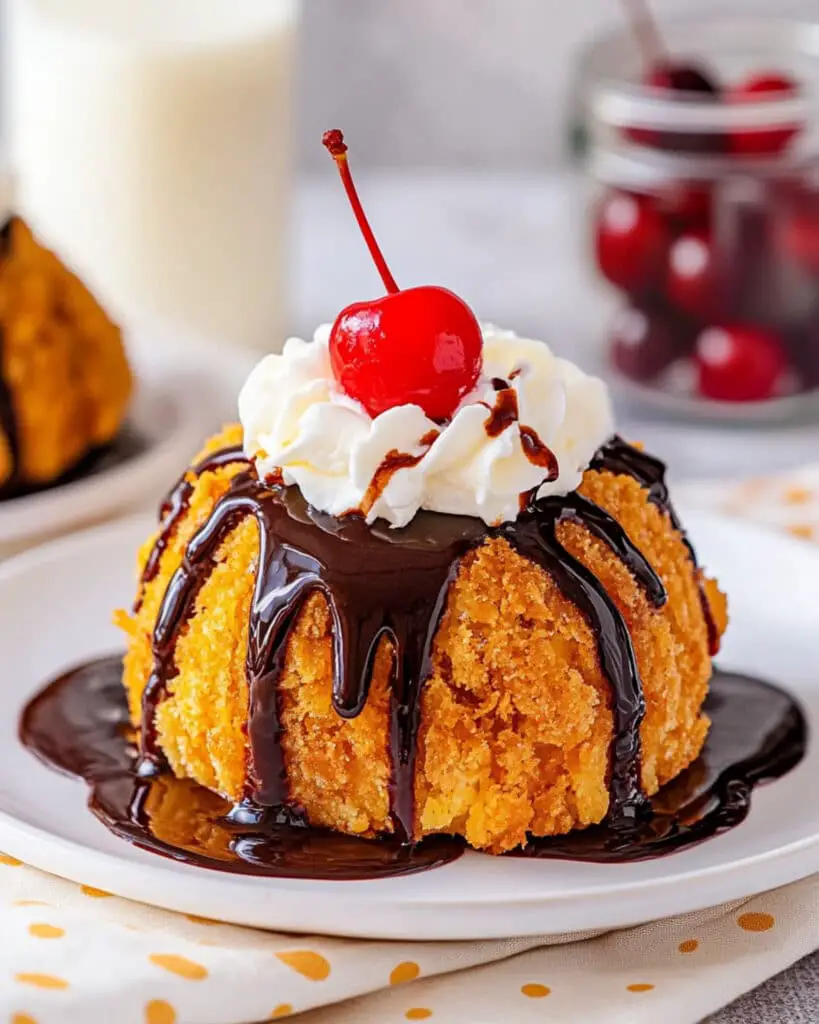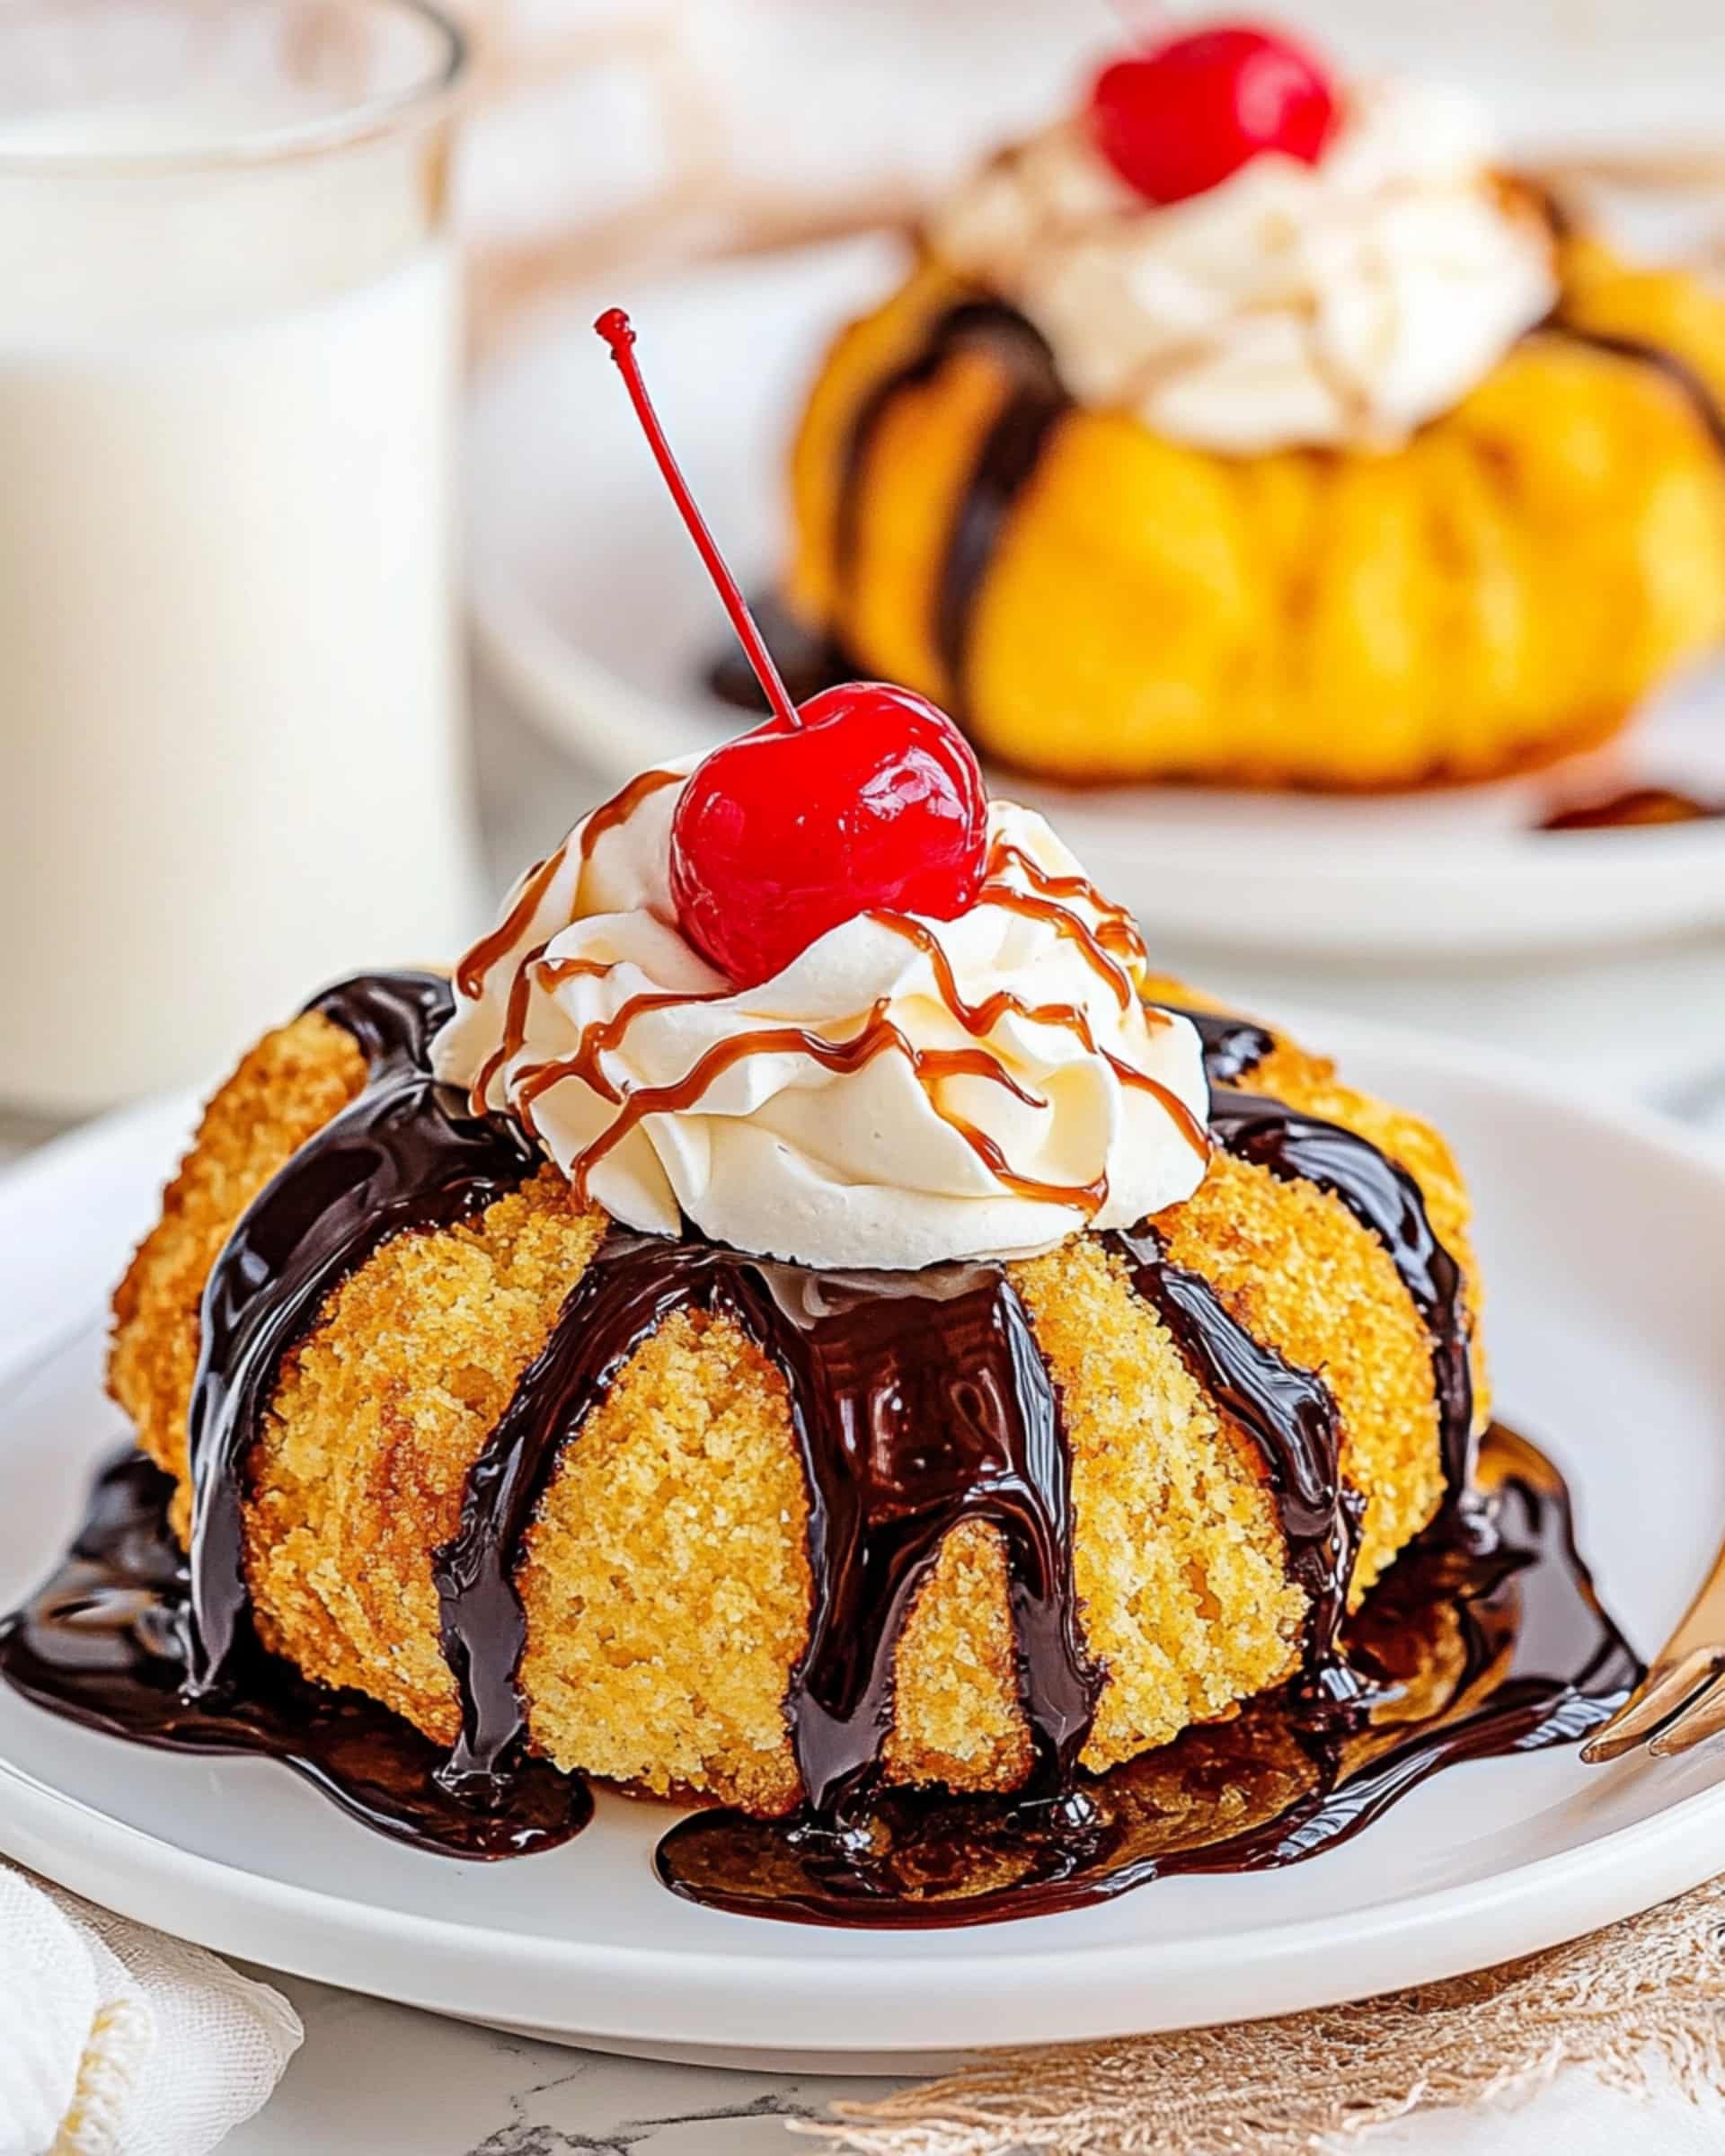
This indulgent Easy Homemade Fried Ice Cream delivers all the crispy, creamy delight of restaurant-style fried ice cream without the hassle of actual frying! The contrast between the crunchy cinnamon-sugar coating and the cold, creamy ice cream creates a dessert that’s guaranteed to impress. Best of all, you can whip this up in just 15 minutes for a showstopping dessert that’ll have everyone asking for seconds!
Why You’ll Love This Recipe
- No Deep Frying Needed: All the delicious taste of traditional fried ice cream without the mess, danger, or complexity of deep frying.
- Quick Preparation: This impressive dessert comes together in just 15 minutes of active time, making it perfect for last-minute entertaining.
- Customizable: Use your favorite ice cream flavor and toppings to create your perfect dessert experience.
- Kid-Friendly Fun: Children love helping roll the ice cream balls and watching the transformation happen.
- Restaurant-Quality Results: Impress your guests with a dessert that tastes like it came from your favorite Mexican restaurant.
Ingredients You’ll Need
- Ice Cream: The star of the show – choose a high-quality vanilla for traditional flavor, or get creative with your favorite variety. Premium brands with less air whipped in will form better balls.
- Unsalted Butter: Adds richness to the coating and helps the cornflakes toast to golden perfection without burning.
- Cornflakes: Creates that signature crunchy exterior that mimics deep-fried batter. Make sure they’re crushed well for better adhesion to the ice cream.
- Ground Cinnamon: Provides that warm, aromatic flavor that’s essential to authentic fried ice cream. Use fresh cinnamon for the best flavor.
- Granulated Sugar: Adds sweetness to the coating and helps create a caramelized effect when mixed with the warm cornflakes.
- Toppings: Chocolate sauce, whipped cream, and cherries are classic choices, but feel free to experiment with caramel, honey, fruit sauces, or sprinkles.
Note: You’ll find the complete list of ingredients, along with their exact measurements, in the printable recipe card at the bottom of this post.
Variations
Different Coatings
- Cinnamon Toast Crunch: Substitute the cereal for a sweeter, more cinnamon-forward coating.
- Honey Graham Coating: Use crushed graham crackers instead of cornflakes for a different texture and flavor.
- Churro Style: Double the cinnamon and sugar for an extra sweet, churro-inspired coating.
Flavor Twists
- Mexican Chocolate: Add a pinch of chili powder to the coating for a subtle heat that pairs beautifully with chocolate ice cream.
- Coconut Paradise: Roll the coated ice cream in toasted coconut flakes for a tropical twist.
- Coffee Lover’s Dream: Use coffee ice cream and add a teaspoon of instant espresso powder to the coating.
How to Make Fried Ice Cream
Step 1: Form the Ice Cream Balls
Scoop out one cup of ice cream and quickly shape it into a smooth ball with your hands. Place it on a plate and immediately return it to the freezer. Repeat with the remaining ice cream, working quickly to prevent excessive melting.
Step 2: Prepare the Crunchy Coating
Melt the butter in a large skillet over medium heat. Add the crushed cornflakes and cinnamon, stirring constantly to ensure even distribution. Continue cooking for about 5 minutes until the cornflakes become fragrant and slightly darker in color. Remove from heat and stir in the sugar while still warm. Transfer to a shallow dish and allow to cool completely.
Step 3: Coat the Ice Cream
Once the cornflake mixture has cooled, take one ice cream ball from the freezer. Roll it in the crumb mixture, pressing gently to ensure the coating adheres well. Return it to the freezer immediately and repeat with the remaining balls.
Step 4: Freeze and Serve
Place the coated ice cream balls back in the freezer for 10-15 minutes until frozen solid. Serve with chocolate sauce, whipped cream, cherries, or your preferred toppings.
Pro Tips for Making the Recipe
- Cold Equipment: Pre-chill your plates and tools in the freezer for about 15 minutes before starting – this helps prevent premature melting.
- Double Coat for Extra Crunch: For an even crunchier exterior, let the first layer of coating set in the freezer for 5 minutes, then roll the balls in the mixture again.
- Portion Control: Use an ice cream scoop for uniform balls that will freeze and coat evenly.
- Timing Is Everything: Have everything ready before you start – once you begin working with the ice cream, speed is crucial to prevent melting.
- Hand Protection: If your hands are sensitive to cold, wear food-safe gloves not only for cleanliness but also to insulate your hands from the freezing ice cream.
How to Serve
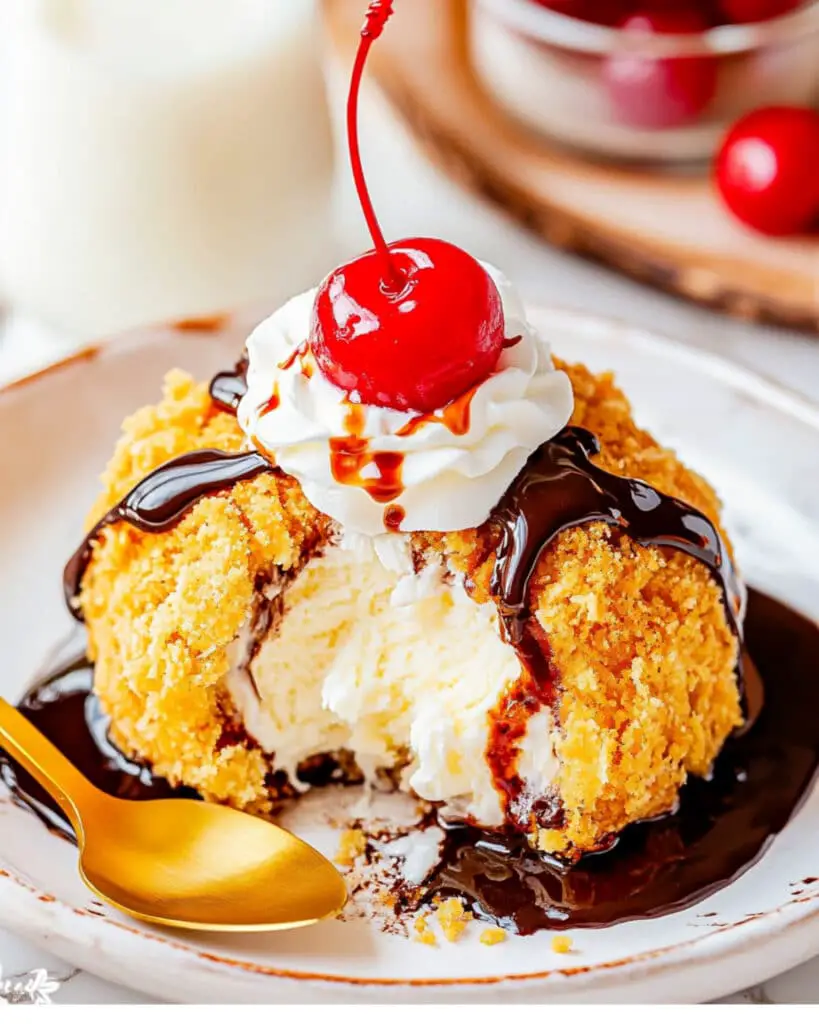
Classic Presentation
Serve each ball in a small bowl with chocolate sauce drizzled over the top, a generous dollop of whipped cream, and a maraschino cherry for that picture-perfect finish.
Dessert Tacos
Place the fried ice cream in a waffle bowl or sugar taco shell for a fun twist on the traditional serving method.
Sundae Bar
Set up a fried ice cream bar with various sauces (chocolate, caramel, strawberry), toppings (nuts, sprinkles, crushed cookies), and whipped cream so everyone can customize their dessert.
Make Ahead and Storage
Freezing
These fried ice cream balls can be made up to 3 days ahead. After coating, place them in an airtight container with parchment paper between layers to prevent sticking. They’ll keep well in the freezer for up to a week.
Best Serving Practice
For the optimal texture contrast, remove the balls from the freezer about 2-3 minutes before serving to allow the ice cream to soften slightly while the coating remains crunchy.
Storing Leftover Coating
If you have extra cornflake coating, store it in an airtight container at room temperature for up to a week. It makes a delicious topping for regular ice cream or yogurt!
FAQ
-
Why is my ice cream melting too quickly when I try to form balls?
Ice cream melts rapidly at room temperature. Try working with smaller portions at a time, keeping the rest in the freezer. You can also pre-scoop the ice cream onto a frozen baking sheet, then return it to the freezer for 30 minutes before shaping into balls.
-
Can I use any type of cereal for the coating?
Absolutely! While cornflakes provide that classic texture, you can experiment with other cereals like Rice Krispies, Cinnamon Toast Crunch, or even crushed cookies. Just ensure they’re crushed finely enough to adhere to the ice cream.
-
How far in advance can I make fried ice cream?
You can prepare these up to 3 days ahead of time. Store them in a covered container in the freezer, and they’ll be ready whenever you need a quick impressive dessert. For best texture, though, same-day preparation is ideal.
-
Can I actually deep-fry this ice cream for a more authentic version?
While this recipe is designed as a no-fry alternative, you can deep-fry the coated ice cream balls if you prefer. You’ll need to coat the frozen balls in beaten egg and another layer of crumbs, then fry at 375°F for just 10-15 seconds. It’s tricky but doable for the adventurous!
Final Thoughts
This Easy Homemade Fried Ice Cream brings the magic of your favorite restaurant dessert right into your kitchen with none of the fuss. The beautiful contrast between the warm, cinnamon-spiced crunch and the cold, creamy center creates a dessert experience that’s truly special. Whether you’re hosting a dinner party or just treating yourself after a long day, this simple yet impressive dessert is guaranteed to bring smiles. Give it a try tonight – I promise you’ll be amazed at how something so delicious can be so easy to make!
Print
Easy Homemade Fried Ice Cream Recipe
- Prep Time: 10 minutes
- Cook Time: 5 minutes
- Total Time: 15 minutes
- Yield: 4 servings
- Category: Desserts
- Method: No-cook
- Cuisine: American
Description
This Easy Homemade Fried Ice Cream recipe is a delightful dessert that combines the creaminess of ice cream with the crunchy texture of toasted cornflakes. Perfect for special occasions or just a fun treat, this dessert is easy to customize with your favorite toppings like chocolate sauce, whipped cream, or cherries. It’s a no-fry method that’s quick, simple, and irresistibly delicious!
Ingredients
For the Ice Cream Balls:
- 4 cups ice cream
For the Coating:
- 3 tablespoons unsalted butter
- 3 cups crushed cornflakes
- 1 teaspoon ground cinnamon
- 1 tablespoon granulated sugar
For Serving:
- Chocolate sauce
- Whipped cream
- Cherries
Instructions
- Form the Ice Cream Balls
Take one cup of ice cream and form it into a smooth ball using clean hands. Repeat with the remaining ice cream and place each ball on a plate in the freezer to harden. - Prepare the Coating
In a large skillet over medium heat, melt the butter. Once melted, add the crushed cornflakes and cinnamon. Stir constantly to coat the cornflakes evenly with butter and cinnamon. Cook for about 5 minutes, or until the cornflakes become fragrant and slightly deeper in color. - Add Sugar and Cool
Remove the skillet from the heat and stir in the sugar. Transfer the coating mixture to a shallow dish and allow it to cool completely. - Roll and Coat the Ice Cream Balls
Once the coating is cool, roll each ice cream ball in the mixture, pressing gently to make sure the crumbs stick evenly. Place each coated ball on a clean plate and return to the freezer for an additional 10–15 minutes until fully set. - Serve and Enjoy
Top the frozen ice cream balls with your favorite toppings such as chocolate sauce, whipped cream, and cherries. Serve immediately and enjoy your homemade fried ice cream!
Notes
- Work Quickly: Ice cream melts fast, so keep your freezer door closed as much as possible. Form a ball of ice cream, freeze it, then coat it.
- Use Gloves: Wearing gloves can help prevent your hands from getting sticky or too cold, and they also help you form neater ice cream balls.
- Rolling Pin Magic: For finer crumbs, crush the cornflakes using a rolling pin in a sealed plastic bag. This ensures a smoother and more even coating.
- Have Toppings Ready: Set out your favorite toppings—such as caramel sauce, chocolate sauce, or fruit sauce—before you pull the ice cream from the freezer to avoid melting.
- Try a Different Ice Cream Flavor: Vanilla is classic, but feel free to use flavors like cookies and cream, mint chocolate chip, or anything else you enjoy.
Nutrition
- Serving Size: 1 ice cream ball
- Calories: 380
- Sugar: 25g
- Sodium: 190mg
- Fat: 18g
- Saturated Fat: 9g
- Unsaturated Fat: 9g
- Trans Fat: 0g
- Carbohydrates: 49g
- Fiber: 2g
- Protein: 4g
- Cholesterol: 40mg

