
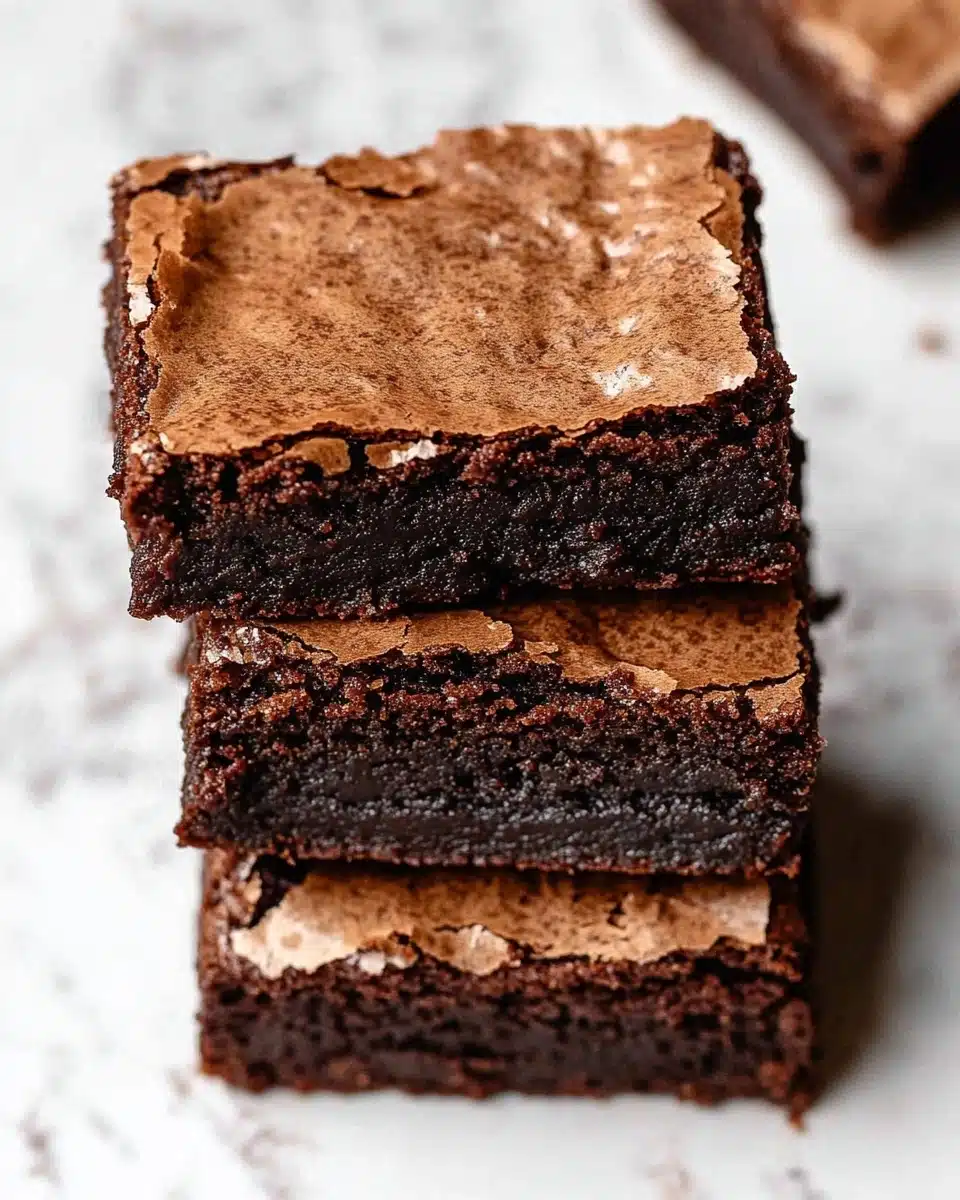
Get ready to fall in love at first bite—these Espresso Brownies are decadently fudgy and deeply chocolatey, with a rich kick of bold espresso that makes every square absolutely unforgettable.
Why You’ll Love This Recipe
- Irresistibly Fudgy: Thanks to browned butter and melted chocolate, these brownies deliver that perfect, sink-your-teeth-in density.
- Bold Espresso Flavor: A generous dose of espresso powder intensifies the chocolate and adds a grown-up richness you’ll adore.
- Simple, Pantry-Friendly Ingredients: Everything you need is easy to find, yet each ingredient truly shines in the final result.
- Perfect for Sharing (or Not!): Cut them into 16 bites for a crowd, or steal a giant square all for yourself—no judgment from this corner.

Ingredients You’ll Need
This Espresso Brownies recipe is proof that a few good-quality ingredients can add up to something spectacular. Each one plays a starring role, from the rich chocolate to the deep, aromatic espresso powder—so reach for your favorites!
- Unsalted Butter (cold): Browning the butter gives these brownies a complex, nutty flavor that sets them apart from the usual batch.
- Semi-sweet Chocolate Chips: They melt beautifully into the browned butter for a lusciously chocolaty base.
- All-purpose Flour: Just enough to hold everything together without making the brownies cakey.
- Dark Cocoa Powder: Gives extra rich chocolate flavor and a deep, dark color you’ll swoon over.
- Espresso Powder: The hero of this recipe—a little goes a long way to amplify the chocolate and add that addictive coffee note.
- Salt: Essential for balancing all the sweetness and highlighting those deep flavors.
- Granulated Sugar: Not just for sweetness—it helps create that shiny, irresistible crackled crust on top.
- Large Eggs: The secret to chewy, fudgy texture and structure.
- Vanilla Extract: Rounds out the chocolate and espresso, giving your brownies that signature bakery aroma.
Variations
What’s more fun than tailoring Espresso Brownies to your own cravings? There are so many ways to make these your own—just a tweak here or a sprinkle there, and you’ll have a completely new treat that’s still rich and fudgy every time.
- Mocha Madness: Swirl in some white chocolate chips or drizzle a coffee glaze over the top for an extra jolt.
- Nuts for Texture: Fold in a big handful of toasted walnuts or pecans for crunch in every bite.
- Gluten-Free Version: Swap the flour for a trusted gluten-free blend and enjoy these even if you’re avoiding gluten.
- Extra Dark and Decadent: Use bittersweet chocolate chips and black cocoa powder for an even deeper chocolate profile.
How to Make Espresso Brownies
Step 1: Prep Your Pan and Ingredients
Start by preheating your oven to 350°F (180°C) and lining a metal square 8×8 baking pan with parchment paper—don’t skip this part, it guarantees easy removal and crisp edges. Measure out all your ingredients; because things will move quickly once you start combining!
Step 2: Brown the Butter and Melt Chocolate
Browning butter transforms its flavor—melt it in a stainless steel pan over medium heat for 10–12 minutes, stirring occasionally. As soon as you smell that nutty aroma and see those golden brown (not black!) bits on the bottom, pour every last drop and scrap into a heatproof bowl. Immediately add the chocolate chips and stir until completely melted and glossy.
Step 3: Mix Dry Ingredients
In a separate bowl, whisk together the flour, dark cocoa powder, espresso powder, and salt. This helps distribute everything evenly—so you don’t end up with a pocket of baking magic in one unlucky corner.
Step 4: Whip the Eggs and Sugar
In your main mixing bowl, beat the eggs, granulated sugar, and vanilla on medium speed for 1–2 minutes. You’re looking for a pale, fluffy mixture; this step creates that delightful shiny crust on your Espresso Brownies.
Step 5: Combine and Fold
With your mixer on low, gently stream the warm butter-chocolate mixture into the eggs and sugar, mixing just until combined. Switch to a spatula and fold in the dry ingredients patiently—stop as soon as the batter looks uniform. Overmixing is the enemy of fudginess, so a lumpy streak or two is totally fine.
Step 6: Bake to Perfection
Pour the thick, glossy batter into your prepared pan and smooth the top. Bake for 30–40 minutes (or a bit longer depending on your pan) until a toothpick inserted in the middle comes out with just a few moist crumbs. Remember: a slightly underbaked center means ultra-fudgy Espresso Brownies.
Step 7: Cool, Slice & Enjoy
Let the brownies cool completely in the pan on a wire rack—if you try to cut them too soon, they’ll fall apart (trust me, I’ve tried!). Once cool, lift them out using the parchment, and with a hot, sharp knife, cut into 16 gorgeous squares, cleaning the blade between cuts for crisp, bakery-style edges.
Pro Tips for Making Espresso Brownies
- Brown Butter Watch: For maximum nutty flavor, don’t step away while the butter browns—those golden bits can burn quickly in the final moments.
- Espresso Intensity: Use a high-quality, finely ground espresso powder for bold but balanced coffee notes (you can dial it up or down to taste).
- Pan Perfection: A square metal 8×8 pan with sharp corners will give you even baking and those crave-worthy chewy edges—avoid glass or ceramic, as they can throw off your bake times.
- Clean Cut Technique: For those picture-perfect squares, heat your knife under hot water and wipe it between slices—your brownies will look straight from the bakery!
How to Serve Espresso Brownies

Garnishes
Espresso Brownies look stunning dusted with a little cocoa powder or a light sprinkle of flaky sea salt—which really makes the espresso pop! For special occasions, drizzle melted chocolate or a zigzag of coffee glaze over the top, or finish each square with an espresso bean for a playful, coffeehouse vibe.
Side Dishes
A cold glass of milk is timeless, but these brownies are also perfect next to a scoop of vanilla or salted caramel ice cream. For full coffee-shop feels, serve with a hot latte, cappuccino, or a chilled cold brew; the pairing truly spotlights that incredible espresso flavor.
Creative Ways to Present
Try stacking Espresso Brownies with layers of coffee whipped cream to build a stunning mini trifle, or cut them into bite-sized cubes and thread onto skewers with marshmallows for a playful party dessert. They also make fabulous edible gifts—wrap squares in parchment and tie with twine for an elegant, homemade touch.
Make Ahead and Storage
Storing Leftovers
Once cooled and sliced, Espresso Brownies keep well for 3–5 days in an airtight container at room temperature. Slip a piece of parchment or wax paper between layers to keep the edges from getting sticky, and store the container someplace cool and dry.
Freezing
If you’re planning ahead or need to hide your stash, these brownies freeze like a dream! Wrap each square tightly in plastic, then drop into a freezer-safe bag. They’ll stay fresh for up to 2 months—just thaw at room temperature before serving.
Reheating
For gooey, just-baked vibes, pop your Espresso Brownies in the microwave for 5–10 seconds. Warmth intensifies the chocolate and espresso aroma, making each bite even more heavenly (especially if you’re pairing with a scoop of ice cream!).
FAQs
-
Can I make Espresso Brownies without espresso powder?
Absolutely! While the espresso powder really amplifies the chocolate flavor and adds a special depth, you can leave it out if you’re sensitive to caffeine or want a classic chocolate brownie. They’ll still be delicious—just slightly less bold.
-
Why do I need to use a metal pan for these brownies?
Metal pans conduct heat much more efficiently than glass or ceramic, which means your Espresso Brownies will bake evenly with those chewy edges and shiny tops. Glass and ceramic bake more slowly and can cause overdone edges with undercooked centers.
-
How can I tell when the brownies are baked just right?
The best indicator is when a toothpick inserted into the center comes out with a few moist (but not wet) crumbs. If you like extra fudgy brownies, err on the side of underbaking by a few minutes. If the toothpick is clean, the brownies could be a bit dry.
-
Can I double the recipe for a bigger crowd?
Definitely—just double all ingredients and bake in a 9×13-inch metal pan. Keep an eye on the bake time; it may need a few extra minutes, but check with a toothpick as before and don’t overbake.
Final Thoughts
There’s something irresistible about a tray of Espresso Brownies—so much flavor in every fudgy, chocolate-packed square! Whether you’re baking for a gathering or just need a coffee-infused treat after a long day, don’t wait to give these brownies a try. I hope they bring as much joy to your kitchen as they do to mine!
Print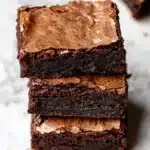
Espresso Brownies Recipe
- Prep Time: 20 minutes
- Cook Time: 40 minutes
- Total Time: 1 hour
- Yield: 16 squares
- Category: Dessert
- Method: Baking
- Cuisine: American
- Diet: Vegetarian
Description
Indulge in the rich and decadent flavors of Espresso Brownies, where the deep essence of espresso complements the intense chocolatey goodness. These brownies are a perfect treat for coffee lovers and chocolate enthusiasts alike.
Ingredients
Browned Butter Chocolate Mixture:
- 1 cup unsalted butter, cold
- 1 cup + 2 tbsp semi-sweet chocolate chips
Dry Ingredients:
- 1 cup all-purpose flour
- 3 tbsp dark cocoa powder
- 2 tbsp espresso powder
- 1/2 tsp salt
Wet Ingredients:
- 1 1/4 cups granulated sugar
- 3 large eggs
- 1/2 tbsp vanilla extract
Instructions
- Preheat and Prepare: Preheat the oven to 350°F/180°C. Line an 8×8 square baking pan with parchment paper.
- Brown the Butter: Brown the butter in a pan until nutty and fragrant. Add chocolate chips, melt, and set aside.
- Mix Dry Ingredients: Combine flour, cocoa, espresso, and salt in a bowl. Set aside.
- Beat Wet Ingredients: Whisk eggs, sugar, and vanilla until fluffy. Stream in the melted chocolate-butter mixture.
- Combine: Fold in the dry ingredients until just combined.
- Bake: Pour batter into the pan and bake for 30-40 minutes. Cool, cut into squares, and serve.
Notes
- Step-by-step process photos are provided above, in the body of this post.
- Measure your flour properly using the spoon-level method for best results.
- Use a square metal 8×8 baking pan for optimal baking results.
Nutrition
- Serving Size: 1 brownie square
- Calories: 250
- Sugar: 18g
- Sodium: 150mg
- Fat: 15g
- Saturated Fat: 9g
- Unsaturated Fat: 4g
- Trans Fat: 0g
- Carbohydrates: 28g
- Fiber: 2g
- Protein: 3g
- Cholesterol: 70mg


