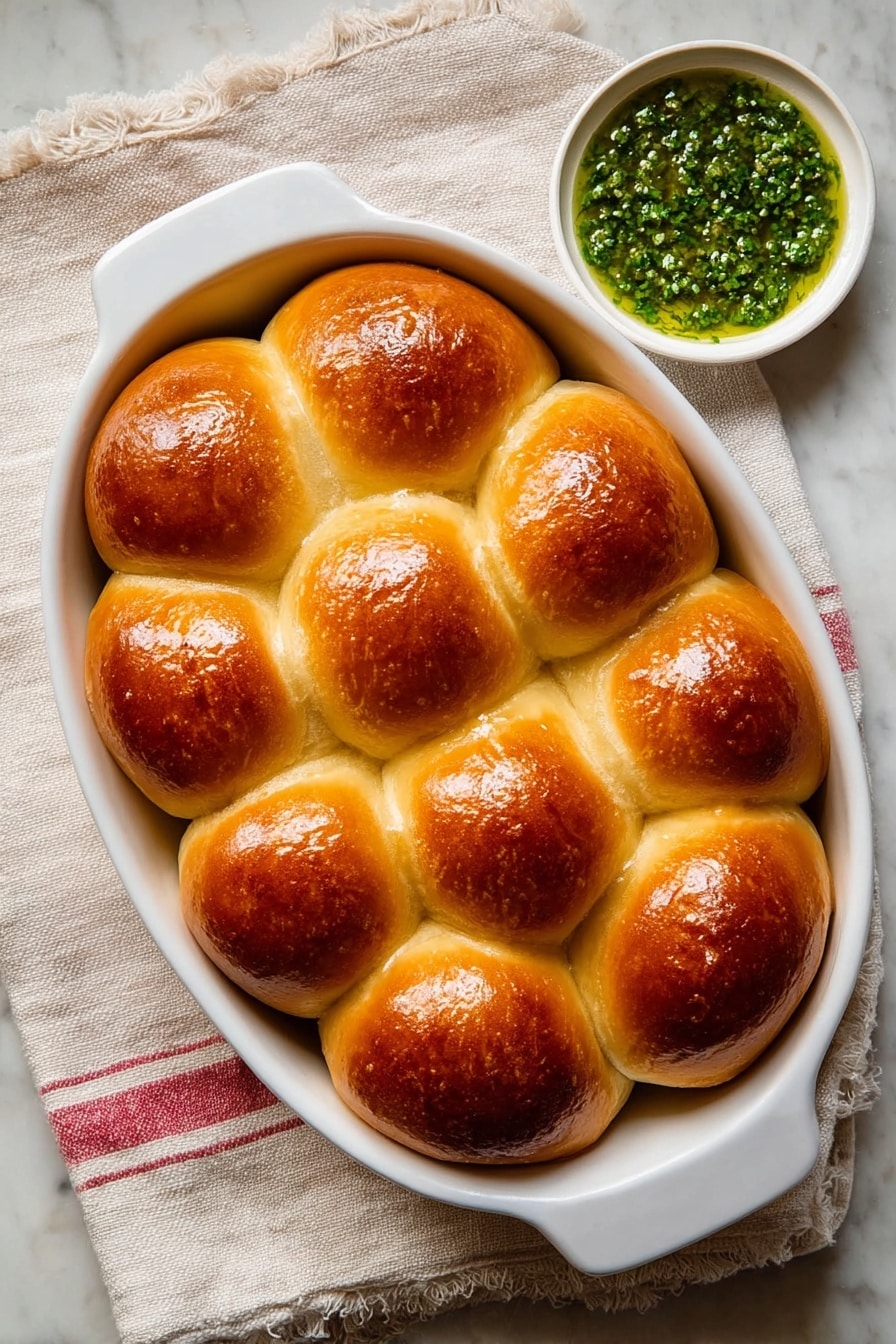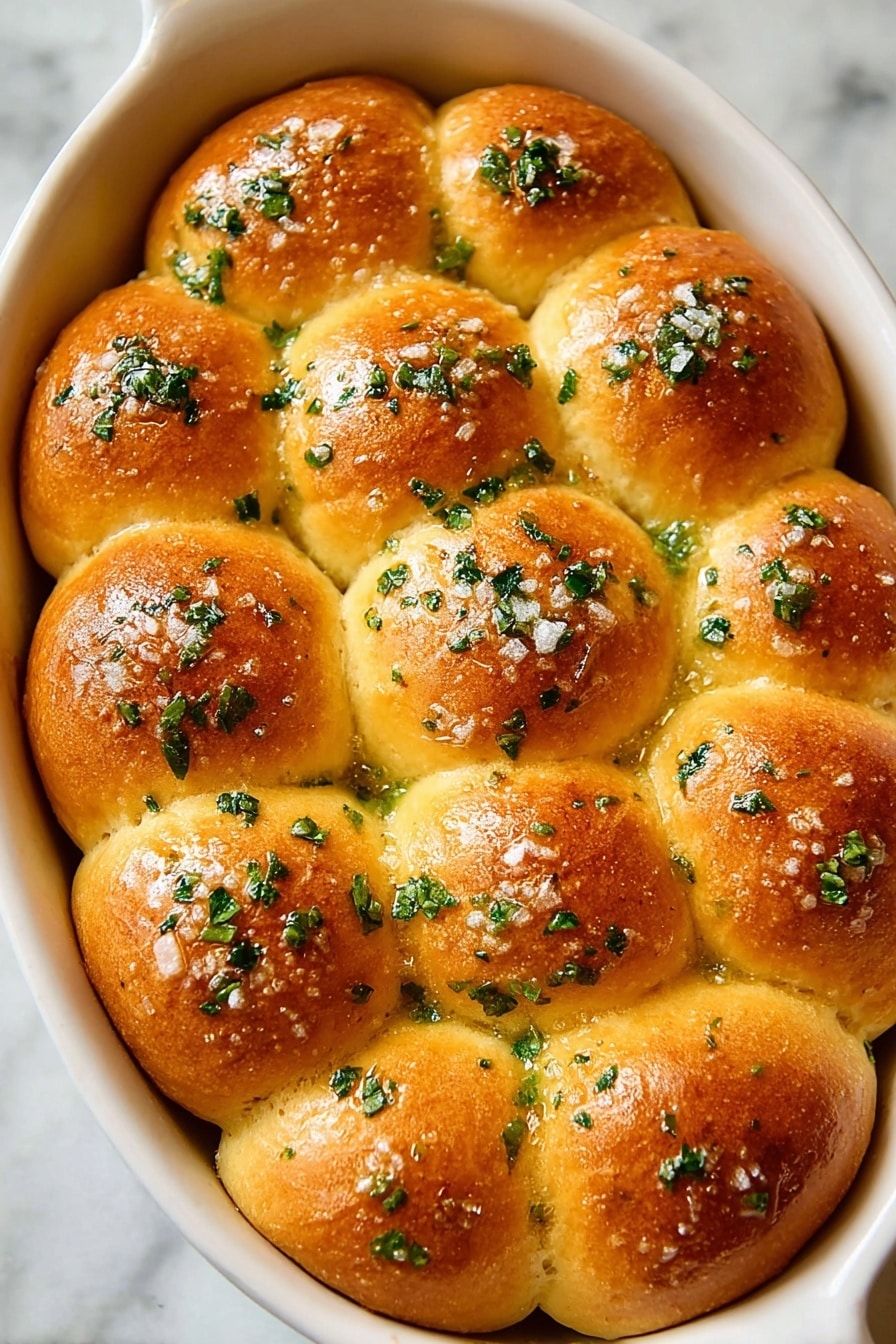
If you’re looking for a warm, soft, buttery bread to brighten up any dinner table, this Garlic Butter Dinner Rolls Recipe is exactly what you need. I absolutely love how these rolls come out—pillowy soft with a subtle garlic kick and fresh parsley to finish. Whether it’s a weeknight family dinner or a holiday feast, these rolls always steal the show and bring everyone back for seconds. Keep reading, I’m going to walk you through every step with tips to make sure your rolls turn out perfect!
Why You’ll Love This Recipe
- Soft and Fluffy Every Time: The yeast and warm milk work magic to make the dough perfect for tender rolls.
- Garlic Butter Finish: Brushing the rolls with homemade garlic butter right out of the oven takes the flavor next-level.
- Simple Ingredients: You likely have everything in your pantry already—no fancy stuff needed.
- Great for Any Occasion: Whether it’s a holiday dinner or casual family meal, these rolls fit right in.
Ingredients You’ll Need
You don’t need a long grocery list to make garlic butter dinner rolls, just a few staples that come together beautifully. I always recommend using fresh yeast if you can find it, but active dry yeast works perfectly too. Using bread flour helps get that ideal chewy texture, but in a pinch, all-purpose flour will do just fine.
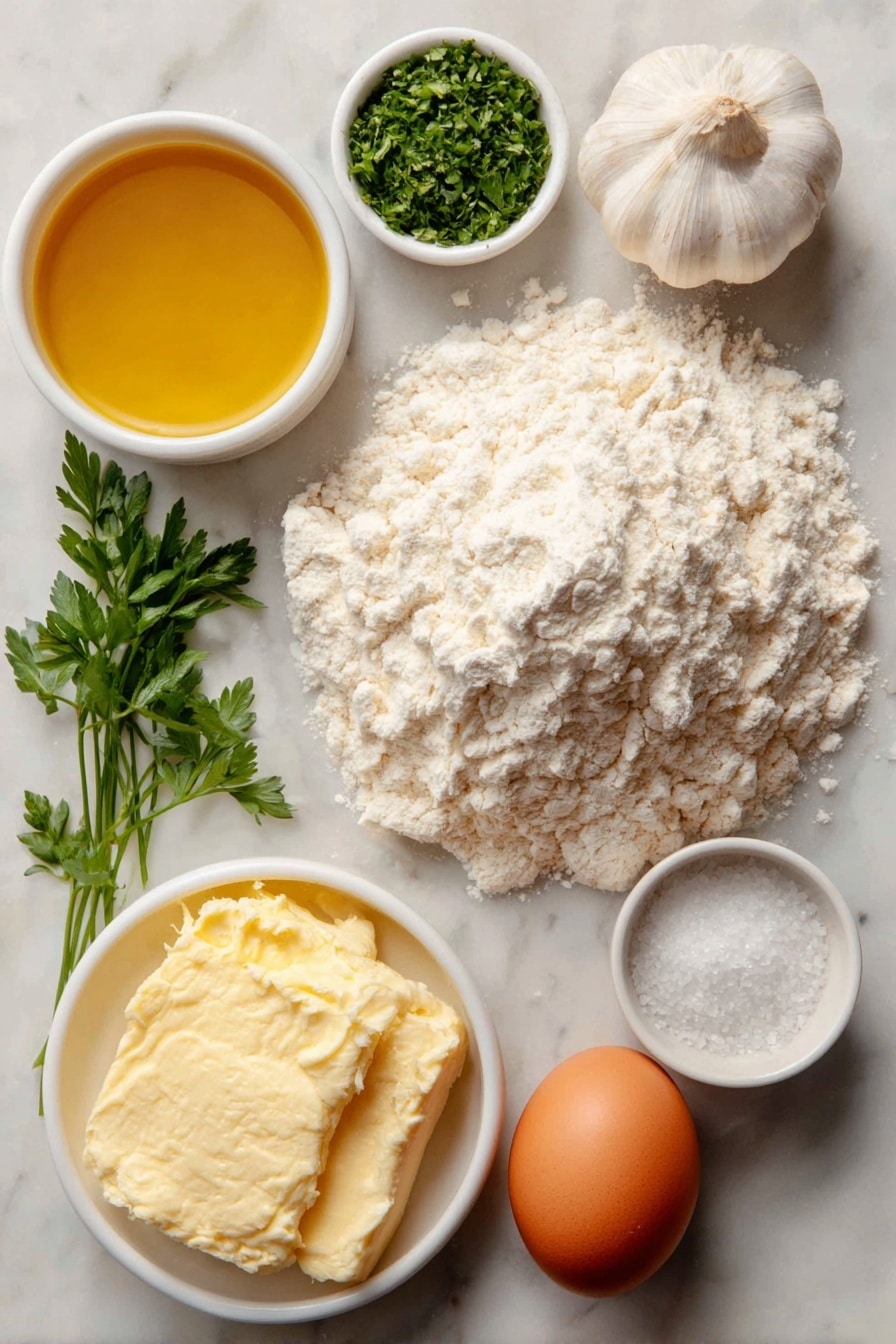
- Warm milk: Whole milk gives richness, but skimmed works if that’s what you have, just make sure it’s lukewarm or you risk killing the yeast.
- Sugar: Feeds the yeast and balances the savory flavors perfectly.
- Active dry yeast: This is the magic that makes your rolls rise beautifully and become fluffy.
- Vegetable oil: Keeps the dough tender—feel free to substitute with olive oil for a slight twist.
- Eggs: Adds structure and richness; one goes into the dough, and one is used for egg wash.
- Salt: Enhances flavor and controls yeast fermentation so you don’t get overly yeasty rolls.
- Bread Flour: Gives rolls that slightly chewy, soft texture that bread lovers crave.
- Butter: Melted and mixed with garlic for the finishing touch—trust me, this is the best part!
- Garlic clove: Freshly pressed for intense flavor that complements the buttery rolls.
- Fresh parsley: Chopped and sprinkled into butter for a pop of freshness and color.
Variations
I love that this garlic butter dinner rolls recipe is so customizable—once you nail down the basics, you can play around and make it your own. You’ll find these rolls shine bright with just the classic garlic and parsley, but don’t hesitate to experiment!
- Cheese stuffed rolls: One of my favorite tweaks is adding a small cube of mozzarella or cheddar in the center of each dough ball—melty cheese heaven!
- Herb variations: Sometimes I swap parsley for rosemary or thyme to change things up seasonally.
- Vegan option: Replace the egg with a flaxseed “egg” and use a plant-based butter to make this recipe vegan-friendly.
- Spicy twist: Adding a pinch of chili flakes to the garlic butter is a great way to give a subtle heat that wakes up your taste buds.
How to Make Garlic Butter Dinner Rolls Recipe
Step 1: Bloom the Yeast and Mix the Wet Ingredients
Start by scooping your warm milk into a small bowl (aim for about 110°F/43°C – warm to the touch but not hot). Sprinkle the sugar and yeast on top and stir lightly. Let it sit untouched for 5 minutes until it foams and bubbles—that’s the yeast waking up and getting ready to work its magic. Then stir in the vegetable oil, salt, and the egg. Mixing with a fork works great here.
Step 2: Combine with Flour and Knead
Once your yeast mix is bubbly, pour it over the flour in a large mixing bowl. Stir with a wooden spoon or spatula until a rough dough forms. Time to get hands-on! Dump the dough onto a floured surface and knead for about 8-10 minutes, until it’s smooth, elastic, and not sticky. If you have a stand mixer, use the dough hook—start slow for 1 minute, then crank to medium for 4 more minutes. Kneading well is key to those soft rolls.
Step 3: First Rise in a Warm Spot
Rub a clean bowl with a little vegetable oil and place the dough inside, turning it to coat all over. Cover with plastic wrap and a kitchen towel, then let it rest in a warm spot for about 1 to 1.5 hours. You’re looking for the dough to triple in size—this step really makes the dough airy and light. I like placing mine near a turned-off oven with the oven light on for gentle warmth.
Step 4: Shape the Rolls and Second Rise
When the dough is puffy and risen, punch it down gently and move it onto a floured surface. Divide the dough into 16 equal pieces—I usually eyeball, but using a kitchen scale works perfectly to keep sizes uniform. Roll each piece into a smooth ball and place into a buttered 9 x 13-inch baking pan, leaving about an inch between each. Cover with a clean tea towel and give them a second rise for 30 minutes. This step helps those rolls puff up beautifully and bake evenly.
Step 5: Egg Wash and Bake
Beat the remaining egg and gently brush it over the tops of the risen rolls. This not only helps the rolls get that gorgeous golden color but adds a slight sheen too. Bake in your preheated oven at 180°C (350°F) for 20-25 minutes. Keep an eye out—they’re done when golden brown and your kitchen smells irresistible.
Step 6: Garlic Butter Finish
While your rolls bake, melt the butter in a small saucepan or microwave. Add the pressed garlic and let it infuse the butter for a couple of minutes, then stir in the chopped parsley. As soon as your rolls come out of the oven, brush them generously with this garlic butter mixture. I promise, once you try this, you’ll see why it’s my family’s favorite step—it adds a punch of flavor and keeps the rolls moist.
Pro Tips for Making Garlic Butter Dinner Rolls Recipe
- Perfect Yeast Temperature: Make sure your milk is warm but not hot, testing with your wrist so it feels like a warm bath—it keeps yeast happy and active.
- Knead With Love: Don’t rush the kneading—it builds gluten and makes your rolls springy and fluffy.
- Even Sizes Matter: Try to keep the dough balls roughly the same size so they bake evenly and fit nicely in the pan.
- Butter Right Out of Oven: Brush rolls as soon as they come out; it locks in moisture and carries the garlic flavor best.
How to Serve Garlic Butter Dinner Rolls Recipe
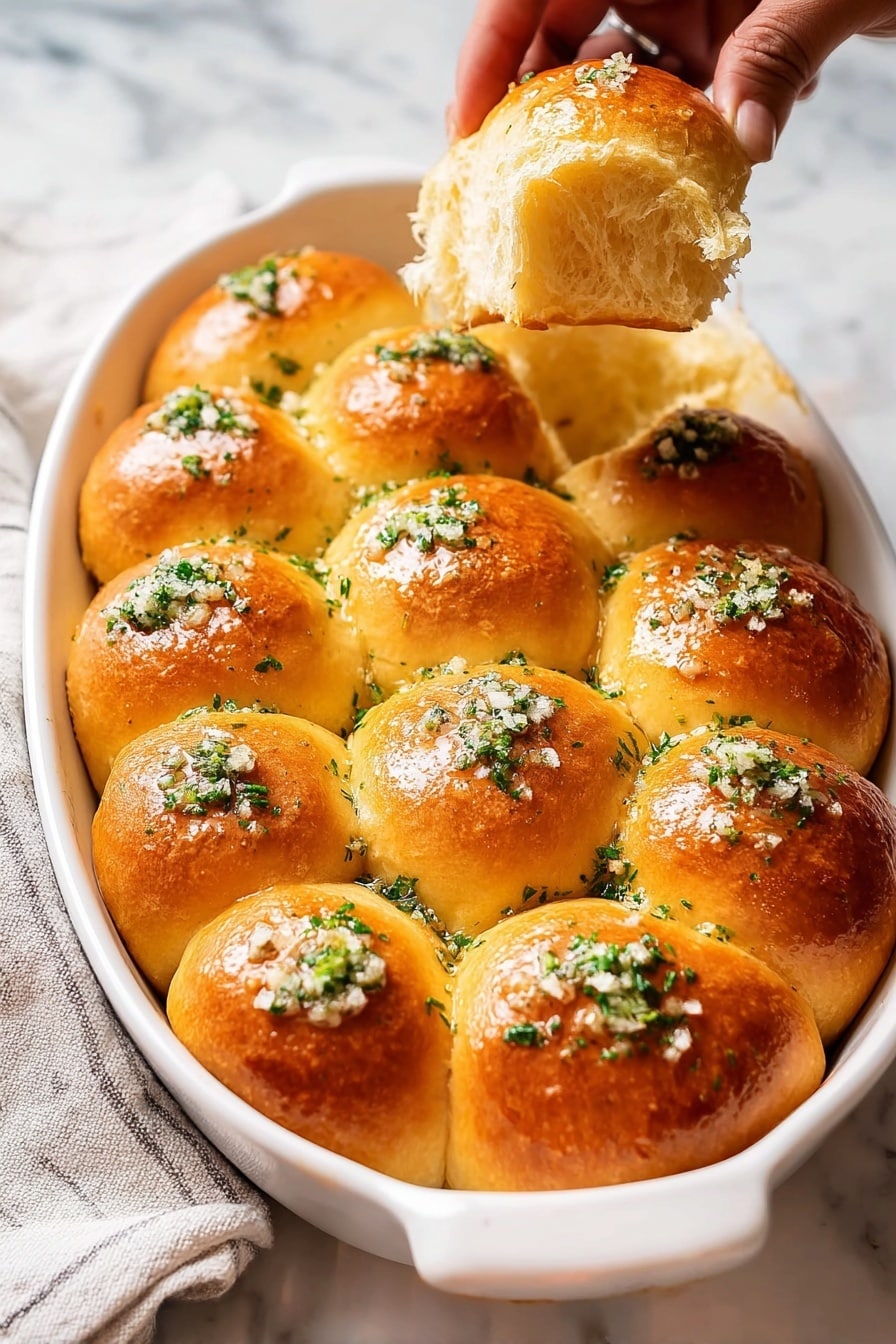
Garnishes
I love sprinkling a little extra chopped parsley or even some finely grated Parmesan right after brushing the garlic butter for a pretty, flavorful touch. Sometimes a tiny pinch of flaky sea salt adds a wonderful contrast to the sweet butter too.
Side Dishes
These rolls are perfect alongside hearty soups like tomato basil or creamy chicken stew. I also enjoy pairing them with roasted vegetables or classic dishes like meatloaf or holiday turkey dinners. Honestly, they’re a crowd-pleaser with almost everything!
Creative Ways to Present
For special family dinners or holidays, I like placing the rolls in a braided or circular pattern in the pan before their second rise for a beautiful pull-apart effect. You can also pop them in cute individual ramekins for a fun serving twist that guests love.
Make Ahead and Storage
Storing Leftovers
If you’re lucky enough to have leftovers, store them in an airtight container or resealable bag at room temperature for up to 2 days. I like to keep them wrapped up so they don’t dry out—these rolls lose their magic if left uncovered.
Freezing
To keep your garlic butter dinner rolls fresh long-term, freeze them before the garlic butter step in a sealed freezer bag. When you want to enjoy, thaw overnight at room temperature and then reheat with fresh garlic butter brushed on top for that just-baked flavor.
Reheating
For best results, pop your leftover rolls in a 350°F oven for 5-7 minutes with a foil tent to prevent over-browning. Then brush with fresh garlic butter and serve warm—trust me, you’ll hardly tell they’re reheated!
FAQs
-
Can I use all-purpose flour instead of bread flour?
Yes! All-purpose flour works just fine if bread flour isn’t on hand. Bread flour has more protein, which gives a chewier texture, but the rolls will still be delicious and soft with all-purpose flour.
-
How do I know if my yeast is still active?
After mixing the yeast, sugar, and warm milk, it should foam or bubble within 5 minutes. If you don’t see any froth, your yeast may be expired or the water temperature was too hot or cold. Fresh yeast is essential for fluffy rolls.
-
Can I make these rolls vegan?
Absolutely! Swap the egg in the dough and for the egg wash with a flaxseed “egg” (1 tbsp ground flaxseed + 3 tbsp water) and replace butter with a plant-based alternative. The rolls will still be tasty and fluffy.
-
What if I want garlic rolls without parsley?
You can simply omit the parsley and still have amazing garlic butter rolls. Or try other herbs like chives, oregano, or thyme depending on what you have or prefer.
-
How long do the rolls keep fresh?
Stored properly in an airtight container at room temperature, these rolls stay soft and fresh for about 2 days. After that, freezing is your best bet to preserve freshness.
Final Thoughts
Honestly, this Garlic Butter Dinner Rolls Recipe quickly became one of my all-time favorites. The combination of tender, fluffy bread with the rich garlic butter finish is such a crowd-pleaser—my family goes crazy for them every time. I used to struggle with rolls that ended up too dense or dry, but once I discovered the right kneading time and warm proofing spot, things changed forever. Give this recipe a shot—you’ll love how easy it is, and you might even find yourself making these rolls just because they brighten up the day. Happy baking!
Print
Garlic Butter Dinner Rolls Recipe
- Prep Time: 25 minutes
- Cook Time: 20 minutes
- Total Time: 1 hour 45 minutes
- Yield: 16 dinner rolls
- Category: Bread
- Method: Baking
- Cuisine: American
Description
These Garlic Butter Dinner Rolls are soft, fluffy, and infused with rich garlic and herb butter. Perfectly golden and tender, they make an ideal accompaniment to any meal or a delicious snack on their own. Easy to prepare with simple ingredients including yeast, butter, garlic, and fresh parsley, these rolls are sure to delight with their buttery aroma and mouthwatering flavor.
Ingredients
Dough Ingredients
- 220ml / 1 cup warm milk (whole or skimmed)
- 1½ tsp sugar
- 7g / 1 tbsp active dry yeast
- 3 tbsp vegetable oil
- 1 large egg
- ½ tsp salt
- 400g / 3 cups bread flour (or all-purpose flour)
Topping Ingredients
- 1 egg (for brushing)
- 1 tbsp butter (melted)
- 1 clove garlic (pressed)
- 1 tbsp fresh parsley (chopped)
Instructions
- Activate the Yeast: In a small bowl, combine warm milk, yeast, and sugar. Let the mixture stand for 5 minutes until the yeast blooms and becomes frothy, indicating it’s active.
- Mix Wet Ingredients: Add vegetable oil, salt, and one large egg to the yeast mixture. Mix well with a fork to combine all wet ingredients thoroughly.
- Form and Knead Dough: Pour the wet mixture into the bowl with flour and stir until a rough dough forms. Transfer the dough onto a floured surface and knead for 8-10 minutes until smooth and elastic. Alternatively, use a stand mixer with a dough hook: knead on low speed for 1 minute, then medium speed for 4 more minutes.
- First Rise: Lightly oil a clean bowl and place the dough inside. Cover with plastic wrap and a towel, then let it rise in a warm place for 1 to 1.5 hours, or until the dough has tripled in volume. During this time, preheat the oven to 180°C (350°F).
- Shape Rolls: Punch down the dough and transfer it back to a floured surface. Divide the dough into 16 equal pieces. Roll each piece into a ball and place them 1 inch apart in a well-buttered 9×13 inch baking pan. Cover with a tea towel and allow the rolls to rise a second time for 30 minutes.
- Prepare for Baking: Brush the tops of the risen rolls with a beaten egg to give them a golden, shiny crust when baked.
- Bake Rolls: Bake in the preheated oven for 20-25 minutes or until the rolls turn golden brown and sound hollow when tapped.
- Make Garlic Butter: While rolls are baking, melt 1 tablespoon of butter and mix in the pressed garlic and chopped fresh parsley to create a flavorful garlic herb butter.
- Finish with Garlic Butter: Once the rolls come out of the oven, immediately brush them generously with the garlic butter mixture to infuse flavor and add moisture.
Notes
- For best results, ensure the milk is warm but not hot to avoid killing the yeast.
- Weighing the dough portions helps keep rolls uniform in size, but eyeballing portions works well too.
- Brush the rolls immediately after baking for the garlic butter to absorb into the rolls while warm.
- These rolls are perfect served fresh but can be reheated wrapped in foil for a few minutes in the oven.
- Use fresh parsley for the brightest flavor, or substitute with dried herbs if unavailable.
Nutrition
- Serving Size: 1 roll
- Calories: 116 kcal
- Sugar: 1 g
- Sodium: 92 mg
- Fat: 2 g
- Saturated Fat: 1 g
- Unsaturated Fat: 1.3 g
- Trans Fat: 0.03 g
- Carbohydrates: 19 g
- Fiber: 1 g
- Protein: 4 g
- Cholesterol: 24 mg

