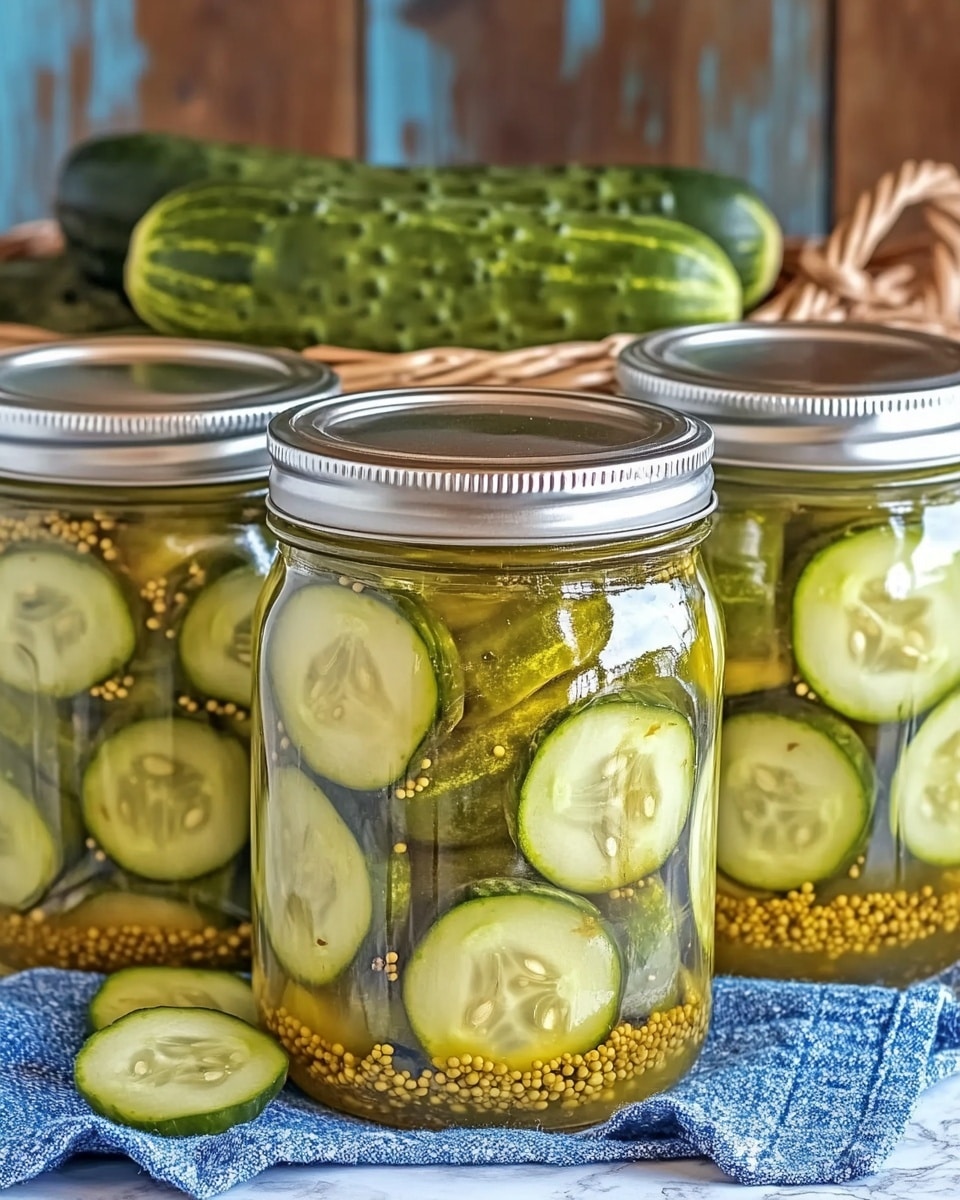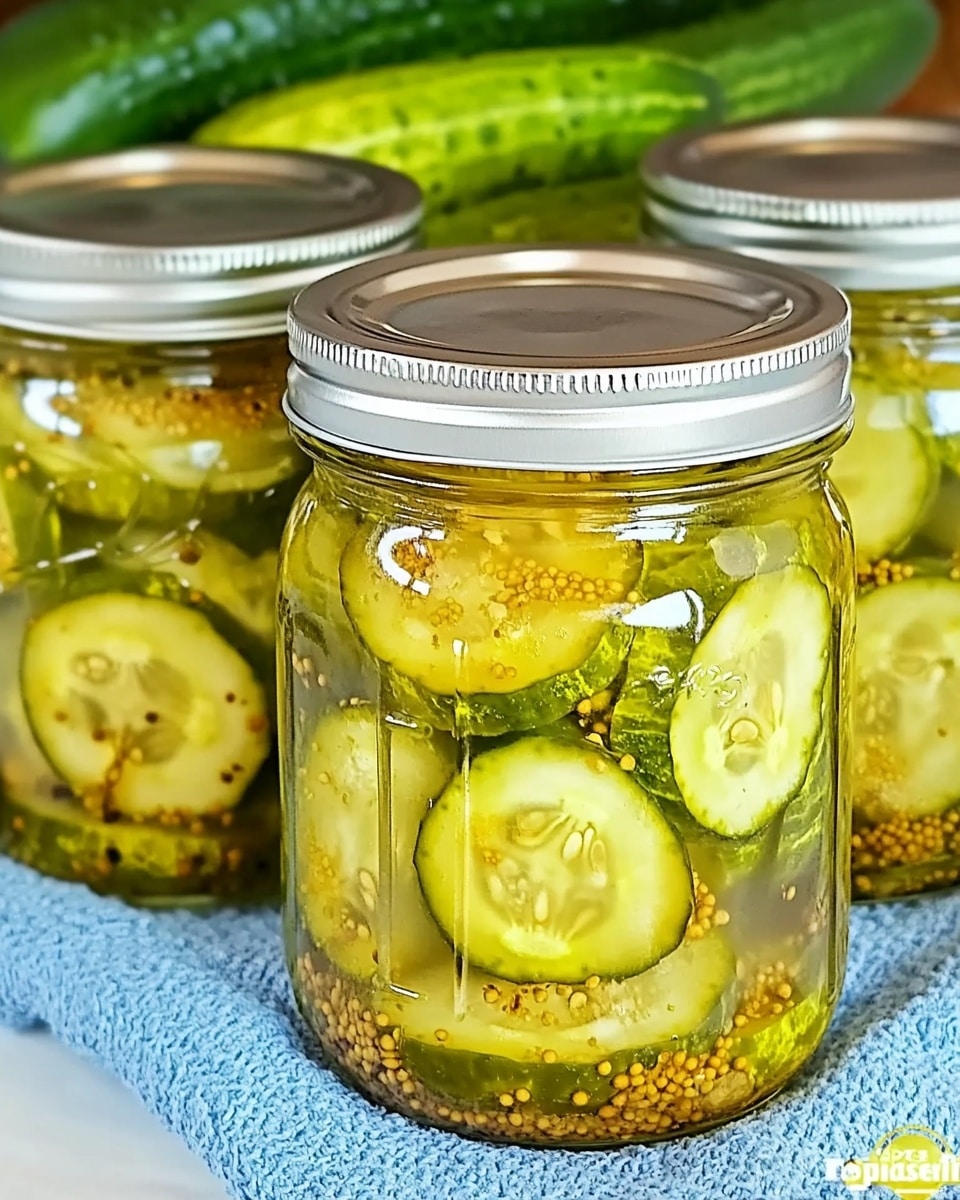
I absolutely love sharing Granny’s Bread and Butter Pickles Recipe because it’s a treasure from my family kitchen that brings a burst of tangy sweetness to every bite. These pickles aren’t just about flavor—they have that perfect crunch and nostalgic appeal that take me right back to summer days spent canning jars on the porch with my grandma.
You’ll find that this classic recipe is wonderfully versatile, great for jazzing up sandwiches, burgers, or even just snacking straight from the jar. If you’re looking to dive into a genuinely rewarding pickling project, Granny’s Bread and Butter Pickles Recipe is a heartfelt keeper you’ll want to make year after year.
Why You’ll Love This Recipe
- Authentic Flavor: This is a time-tested recipe straight from Granny’s kitchen, full of that perfect balance of sweet and tangy.
- Perfect Crunch: The salt and ice soak step keeps cucumbers delightfully crisp, a texture that’s hard to beat in pickles.
- Long-Lasting Pantry Staple: Once properly canned, these pickles are shelf-stable and develop flavor over weeks, perfect for gifting or meal prepping.
- Straightforward Process: Even if you’re new to canning, this recipe walks you through every step for consistent success.
Ingredients You’ll Need
Each ingredient in Granny’s Bread and Butter Pickles Recipe brings something special to the table. From the tang of apple cider vinegar to the aromatic mustard seeds, these flavors combine beautifully to create that classic pickle taste you’ll crave.
- Pickling Cucumbers: Choose fresh, firm cucumbers to ensure that crisp crunch everyone loves.
- Onions: They add a mild sweetness and texture contrast; thin slicing helps them pickle evenly.
- Pickling Salt: Essential for drawing out moisture and keeping pickles crisp without the bitterness table salt can cause.
- Crushed Ice / Ice Cubes: This helps maintain the cucumbers’ crunch during the salting process.
- Sugar: Provides the signature sweetness that balances the tangy vinegar.
- Yellow Mustard Seed: Adds a subtle spice and texture that’s just right for bread and butter pickles.
- Celery Seed: Brings earthiness and depth to the brine.
- Ground Turmeric: Gives the pickles a lovely golden color and a mild, warm flavor.
- Black Peppercorn: Whole peppercorns offer gentle heat and aromatic notes during pickling.
- Apple Cider Vinegar (5% acidity): The heart of the tang, you can substitute white vinegar, but cider vinegar adds more character.
Variations
I love to experiment a bit depending on the season or what’s in my pantry, and you might find a few twists that make this recipe your own. Feel free to tweak the spices or sugar level to suit your taste—you can make it more tangy or sweeter, depending on what you prefer.
- Spice it up: I sometimes add a pinch of crushed red pepper flakes for a little heat, and it really livens up the classic recipe.
- Low-sugar option: When I want something lighter, I reduce the sugar slightly and add a splash of honey for natural sweetness.
- Vinegar swap: Using white vinegar instead of apple cider vinegar gives a sharper tang and keeps the color a bit paler.
- Added crunch: Adding sliced bell peppers along with cucumbers can introduce a fun, crunchy texture.
How to Make Granny’s Bread and Butter Pickles Recipe
Step 1: Prep Your Cucumbers and Onions for Crunch
Start by washing your cucumbers thoroughly, then slice them into 1/4-inch discs—don’t forget to discard those tough ends. Peel and thinly slice your onions. Toss both into a large bowl, sprinkle with the pickling salt, then cover with crushed ice and water. This soak is key; it draws out excess moisture, locking in that satisfying crunch. Let them sit for about 3 hours—this step is definitely worth the patience.
Step 2: Prepare Your Canning Gear
While your cucumbers and onions are soaking, get your jars, lids, and tools sparkling clean with hot soapy water. Rinse really well to avoid any soap residue, then set them out to air dry on a clean towel. Place your jars in a water bath canner with enough water to cover them and heat to about 180°F for 10 minutes—this keeps everything warm and ready for sealing.
Step 3: Make the Brine and Combine
Pour your sugar, mustard seed, celery seed, turmeric, peppercorns, and apple cider vinegar into a large pot. Heat just to a boil, stirring to dissolve the sugar. Drain and rinse your cucumbers and onions well to remove most of the salt and ice. Add them into the hot brine and bring everything back to a boil—this cooks the pickles slightly and infuses them with flavor.
Step 4: Pack and Can Your Pickles
Lay a kitchen towel on your counter and, using a jar lifter, carefully remove one hot jar from the canner. Use a canning funnel and ladle to loosely pack cucumbers and onions into the jar, then pour the boiling brine over, leaving about 1/2 inch of headspace. Run a bubble popper or a thin spatula around the jar to release trapped air bubbles—this step helps create a good seal. Wipe the rims clean, place lids on, and screw on bands fingertip tight. Return jars to the canner and repeat with the rest.
Step 5: Process the Jars
Adjust water level so it’s 2 inches above jars, cover the canner, and bring it to a rolling boil. Process the pickles for 10 minutes if you’re at an altitude below 1,000 feet (adjust processing time if necessary depending on your altitude). When time’s up, turn off heat, remove the lid carefully to avoid steam burns, and let the canner settle for about 5 minutes before removing jars.
Step 6: Cool and Store Your Pickles
Place the hot jars upright on a dry towel and don’t tighten bands or check seals just yet. Let them cool undisturbed for 12-24 hours. When cool, test the lids by pressing the center—if it doesn’t pop, you’re good to go! Remove the bands, wash the jars, label and date them, then tuck into a cool, dark place. The flavor improves over 4-5 weeks, so try to wait before opening if you can.
Pro Tips for Making Granny’s Bread and Butter Pickles Recipe
- Don’t Skip the Ice Soak: I learned this the hard way—without it, the pickles end up soft and soggy. The ice soak keeps them satisfyingly crisp.
- Use a Canning Funnel: It makes filling jars so much easier and helps keep rims clean to avoid sealing issues.
- Label Your Jars: I like to write the date and recipe name right on the jar; it saves confusion once your pantry fills up.
- Adjust Processing Time for Altitude: I used to overlook this and got inconsistent seals—good to double-check your altitude and modify timing accordingly.
How to Serve Granny’s Bread and Butter Pickles Recipe
Garnishes
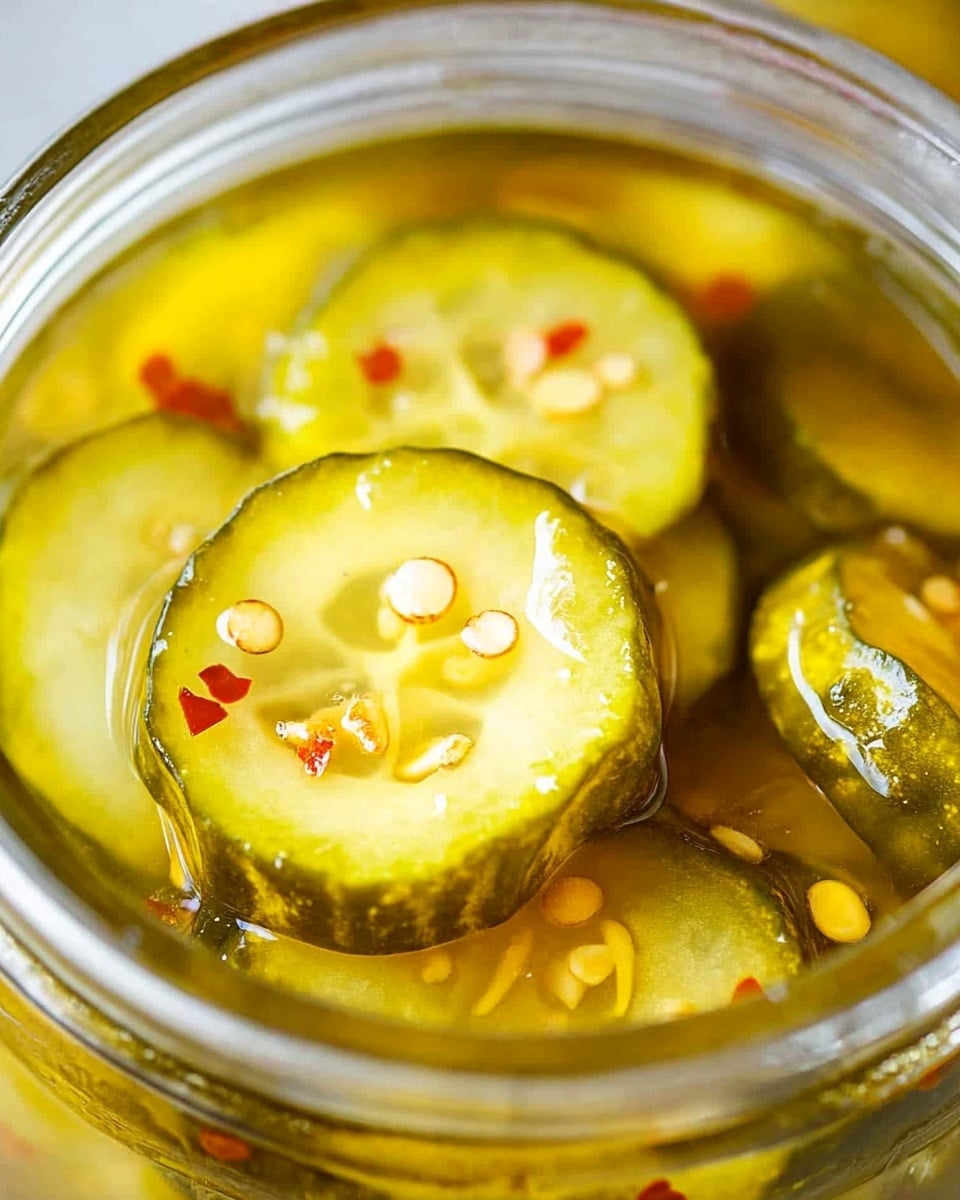
Honestly, I usually enjoy these pickles as they are straight from the jar, but if you want to garnish for serving, a sprinkle of fresh dill or a few extra mustard seeds adds a lovely aroma. Sometimes, adding thin slices of fresh chili peppers gives a colorful, zesty kick that’s a fun surprise.
Side Dishes
Granny’s Bread and Butter Pickles go wonderfully alongside classic deli sandwiches, grilled burgers, or even fried chicken. I also love pairing them with sharp cheddar cheese and crackers for an easy appetizer tray that always gets compliments.
Creative Ways to Present
For special occasions, I like to serve these pickles in small, decorative jars tied with twine and a handwritten tag. They make charming party favors or hostess gifts, and they’re a conversation starter as people always ask about the recipe.
Make Ahead and Storage
Storing Leftovers
Once opened, store your pickles in the refrigerator where they keep well for up to a month. I always use clean utensils when grabbing pickles from the jar to prevent any contamination that could shorten their life.
Freezing
Freezing pickles isn’t something I recommend because it tends to break down their texture, making them mushy. Stick to refrigeration and proper canning for best results.
Reheating
Since these pickles are eaten cold or at room temperature, reheating isn’t necessary. Just bring them out from the fridge and serve as a crisp, flavorful accompaniment.
FAQs
-
Can I use regular table salt instead of pickling salt?
It’s best to use pickling or canning salt because it doesn’t contain additives like iodine or anti-caking agents, which can cloud the brine or affect the pickles’ texture. Using pickling salt helps keep your bread and butter pickles clear and crisp.
-
How long should I wait before eating the pickles?
Although you can taste them earlier, I suggest waiting at least 4 to 5 weeks for the best flavor development. This patience rewards you with pickles that are perfectly balanced in sweetness and tang.
-
What if some jars don’t seal?
If the lids didn’t seal, don’t panic—simply refrigerate those jars and consume within a week. You can reprocess with new lids if you want to store them longer, just follow safe canning guidelines closely.
-
Is this recipe safe for canning beginners?
Absolutely! The instructions are clear and the Ball Blue Book tested this recipe for safety. Just be sure to follow the processing times and your altitude adjustments carefully, and you’ll have no trouble making delicious, safe pickles.
Final Thoughts
Granny’s Bread and Butter Pickles Recipe truly feels like a warm hug from the past each time I prepare it. Sharing this recipe has become one of my favorite ways to bring joy to my kitchen and those I love. If you’re ready to make pickles with heart and tradition, trust me—you won’t regret giving this recipe a try. It’s comforting, delicious, and a wonderful introduction to the art of canning.
Print
Granny’s Bread and Butter Pickles Recipe
- Prep Time: 3 hours 30 minutes
- Cook Time: 10 minutes
- Total Time: 3 hours 40 minutes
- Yield: About 5 pints (approximately 80 servings of 1 ounce each)
- Category: Pickling
- Method: Water Bath Canning
- Cuisine: American
Description
Granny’s Bread and Butter Pickles are a classic homemade recipe featuring crisp cucumbers and onions in a sweet and tangy pickling brine. These traditional pickles are perfect for preserving summer cucumbers and providing a flavorful accompaniment to sandwiches and snacks. The recipe utilizes safe water bath canning techniques to ensure long-lasting shelf stability.
Ingredients
Vegetables
- 3 pounds pickling cucumbers
- 1 pound onions
Pickling Ingredients
- 1/4 cup canning or pickling salt
- 2 quarts crushed ice or ice cubes and water
- 1 cup sugar
- 1 tablespoon yellow mustard seed
- 1 teaspoon celery seed
- 1 teaspoon ground turmeric
- 1/2 teaspoon black peppercorn
- 3 cups apple cider vinegar (5% acidity) or white vinegar
Instructions
- Prepare the cucumbers and onions: Wash the cucumbers thoroughly, then slice them into 1/4-inch thick discs, discarding the ends. Peel and thinly slice the onions. Place the sliced cucumbers and onions into a large bowl.
- Salt and soak: Sprinkle the canning or pickling salt evenly over the cucumbers and onions. Cover the mixture with crushed ice or ice cubes and water, then let it stand for 3 hours to draw out excess moisture and crisp the vegetables.
- Prepare canning equipment: Wash jars, lids, screw bands, and canning tools in hot soapy water, then rinse thoroughly and air dry them on a clean kitchen towel. Place the jar rack into a water bath canner, add jars, fill with water to cover jars, bring to a simmer at 180°F, and keep jars hot for 10 minutes.
- Make the pickling brine: In a large pot, combine sugar, yellow mustard seed, celery seed, ground turmeric, black peppercorns, and vinegar. Heat the mixture just to a boil, stirring to dissolve the sugar.
- Drain and rinse vegetables: Drain the cucumber and onion mixture from the ice water and rinse under fresh water. Add these drained vegetables to the boiling brine in the pot and return the mixture to a boil. Reduce heat and keep warm while filling jars.
- Fill jars with pickles: Place a kitchen towel on the counter. Using a jar lifter, remove a hot jar from the canner, drain the water, and set on the towel. Using a canning funnel and ladle, loosely pack the hot cucumber and onion mixture into the jar. Ladle hot brine over the pickles, maintaining a 1/2 inch headspace.
- Remove air bubbles and seal jars: Use a bubble popper or non-metallic spatula to release any trapped air bubbles inside the jar. Ensure all pickles are fully submerged under the brine. Wipe the jar rim clean, center a lid on the jar, and screw on the band fingertip tight.
- Process jars in water bath: Using the jar lifter, place the filled jars back into the canner. Repeat for remaining jars. Ensure the water level is 2 inches above jar tops. Cover the canner and bring water to a full boil over high heat. Process pickles for 10 minutes for altitudes under 1,000 feet, adjusting time for higher altitudes if needed.
- Cool and seal jars: After processing, turn off heat, remove canner lid (tilt away from you to avoid steam), and let canner cool and settle for about 5 minutes. Remove jars and place upright on a dry towel. Do not tighten bands or disturb jars. Let jars cool undisturbed for 12 to 24 hours.
- Check seals and store: After cooling, press the center of each lid to check seal—lid should not flex up and down. If unsealed, refrigerate and consume within one week. Remove screw bands from sealed jars, clean jars, label with date, and store in a cool, dark place. Allow 4-5 weeks for flavors to develop. Use within one year.
Notes
- This recipe is a tested safe canning procedure from the Ball Blue Book Guide to Preserving. Altering ingredients or methods may affect safety.
- Processing times are for altitudes under 1,000 feet. For altitudes between 1,001 – 6,000 feet, increase processing to 15 minutes; above 6,000 feet, process for 20 minutes.
- If you have urgent canning questions, contact your local extension office for expert guidance.
Nutrition
- Serving Size: 1 ounce
- Calories: 5 kcal
- Sugar: 1 g
- Sodium: 245 mg
- Fat: 0 g
- Saturated Fat: 0 g
- Unsaturated Fat: 0 g
- Trans Fat: 0 g
- Carbohydrates: 1 g
- Fiber: 1 g
- Protein: 0.2 g
- Cholesterol: 0 mg

