If you’re on the hunt for a spooky and irresistibly cute Halloween treat, then I have just the thing for you! This Halloween Frankenstein Pudding Pops Recipe is seriously fan-freaking-tastic, combining creamy, minty goodness with a fun Frankenstein twist that kids and adults both adore. Stick with me because I’m going to share all my personal tips and tricks so your pops turn out perfectly every time.
Why You’ll Love This Recipe
- Super Fun Presentation: The Frankenstein design makes these pudding pops a total showstopper at any Halloween party.
- Kid-Approved Flavor: Creamy pudding with a hint of mint is something both kids and adults will enjoy licking off the stick.
- Simple to Make: No scary steps here — you’ll whip these up in no time, I promise.
- Great for Parties or Treat Bags: These pops travel well and can be made ahead, making your Halloween stress-free.
Ingredients You’ll Need
All the ingredients for this Halloween Frankenstein Pudding Pops Recipe are straightforward but chosen carefully so the flavors and textures really pop — pun intended! Make sure you pick pudding with a flavor that pairs nicely with green food coloring (I like vanilla).
- Instant pudding mix: Vanilla or pistachio work best for that bright green base and smooth texture.
- Milk: Whole milk will give the richest pops, but you can use 2% if you want to lighten it up a bit.
- Green food coloring: Gel colors give a deeper hue without watering down the pudding.
- Chocolate chips or candy melts: These become Frankenstein’s iconic bolts and stitches.
- Popsicle molds and sticks: Sturdy molds help you shape perfect pops and keep them from falling apart.
Variations
One of the fun things about the Halloween Frankenstein Pudding Pops Recipe is how easy it is to make your own twist. I like to experiment with flavor infusions or swap toppings depending on who’s eating them.
- Mint chocolate variation: Adding a drop of mint extract kicked the flavor up a notch for me and gave it that classic “monster” vibe.
- Dairy-free version: I’ve swapped the milk for almond milk and used dairy-free pudding mix with success—just make sure everything is fully chilled so it sticks.
- Decorative tweaks: Instead of classic bolts, sometimes I use mini pretzel sticks and melt chocolate to pipe Frankenstein’s stitches — extra creepy and fun.
How to Make Halloween Frankenstein Pudding Pops Recipe
Step 1: Whisk Up the Pudding
To start, whisk your instant pudding mix with milk according to the package instructions. This usually takes about 2 minutes. Once smooth, add green food coloring a drop at a time until you get that perfect Frankenstein-green. Trust me, it’s easier to add more slowly than fix if you add too much.
Step 2: Pour and Freeze the Pops
Pour the green pudding mixture carefully into your popsicle molds, leaving a little space at the top, then insert the sticks. Freeze for at least 4 hours or overnight. I like to cover the molds with plastic wrap to avoid any freezer odors.
Step 3: Add Frankenstein Details
Once frozen solid, it’s time to make these pops truly Frankenstein-y. Use melted chocolate chips or candy melts to pipe lines for his stitches and stick small pretzel or candy “bolts” on the sides of the pops with a little melted chocolate acting like glue.
Step 4: Serve and Enjoy
I usually pop these out onto a chilled plate and hand them out right away—watch how excited everyone gets to see their cute little monsters!
Pro Tips for Making Halloween Frankenstein Pudding Pops Recipe
- Keep It Cold: I learned the hard way that if the pudding isn’t cold enough before you fill the molds, the pops won’t freeze correctly, so chill your mixture in the fridge for 30 minutes before pouring.
- Use Gel Colors: Liquid green food coloring can water down the pudding, but gel colors keep it vibrant without affecting texture—this is my secret to the perfect Frankenstein green.
- Decorate Carefully: I find using a toothpick to apply the melted chocolate decorations helps keep lines thin and clean for the best Frankenstein look.
- Popsicle Stick Placement: Insert your sticks slightly off-center, I’ve noticed it makes decorating easier and keeps the bolts from breaking off.
How to Serve Halloween Frankenstein Pudding Pops Recipe
Garnishes
I love placing these Frankenstein pudding pops on a tray of crushed Oreo “dirt” or green shredded coconut “grass” to make them look like they’re rising from a spooky graveyard. Adding edible candy eyes right on the pops adds to the fun, but I usually keep it simple with just chocolate stitch details and pretzel bolts.
Side Dishes
Pair these pudding pops with some classic Halloween cookies, like spiderweb sugar cookies, or a bowl of candy corn. I’ve also served them alongside warm apple cider—it’s a crowd-pleaser!
Creative Ways to Present
Once, at a Halloween party, I lined up the Frankenstein pudding pops inside a hollowed-out pumpkin filled with ice. Everyone enjoyed grabbing one from the “franken-lair” — it really elevated the vibe and was a total hit!
Make Ahead and Storage
Storing Leftovers
If you have any pops left over, store them individually wrapped in plastic wrap or in an airtight container in the freezer. This keeps them fresh and prevents freezer burn — trust me, I always keep some extras for later cravings!
Freezing
Freezing is key for this recipe. I always recommend freezing the pops for at least 4 hours, ideally overnight, for the best texture. I’ve even made these a day or two in advance—makes Halloween prep easier.
Reheating
Since these pudding pops are meant to be enjoyed frozen, reheating isn’t really necessary. But if they get too hard, just let them sit at room temperature for 5 minutes to soften before serving—they’ll be perfectly creamy again.
FAQs
-
Can I use homemade pudding for this recipe?
Absolutely! Homemade pudding is delicious, but it should be thick enough to hold its shape in the pops. If your pudding is too thin, consider chilling it longer or adding a little cornstarch to thicken before freezing.
-
What’s the best way to remove the pudding pops from molds?
I like to run the molds under warm water for 10-15 seconds to loosen the edges, then gently wiggle the pops free. Be patient—pulling too hard can cause the pops to crack.
-
Can I make these pudding pops without food coloring?
You can, but the bright Frankenstein green is part of the fun! If you prefer to skip food coloring, try using pistachio flavored pudding for a natural green color.
-
Are these pudding pops kid-friendly?
Definitely! Kids love the look and the creamy texture. Just supervise little ones when adding the decorative bolts or chocolate details to avoid any choking hazards.
Final Thoughts
You know, I absolutely love how this Halloween Frankenstein Pudding Pops Recipe manages to be festive, delicious, and super easy all at once. The first time I tried making these with my kiddos, their faces lit up, and now it’s become a Halloween tradition in our house. I can’t recommend it enough if you want a treat that’s more memorable than just candy. So go ahead and give it a try—franken-fans everywhere will thank you!
Print
Halloween Frankenstein Pudding Pops Recipe
- Prep Time: 60 minutes
- Cook Time: 15 minutes
- Total Time: 75 minutes
- Yield: 20 cupcakes
- Category: Dessert
- Method: Baking
- Cuisine: American
Description
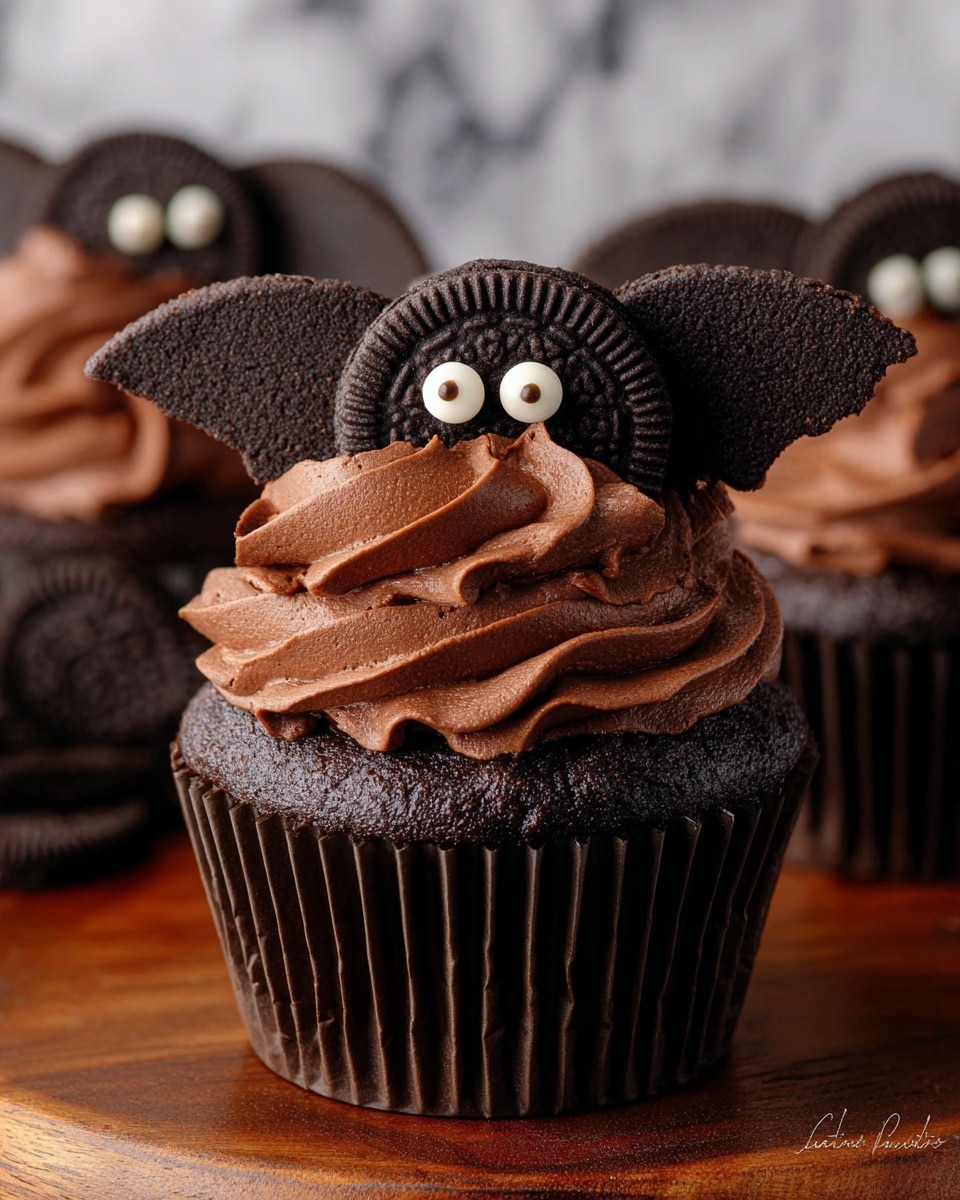
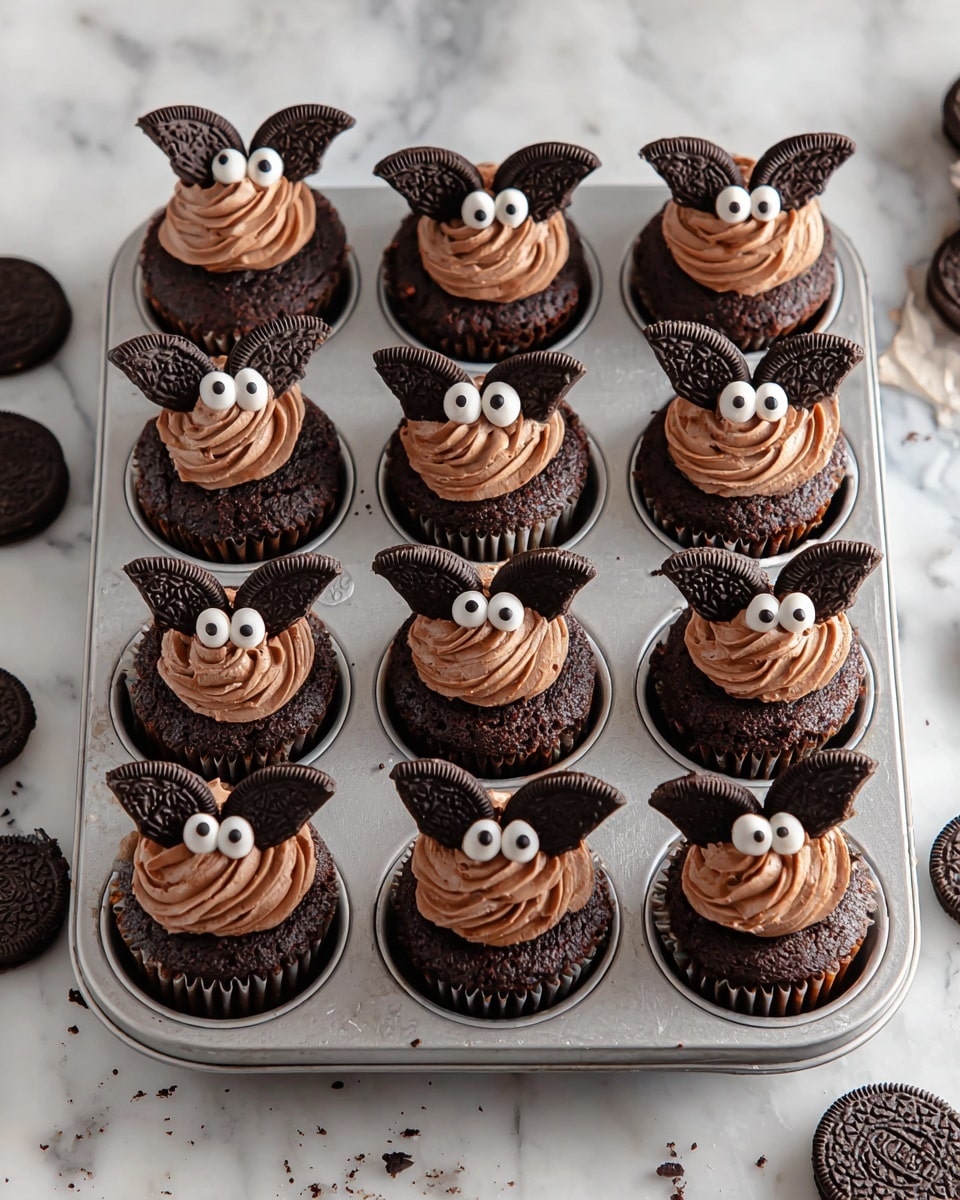
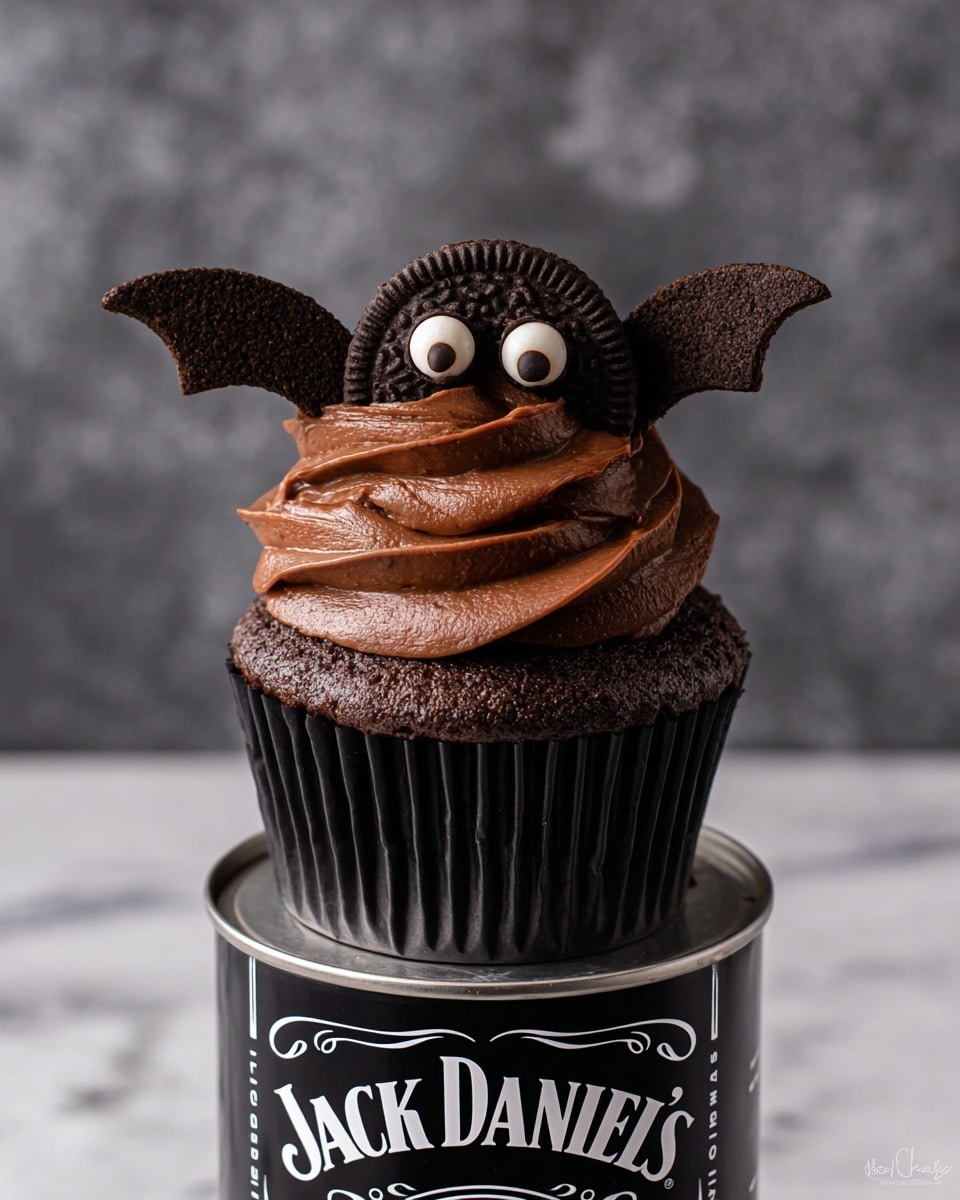
These Bat Cupcakes are a perfect Halloween treat combining rich chocolate flavor with a fun and spooky bat design made from Oreo cookies and candy eyes. Moist chocolate cupcakes are topped with a creamy homemade chocolate frosting and decorated with adorable Oreo bat toppers, making them a festive dessert sure to delight kids and adults alike.
Ingredients
Cupcake Ingredients
- 1 box chocolate cake mix
- ½ cup salted butter (softened)
- 3 large eggs
- ¼ cup sour cream
- 1 cup milk
- 1 teaspoon vanilla extract
Frosting Ingredients
- 1 cup salted butter (softened)
- ½ cup unsweetened cocoa powder
- ½ cup heavy cream (or hot water)
- 2 cups powdered sugar
- 4 ounce semi-sweet baking bar (melted and cooled)
Decorations
- 1 package standard Oreo cookies (extra recommended to account for breakage)
- 1 package mini Oreo cookies
- 20 pairs of candy eyeballs
Instructions
- Preheat and Prepare Tins: Preheat your oven to 350°F (175°C) and line standard size muffin tins with cupcake liners. Set aside.
- Mix Cupcake Batter: In a large mixing bowl, combine the chocolate cake mix, softened butter, eggs, sour cream, milk, and vanilla extract. Beat initially on low speed for 1 minute to combine, then increase to medium-high speed and beat for an additional 2 minutes until smooth.
- Fill Cupcake Liners and Bake: Fill each cupcake liner about halfway with the prepared batter. Bake in the preheated oven for 15 minutes or until a toothpick inserted comes out clean. Remove and allow cupcakes to cool completely.
- Melt Chocolate for Frosting: Chop the semi-sweet baking chocolate bar into small pieces. Melt using a double boiler or microwave in 30-second increments, stirring in between until fully melted. Allow to cool so it is no longer hot to touch but not hardened.
- Prepare Cocoa Mixture: Stir together the unsweetened cocoa powder and hot heavy cream (or hot water) using a whisk until smooth and shiny.
- Make Frosting: In a large mixing bowl, beat the softened butter, melted cooled chocolate, cocoa mixture, and powdered sugar together until fully combined, light, and fluffy.
- Pipe Frosting on Cupcakes: Fill a piping bag fitted with a #1M (or open star) tip with the prepared frosting. Pipe swirls of frosting atop each cooled cupcake evenly.
- Assemble Oreo Bat Toppers: Cut a standard Oreo cookie in half with a strong, swift knife cut for clean edges to form the bat wings. Separate the halves from the cream filling. Arrange two halves side by side on a flat surface to resemble wings.
- Add Bat Face: Twist a mini Oreo cookie and use the half with cream filling. Press this mini Oreo onto the center where the two Oreo halves meet; the cream filling will act as glue.
- Add Eyes: Use a toothpick or the tip of a piping bag to place two small dots of frosting on the mini Oreo ‘bat face.’ Place two candy eyeballs on these dots carefully.
- Place on Cupcakes: Gently place each completed Oreo bat onto the top of a frosted cupcake, pressing lightly to secure.
Notes
- Extra Oreos are recommended because some may break during cutting or assembly.
- Use softened butter for both batter and frosting to achieve the best texture.
- Ensure cupcakes are completely cooled before frosting to prevent melting.
- If you don’t have candy eyeballs, small dots of white and black icing can substitute for eyes.
- For a dairy-free variation, substitute the heavy cream with hot water and choose vegan butter and chocolates.
Nutrition
- Serving Size: 1 cupcake
- Calories: 342 kcal
- Sugar: 22 g
- Sodium: 312 mg
- Fat: 24 g
- Saturated Fat: 14 g
- Unsaturated Fat: 9 g
- Trans Fat: 1 g
- Carbohydrates: 32 g
- Fiber: 2 g
- Protein: 4 g
- Cholesterol: 71 mg

