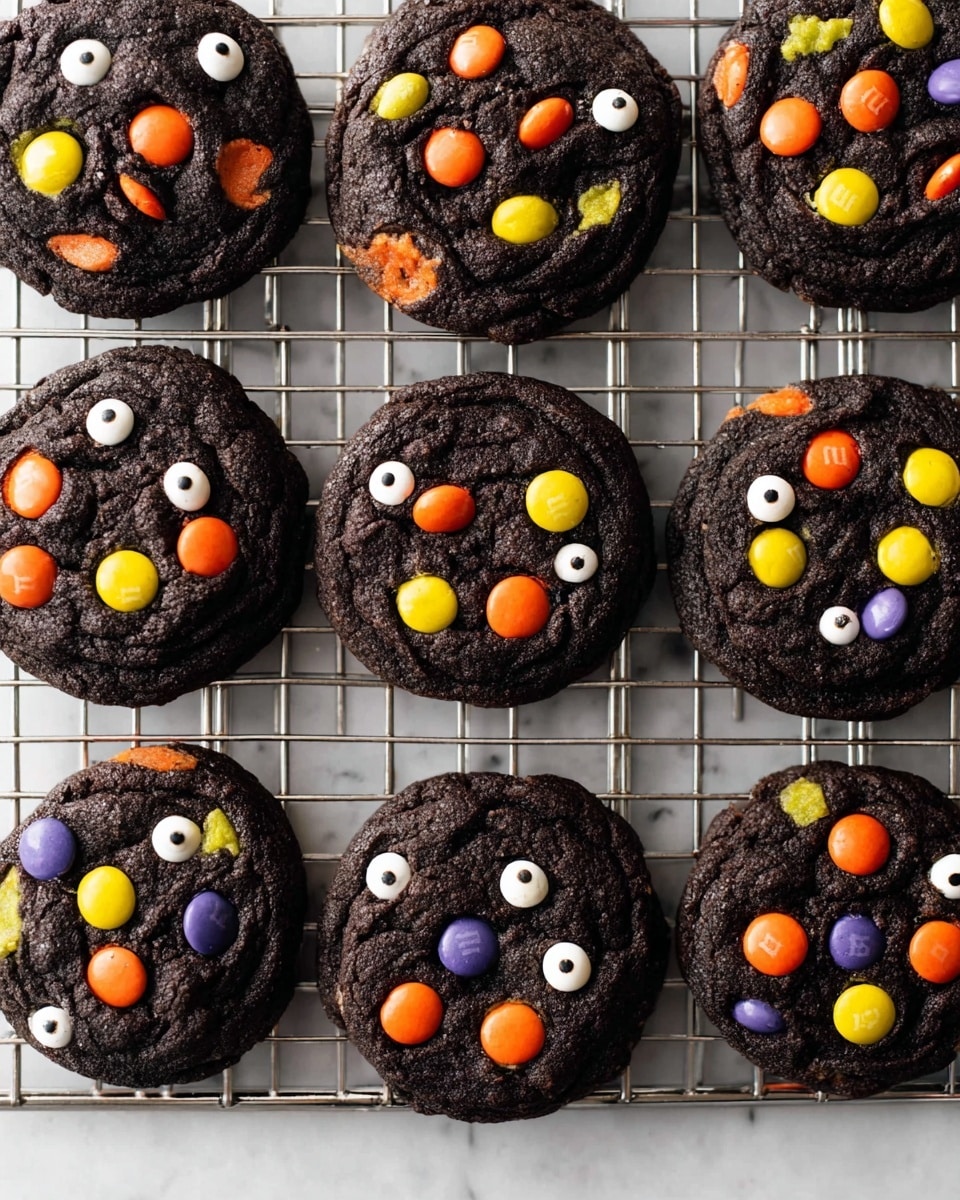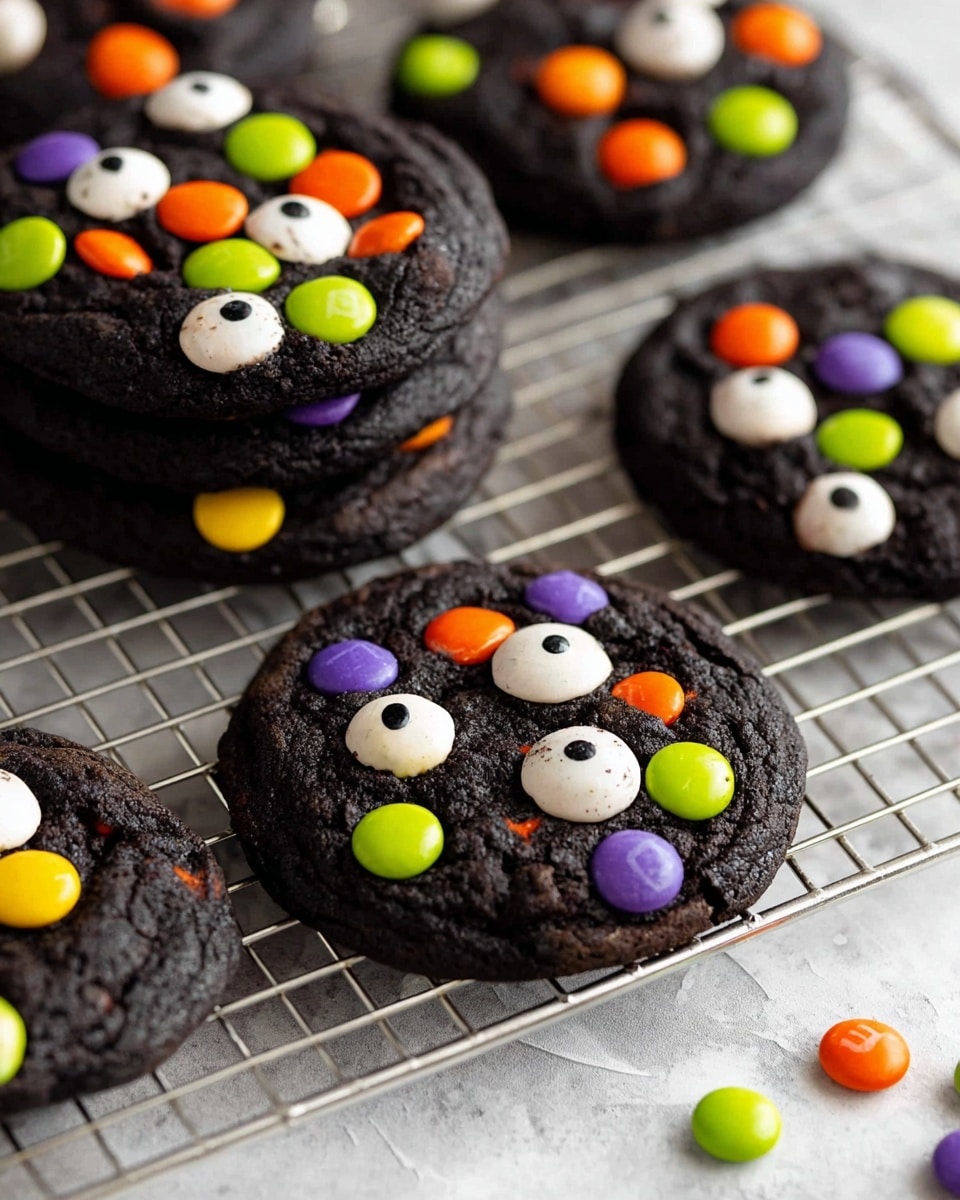
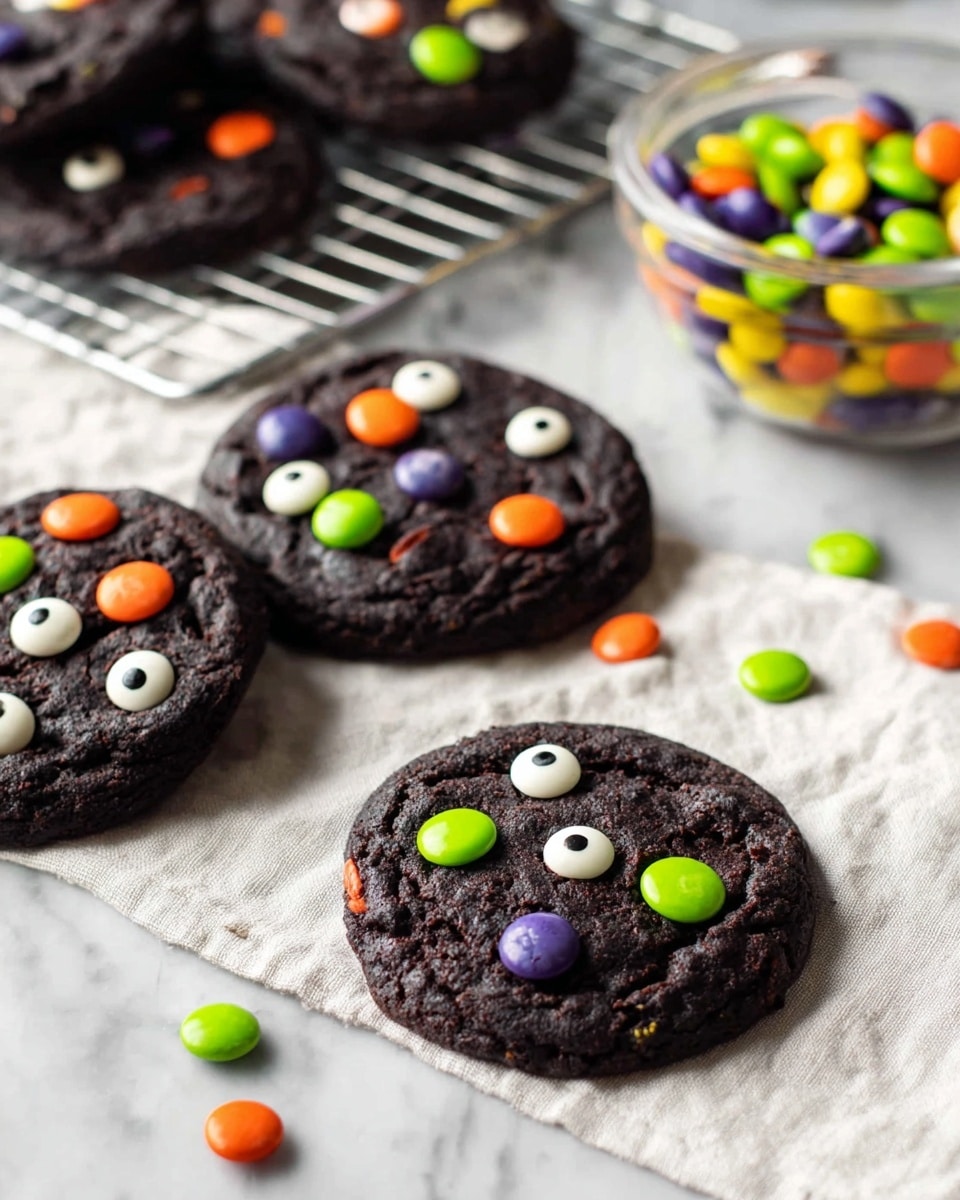
If you’re anything like me, Halloween is the perfect excuse to get a little wild in the kitchen, and this Halloween Monster Cookies Recipe is exactly what you need to make your spooky celebrations extra fun. These cookies aren’t just ordinary chocolate chip treats — they’re soft, chewy, packed with rich cocoa flavor, and decorated with creepy-cute candy eyes and vibrant M&Ms that scream Halloween spirit. Trust me, once you make these, your whole family (and friends!) will be begging for more—no scary Halloween tricks here, just delicious treats.
Why You’ll Love This Recipe
- Soft & Chewy Texture: These cookies strike the perfect balance of softness and chewiness thanks to a blend of brown and white sugars plus black and Dutch cocoa powder.
- No Food Coloring Needed: The natural dark cocoa gives a spooky, monster-like look without artificial colors, making them healthier and totally delicious.
- Kid-Friendly & Fun: Decorating with monster eyes and colorful M&Ms is a fantastic activity to do with your kids or friends to get into the Halloween spirit.
- Easy to Make: Whether you use a stand mixer or mix by hand, this recipe is straightforward and forgiving, making it great for bakers of all levels.
Ingredients You’ll Need
The magic behind this Halloween Monster Cookies Recipe lies in the combination of rich cocoa, real butter, and a mix of sugars that create that perfect texture and flavor. Plus, the monster eyes and M&Ms add the festive pop of fun you want for this spooky season. I always recommend measuring the flour and cocoa powders by spooning them into the cup and leveling for the best accuracy—baking loves precision!
- Unsalted Butter: Melted and slightly cooled for easy mixing and a tender crumb.
- Dark Brown Sugar: Adds moistness and depth of flavor with its molasses content.
- Granulated White Sugar: Helps with that perfect balance of chewiness and light crisp edges.
- Sea Salt: Enhances all the sweet and chocolate flavors; adjust to taste if you prefer less salt.
- Vanilla Extract: For a warm, inviting aroma that brings everything together.
- Eggs: They bind ingredients and give structure to these monster beauties.
- Baking Soda & Baking Powder: Key for that gentle rise and soft texture.
- All-Purpose Flour: The base of your cookie dough; I always recommend spoon-and-level measuring here.
- Black Cocoa Powder: This is the secret to the deep black color and rich chocolatey taste—don’t skip it!
- Dutch Processed Cocoa Powder: Adds chocolate complexity and balances acidity.
- Dark Chocolate Chips: Or chopped chocolate for melty pockets of chocolate goodness.
- M&M Ghoul Mix: Adds vibrant pops of color and texture that scream Halloween fun.
- Monster Eye Candy: These creepy-cute eyes bring the cookies to life—perfect for decorations.
Variations
I love that the Halloween Monster Cookies Recipe gives you so much room to play around. Whether you want to swap out the chocolate or add a bit more holiday flair, customizing it can make the experience even more fun and suited to your own taste.
- Chocolate Mix: Sometimes I mix white and dark chocolate chips for extra contrast and sweetness – it’s a little trick I discovered one Halloween, and my family goes crazy for it!
- Nut-Free Option: If you want to keep it nut-free, just be sure to double-check your candy decorations and chocolates, as some may contain traces of nuts.
- Spiced Version: Adding a pinch of cinnamon or pumpkin pie spice gives a warm, autumnal touch to the dough that pairs beautifully with the chocolate.
- Vegan Adaptation: You can swap butter for coconut oil and use a flax egg instead of real eggs to make a vegan-friendly batch that’s just as tasty.
How to Make Halloween Monster Cookies Recipe
Step 1: Get Your Butter and Sugars Ready
Start by melting your unsalted butter and letting it cool slightly—you don’t want it hot when it hits the eggs, or they might scramble. Then, stir the dark brown sugar and granulated sugar into the butter until it’s smooth and well combined. This step is key to that chewy texture and deep flavor. I usually do this part with a whisk or paddle attachment on my mixer for about 2 minutes. You’ll notice it develops a little gloss, which is your cue to move on.
Step 2: Add the Eggs and Vanilla
Next, you’ll add the vanilla extract and eggs one at a time, mixing just until combined. It’s tempting to overmix here, but trust me, less is more—overworking the batter can make cookies tough. I learned this trick from some too-chewy batches a few years ago, so now I mix gently but thoroughly.
Step 3: Sift and Mix the Dry Ingredients
Sift together your all-purpose flour, black cocoa powder, Dutch cocoa powder, baking soda, baking powder, and salt. This makes sure there aren’t any lumps and evenly distributes the leavening agents. Then gradually fold the dry ingredients into the wet mixture. Using a rubber spatula helps with gentle folding, preserving that tender dough texture.
Step 4: Fold in Chocolate Chips
Now for the best part—fold in your dark chocolate chips or chopped chocolate. This gives you pockets of ooey-gooey deliciousness in every bite. You can also mix in some mini white chips if you want a bit of contrast. The dough will be thick and dark—just how monster cookies should be!
Step 5: Chill the Dough Overnight
Here’s a game changer: chilling. I can’t stress enough how letting your dough rest overnight in the fridge makes the cookies taste so much better and develop a richer texture. When I first skipped this step, my cookies spread too much and were flatter. After chilling, they hold their shape and have a more intense flavor, so plan ahead if you can.
Step 6: Scoop and Bake
Preheat your oven to 350°F (175°C). Use a cookie scoop to drop generous balls of dough onto a parchment-lined baking sheet — leaving plenty of space, because these cookies do get big and monster-sized. Before baking, press a few M&M’s and a monster eye candy gently into each dough ball. Bake for about 12-14 minutes, until the edges are set but the centers still look slightly soft. Don’t overbake—soft and chewy is the goal here!
Once out of the oven, let the cookies cool on the baking sheet for about 5 minutes before moving them to a wire rack to cool completely. This helps them set up perfectly without breaking apart.
Pro Tips for Making Halloween Monster Cookies Recipe
- Butter Temperature Matters: Melting the butter but letting it cool prevents your eggs from cooking and ensures a smooth dough.
- Chill Dough Overnight: I learned that chilling not only intensifies flavor but stops the cookies from spreading too much during baking.
- Use Black Cocoa Powder: This unique ingredient gives the dark color and rich taste without food coloring — you can find it at specialty stores or online.
- Don’t Overbake: Pull the cookies out when edges look set but centers still look soft; they’ll firm up as they cool.
How to Serve Halloween Monster Cookies Recipe
Garnishes
I always keep a stash of monster eye candies and M&Ms handy so I can quickly decorate fresh cookies. For an extra spooky touch, sometimes I sprinkle on a little edible glitter or colored sugar around the eyes. It’s silly but makes the cookies pop for parties or school events—kids really notice the little details!
Side Dishes
These cookies pair wonderfully with a cold glass of milk for classic comfort, or if you feel adventurous, a rich hot chocolate or a pumpkin spice latte complements their chocolaty goodness beautifully. For Halloween parties, I like setting out a platter with apple slices and caramel dip alongside for a bit of fruity balance.
Creative Ways to Present
One year, I arranged them on a large platter around a bowl of spooky punch, with cute paper napkins and tiny decorative pumpkins. Another time, I wrapped individual cookies in clear bags tied with orange and black ribbons—perfect for handing out to trick-or-treaters or party guests. Get creative with your presentation for maximum Halloween fun!
Make Ahead and Storage
Storing Leftovers
I keep my leftover Halloween Monster Cookies in an airtight container at room temperature, layering them between parchment paper sheets so they don’t stick together. They stay wonderfully soft and chewy for up to 4 days. If you want to keep them fresh longer, and who doesn’t, read on for my freezing tips.
Freezing
These cookies freeze beautifully! After cooling completely, I place them in a single layer on a baking sheet and freeze for about an hour. Then I transfer them to a freezer-safe container or ziplock bag. When you’re ready to enjoy, just thaw at room temperature or pop them in the oven at 300°F for a few minutes to bring back that fresh-baked taste.
Reheating
If you want to revive a cookie’s soft texture, I recommend warming it in a preheated oven at 300°F for 5-7 minutes or microwaving for 10 seconds. This simple trick makes each bite taste like it just came out of the oven—trust me, it’s a game-changer!
FAQs
-
Can I make Halloween Monster Cookies without black cocoa powder?
Black cocoa powder is what gives these cookies their characteristic deep black color and rich flavor, so it’s a key ingredient. If you can’t find black cocoa powder, you can try using extra Dutch process cocoa powder, but the color will be less intense and the flavor slightly different. The cookies will still taste delicious, just not quite as dark or dramatic.
-
How long should I chill the dough for best results?
I recommend chilling the dough overnight or at least 6-8 hours. This resting time lets the flavors meld and prevents the cookies from spreading too much during baking, giving you perfect thick and chewy monster cookies every time.
-
Can I bake these cookies without monster eyes or M&Ms?
Absolutely! The monster eyes and M&Ms are mostly for decoration and fun. If you don’t have them on hand, you can bake the cookies plain, or decorate with other candies or sprinkles you prefer. They’ll still be incredibly tasty.
-
What if my dough is too sticky to handle?
If your dough feels too sticky, chill it a bit longer in the fridge to firm up. Slightly sticky dough is normal with these cookies, but chilling makes it easier to scoop and shape into cookie balls.
-
Can I use salted butter instead of unsalted?
You can, but I recommend reducing or omitting the added sea salt in the recipe to prevent the cookies from becoming too salty. Using unsalted butter lets you control the salt level better.
Final Thoughts
This Halloween Monster Cookies Recipe has become one of my seasonal favorites because it’s so versatile, fun to make, and perfectly indulgent. Whether you’re baking with kids, throwing a Halloween party, or just craving a monster-sized treat, these cookies have your back. I absolutely love how they come out every single time—soft, chewy, chocolaty, and packed with festive flair. Give it a try, and I guarantee your Halloween celebrations will be that much sweeter and more memorable!
Print
Halloween Monster Cookies Recipe
- Prep Time: 30 minutes
- Cook Time: 15 minutes
- Total Time: 3 hours (including chilling time)
- Yield: 20 cookies
- Category: Dessert
- Method: Baking
- Cuisine: American
Description
These Halloween Monster Cookies are a delightful treat that combines soft, chewy chocolate chip cookie goodness with spooky Halloween fun. Made with a blend of dark and Dutch cocoa for rich chocolate flavor, these cookies are packed with dark chocolate chips and topped with colorful M&M ghoul mix and monster eye candy for a festive touch. Perfect for kids and adults alike, they are easy to prepare, use no food coloring, and feature a recommended chilling step to enhance flavor and texture.
Ingredients
Wet Ingredients
- 226 g unsalted butter (2 sticks, melted and slightly cooled)
- 2 eggs
- 1 tbsp vanilla extract
Dry Ingredients
- 150 g dark brown sugar (¾ cup)
- 150 g granulated white sugar (¾ cup)
- 1 tsp sea salt (use only ½ tsp if less salt preferred)
- 1 tsp baking soda
- ¼ tsp baking powder
- 280 g all-purpose flour (2 ¼ cups, measured by spoon and level method)
- 50 g black cocoa powder (½ cup, measured by spoon and level method)
- 20 g Dutch cocoa powder (2 tbsp)
Add-ins and Toppings
- 200 g dark chocolate chips (or chopped chocolate from a bar; can mix white and dark chocolate)
- M&M ghoul mix (or similar Halloween-themed candy)
- Monster eye candy
Instructions
- Prepare the Dough: In a large bowl or stand mixer, combine the melted and slightly cooled unsalted butter with dark brown sugar and granulated white sugar. Mix until smooth and well incorporated. Add the eggs and vanilla extract, mixing until fully combined and creamy.
- Combine Dry Ingredients: In a separate bowl, whisk together the all-purpose flour, black cocoa powder, Dutch cocoa powder, baking soda, baking powder, and sea salt to ensure even distribution of leavening agents and cocoa.
- Mix Dry and Wet Ingredients: Gradually add the dry ingredients to the wet mixture while stirring on low speed or folding by hand until a uniform chocolate cookie dough forms.
- Add Chocolate Chips: Fold in the dark chocolate chips evenly throughout the dough to ensure every cookie will have rich chocolate bursts.
- Chill the Dough: Cover the dough with plastic wrap and refrigerate for several hours or preferably overnight. This resting period develops the flavors and improves the texture, making the cookies softer and chewier after baking.
- Preheat Oven and Prepare Baking Sheet: When ready to bake, preheat the oven to 175°C (350°F) and line baking sheets with parchment paper to prevent sticking.
- Scoop and Decorate: Using a cookie scoop or spoon, portion the dough into roughly 20 equal-sized balls and place them spaced out on the prepared baking sheets. Press M&M ghoul mix and monster eye candy gently into the tops of each dough ball to create a festive monster look.
- Bake the Cookies: Bake in the preheated oven for approximately 12 to 15 minutes, or until the edges are set but the centers remain soft. Avoid overbaking to retain chewiness.
- Cool and Serve: Allow the cookies to cool on the baking sheet for 5 minutes before transferring to a wire rack to cool completely. Enjoy your spooky Halloween Monster Cookies fresh or store them in an airtight container.
Notes
- This recipe uses common US cup, teaspoon, and tablespoon measurements, but weight measurements are recommended for accuracy.
- Overnight chilling of the dough enhances flavor and texture, resulting in softer, chewier cookies.
- No artificial food coloring is used—natural cocoa powders provide rich color.
- The recipe is easy to make by hand or with a stand mixer, making it a fun activity to do with children during Halloween.
Nutrition
- Serving Size: 1 cookie
- Calories: 260 kcal
- Sugar: 18 g
- Sodium: 192 mg
- Fat: 13 g
- Saturated Fat: 9 g
- Unsaturated Fat: 4 g
- Trans Fat: 1 g
- Carbohydrates: 33 g
- Fiber: 2 g
- Protein: 4 g
- Cholesterol: 41 mg

