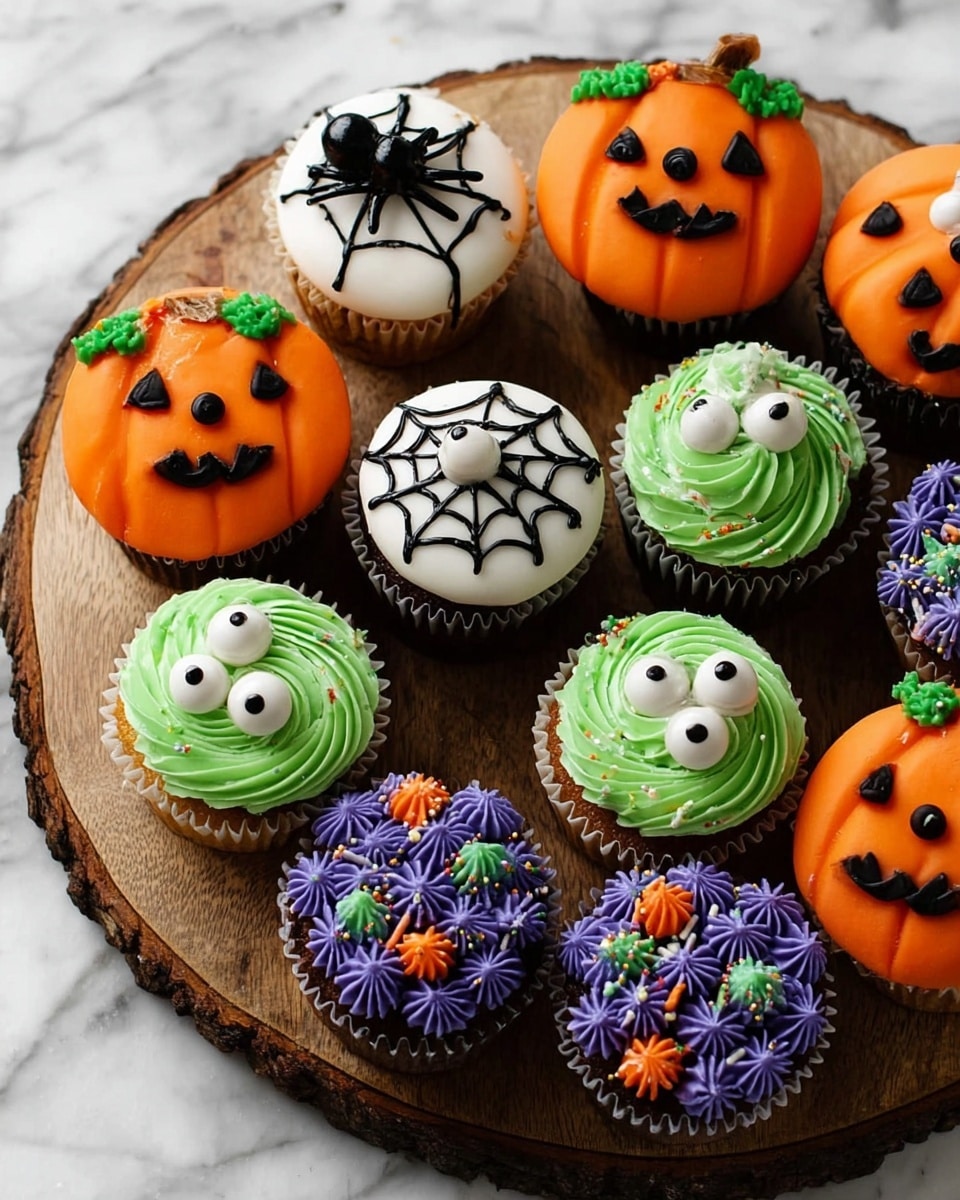
If you’re on the hunt for a show-stopping dessert that’s fun, festive, and downright adorable, this Halloween Surprise Stuffed Candy Corn Cake Recipe is exactly what you need. It’s got that perfect blend of vibrant colors, a secret surprise center, and flavors that will have everyone asking for seconds. Trust me, once you try this recipe, your Halloween parties will never be the same!
Why You’ll Love This Recipe
- Surprise Center: The candy corn surprise inside makes every bite exciting—this isn’t just a cake, it’s a Halloween experience.
- Festive and Fun: Vibrant colors and charming decorations create the perfect spooky-but-cute vibe for your Halloween spread.
- Crowd-Pleaser: Whether it’s for kids or adults, this cake draws oohs and aahs, guaranteed to be the centerpiece of your party.
- Easy to Customize: You can tweak flavors, fillings, and decorations to keep things fresh and personal each year.
Ingredients You’ll Need
Getting the right ingredients is key to nailing this Halloween Surprise Stuffed Candy Corn Cake Recipe. You’ll want to focus on fresh, quality staples and vibrant candy corn for that perfect surprise inside. Here’s what I always make sure to have on hand:
- All-purpose flour: Provides the perfect structure for a moist but sturdy cake that holds the surprise inside well.
- Baking powder and baking soda: Essential for giving the cake that light, fluffy texture.
- Granulated sugar: Sweetness done right—not too overpowering but enough to satisfy your sweet tooth.
- Unsalted butter: For richness and a tender crumb; softened to room temperature is best.
- Eggs: Bind everything together and add moisture—always use them fresh.
- Whole milk or buttermilk: The acid in buttermilk complements the sweetness and keeps the cake tender.
- Vanilla extract: Adds warmth and depth to the cake flavor.
- Candy corn: The star of the show—choose classic candy corn or try the autumn-flavored varieties for a twist.
- Buttercream frosting: I recommend a smooth, creamy vanilla or cream cheese buttercream to complement the cake without overpowering it.
- Food coloring (optional): To get those iconic candy corn layers and festive colors just right.
Variations
I love mixing things up with this Halloween Surprise Stuffed Candy Corn Cake Recipe. Whether you want to go healthier, jazz it up with some unique flavors, or keep it super simple, there’s room for your personal spin here!
- Chocolate Lover’s Version: Swap one layer for a rich chocolate cake. My family goes crazy for the contrast between the candy corn colors and deep chocolate flavor.
- Gluten-Free Adaptation: Use a gluten-free flour blend. I discovered this trick for my friend who has gluten intolerance, and it worked amazingly without compromising texture.
- Spiced Pumpkin Infusion: Add pumpkin puree and warm spices to the batter for extra autumn vibes. It’s my go-to when I want to really embrace the season’s flavors.
- Dairy-Free Option: Substitute dairy milk and butter with plant-based alternatives. The frosting turns out just as creamy and festive.
How to Make Halloween Surprise Stuffed Candy Corn Cake Recipe
Step 1: Prepare Your Cake Batter
Start by preheating your oven and prepping your cake pans—lining them with parchment paper saves you a lot of heartache later! In a large bowl, cream the softened butter and sugar together until fluffy; I usually spend a full 3–4 minutes here—it really makes a difference. Then, add your eggs one at a time, mixing well after each addition. Alternate adding your dry ingredients and milk (or buttermilk), beginning and ending with the dry stuff. This keeps the batter balanced and smooth. If you want those iconic candy corn colors, separate your batter and add food coloring to create three hues: white, orange, and yellow. You’ll layer these in the pans for the classic look.
Step 2: Bake Your Cake Layers
Divide your colored batters evenly into your prepared pans. Bake until a toothpick inserted comes out clean and the tops spring back when gently pressed. I usually check around the 25-minute mark but keep an eye out because every oven’s a bit different. Once baked, let your layers cool completely—patience here pays off, especially for decorating and assembling later. Cooling your layers on wire racks speeds up the process and keeps the bottoms from getting soggy.
Step 3: The Magic – Stuff the Candy Corn Surprise
Now, here’s where the fun begins! Take your cooled cake layers and carefully carve out a small well or tunnel in the center of one or more layers. Fill this hollow with a generous handful of candy corn. I do this step gently to avoid crumbs—using a small spoon or even a piping bag helps get the candy neatly inside. When you stack your cake layers back together with frosting between each, the candy corn center remains hidden until the big reveal. I promise, this trick is why guests always get wide-eyed and excited!
Step 4: Frost and Decorate
I keep my frosting simple—a classic vanilla buttercream works wonders here. Color portions of it with bright orange, yellow, and white gel food coloring to match the candy corn theme. Apply a thin crumb coat first to trap those little crumbs, then chill your cake for about 20 minutes. Finish with a smooth final layer of colored frosting, blending the colors so the cake looks like candy corn from the outside. For some extra Halloween spirit, I love adding little fondant pumpkins, edible glitter, or even candy eyes to the top. It’s those special touches that make this cake a party standout.
Pro Tips for Making Halloween Surprise Stuffed Candy Corn Cake Recipe
- Choose Quality Candy Corn: I learned the hard way that cheaper candy corns tend to melt or lose shape inside the cake, so investing in a good brand really pays off.
- Don’t Overmix the Batter: Stir just until combined for the fluffiest cake texture—overmixing can make your cake dense.
- Use Parchment Guides for Perfect Layers: Cutting perfect candy corn-colored layers is easier if you use parchment paper strips to line your pans and avoid spills.
- Chill Before Layering: Chilling your cake layers before carving the candy corn surprise prevents crumbs and keeps the cut edges clean.
How to Serve Halloween Surprise Stuffed Candy Corn Cake Recipe
Garnishes
I usually top mine with a few candy corn pieces arranged like a little crown, maybe some edible glitter, and tiny pumpkin candies for that extra festive flair. They’re simple but add such a fun touch that really brings the whole cake alive.
Side Dishes
This cake pairs beautifully with light bites like spiced apple cider, pumpkin spice latte, or even a crisp green salad if you’re serving it at a bigger meal. The sweetness of the cake stands out more when balanced with a slightly tart, refreshing drink.
Creative Ways to Present
One year, I hollowed out a large pumpkin and served the slices inside it— the Halloween surprise took on a whole new level of wow! Another great idea is stacking mini versions of this cake as a candy corn-inspired tiered cake that dazzles your guests visually and flavor-wise.
Make Ahead and Storage
Storing Leftovers
I store my leftover Halloween Surprise Stuffed Candy Corn Cake wrapped tightly in plastic wrap and placed inside an airtight container at room temperature if it’s only a day or two. For longer storage, it’s best to refrigerate to keep the frosting fresh, but bring the cake back to room temp before serving—this helps the flavors shine through.
Freezing
This cake freezes beautifully if you slice it into individual portions first. Wrap each slice in plastic wrap and place in a freezer bag. Defrost overnight in the fridge, and it tastes almost as good as fresh! I’ve done this many times for last-minute Halloween gatherings.
Reheating
Since this is a frosted cake, I don’t recommend microwaving it directly. Instead, I let it come to room temperature naturally. If you want it a bit warmer, cover with foil and warm gently in a low oven (about 275°F) for 10 minutes or so, watching carefully to keep the frosting intact.
FAQs
-
Can I make the Halloween Surprise Stuffed Candy Corn Cake Recipe ahead of time?
Absolutely! You can bake your cake layers a day or two in advance and store them wrapped tightly in plastic wrap. It’s best to assemble and decorate the cake the same day you plan to serve it to keep the frosting fresh and vibrant.
-
What type of candy corn works best inside the cake?
I recommend traditional candy corn or the autumn-flavored varieties made with natural ingredients. Avoid cheap or overly soft candy corn as they might melt or lose shape inside the cake when baked or stored for long periods.
-
Can I use a different shape for the surprise inside?
Definitely! I’ve experimented with mini candy pumpkins, colorful gummies, or even chocolate chips for a fun twist. The key is to use something that holds its shape and won’t melt during storage.
-
How do I prevent crumbs when carving out the candy corn tunnel?
Chilling your cake layers for at least 30 minutes before carving really helps. Also, use a small, sharp spoon or melon baller to gently scoop out the center, and take your time to avoid breaking the edges.
-
What frosting works best for this cake?
Classic vanilla buttercream or cream cheese frosting work beautifully. They’re creamy but not too sweet, balancing perfectly with the candy corn surprise inside. Plus, they take gel colors very well for vibrant layering.
Final Thoughts
I absolutely love how this Halloween Surprise Stuffed Candy Corn Cake Recipe brings joy and wonder to any gathering. There’s something magical about slicing into the cake and revealing that colorful candy-filled core that never fails to make people smile. Whether you’re hosting a big party or just making a festive treat for your own family, this cake is sure to be a hit. Give it a try—you’ll be so happy you did, and your Halloween celebrations will be that much sweeter!
Print
Halloween Surprise Stuffed Candy Corn Cake Recipe
- Prep Time: 45 minutes
- Cook Time: 0 minutes
- Total Time: 45 minutes
- Yield: 12 cupcakes
- Category: Dessert
- Method: No-Cook
- Cuisine: American
- Diet: Vegetarian
Description
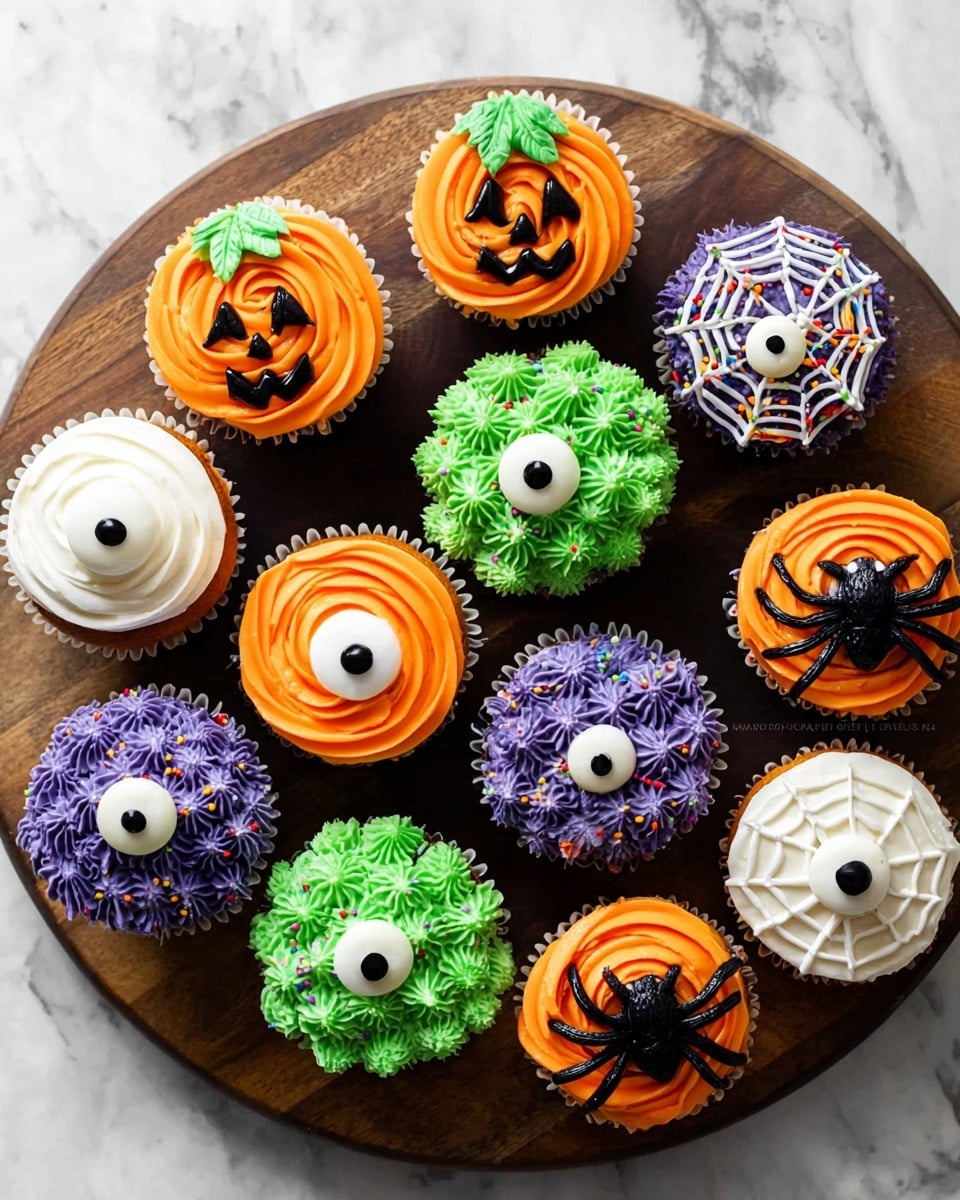
This recipe guides you through decorating 12 festive Halloween cupcakes with fun and colorful designs including monsters, jack-o’-lanterns, and spooky spiders. Using a creamy, tinted buttercream frosting and various piping techniques, these cupcakes turn your favorite base recipe into delightful treats perfect for Halloween parties or seasonal gatherings.
Ingredients
Cupcakes
- 12 pumpkin cupcakes or your favorite cupcake recipe
Buttercream Frosting
- 1 and 1/2 cups (340g) unsalted butter, softened to room temperature
- 6 cups (720g) confectioners’ sugar (see note for adjustment)
- 6 Tablespoons (60ml) heavy cream, half-and-half, or whole milk, at room temperature
- 2 teaspoons pure vanilla extract
- Salt, to taste
Gel Food Coloring
- Leaf Green
- Fuchsia + Violet (to make pinkish purple)
- Super Black
- Orange
Decorating Tools and Candy
- 2 piping bags + 2 couplers for initial decorating
- Piping tips: small open star tip (e.g., Wilton #21), large petal tip (Wilton #125), small round tip (Wilton #4)
- Small candy eyeballs
- Large candy eyeballs
- Optional sprinkles
- 3 piping bags for specific designs
- Oreo Mini cookies (for spider design)
- Mini candy eyeballs (for spider eyes)
Instructions
- Make Buttercream Frosting: Using a handheld or stand mixer with a paddle attachment, beat 1½ cups of softened unsalted butter on medium speed until creamy, about 2 minutes. Add 5½ cups (660g) confectioners’ sugar, 6 tablespoons heavy cream, and 2 teaspoons vanilla extract. Beat on low speed for 30 seconds, then increase to medium-high speed and beat for 2 minutes. Taste and add 1/8 teaspoon salt if too sweet.
- Remove Air Bubbles: Stir the buttercream by hand with a silicone spatula or wooden spoon against the bowl sides to pop air bubbles, working for 1–2 minutes until most bubbles are gone.
- Adjust Consistency: If frosting is too thin, add up to ½ cup (60g) more confectioners’ sugar. If too thick, add heavy cream by the tablespoon, mixing and tasting until desired consistency is reached.
- Divide and Tint Frosting: Divide frosting into 5 bowls for all 4 designs (less black needed). Tint each with desired gel color: green (Leaf Green), purple (Fuchsia + Violet), black (Super Black), orange, and keep one bowl white for spider design. Adjust color brightness with a tiny dot of black coloring if needed; colors darken as frosting sits.
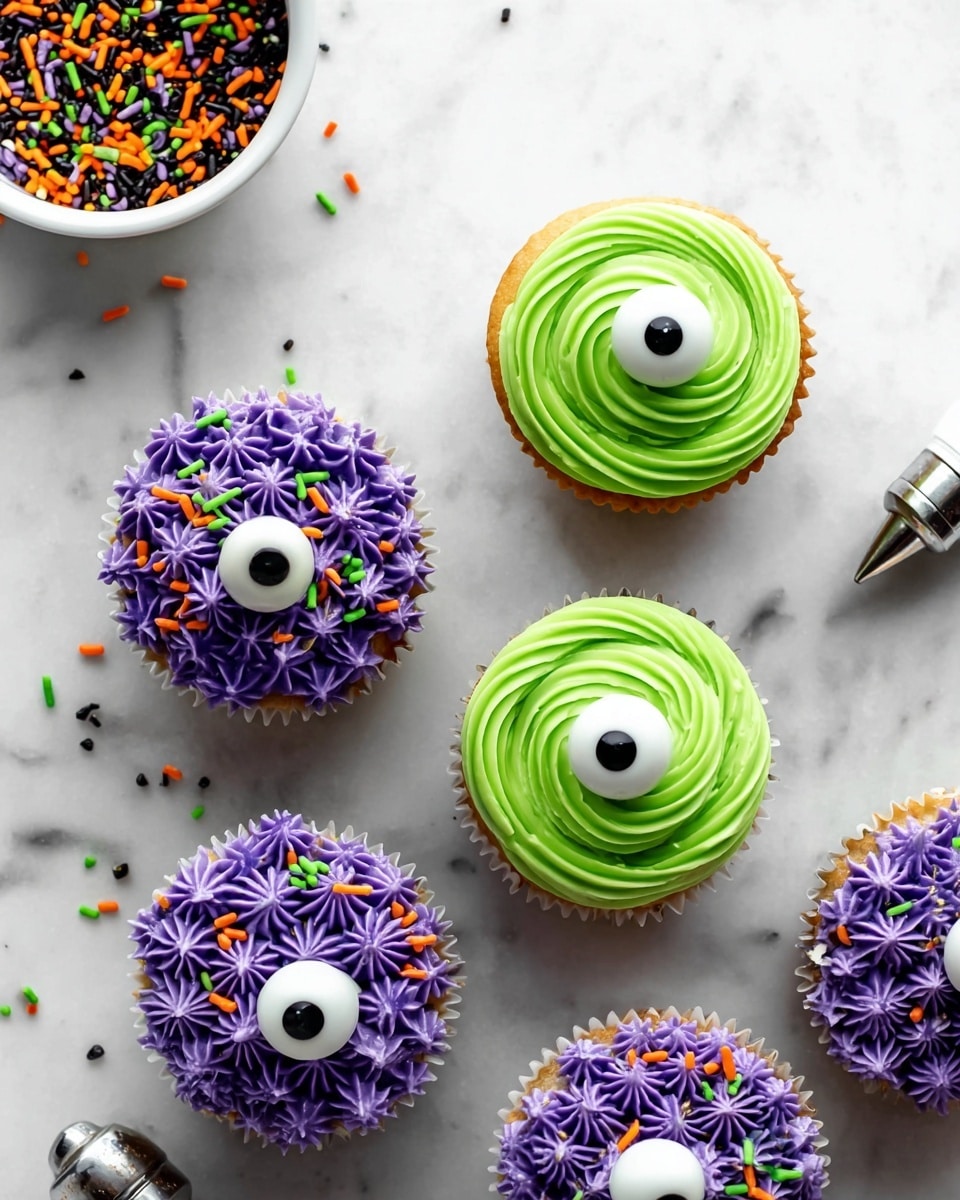
- Monster Cupcakes: Fit a piping bag with a small open star tip (Wilton #21) and coupler. Fill with green frosting, pipe a spiral from outside to center on cupcake, and place a large candy eyeball centrally.
- Purple Monster Cupcakes: Using the same piping tip and coupler, fill a bag with purple frosting. Pipe stars to cover cupcake’s surface and press small candy eyeballs into frosting. Add sprinkles if desired.
- Jack-o’-Lantern Cupcakes: Fit three piping bags with tips: large petal tip (#125) with orange frosting, small star tip (#21) with green frosting, and small round tip (#4) with black frosting. Pipe rounded vertical orange lines alternating sides to create pumpkin shape. Pipe green pumpkin stem. Use black frosting for eyes, nose, and mouth—make them spooky or goofy.
- Spider Web Cupcakes: Use small round tip (#4) and fill with black frosting in a piping bag. Spread white frosting smoothly over cupcake surface using offset spatula or knife. Pipe 3 crisscrossing black lines forming 6 web sections, then connect sections with curved black lines. Place half a mini Oreo cookie for spider body on web, pressing gently. Pipe two tiny black frosting dots as eyes, stick mini candy eyeballs onto them, and pipe 8 black leg lines around Oreo to create spider legs.
- Storage: Store decorated cupcakes uncovered at room temperature for a few hours before serving. For longer storage, cover and refrigerate cupcakes up to 5 days. Use a cupcake carrier for easy transport and to avoid damage to decorations.
Notes
- This recipe uses buttercream frosting tinted with gel food colors for vibrant designs.
- Adjust buttercream quantities if you plan to decorate fewer cupcakes or fewer designs.
- Refer to a video tutorial (if available) for visual guidance on piping techniques.
- Pumpkin cupcakes are recommended, but you may use any favorite cupcake base.
- Adding salt to buttercream balances sweetness; usually 1/8 teaspoon is enough.
- Stir frosting by hand to pop air bubbles for smooth application.
- Carefully select piping tips to achieve detailed decorations.
Nutrition
- Serving Size: 1 cupcake
- Calories: 360
- Sugar: 35g
- Sodium: 110mg
- Fat: 22g
- Saturated Fat: 14g
- Unsaturated Fat: 7g
- Trans Fat: 0g
- Carbohydrates: 38g
- Fiber: 1g
- Protein: 3g
- Cholesterol: 65mg

