

If you’ve ever wanted to bake bread that fills your home with that irresistible, warm aroma and gives you a crusty, airy loaf to be proud of, you’re going to love this Homemade Sourdough Bread Recipe. It’s approachable for beginners, yet rewarding for seasoned bakers—you don’t need a ton of fancy steps or complicated equipment. I absolutely love how this turns out every single time, and I can’t wait to walk you through the simple steps that will have you slicing into your own perfect loaf before you know it.
Why You’ll Love This Recipe
- Simple Ingredients: With just flour, water, salt, and your starter, this recipe is straightforward and comforting.
- Hands-Off Process: Most of the time, the dough is just resting and rising, so you can get other things done.
- Impressive Results: You’ll get that crispy crust and open crumb that make sourdough so special without fuss.
- Flexible Timing: Whether you proof for a few hours or overnight, the dough adapts so you can fit baking into your schedule.

Ingredients You’ll Need
The magic of the Homemade Sourdough Bread Recipe truly comes from simple, high-quality ingredients that work beautifully together. I always recommend a digital scale for accuracy—it makes all the difference.
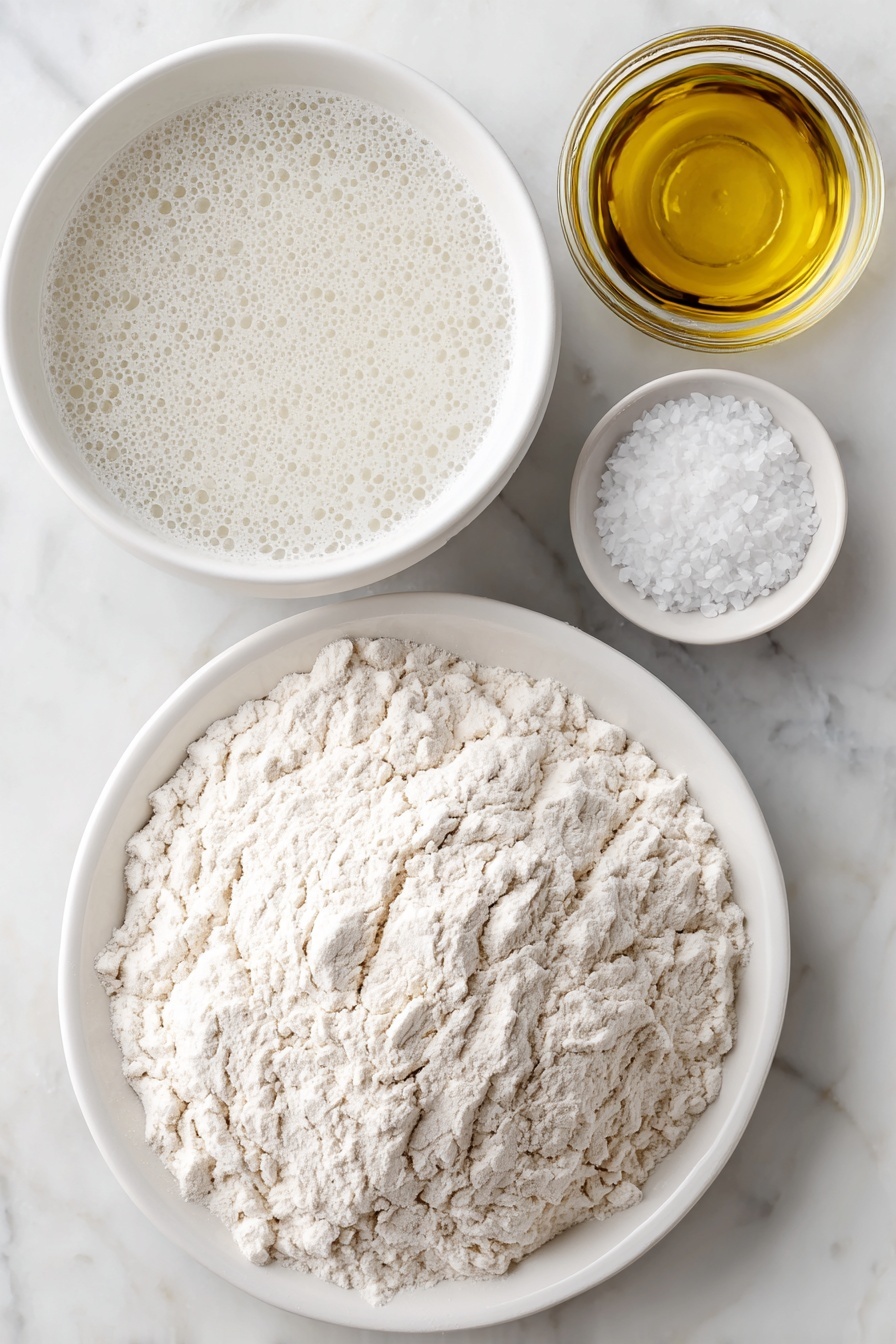
- Active sourdough starter: Make sure your starter is bubbly and active; it’s the heart of your bread’s flavor and rise.
- Bread flour: Opt for bread flour because of its higher protein content, which helps create that chewy texture.
- Water: Warm water helps activate your starter and dough; I adjust the amount slightly based on my dough’s feel.
- Fine sea salt: Salt enhances flavor and controls fermentation, so don’t skimp here!
Variations
I love that the Homemade Sourdough Bread Recipe is a great foundation to experiment with—because sometimes you want a little extra flair! Feel free to get creative here and make the loaf truly your own.
- Add-ins: I once added fresh rosemary and grated cheddar before the third set of folds—so good with a pungent, savory twist.
- Hydration changes: For a more open crumb, I bump up the water just a bit, but keep in mind it makes the dough a little stickier.
- Shaping styles: Try a batard shape if you want a different look and crumb texture instead of the classic round.
- Proofing time: I sometimes refrigerate the dough up to 48 hours for a deeper flavor and more convenience.
How to Make Homemade Sourdough Bread Recipe
Step 1: Mix and Let Rest
Start by whisking your bubbly starter and warm water together in a large bowl—I use a fork for this, which is an old trick I picked up to save my hands early on. Next, mix in your bread flour and salt, making sure everything comes together in a rough dough. It might look shaggy and not very formed, but that’s just right! Cover it with a damp towel and let it rest for 30 minutes; this hydrates the flour and makes the dough easier to work with in the next steps.
Step 2: Stretch and Fold (Repeat!)
After that initial rest, get ready to stretch and fold your dough—this step’s essential for building gluten and structure without kneading. Grab a corner of your dough, pull it up gently, and fold it back toward the center. Do this 4 to 5 times, rotating each time so you treat the dough evenly. I know it sounds a little strange, but trust me, this builds strength beautifully. Let it rest 30 minutes, then repeat the folds. If you have time, do this twice more over the next hour or two; if not, even a single round works wonders.
Step 3: Bulk Fermentation – Watch the Dough Rise
Cover the bowl with a towel and leave it at room temperature to rise—around 8 to 10 hours depending on your kitchen temperature. Here’s a trick I discovered: keep an eye on the dough doubling by about 50%, not necessarily doubling fully. You’ll know it’s ready when it jiggles a bit if you move the bowl and bubbles appear on the surface. If your kitchen is warm, this can happen sooner, so don’t fixate on timing.
Step 4: Shape the Dough
Onto a lightly floured surface, gently coax your dough out of the bowl. Fold the top toward the center, turn it, and keep folding in a circle to build tension across the surface. It takes a few tries to get the feel, but I promise it becomes second nature. If you have a bench scraper, it’s great for this job. Then, place the dough seam side up and let it rest for 30 minutes.
Step 5: Final Proof in the Fridge
Line your proofing basket or bowl with a well-floured towel (rice flour is my go-to here), place your shaped dough seam up, cover, and chill in the fridge for 1 to 48 hours. For a flavor boost and easier schedule, I usually let mine proof for about 24 hours. If you’re short on time, an hour will still work, but the longer proof makes a noticeable difference in texture and taste.
Step 6: Score and Bake!
Preheat your oven to 550°F with a Dutch oven inside—this is key to that blistering crust and oven spring. When ready, place a piece of parchment over your dough and flip it out carefully. Score the top with a sharp knife or razor blade—I love a simple “X,” but decorative scoring looks stunning too. Transfer the dough on the parchment into your hot Dutch oven, cover, and reduce temperature to 450°F. Bake covered for 30 minutes, then remove the lid and bake for another 10 to 15 minutes at 400°F. Sometimes, I lift the bread out and let it finish directly on the rack for extra crustiness. Let your loaf cool fully before slicing; it’s worth the wait!
Pro Tips for Making Homemade Sourdough Bread Recipe
- Use Visual Cues Over Time: I learned early on that dough rises can vary wildly—watch for a 50% volume increase and bubbles rather than the clock.
- Don’t Skip Stretch and Folds: Even if you only manage one round, your dough texture will thank you later.
- Dust with Rice Flour: It prevents sticking during proofing and doesn’t burn like regular flour, giving your crust a cleaner taste.
- Warm Water Helps Starter Activity: I use warm water (not hot!) to help wake my starter and give the fermentation a boost.
How to Serve Homemade Sourdough Bread Recipe

Garnishes
I keep it simple here—I love a smear of good butter or olive oil with flaky sea salt. Sometimes I’ll sprinkle fresh herbs like thyme or rosemary on the butter for a fragrant twist. And for treats, a drizzle of honey or your favorite jam is heavenly.
Side Dishes
This bread pairs perfectly with soups, stews, or a cheese board. I often serve it alongside a rich tomato basil soup or a chard and white bean stew. It’s also fantastic just toasted with avocado and lemon sprinkle for a simple brunch.
Creative Ways to Present
For special occasions, I like to slice the bread thick and turn it into little toast squares topped with various toppings—think whipped feta, smoked salmon, or fresh tomatoes. Another favorite is hollowing out the loaf and using it as an edible bread bowl for dips or chowders—it’s always a hit!
Make Ahead and Storage
Storing Leftovers
I store leftover sourdough bread in an airtight container or a plastic bag at room temperature—this keeps it fresh for up to three days. If you leave it out uncovered, it tends to dry and get hard faster, so sealing it well is key.
Freezing
Freezing sourdough bread works wonderfully! I slice my loaf first, wrap the slices tightly in plastic wrap, then a layer of foil or a freezer bag. This way, I can grab just a slice or two when bread cravings hit, and it stays flavorful and moist after thawing.
Reheating
When I reheat leftover sourdough, I pop slices into a toaster or warm whole loaves wrapped in foil in a 350°F oven for 10-15 minutes. This revives the crust’s crunch and warms the crumb perfectly—no microwave for me, as it tends to make the bread chewy.
FAQs
-
What if my sourdough starter isn’t bubbly and active yet?
Getting your starter bubbling and active is crucial. If yours is sluggish, try feeding it more frequently with equal parts flour and water and keeping it in a warmer spot (around 75°F). It usually takes about 5-7 days to develop strong activity. Using a mature starter will guarantee your bread rises nicely.
-
Can I use all-purpose flour instead of bread flour?
Yes, you can, but bread flour’s higher protein content helps develop gluten, leading to better structure and chew. All-purpose flour works in a pinch, but you might notice a denser crumb and less rise. I prefer bread flour for a consistent, airy loaf.
-
How do I know when my dough has risen enough during bulk fermentation?
Rather than relying only on time, look for the dough to rise about 50% in volume, bubbles forming on the surface, and a slight jiggle when moving the bowl. These signs mean your dough is ready for shaping and will give you the best oven spring.
-
What should I do if the dough feels too sticky?
Sticky dough can be intimidating! One trick I’ve found helpful is lightly wetting your hands or using a bench scraper to handle the dough. Also, make sure you’re measuring flour and water accurately with a scale. Sticky dough is often a sign of high hydration, which creates an open crumb, so embrace it a bit—but if it’s unmanageable, add a little flour during shaping.
-
Can I make the dough ahead of time and bake it later?
Absolutely! Proofing your dough cold in the fridge for up to 48 hours slows fermentation and enhances the flavor. Just be sure to cover it well so it doesn’t dry out. When ready to bake, bring it to room temperature briefly, score, and follow the baking steps.
Final Thoughts
Honestly, this Homemade Sourdough Bread Recipe has become my go-to for homemade bread—it’s approachable enough to fit into busy days, but it rewards you with those bakery-style results that feel like a real win. I remember the first time I pulled a golden loaf from my oven and smelled that tangy crust; it’s addictive. If you’re curious about sourdough or just want to impress with fresh bread, I encourage you to give this a try. You’ll enjoy the process—and more importantly, you’ll adore every slice.
Print
Homemade Sourdough Bread Recipe
- Prep Time: 18 hr
- Cook Time: 45 min
- Total Time: 18 hr 45 min
- Yield: 1 loaf
- Category: Bread
- Method: Baking
- Cuisine: American
Description
This Homemade Sourdough Bread recipe guides you through creating a beautiful, crusty sourdough loaf with a light, airy crumb. Using just a handful of simple ingredients and a few hours of active time spread over a long fermentation process, this recipe is perfect for beginners and experienced bakers alike. The step-by-step instructions help you develop gluten through folding and resting, proof your dough for optimal rise and flavor, and bake it in a preheated Dutch oven to achieve an irresistibly crisp crust and tender interior. Ideal for fresh sandwiches or toasted slices, this bread stays fresh for days and freezes well for later enjoyment.
Ingredients
Basic Sourdough Bread Ingredients
- 50 – 100 g (1/4 – 1/2 cup) bubbly, active sourdough starter (100 g recommended)
- 375 g (1 1/2 cups plus 1 tbsp) warm water, or more if needed
- 500 g (4 cups plus 2 tbsp) bread flour
- 9 to 12 g (1.5 – 2.5 teaspoons) fine sea salt (use 12 g if using fine sea salt or kosher salt)
Instructions
- Mix starter and water: Whisk the bubbly, active sourdough starter and warm water together in a large bowl using a fork or spatula until combined.
- Add flour and salt: Add bread flour and fine sea salt to the liquid mixture. Mix thoroughly to combine, finishing by hand if necessary to form a rough, shaggy dough.
- Rest the dough: Cover the bowl with a damp towel and let the dough rest for 30 minutes to hydrate the flour and start gluten development.
- Stretch and fold #1: After resting, stretch and fold the dough by grabbing a corner and pulling it to the center. Repeat 4-5 times around the dough. Rest for 30 minutes, then repeat the stretch and fold once again. If time allows, perform these stretch and folds twice more over two hours for a total of four. Even one set improves dough structure.
- Bulk fermentation: Cover the bowl with a towel and let the dough rise at room temperature (around 70°F/21°C) for 8 to 10 hours, or until it has increased by about 50% in volume and shows bubbles and jiggle. In warmer environments, this may take less time. Rely on visual cues over timing.
- Pre-shape the dough: Turn the dough out onto a lightly floured surface. Gently fold it into a round by folding the top down to the center, turning the dough, and repeating until the round is formed. Use a bench scraper to create surface tension by pushing and pulling the dough gently.
- Rest pre-shaped dough: Place the dough seam side up and let it rest for 30 minutes while preparing a proofing basket or bowl lined with a floured towel (preferably rice flour).
- Final shaping and proofing: Shape the dough again as before, then place it seam side up into the lined bowl. Cover and refrigerate for at least 1 hour and up to 48 hours. For best flavor and crumb, refrigerate at least 24 hours. Optionally, place the dough in a loosely tied bag to prevent drying.
- Preheat oven and Dutch oven: Place a Dutch oven inside your oven and preheat to 550°F (290°C). Cut a piece of parchment paper to fit inside the Dutch oven.
- Score and bake: Turn the dough out onto the parchment paper. Score the top with a sharp knife or razor blade in your desired pattern (a simple “X” works well). Using the parchment, transfer the dough carefully into the preheated Dutch oven.
- Bake covered: Lower oven temperature to 450°F (230°C). Cover the Dutch oven with its lid and bake for 30 minutes.
- Bake uncovered: Remove the lid, lower the oven temperature to 400°F (200°C), and bake an additional 10 to 15 minutes. If needed, lift the bread out of the pot and bake directly on the oven rack for 5 to 10 minutes to crisp the crust further.
- Cool: Remove the bread from the oven and let cool completely on a wire rack for at least 1 hour before slicing to finish setting the crumb.
- Storage: Store bread in an airtight plastic bag or container at room temperature for up to 3 days. The bread freezes well for extended storage.
Notes
- This recipe requires an active sourdough starter; King Arthur Flour and Breadtopia starters are recommended.
- Investing in a digital scale ensures accurate measurement and better results.
- Flour sack towels are ideal for proofing as they prevent sticking.
- Rice flour is preferred for dusting proofing baskets since it doesn’t burn like all-purpose flour.
- Adjust hydration by varying water amount; 380 g water gives a higher hydration dough with a more open crumb.
- Both fine sea salt and kosher salt (Diamond Crystal brand preferred) work well; use 12 g salt total.
- For more open crumb, shape a batard instead of a round and consider skipping preshaping.
- Additional ingredients like cheese, herbs, or jalapeños can be added before the third set of stretch-and-folds with an extra fold to incorporate them evenly.
- Select starter amount based on ambient temperature: 100 g starter speeds fermentation in cold climates; 50 g suffices for warm/humid climates or overnight ferment.
- Monitor bulk fermentation visually; a straight-sided vessel makes it easier to judge volume increase.
- Refer to troubleshooting tips for sticky dough and other common issues.
- Watch the included step-by-step videos for detailed guidance on shaping and stretching.
Nutrition
- Serving Size: 1 slice (about 60g)
- Calories: 160
- Sugar: 0.2 g
- Sodium: 220 mg
- Fat: 0.8 g
- Saturated Fat: 0.1 g
- Unsaturated Fat: 0.6 g
- Trans Fat: 0 g
- Carbohydrates: 33 g
- Fiber: 2 g
- Protein: 5 g
- Cholesterol: 0 mg


