

This vibrant Sushi Bowl brings all the delicious flavors of sushi into an easy, customizable bowl format that’s perfect for busy weeknights. Featuring teriyaki chicken, fresh vegetables, and all your favorite sushi condiments, this deconstructed sushi experience delivers big on taste without the rolling skills. Ready in just 35 minutes, it’s a family-friendly meal that lets everyone create their perfect combination.
Why You’ll Love This Recipe
- No Rolling Required: All the amazing flavors of sushi without any of the technical skills needed for traditional rolls.
- Customizable: Each person can build their own bowl with exactly what they love – perfect for families with picky eaters.
- Quick and Nutritious: Packed with protein, vegetables, and whole grains, this balanced meal comes together in just 35 minutes.
- Meal Prep Friendly: The components can be prepared ahead of time for quick assembly throughout the week.

Ingredients You’ll Need
- Diced Chicken: The protein star of this dish, perfectly baked and coated in savory teriyaki sauce. It adds a satisfying heartiness to the bowl.
- Sushi Rice: The foundation of your bowl – sticky, slightly sweet, and quintessentially Japanese. The perfect base to build your flavors on.
- Edamame Beans: These green soybeans add protein, fiber, and a satisfying pop of texture to every bite.
- Teriyaki Sauce: The flavor-packed coating for your chicken that brings sweet, savory, and umami notes to tie everything together.
- Coleslaw Mix: A time-saving way to add crunch and freshness. The cabbage mixture provides the perfect textural contrast.
- Toasted Seaweed: Brings that distinctive ocean flavor that makes sushi taste like sushi. Adds a wonderful crispy-chewy texture.
- Sliced Vegetables: Colorful additions like capsicum (bell pepper), carrot, and cucumber add freshness, crunch, and visual appeal.
- Sesame Seeds: These tiny seeds pack a nutty flavor and add a beautiful finishing touch.
- Kewpie Mayonnaise: This Japanese mayo is richer and tangier than regular mayo, adding a creamy element that brings everything together.
- Pickled Ginger: Adds a bright, palate-cleansing zing between bites, just like at a sushi restaurant.
- Avocado: Brings that creamy, buttery texture that makes sushi rolls so indulgent and satisfying.
Note: You’ll find the complete list of ingredients, along with their exact measurements, in the printable recipe card at the bottom of this post.
Variations
Want to mix things up? Here are some delicious alternatives:
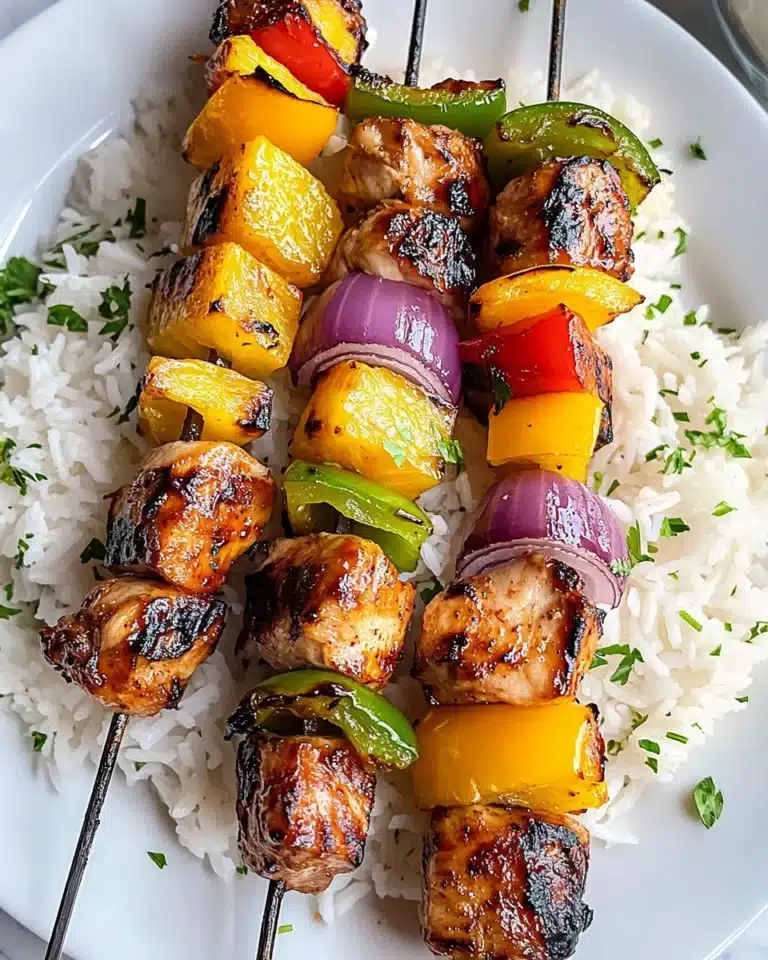
- Protein Options: Swap the chicken for salmon, tuna, shrimp, or tofu for completely different flavor profiles.
- Grain Alternatives: Try brown rice, quinoa, or cauliflower rice for different nutritional profiles.
- Spicy Version: Add sriracha mayo or a sprinkling of shichimi togarashi (Japanese seven-spice) for heat lovers.
- California Style: Add imitation crab meat and extra avocado for a California roll in bowl form.
- Poke-Inspired: Use raw sushi-grade salmon or tuna (properly sourced) instead of chicken for a poke bowl variation.
How to Make Sushi Bowls
Step 1: Prepare the Sushi Rice
Cook your sushi rice according to package instructions. While it’s cooking, move on to preparing the other components. Once done, the rice should be sticky but still maintain distinct grains.
Step 2: Bake the Teriyaki Chicken
Preheat your oven to 200°C (400°F). Spread the diced chicken on a lined baking tray with edges. Add a tablespoon of oil and toss until all pieces are coated. Bake for 15 minutes until cooked through. Remove from the oven and immediately toss with teriyaki sauce, ensuring each piece is well-coated.
Step 3: Prepare the Vegetables and Condiments
While the chicken and rice are cooking, prepare your fresh ingredients. Slice or grate your vegetables, tear the toasted seaweed into bite-sized pieces, prepare your coleslaw, and steam the edamame beans according to package instructions.
Step 4: Assemble Your Sushi Bowls
Start with a base of sushi rice and/or coleslaw in each bowl. Arrange the teriyaki chicken, sliced vegetables, edamame, and avocado in sections around the bowl. Sprinkle with toasted seaweed pieces and sesame seeds. Add dollops of kewpie mayo and small piles of pickled ginger as desired.
Step 5: Add Final Touches
Drizzle with additional teriyaki sauce if desired. Add wasabi or soy sauce on the side for dipping. Serve immediately while the rice is still slightly warm and the chicken is at its most flavorful.
Pro Tips for Making the Recipe
- Prep Ahead: Chop all vegetables and cook the rice in advance to make assembly lightning-quick at mealtime.
- Rice Texture: For authentic sushi rice, rinse it thoroughly before cooking to remove excess starch, then season with a mixture of rice vinegar, sugar, and salt after cooking.
- Family-Style Serving: Set up a “sushi bowl bar” with all components in separate containers and let everyone customize their own bowl.
- Chicken Doneness: Don’t overcook the chicken—15 minutes for small diced pieces is usually perfect for juicy results.
- Seaweed Storage: Keep your nori sheets in an airtight container with a desiccant packet to maintain crispness.
How to Serve

Perfect Pairings
- Serve with miso soup on the side for a complete Japanese-inspired meal.
- A small side of pickled vegetables adds extra tang and authenticity.
- Green tea or a cold Asahi beer complements these flavors beautifully.
Presentation Ideas
- Use a wide, shallow bowl to showcase all the colorful components.
- Arrange ingredients in neat sections for Instagram-worthy presentation.
- For special occasions, garnish with tobiko (flying fish roe) or a sprinkle of furikake seasoning.
Make Ahead and Storage
Storing Leftovers
Store components separately in airtight containers in the refrigerator. The chicken, rice, and prepped vegetables will last 3-4 days. Keep seaweed separate and only add it just before serving to prevent sogginess.
Meal Prep
This recipe is ideal for meal prep! Prepare all components on Sunday, store separately, and assemble fresh bowls throughout the week for quick lunches or dinners.
Reheating
Only reheat the rice and chicken components. Microwave covered with a damp paper towel to prevent drying. Always add fresh vegetables, avocado, and seaweed after reheating for the best texture.
FAQs
-
Can I make this sushi bowl vegetarian or vegan?
Absolutely! Replace the chicken with firm tofu, tempeh, or more edamame for protein. For a vegan version, use vegan mayo instead of kewpie (though the flavor will differ slightly). The bowl will still be delicious and satisfying without animal products.
-
What if I can’t find some of the traditional Japanese ingredients?
Don’t worry! Regular mayonnaise with a touch of rice vinegar can substitute for kewpie. Any teriyaki sauce works well, and if you can’t find nori sheets, you can omit them or use furikake rice seasoning instead. The core concept is flexible.
-
Is there a faster way to prepare this on busy weeknights?
Yes! Use rotisserie chicken tossed in teriyaki sauce, pre-shredded vegetables, and microwave steam-in-bag edamame. Cook the rice in advance or use microwave rice pouches. With these shortcuts, you can have dinner ready in 15 minutes.
-
How do I make sure my sushi rice turns out properly?
The key is rinsing the rice thoroughly until the water runs clear before cooking. After cooking, let it rest covered for 10 minutes, then gently fold in a mixture of 2 tablespoons rice vinegar, 1 tablespoon sugar, and 1/2 teaspoon salt per cup of uncooked rice.
Final Thoughts
This Sushi Bowl recipe brings the joy of Japanese flavors to your table without any of the fuss of traditional sushi making. It’s the perfect way to satisfy your sushi cravings while keeping dinner simple and customizable. The combination of savory teriyaki chicken, fresh vegetables, and all those wonderful sushi condiments creates a bowl that’s both comforting and exciting. Give it a try for your next dinner – I bet it will become a regular in your meal rotation!
Print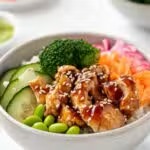
Homemade Sushi Bowl Recipe
- Prep Time: 5 minutes
- Cook Time: 30 minutes
- Total Time: 35 minutes
- Yield: 4 servings
- Category: Main-course
- Method: Baking
- Cuisine: Japanese-inspired
- Diet: Halal
Description
This easy and customizable Sushi Bowl recipe features tender teriyaki chicken, sticky sushi rice, colorful fresh vegetables, edamame beans, and favorite Japanese condiments. Perfect for a healthy, delicious meal that the whole family can build to their liking!
Ingredients
Main Ingredients
- 600 grams diced chicken
- 1 tablespoon oil
- 1 cup sushi rice
- 1 cup edamame beans
- Teriyaki sauce (to taste)
- 2 cups coleslaw
- Toasted seaweed (nori), torn into pieces
- Sliced vegetables (capsicum, carrot, cucumber, avocado)
- 1 tablespoon sesame seeds
Condiments
- Kewpie mayonnaise
- Pickled ginger
- Optional: Wasabi, soy sauce, extra teriyaki sauce
Instructions
- Prepare Sushi Rice:
Cook sushi rice according to the instructions on the package. Once cooked, set aside and keep it warm. - Cook Teriyaki Chicken:
Preheat your oven to 200°C (400°F). Spread the diced chicken breast on a lined baking tray with a lip. Drizzle with oil and toss so all pieces are coated. Bake in the oven for 15 minutes or until cooked through. - Toss in Teriyaki Sauce:
Remove the chicken from the oven, and stir through your preferred teriyaki sauce until all pieces are well coated. - Prep Salad and Condiments:
While the chicken and rice are cooking, prepare your fresh vegetables by slicing or grating capsicum, cucumbers, carrots, and avocado. Tear toasted seaweed (nori) into bite-sized pieces. Prepare your coleslaw, and steam edamame beans as per package instructions. - Assemble Sushi Bowls:
Spoon a layer of sushi rice and/or coleslaw into the bottom of each bowl. Top with prepared vegetables, edamame, and toasted seaweed. Add the teriyaki chicken on top. - Add Finishing Touches:
Drizzle with your favorite condiments: Japanese mayonnaise, extra teriyaki sauce, pickled ginger, optional wasabi, and soy sauce. Sprinkle with sesame seeds. Serve immediately and enjoy!
Notes
- Set all ingredients on the table and let everyone build their own sushi bowl.
- This recipe is kid-friendly and easily customizable—add or omit ingredients to preference.
- You can substitute the chicken with firm tofu for a vegetarian version.
- Edamame beans are conveniently found in the freezer section of supermarkets.
- Use your favorite brand of teriyaki sauce, or opt for a gluten-free version if desired.
- Bagged Japanese slaw can be used for quick coleslaw prep.
- Nori sheets or seaweed snack packs both work well for toasted seaweed.
Nutrition
- Serving Size: 1 bowl (of 4)
- Calories: Approx. 450
- Sugar: 5g
- Sodium: 650mg
- Fat: 15g
- Saturated Fat: 2g
- Unsaturated Fat: 11g
- Trans Fat: 0g
- Carbohydrates: 50g
- Fiber: 7g
- Protein: 32g
- Cholesterol: 65mg


