
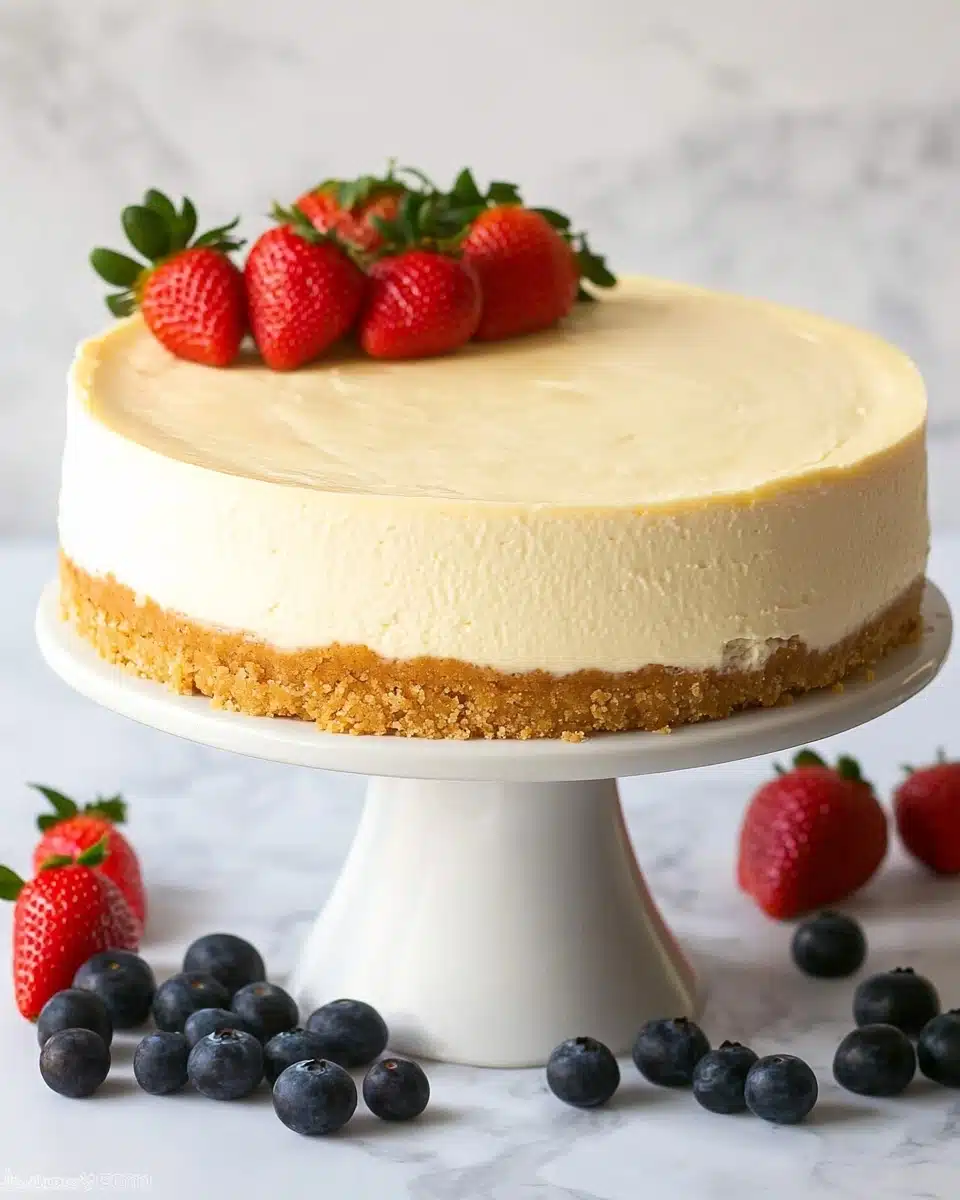
This Instant Pot Cheesecake is nothing short of magical—it’s luxuriously creamy, perfectly sweet, and delightfully fuss-free, thanks to the trusty Instant Pot. If you crave cheesecake but dread overbaking or water bath drama, this recipe will become your go-to dessert superstar!
Why You’ll Love This Recipe
- Ultra Creamy Texture: The Instant Pot creates a gentle, steamy environment that delivers a dreamy, dense cheesecake every single time.
- No-Fuss Method: Forget traditional water baths or cracked tops—your cheesecake comes out smooth and gorgeous without all the hassle.
- Faster Than Oven-Baking: You’ll have dessert on the table sooner, with no need to babysit the oven or guess when it’s perfectly set.
- Customizable and Crowd-Pleasing: Whether you keep it classic or add your own twist, this Instant Pot Cheesecake is always a showstopper for gatherings, birthdays, or just a Tuesday night treat!

Ingredients You’ll Need
The secret to an unforgettable Instant Pot Cheesecake is a handful of simple, top-notch ingredients that work together to create pure magic! Each one plays a special role—so let’s take a closer look at what you’ll need and why it matters.
- Graham cracker crumbs: This classic base adds that toasty, sweet crunch and holds up beautifully to the creamy filling.
- Melted butter: Binds the crumbs so your crust stays crisp, rich, and sliceable.
- Cream cheese (room temperature): The heart and soul of a cheesecake—softened cream cheese ensures a silky-smooth result.
- Granulated sugar: Just the right touch of sweetness to balance tangy and creamy flavors.
- Plain sour cream or Greek yogurt: Adds tang and tenderness, making the filling extra luscious.
- Large eggs (room temperature): These bring structure and that signature custardy texture.
- Vanilla extract: Infuses your cheesecake with gorgeous, fragrant warmth.
- Water (for Instant Pot): This helps create the perfect steamy environment that cooks your cheesecake gently and evenly.
Variations
One of the best things about this Instant Pot Cheesecake is how easy it is to customize! Whether you need a special flavor, want to make it lighter, or cater to a craving, these ideas make it simple to whip up the cheesecake of your dreams.
- Chocolate Swirl: Swirl in a few tablespoons of melted chocolate or chocolate hazelnut spread for a decadent twist.
- Lemon or Orange Zest: Add citrus zest to your filling for a bright, fresh pop that pairs perfectly with fruit toppings.
- Gluten-Free Crust: Simply swap in gluten-free graham crackers for those who need an allergy-friendly option.
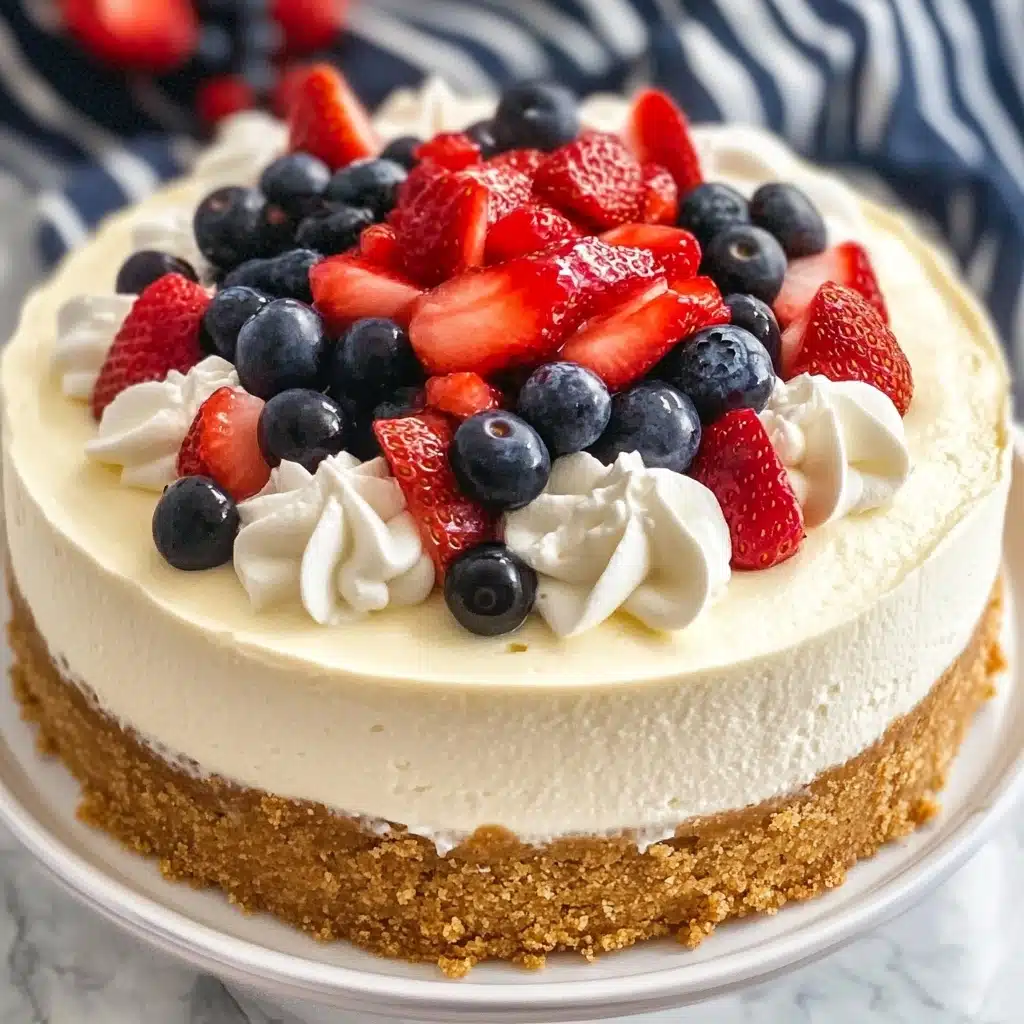
- Berry Topping: Top with fresh berries, berry compote, or even a handful of pomegranate seeds for color and zing.
How to Make Instant Pot Cheesecake
Step 1: Prepare the Crust
Start by stirring together your graham cracker crumbs and melted butter until the mixture resembles damp sand. Press this firmly into the bottom and about an inch up the sides of a 7-inch springform pan. Bake at 350°F for 10 minutes until the crust is set and toasty—this little oven trip keeps your crust crisp even with the Instant Pot’s humidity. Cool slightly while you make the filling.
Step 2: Make the Creamy Filling
Using an electric mixer, beat the room temperature cream cheese until it’s completely smooth and lump-free. Go low and slow as you add the sugar, then mix in the sour cream (or Greek yogurt) just until blended. Finish by adding eggs and vanilla, beating at low speed to avoid excess air bubbles—this keeps your Instant Pot Cheesecake super creamy with a flawless top.
Step 3: Assemble and Remove Air Bubbles
Pour your velvety batter into the cooled crust. Now, tap the pan gently on the counter to coax out any sneaky air bubbles. Use a knife tip to pop the larger ones; this simple step helps prevent cracks and ensures a professional, bakery-worthy finish.
Step 4: Set Up Your Instant Pot
Pour 1½ cups of water into the Instant Pot and set the trivet inside. Next, fold a long piece of aluminum foil lengthwise to make a sturdy sling—this will be your “cheesecake elevator.” Place the sling on the trivet with the edges sticking up, then carefully lower in the pan. Fold the sling ends over top. This creative trick makes removing the cheesecake a breeze later!
Step 5: Pressure Cook, Cool, and Chill
Seal the lid, turn the valve to sealing, and set the Instant Pot to Pressure Cook for 32 minutes. Once done, let the pressure release naturally—this slow, gentle finish is essential for a smooth, even set. When safe, lift the pan out with your sling and let it cool on a wire rack. Patience pays off! For that classic cheesecake texture, refrigerate for at least 8 hours (or overnight) before slicing and serving.
Pro Tips for Making Instant Pot Cheesecake
- Room Temperature Matters: Always let your cream cheese and eggs come to room temperature before mixing—this lights-out step is key for a perfectly smooth, lump-free filling.
- Gentle Mixing, Gorgeous Texture: Beat everything together at low speed to avoid whipping in too much air; this keeps cracks at bay and ensures that signature creamy density.
- Sling for Success: Make a sturdy foil sling to easily lower and lift out your cheesecake—there’s no risk of spilling or burning yourself on a hot pan!
- Natural Pressure Release: Give your Instant Pot Cheesecake a gentle finish by letting the pressure release on its own; this gradual cooling helps the center set up perfectly without splitting or sinking.
How to Serve Instant Pot Cheesecake
Garnishes
This cheesecake is a glorious canvas for your favorite toppings! Try a flurry of fresh berries, chocolate sauce, caramel drizzle, or a dollop of whipped cream. A sprinkle of lemon or orange zest will add brightness, while toasted nuts lend crunch and an earthy note.
Side Dishes
While Instant Pot Cheesecake honestly steals the show, it pairs beautifully with fresh fruit salad, a crisp glass of sparkling wine, or even a scoop of berry sorbet. For a cozy finale, serve with hot coffee or tea—the flavors and temperature contrast are unbeatable.
Creative Ways to Present
If you’re feeling festive, cut cheesecake into small squares and serve them on a dessert platter with toothpicks for an elegant party bite. Or, layer wedges with fruit in mini trifle glasses for a show-stopping presentation. Swirl sauces on plates or use edible flowers for a gourmet touch that’ll earn rave reviews!
Make Ahead and Storage
Storing Leftovers
Store any leftover Instant Pot Cheesecake in the refrigerator, tightly covered or in a sealed container. It stays fresh and luscious for up to 5 days—just let it come to room temperature for a bit before enjoying for maximum creaminess.
Freezing
To freeze, wrap slices or the whole cheesecake well in plastic wrap, then foil. Tuck into a freezer-safe bag or container and freeze for up to 2 months. Thaw overnight in the fridge for dessert that tastes like it was just made!
Reheating
Cheesecake is best served chilled or at room temperature, so generally no reheating is necessary. If you prefer it slightly warmer, let a slice sit on the counter for an hour, or microwave in 10-second bursts—just be cautious not to overheat and dry it out.
FAQs
-
Can I use a different size pan for Instant Pot Cheesecake?
The recipe is optimized for a 7-inch pan, which fits most 6- or 8-quart Instant Pots. If you use a different size, you may need to adjust the cooking time and possibly the ingredient quantities to ensure it fits and sets properly.
-
Why does my cheesecake crack on top?
Cracks usually come from overmixing or rapid temperature changes. Use low speed to mix, avoid adding too much air, and always let pressure release naturally in the Instant Pot for a smooth, crack-free surface.
-
Can I make Instant Pot Cheesecake ahead of time?
Absolutely! In fact, cheesecake benefits from a long chill—make it the day before and let it set in the fridge overnight for the best flavor and texture.
-
Can I customize the flavor or crust?
Definitely! Add chocolate, citrus zest, spices, or a flavored extract to the filling, and try vanilla or chocolate cookie crumbs for the crust. This Instant Pot Cheesecake is super versatile for every craving.
Final Thoughts
If you’ve ever wanted cheesecake perfection without the fuss, this Instant Pot Cheesecake is the answer. I hope you give it a try—whether you’re celebrating with friends or treating yourself, you deserve every creamy, dreamy bite!
Print
Instant Pot Cheesecake Recipe
- Prep Time: 15 minutes
- Cook Time: 34 minutes
- Total Time: 8 hours 49 minutes
- Yield: 12 servings
- Category: Instant Pot
- Method: Pressure Cooking
Description
This Instant Pot Cheesecake is a creamy and indulgent dessert that is easy to make in your pressure cooker. With a buttery graham cracker crust and a rich, velvety filling, this cheesecake is a crowd-pleaser for any occasion.
Ingredients
Graham Cracker Crust:
- 1 1/2 cups graham cracker crumbs
- 1/4 cup melted butter
Cheesecake Filling:
- 16 ounces cream cheese, room temperature
- 3/4 cup granulated sugar
- 1/2 cup sour cream or Greek yogurt (plain)
- 2 large eggs, room temperature
- 1 teaspoon vanilla extract
- 1 1/2 cups water (for Instant Pot)
Instructions
- Preheat oven to 350°F. In a medium bowl, stir together graham crumbs and butter. Press into the bottom and about 1″ up the sides of a 7″ springform pan or push pan.
- Bake crust for 10 minutes, or until dry. Set aside to cool slightly.
- In a large bowl, beat cream cheese with an electric mixer on medium speed until smooth. Add sugar and beat on low speed until smooth. Using low speed helps to prevent adding unnecessary air bubbles to the batter.
- Add sour cream and beat on low speed just until smooth.
- Add eggs and vanilla and beat on low speed until smooth.
- Pour into prepared crust. Tap gently on the counter to bring air bubbles to the top and pop with a knife.
- Tear off a long piece of foil and fold it lengthwise to create a long narrow sling. Pour the water into the Instant Pot, then place the trivet in the pot. Put the sling on top of the trivet, bending it to lay flat on the bottom and stick up the sides. Place pan on top of the sling, and fold the ends of the sling over top the pan.
- Put the lid on, turn the valve to sealing, and select Pressure Cook for 32 minutes. When the cook time is over, allow the pressure to release naturally before opening the valve and removing the lid.
- Remove the pan from the Instant Pot using the sling. Set on a wire rack to cool to room temperature before refrigerating for 8 hours or overnight.
- Slice and serve.
Nutrition
- Serving Size: 1 slice
- Calories: 344
- Sugar: 21g
- Sodium: 265mg
- Fat: 25g
- Saturated Fat: 14g
- Carbohydrates: 27g
- Fiber: 1g
- Protein: 5g
- Cholesterol: 108mg


