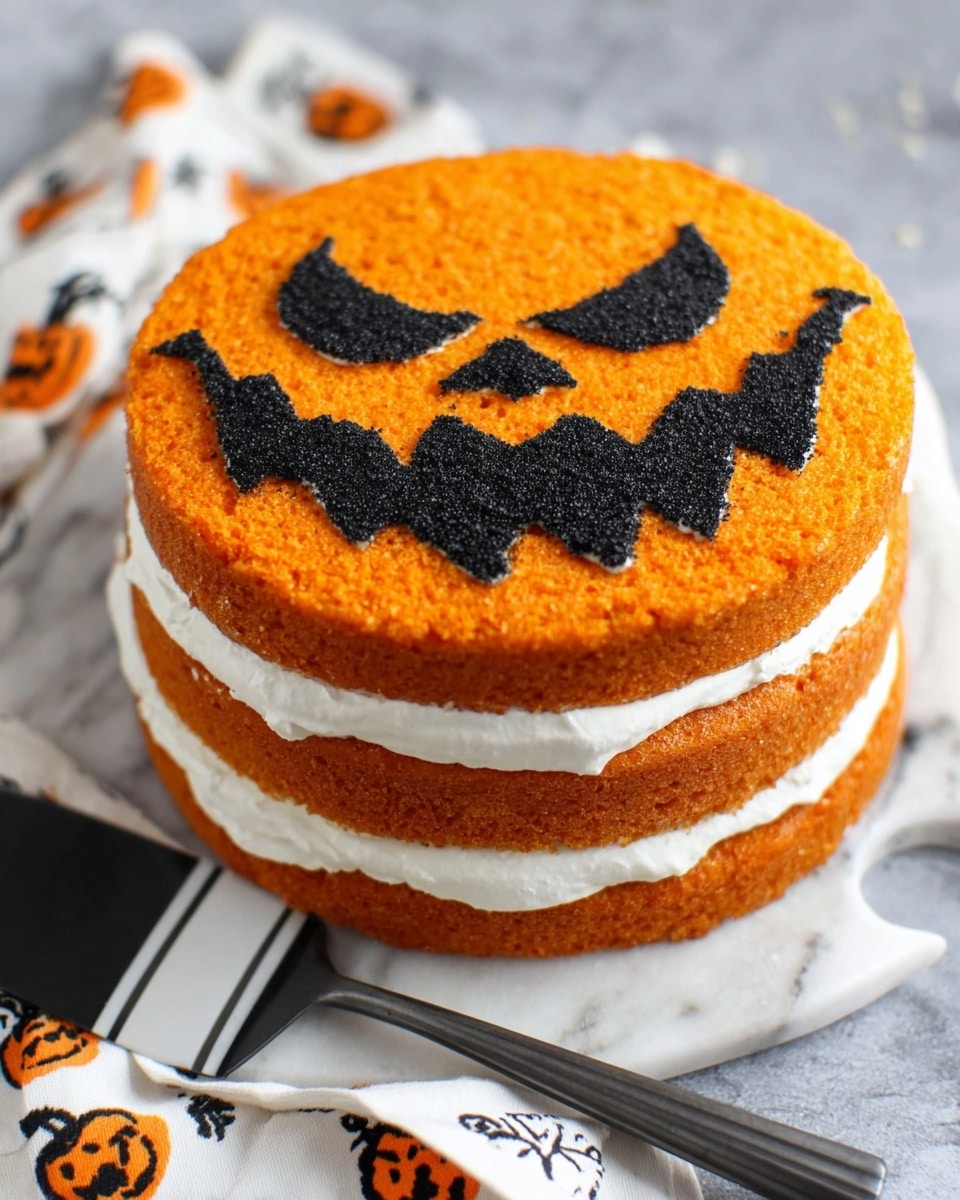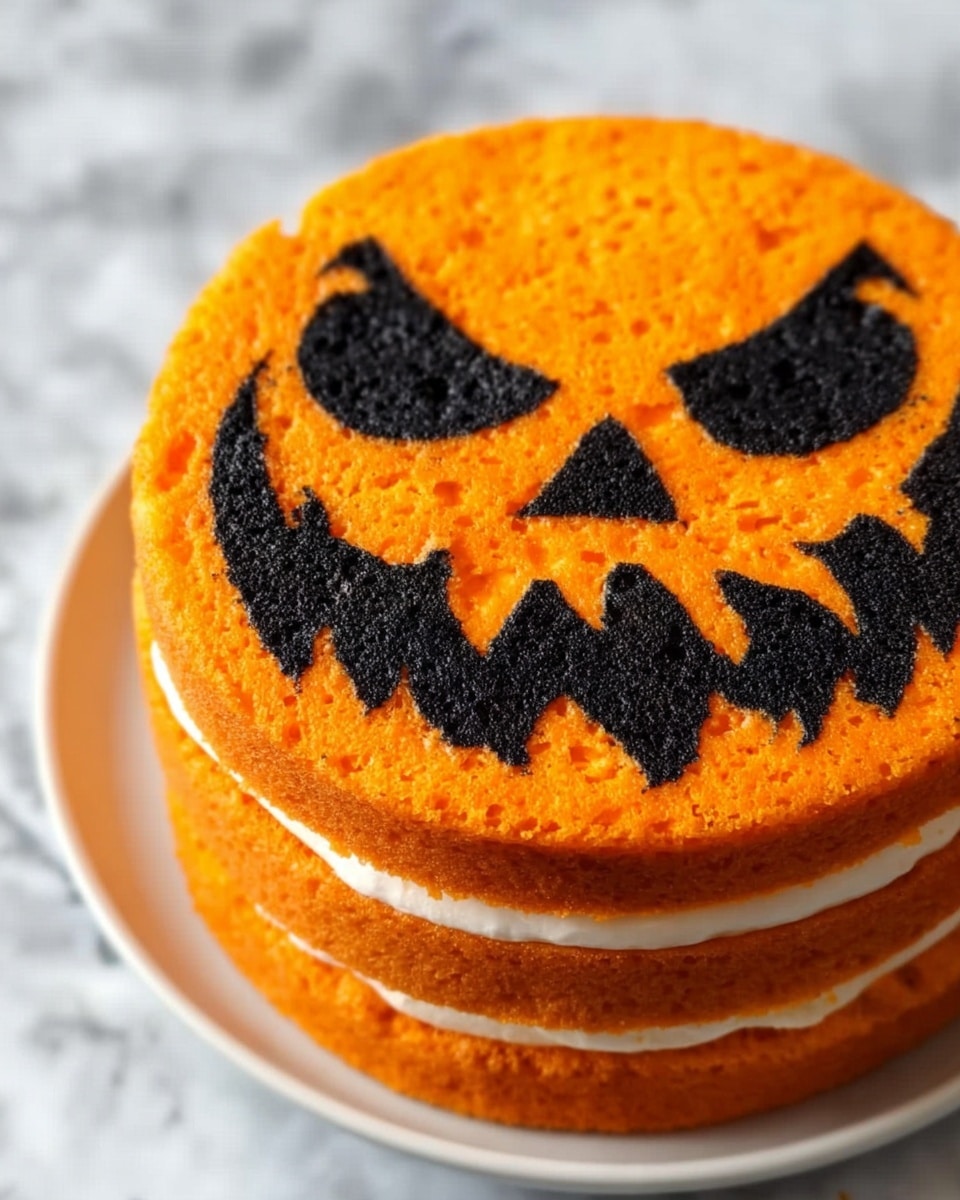
If you’re looking for a show-stopping dessert that doubles as a festive Halloween centerpiece, you’re in for a treat with this Jack-O-Lantern Cake Recipe. I absolutely love how this turns out every time — the spongy cake layers paired with fluffy whipped cream and that adorable jack-o-lantern face just steals the show. Whether you’re throwing a Halloween party or just want to amaze your family, this recipe is both fun to make and delicious to eat. Stick with me, and I’ll walk you through every step so you can nail this festive cake with zero stress.
Why You’ll Love This Recipe
- Festive and Fun: The Jack-O-Lantern face adds a playful and seasonal vibe that’s sure to delight kids and adults alike.
- Light and Fluffy: Unlike heavy Halloween desserts, this cake stays airy with whipped cream layers that balance sweetness perfectly.
- Impressive Yet Doable: You don’t need to be a pro baker — I’ll share tips to help you avoid common pitfalls and bake with confidence.
- Perfect for Make-Ahead: You can prepare this cake in advance to reduce your party day stress without losing flavor or texture.
Ingredients You’ll Need
For this Jack-O-Lantern Cake Recipe, I chose classic cake ingredients that work beautifully together to deliver soft, tender layers that hold up well with whipped cream. Using fresh eggs and real vanilla really makes a difference here, and you’ll want to pick a good quality heavy cream for the best whipped topping.
- Egg yolks: These provide richness and structure; make sure your eggs are room temperature for better mixing.
- Sugar (in two parts): Balances sweetness and gives the cake a lovely tenderness; separate usage in batter and egg whites stabilizes texture.
- Vegetable oil: Keeps the cake moist without overpowering flavors; neutral flavor is key.
- Whole milk: Adds creaminess and helps dissolve sugar for a smoother batter.
- Vanilla extract: Adds depth of flavor; fresh vanilla is always worth it.
- All-purpose flour: Provides structure; sift for lightness.
- Cornstarch: Keeps the cake tender by cutting down gluten development.
- Egg whites: Whipped to stiff peaks they create the airy lift in the cake.
- Vinegar: Stabilizes egg whites and helps maintain that perfect rise.
- Heavy whipping cream: For the luscious, fluffy filling; cold cream whips best.
- Confectioners sugar: Sweetens the whipped cream smoothly without grittiness.
- Dash of salt: Enhances all the flavors without being noticeable.
Variations
I love how versatile this Jack-O-Lantern Cake Recipe is — you can tweak it to fit your taste or dietary needs and still keep that festive feel. Don’t be afraid to get creative with it!
- Chocolate Twist: Once, I swapped ¼ cup of the flour for cocoa powder, giving the cake a subtle chocolate hint that my chocolate-loving friends adored.
- Dairy-Free Version: Substitute the whole milk with almond or oat milk and use coconut cream whipped with powdered sugar for a non-dairy whipped topping — it works surprisingly well!
- Spiced Pumpkin: Adding a teaspoon of pumpkin pie spice to the batter complements the jack-o-lantern theme fabulously — you’ll swear you’re biting into fall itself.
- Mini Cakes: I sometimes split the batter into mini pans for individual cakes — perfect for parties as everyone gets their own spooky treat to decorate.
How to Make Jack-O-Lantern Cake Recipe
Step 1: Prep Your Pan and Design
Start by preheating your oven to 375°F (190°C). Grease an 8-inch round pan with cooking spray and line it with parchment paper. Here’s a fun trick — draw or trace your Jack-O-Lantern face directly onto the parchment paper so you’ll have a perfect guide when piping the black batter later. I like to cut the parchment to fit snugly inside my pan; this makes flipping and peeling much easier after baking.
Step 2: Whisk the Egg Yolks and Sugar
Whisk together the 6 egg yolks and 4 tablespoons of sugar until smooth and lightened in color. The sugar helps give structure and sweetness to the yolks, so keep whisking until it feels just right. Remember to save your egg whites — we’re going to need those for a perfect fluffy texture coming up.
Step 3: Add the Wet Ingredients and Dry Ingredients
Mix in the vegetable oil, whole milk, and vanilla extract to your yolk mixture, whisking until fully combined. Then sift in the flour and cornstarch — this keeps the batter light and tender. The batter should be smooth now; you can add 2-3 drops of orange food gel here for that classic pumpkin color. This step is where your cake really starts coming to life visually.
Step 4: Whip Egg Whites to Stiff Peaks
Using your stand mixer and the whisk attachment, start beating the 6 egg whites until frothy. Slowly add the vinegar and 4 tablespoons of sugar while continuing to whip until stiff peaks form. This is super important — stiff peaks mean the whites hold their shape firmly without drooping. If you don’t get stiff peaks, your cake won’t rise properly and might turn out dense. Trust me, I learned this the hard way the first time I baked this cake!
Step 5: Fold in the Egg Whites
Gently fold the whipped egg whites into your batter, mixing just until even. Be really careful not to overmix here — you want to keep those air bubbles intact so the cake stays light and fluffy. I like to use a rubber spatula and a folding motion, stopping as soon as I don’t see any streaks.
Step 6: Make the Jack-O-Lantern Face
Scoop out about ¼ cup of your batter into a small bowl and dye it black with gel food coloring. Then transfer this black batter into a piping bag or a zip-top bag with the corner snipped off. Pipe your Jack-O-Lantern face design directly onto the parchment paper in your pan, using the guide you drew earlier. Pop the pan into the freezer for 5-8 minutes so the design sets up and doesn’t smear when you pour the rest of the batter.
Step 7: Add the Orange Batter and Bake
After your black face design has set, pour the rest of the orange batter over it, spreading evenly to cover the entire pan. Bake for 8-9 minutes or until the cake edges turn golden brown. Quick baking time keeps the cake soft and prevents drying out — so don’t skip the timer!
Step 8: Cool and Prepare Additional Layers
Once baked, carefully flip your cake out of the pan and peel the parchment paper off as soon as you can. This prevents your Jack-O-Lantern design from sticking or tearing. Use the remaining batter to bake two more plain layers of cake without any design. Let all your cake layers cool completely before the next step.
Step 9: Make the Whipped Cream Filling
Place your heavy whipping cream, confectioners sugar, and vanilla into a cold mixing bowl. Whisk on high speed until stiff peaks form, just like with the egg whites. I like to chill my bowl and whisk in the fridge for 10 minutes first — it really helps the cream whip up faster and fluffier. This whipped cream is the perfect light filling to balance the soft cake.
Step 10: Assemble Your Jack-O-Lantern Cake
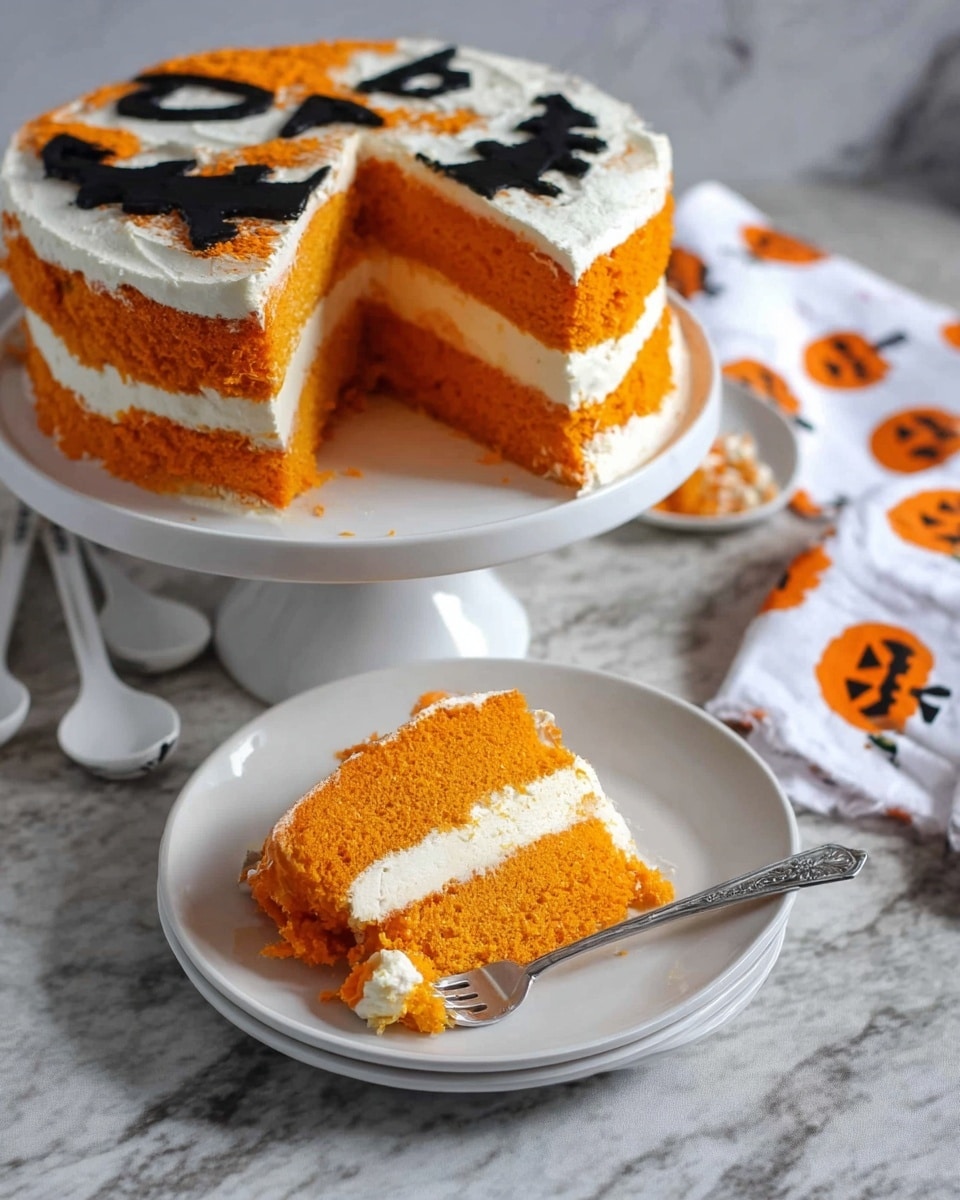
Start with one layer of the plain cake on your serving plate, then pipe or spread a generous layer of whipped cream on top. Add the second plain cake layer, repeat with whipped cream, and then carefully place the Jack-O-Lantern layer on top. Chill your assembled cake in the fridge until ready to serve. This layering gives you that delightful creamy texture with each bite and shows off the festive top.
Pro Tips for Making Jack-O-Lantern Cake Recipe
- Egg Whites Stiff Peak Test: When you lift the whisk, the peaks should stand tall without collapsing — this ensures a fluffy cake every time.
- Freeze the Design Batters: Setting your piped face design in the freezer before pouring batter keeps the shapes sharp and prevents bleeding.
- Don’t Overmix: Folding the egg whites too much deflates the batter, leading to a dense cake — mix gently just until combined.
- Peeling Parchment ASAP: Removing parchment as soon as the cake is out of the pan avoids sticking and keeps your design intact.
How to Serve Jack-O-Lantern Cake Recipe
Garnishes
I like to keep the garnishes simple so the Jack-O-Lantern face gets all the attention. A light sprinkle of edible glitter or a few candy pumpkins around the base always gets compliments. If you’re feeling fancy, you can add some fresh mint leaves or a dusting of cinnamon for an autumnal touch.
Side Dishes
This cake pairs beautifully with spiced apple cider or a cozy cup of hot chocolate. I’ve also enjoyed it alongside a fresh fruit salad with seasonal fruits like pears and cranberries — it helps brighten up the rich cake flavors.
Creative Ways to Present
For Halloween parties, I like to place the cake on a rustic wooden board and surround it with mini pumpkins or autumn leaves. Another fun idea is to bring out themed cake forks or plates to keep things festive. If you make mini Jack-O-Lantern cakes, you can present them in clear jars or little baskets for adorable individual servings.
Make Ahead and Storage
Storing Leftovers
I find that wrapping the cake tightly with plastic wrap and keeping it in an airtight container in the fridge keeps it fresh for up to 3 days. The whipped cream may soften slightly but the cake remains moist and delicious. Just bring it to room temp before serving for the best texture.
Freezing
Freezing this cake is possible but a bit tricky because of the whipped cream. I recommend freezing the unfrosted layers wrapped well in plastic wrap and foil. When ready to serve, thaw completely, whip fresh cream, and assemble for the best results.
Reheating
Since this is a cream-filled cake, you really don’t want to heat it. Instead, just let the cake come to room temperature before serving so the cake layers soften up again nicely without the whipped cream melting.
FAQs
-
Can I make the Jack-O-Lantern design without freezing it first?
Freezing the piped black batter for 5-8 minutes before pouring the orange batter really helps keep the design sharp and prevents the colors from blending together. Skipping this step can lead to blurry designs, so I recommend taking the extra few minutes to freeze it.
-
What can I use instead of vinegar in the egg whites?
You can substitute white vinegar with lemon juice or cream of tartar. Both help stabilize the egg whites and achieve those stiff peaks needed for the cake’s structure.
-
Is it okay to use store-bought whipped cream instead?
While store-bought whipped cream can save time, homemade whipped cream tends to hold up better between cake layers and offers a richer flavor and creamier texture that really enhances this Jack-O-Lantern Cake Recipe.
-
Can I make this cake gluten-free?
Yes! Try replacing all-purpose flour with a gluten-free flour blend that measures cup-for-cup. Just be sure the blend includes xanthan gum or another binder for structure, as this helps the cake maintain its texture.
Final Thoughts
This Jack-O-Lantern Cake Recipe holds a special place in my heart every fall. It’s not just the cute design — though that definitely steals the spotlight — but the way the cake layers stay moist, light, and perfectly complemented by the whipped cream. I remember the first time I tried this, I was nervous about getting the design right, but by breaking down each step, it became a fun project and a memorable experience. Now, every time I make it, it brings that same joy, and my family goes crazy for it. I hope you give it a try and enjoy the delicious results just as much!
Print
Jack-O-Lantern Cake Recipe
- Prep Time: 20 minutes
- Cook Time: 8 minutes per cake layer (total approx. 24 minutes)
- Total Time: 50 minutes
- Yield: 8-12 servings
- Category: Dessert
- Method: Baking
- Cuisine: American
Description
This festive Jack-O-Lantern Cake features a fun and spooky pumpkin face design baked right into the cake layers. Light and fluffy orange-tinted sponge cake layers are filled and topped with smooth whipped cream for a delightful balance of flavor and texture. Perfect for Halloween celebrations, this cake impresses with both its eye-catching appearance and delicious taste.
Ingredients
Cake Batter
- 6 egg yolks
- 4 Tbsp sugar
- 4 Tbsp vegetable oil
- 4 Tbsp whole milk
- 2 tsp vanilla extract
- 1 cup all purpose flour
- 2 Tbsp cornstarch
- 6 egg whites
- 1/2 tsp vinegar
- 4 Tbsp sugar (for egg whites)
- 2-3 drops orange food gel
- Black food coloring or gel
Whipped Cream Filling
- 2 cups heavy whipping cream
- 5-6 Tbsp confectioners sugar
- Dash of salt
- 2 tsp vanilla extract
Instructions
- Prepare the Pan and Design: Preheat the oven to 375°F (190°C). Grease an 8-inch circular pan with cooking spray and line it with parchment paper. Draw or trace a Jack-O-Lantern face on the parchment paper, fitting it exactly to the pan size.
- Mix Egg Yolks and Sugar: Whisk together the 6 egg yolks and 4 tablespoons sugar until smooth and pale. Set aside the egg whites for later use.
- Add Wet Ingredients: Add vegetable oil, whole milk, and 2 teaspoons vanilla extract to the egg yolk mixture and whisk thoroughly until fully combined.
- Combine Dry Ingredients: Sift in the all-purpose flour and cornstarch into the wet mixture. Whisk carefully until the batter is smooth. Add 2-3 drops of orange food gel to tint the batter orange.
- Whip Egg Whites: Using a stand mixer with the whisk attachment, whisk the 6 egg whites until frothy. Slowly add vinegar and 4 tablespoons sugar while continuing to whip until stiff peaks form.
- Fold Egg Whites: Gently fold the stiff egg whites into the orange batter just until combined, taking care not to deflate the batter.
- Create Black Batter for Design: Remove about 1/4 cup of the batter and mix in black food coloring to achieve a deep black color. Transfer this black batter to a piping bag.
- Pipe the Jack-O-Lantern Face: Pipe the black batter onto the prepared parchment in the shape of the Jack-O-Lantern design. Freeze the pan for 5-8 minutes to set the design.
- Pipe Orange Batter and Bake: Spread the remaining orange batter gently over the frozen black design to cover the pan evenly. Bake in the preheated oven for 8-9 minutes, or until the edges turn golden brown.
- Cool and Prepare Additional Layers: Remove the cake from the pan, peel off parchment while still warm. Use remaining batter to bake two more plain orange cake layers. Let all cake layers cool completely.
- Make Whipped Cream: In a clean stand mixer bowl fitted with a whisk attachment, whip together heavy cream, confectioners sugar, salt, and vanilla extract until stiff peaks form and cream holds shape.
- Assemble the Cake: On your serving plate, place one plain cake layer, pipe a generous layer of whipped cream, then top with the second plain cake layer. Repeat the whipped cream layer and then top the entire cake with the Jack-O-Lantern designed cake layer.
- Chill and Serve: Keep the assembled cake refrigerated until serving to maintain freshness and cream stability. Best enjoyed fresh but can be made ahead and wrapped tightly in plastic wrap.
Notes
- Ensure stiff peaks form when whipping egg whites for the batter to keep the cake light and airy.
- Do not overfold the egg whites into the batter to prevent deflation and runny texture.
- Use gel food coloring for vibrant, rich orange and black colors without thinning the batter.
- Assemble cake on a flat surface to keep layers even and stable.
- Store assembled cake in the fridge tightly wrapped to keep it fresh for up to 2 days.
- For ease, drawing the Jack-O-Lantern face on parchment paper beforehand helps guide the piping design.
Nutrition
- Serving Size: 1 slice (approx. 1/12 of cake)
- Calories: 280
- Sugar: 20g
- Sodium: 90mg
- Fat: 18g
- Saturated Fat: 11g
- Unsaturated Fat: 6g
- Trans Fat: 0g
- Carbohydrates: 24g
- Fiber: 0.5g
- Protein: 4g
- Cholesterol: 110mg

