
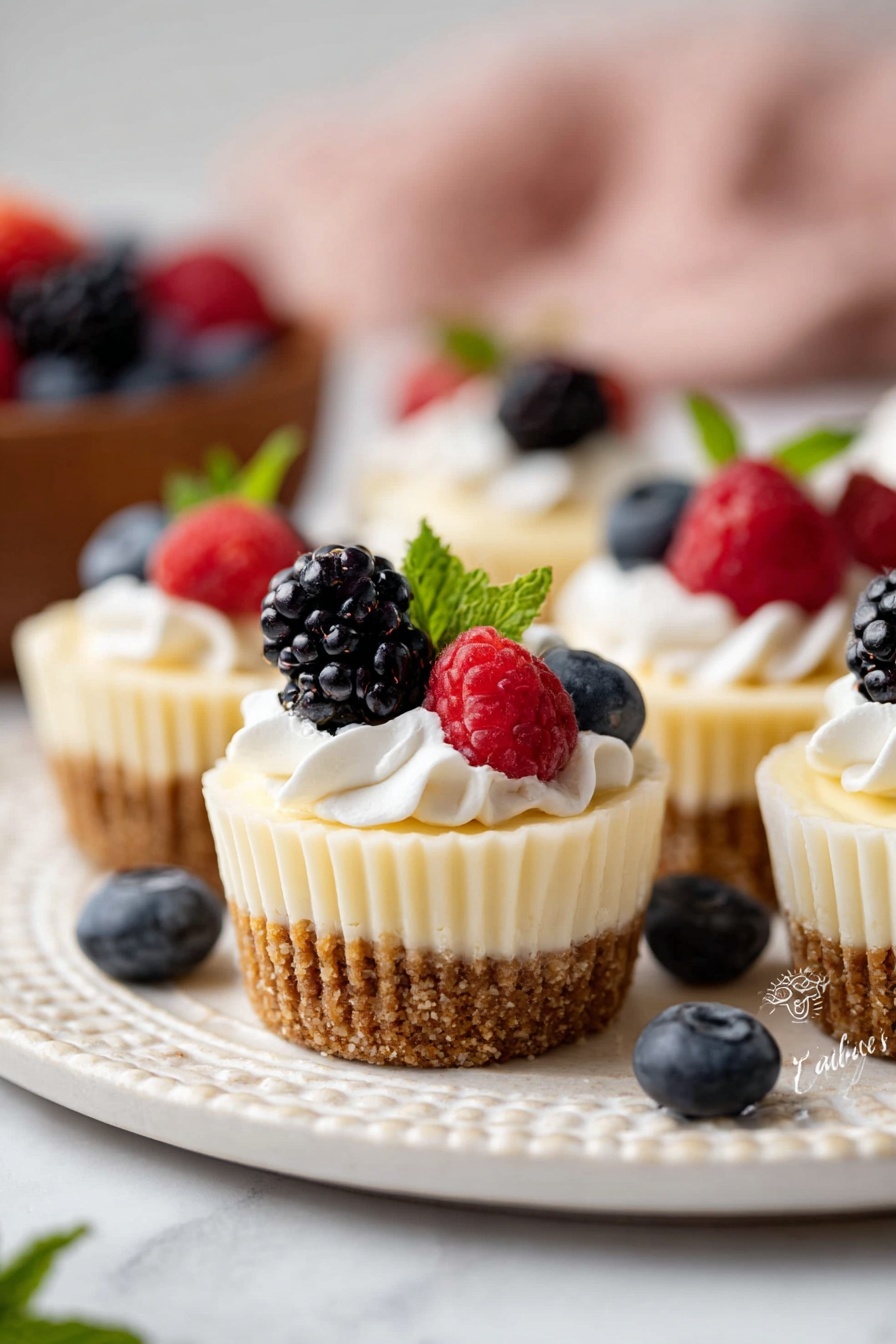
If you’ve ever wanted to wow your friends with a delightful dessert that’s both adorable and utterly delicious, you’re going to love this Mini Cheesecake Bites Recipe. These little gems pack all the creamy, dreamy flavor of a classic cheesecake—just in bite-size portions that make them perfect for parties, snacking, or anytime you want to treat yourself without the guilt of a huge slice. Trust me, once you try these, your family and friends will be asking for the recipe too!
Why You’ll Love This Recipe
- Perfect Portion Control: Each cheesecake is individual-sized, so you can indulge just a little or a lot without the mess of slicing.
- Simple Ingredients: You probably already have everything in your pantry, making it super easy to whip up on short notice.
- Customizable Flavors: Add your favorite toppings or mix-ins to make these cheesecakes truly your own.
- Impressive yet Easy: Looks fancy but comes together faster than a traditional cheesecake – perfect for beginners and pros alike.

Ingredients You’ll Need
This Mini Cheesecake Bites Recipe keeps things simple but delicious with classic cheesecake staples. I love using full-fat cream cheese and sour cream because they give you that rich, luscious texture without being overly dense. And those graham cracker crumbs? They add just the right crunch to balance the creaminess.
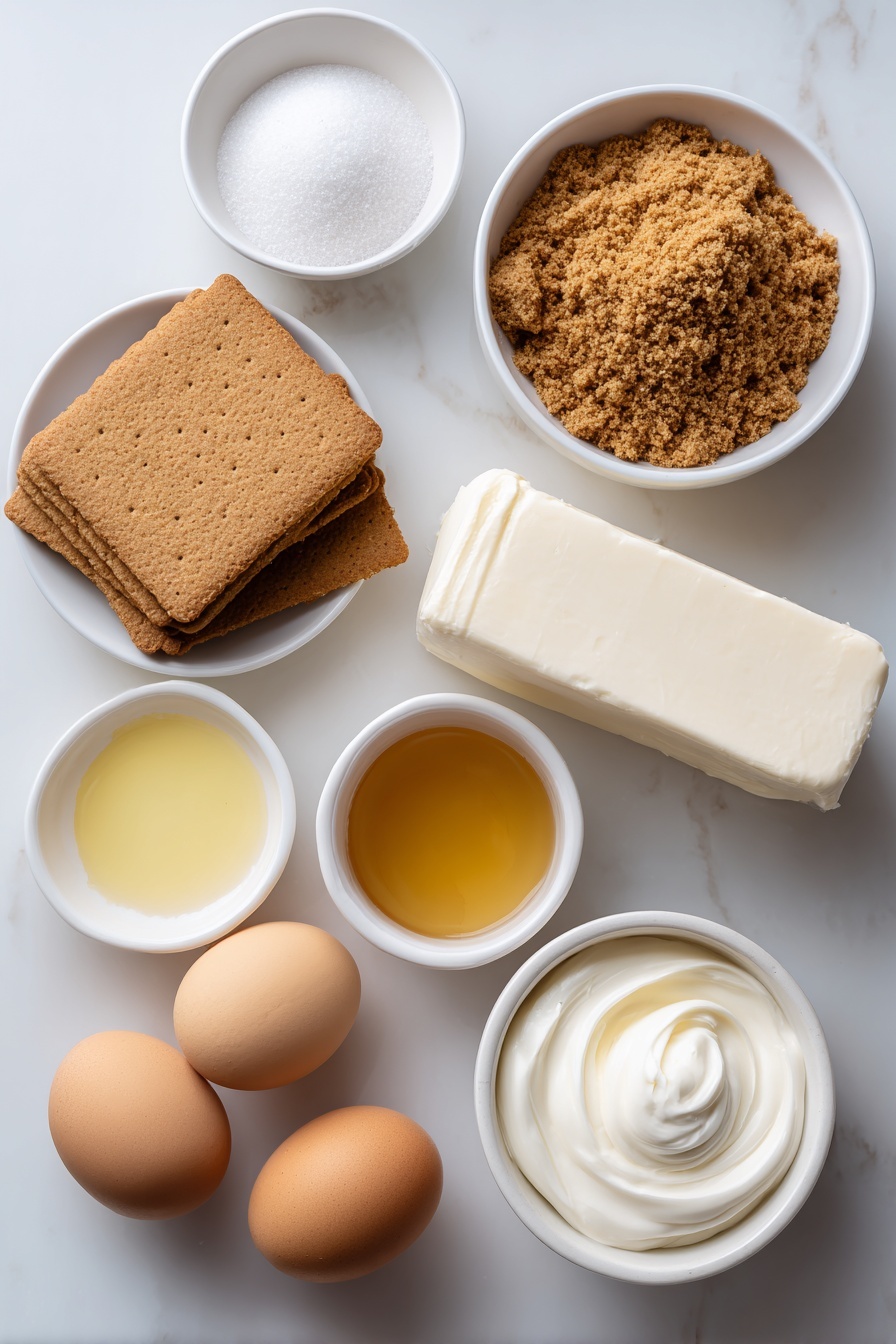
- Graham cracker crumbs: Crushing your own from full sheets gives the best texture and freshness.
- Granulated sugar: Adds just the right amount of sweetness without overpowering.
- Unsalted butter: Melting it before blending into the crust ensures even binding.
- Full-fat cream cheese: Always at room temperature for a silky smooth batter free of lumps.
- Full-fat sour cream: Adds tanginess and moisture to the cheesecake filling.
- Pure vanilla extract: The secret to lifting and rounding out the flavors.
- Freshly squeezed lemon juice: Just a touch brightens up the entire bite beautifully.
- Large eggs: Bring everything together and help set the cheesecake during baking.
Variations
One of the things I love most about this Mini Cheesecake Bites Recipe is how easy it is to make it your own. Whether you’re feeding a crowd or catering to specific dietary needs, there’s a tweak for everyone!
- Flavor Swaps: I sometimes mix in a swirl of raspberry jam or lemon curd for a fruity kick, and trust me, the kids love it!
- Crust Alternatives: Try crushed cookies like Oreos or gingersnaps instead of graham crackers for extra personality.
- Dairy-Free Option: I discovered using vegan cream cheese and coconut cream can still give you that creamy texture if you need to skip dairy.
- Mini Size Variations: For even tinier treats, bake in a mini muffin pan but shorten the baking time accordingly—just watch them closely.
How to Make Mini Cheesecake Bites Recipe
Step 1: Prep Your Crust and Muffin Pan
Start by preheating your oven to 350°F (177°C). Line a 12-count muffin pan with cupcake liners—this keeps clean-up easy and lets you pop the cheesecakes out without fuss. In a bowl, mix the graham cracker crumbs, sugar, and melted butter until sandy but sticking together slightly. Scoop about a heaping tablespoon into each liner, then press down firmly with your fingers or the back of a spoon to form a compact base. Bake for 6 minutes to set it—this step helps you avoid soggy crusts later.
Step 2: Beat the Cream Cheese Filling until Silky
Using a mixer on medium-high speed, cream together the softened cream cheese and sugar until completely smooth and creamy—this usually takes about 2 minutes. Patience here pays off because lumps can ruin the texture. Next, add sour cream, lemon juice, and vanilla extract. Beat just until combined. Then, with the mixer on medium, add your eggs one at a time, beating gently after each. Avoid overmixing, which can cause cracks or a dense texture.
Step 3: Fill and Bake Your Mini Cheesecake Bites
Carefully spoon or pour your creamy batter into each crust-lined cup, filling all the way to the top. Don’t worry if the crusts are still warm from baking. For an extra-smooth cheesecake surface, I like using an optional water bath method where you place a shallow pan of boiling water on the bottom rack—the steam helps keep the cheesecakes moist while baking. Bake until the edges are set but the centers jiggle slightly when you tap the pan, about 20 minutes. This little wiggle is crucial—it means your cheesecakes won’t be dry or overcooked.
Step 4: Cool and Chill
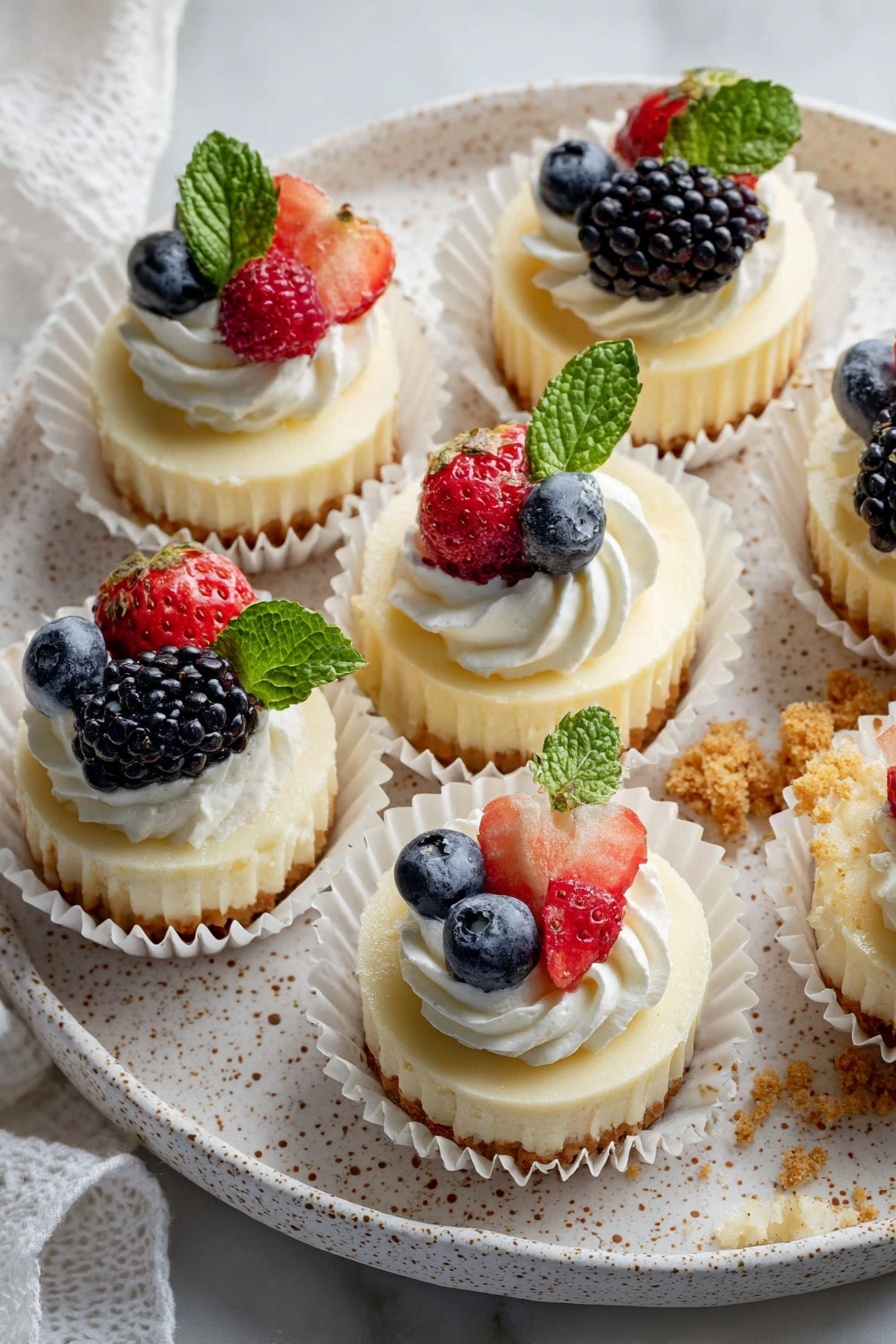
Once baked, let the pan cool on a wire rack for about 45 minutes, then refrigerate for at least 2 hours—or up to 24 for the best flavor and texture. If you’re in a hurry, freezing for 1 hour speeds this up. After chilling, the cheesecakes might settle slightly; don’t worry, that’s normal. If you want to get fancy, pipe on some whipped cream with a Wilton 1M tip and garnish with fresh berries or mint just before serving.
Pro Tips for Making Mini Cheesecake Bites Recipe
- Room Temperature Ingredients: Always bring cream cheese, sour cream, and eggs to room temp—it makes mixing smooth and prevents lumps.
- Don’t Overmix: Adding the eggs gradually and mixing just until combined stops cracks and keeps a silky texture.
- Use a Water Bath: This trick keeps your mini cheesecakes creamy and prevents sinking; I never skip it when I want perfect results.
- Chill Properly: Patience pays off—chilling at least 2 hours is key to beautifully set cheesecakes that slice and hold well.
How to Serve Mini Cheesecake Bites Recipe
Garnishes
I absolutely love topping these mini cheesecakes with fresh berries like blueberries or raspberries and a sprig of mint for that pop of color and freshness. Sometimes I’ll add a dollop of lightly whipped cream with a little vanilla, piped through a star tip for that bakery-style look, which always impresses without adding fuss. You can also drizzle chocolate or caramel sauce if you’re feeling indulgent!
Side Dishes
These bites are so rich and creamy that I usually serve them alongside a light, refreshing fruit salad or a simple cup of black coffee or tea to balance the sweetness. They also pair beautifully with a citrusy sorbet for a complete dessert spread that’s sure to delight.
Creative Ways to Present
For parties, I like to arrange the mini cheesecakes on a tiered serving platter garnished with edible flowers or fresh herbs. Another fun idea is to serve them in colorful cupcake liners to match your event theme. I’ve even packaged a few in cute clear boxes with ribbons as homemade gifts—always a hit!
Make Ahead and Storage
Storing Leftovers
I store leftover mini cheesecakes in an airtight container in the refrigerator, and they stay fresh and creamy for up to 5 days. I like to keep the cupcake liners on until serving to keep them nice and neat.
Freezing
If I have extra, I freeze them without toppings, wrapped well in plastic wrap and then stored in an airtight container. When frozen, they last about a month. Thaw overnight in the refrigerator before serving, and they maintain that creamy texture just as well as fresh.
Reheating
Honestly, I prefer to enjoy these chilled, but if you want a softer texture, bring them to room temperature for about 30 minutes before serving. Avoid microwaving, as it can ruin the smooth creaminess and cause the filling to separate.
FAQs
-
Can I make mini cheesecakes without a water bath?
Yes, you can skip the water bath if you’re in a hurry, but the water bath helps keep the cheesecakes moist and crack-free. Without it, you might notice slight sinking or minor cracks, but they’ll still taste fantastic.
-
What’s the best way to soften cream cheese for this recipe?
Take the cream cheese out of the fridge about an hour before you start. If you’re short on time, cut it into small cubes and microwave for 10-15 seconds at a time until just softened—not melted.
-
Can I double or halve the Mini Cheesecake Bites Recipe?
Absolutely! Just keep your muffin pan capacity in mind and adjust baking times slightly if needed. Smaller batches might bake a bit faster.
-
How do I prevent cracks on mini cheesecakes?
Don’t overmix the batter, add eggs slowly, and consider using the water bath method. Also, avoid overbaking; remember the centers should still jiggle a bit when done.
Final Thoughts
Honestly, this Mini Cheesecake Bites Recipe quickly became one of my go-to desserts when I want to impress without spending hours in the kitchen. They’re creamy, perfectly portioned, and endlessly versatile—exactly what I want in a sweet treat. Give it a try; once you taste that first bite, I bet you’ll be hooked like I am. Happy baking, friend!
Print
Mini Cheesecake Bites Recipe
- Prep Time: 20 minutes
- Cook Time: 20 minutes
- Total Time: 3 hours 15 minutes
- Yield: 12 mini cheesecakes
- Category: Dessert
- Method: Baking
- Cuisine: American
Description
These mini cheesecakes are perfectly creamy and delicious individual desserts baked in a standard 12-count muffin pan. Featuring a graham cracker crust and a smooth cream cheese filling with hints of vanilla and lemon, these bite-sized treats are ideal for portion control and easy serving. Optional steaming with a water bath ensures a silky texture and minimal cracking. Chill and garnish with whipped cream and fresh berries for an elegant presentation.
Ingredients
Crust
- 1 cup (120g) graham cracker crumbs (about 8 full sheet graham crackers)
- 2 Tablespoons (25g) granulated sugar
- 3 Tablespoons (43g) unsalted butter, melted
Filling
- 16 ounces (452g) full-fat brick cream cheese, softened to room temperature
- 1/2 cup (100g) granulated sugar
- 1/4 cup (60g) full-fat sour cream, at room temperature
- 1 teaspoon pure vanilla extract
- 1 teaspoon freshly squeezed lemon juice
- 2 large eggs, at room temperature
Instructions
- Preheat and prepare pan: Preheat oven to 350°F (177°C). Line a standard 12-count muffin pan with cupcake liners to prevent sticking and for easy removal.
- Make crust: In a medium bowl, combine graham cracker crumbs, granulated sugar, and melted butter. The mixture will have a sandy texture. Firmly press a heaping tablespoon of this crust mixture into the bottom of each cupcake liner to form the base. Bake these crusts for 6 minutes to set them before adding the filling.
- Prepare filling: Using a handheld or stand mixer with paddle or whisk attachment, beat the softened cream cheese and 1/2 cup granulated sugar on medium-high speed for about 2 minutes until smooth and creamy. Add sour cream, lemon juice, and vanilla extract, mixing until fully incorporated. With the mixer running on medium speed, add eggs one at a time, beating just until combined after each addition to avoid over-mixing.
- Fill crusts and optional water bath setup: Divide the cheesecake batter among the cupcake liners, filling each to the top. If using the water bath method to prevent sinking or cracking, boil water and pour about 1 inch into a large metal roasting pan placed on the bottom oven rack. Immediately place the filled muffin pan on the center rack above the water bath. Close the oven door to trap steam.
- Bake cheesecakes: Bake for about 20 minutes until the edges are set and centers slightly jiggle when gently tapped. The water bath adds steam to create a moist environment, but the muffin pan should not touch the water.
- Cool and chill: Set the pan on a cooling rack and allow cheesecakes to cool at room temperature for 45 minutes. Then transfer to the refrigerator and chill for at least 2 hours or up to 24 hours. To speed chilling, place in the freezer for 1 hour. Cover loosely if chilling longer than 2 hours. The cheesecakes may sink slightly during cooling, even with the water bath.
- Decorate and store: Optionally pipe whipped cream on top using a Wilton 1M tip and garnish with fresh berries or mint. Whipped cream can be prepared and decorated up to 24 hours ahead. Keep cheesecakes refrigerated until serving. Store leftovers covered in the fridge for up to 5 days.
Notes
- Use a standard 12-count muffin pan for this recipe; for extra mini cheesecakes, a mini muffin pan can be used but will require adjusted baking times.
- The optional water bath creates a steamy oven environment that helps minimize cracking and sinking but isn’t mandatory.
- Chilling is essential for the cheesecakes to set properly and develop flavor; avoid skipping this step.
- Make sure all ingredients are at room temperature to ensure a smooth, lump-free batter.
- Decorate with whipped cream and fresh berries or mint for an elegant presentation before serving.
- Leftovers can be stored refrigerated up to 5 days or frozen for longer storage.
Nutrition
- Serving Size: 1 mini cheesecake
- Calories: 280
- Sugar: 18g
- Sodium: 150mg
- Fat: 20g
- Saturated Fat: 12g
- Unsaturated Fat: 6g
- Trans Fat: 0g
- Carbohydrates: 19g
- Fiber: 0.5g
- Protein: 5g
- Cholesterol: 75mg


