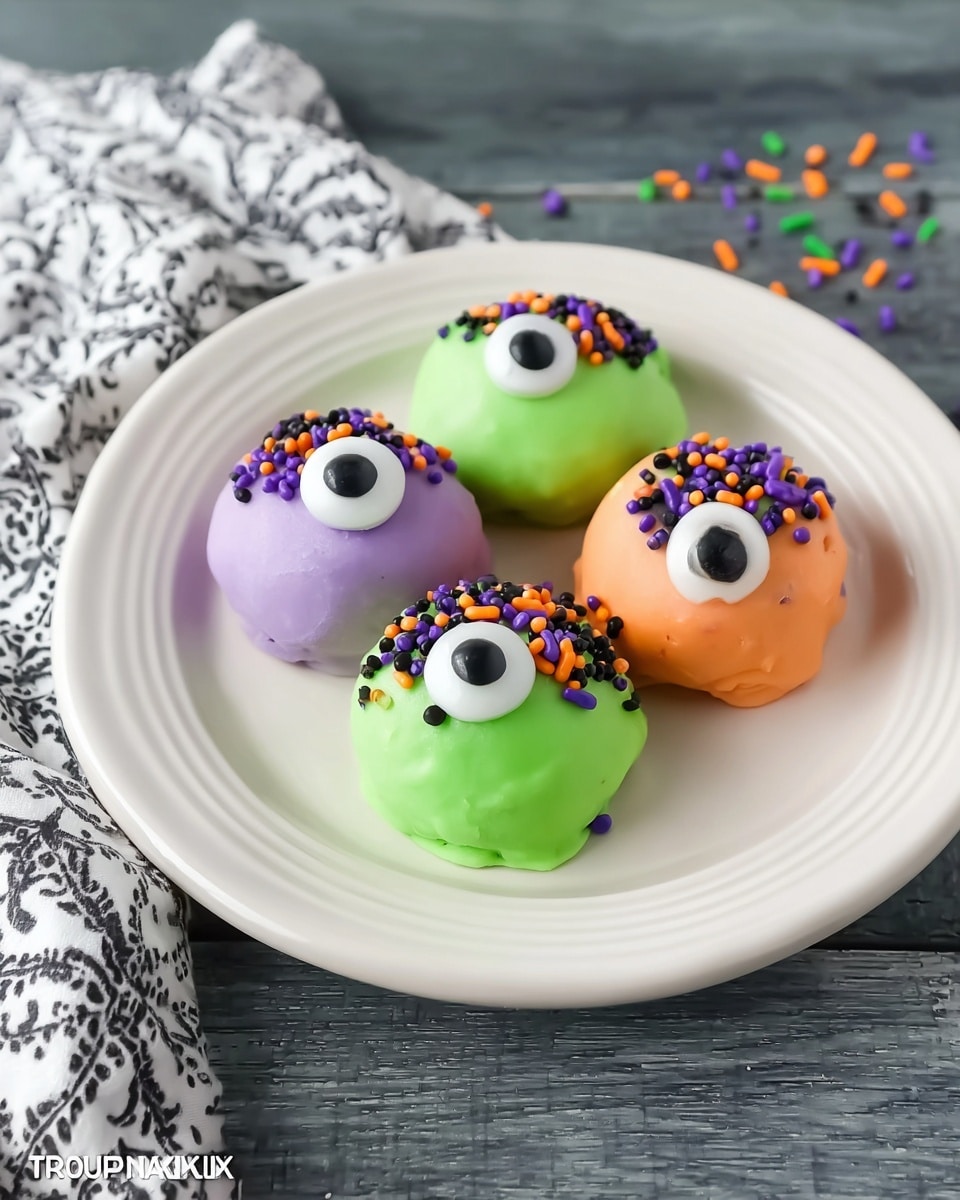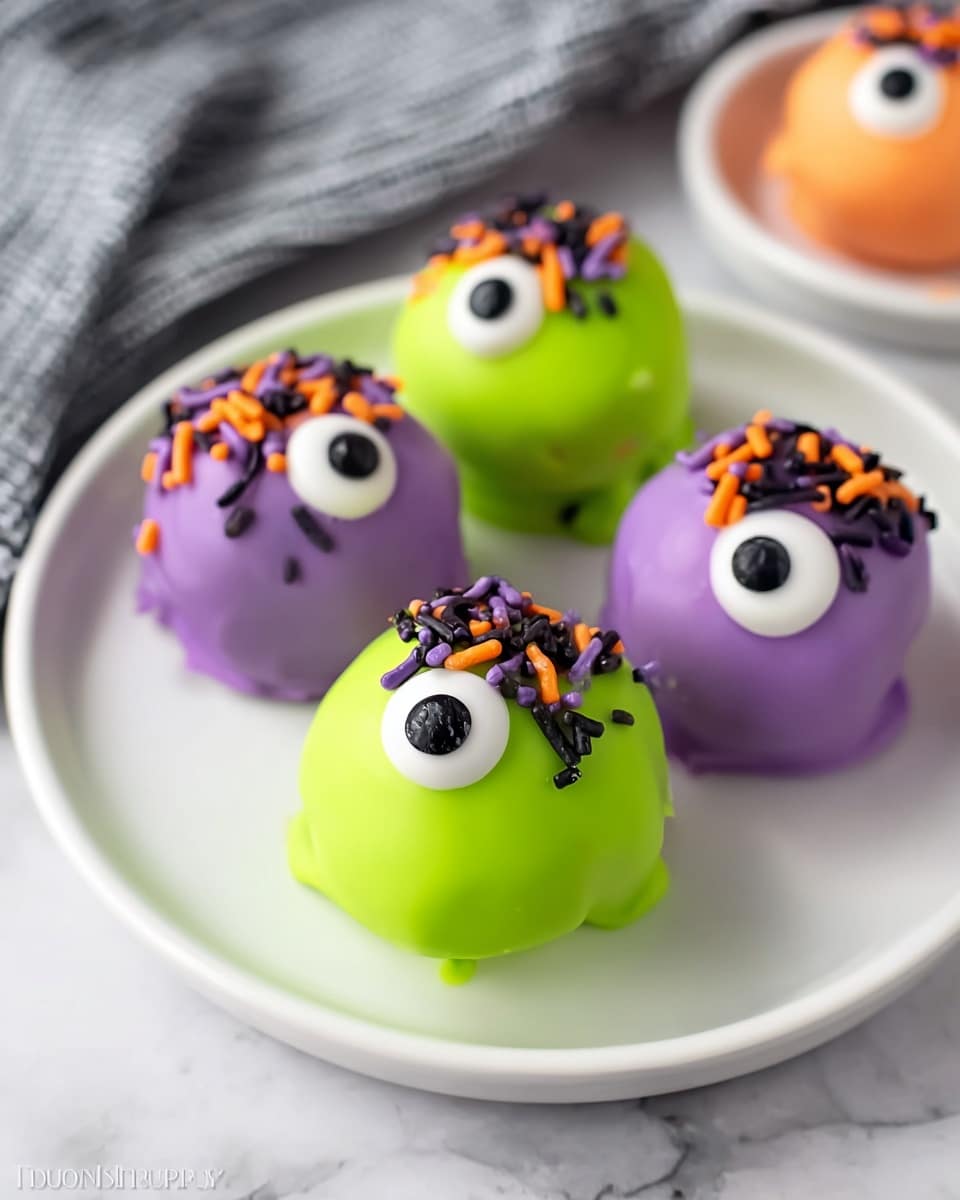
If you’re looking for a spooky, fun, and downright delicious treat for your next party or just a sweet indulgence, you’ve got to try this Monster Oreo Balls Recipe. I absolutely love how these little balls pack all the Oreo goodness, creaminess from cream cheese, and a vibrant pop of candy coating that makes them look like cute little monsters — your guests won’t be able to resist! Grab your ingredients and let me walk you through making these delightful bites.
Why You’ll Love This Recipe
- Easy to Make: You don’t need fancy tools—just a food processor or rolling pin and a bit of patience.
- Kid-Approved: The candy eyes and vibrant candy melts make these as fun to decorate as they are to eat.
- Perfect for Any Occasion: Great for Halloween parties, birthday celebrations, or just a cozy night in.
- Customizable Flavors: You can swap candy melt colors and sprinkles to match any theme or season.
Ingredients You’ll Need
These ingredients combine to create a luscious, no-bake treat that’s both creamy and crunchy. When I shop for Oreos, I always opt for the classic original because that balance of cookie and cream is just unbeatable here.
- Oreo Cookies: The star of the show — finely crushed for that perfect base; regular Oreos work best for consistent sweetness.
- Cream Cheese: Softened to mix smoothly with crumbs, ensuring moist, tender balls.
- Vibrant Green Candy Melts: For the monster’s fun, eerie coating; melts easily for dipping.
- Lavender Candy Melts: Adds a nice color contrast if you want a multi-colored monster look.
- Orange Candy Melts: Perfect for that Halloween vibe and a sweet, colorful finish.
- Candy Eyes: These bring the monster balls to life — I always find them in the baking aisle during fall.
Variations
I love how flexible the Monster Oreo Balls Recipe is — you can really make it your own. Sometimes I play with candy coating colors, or swap out Oreo flavors based on what I’ve got on hand. Don’t be afraid to get creative!
- Chocolate Lovers: Use white chocolate candy melts for a creamy coating or melt some dark chocolate chips for a richer twist—I tried this once and my family went crazy for it!
- Peanut Butter Style: After mixing crumbs and cream cheese, fold in a spoonful of peanut butter for a nutty, delicious variation.
- Dairy-Free Option: Use dairy-free cream cheese and vegan cookie options to keep the texture but meet dietary needs.
- Spooky Sprinkles: Add Halloween-themed edible glitter or sprinkles on top for an extra festive touch.
How to Make Monster Oreo Balls Recipe
Step 1: Crushing Those Oreos
Start by getting those Oreos into fine crumbs — I usually pop them in my food processor and pulse until you can’t see any chunks. If you don’t have one, no worries! Just toss them in a ziplock bag and crush them with a rolling pin; you’ll want to apply some muscle here for that perfect crumbly texture that holds together well.
Step 2: Mixing in Cream Cheese
Once your crumbs are ready, pour them into a mixing bowl and add the softened cream cheese. Here’s the trick I discovered: mix everything on low speed if you’re using a stand mixer—that way, you get a nice, smooth dough that’s easy to roll without getting too sticky or dry.
Step 3: Rolling into Perfect Balls
Grab a cookie scoop or just use your hands (lubricated lightly with cooking spray if the dough sticks) to roll even-sized balls and place them on a parchment-lined sheet. This makes the whole coating and freezing process much easier and keeps your balls uniform, which feels so satisfying!
Step 4: Chill Out Time
Pop your balls into the freezer for about an hour. This firm chill means your balls will hold their shape perfectly when you dip them into candy melts — trust me, it makes dipping way less messy and more fun!
Step 5: Melting Candy Coating & Dipping
Put one cup of each candy melt color into separate microwave-safe bowls and melt them slowly—20 seconds at a time with stirring in between prevents burning. This step always reminds me to be patient; rushing here can lead to grainy candy coating. Once melted, dip each Oreo ball fully, letting the excess drip off before placing it back onto the parchment.
Step 6: Decorating Your Monster
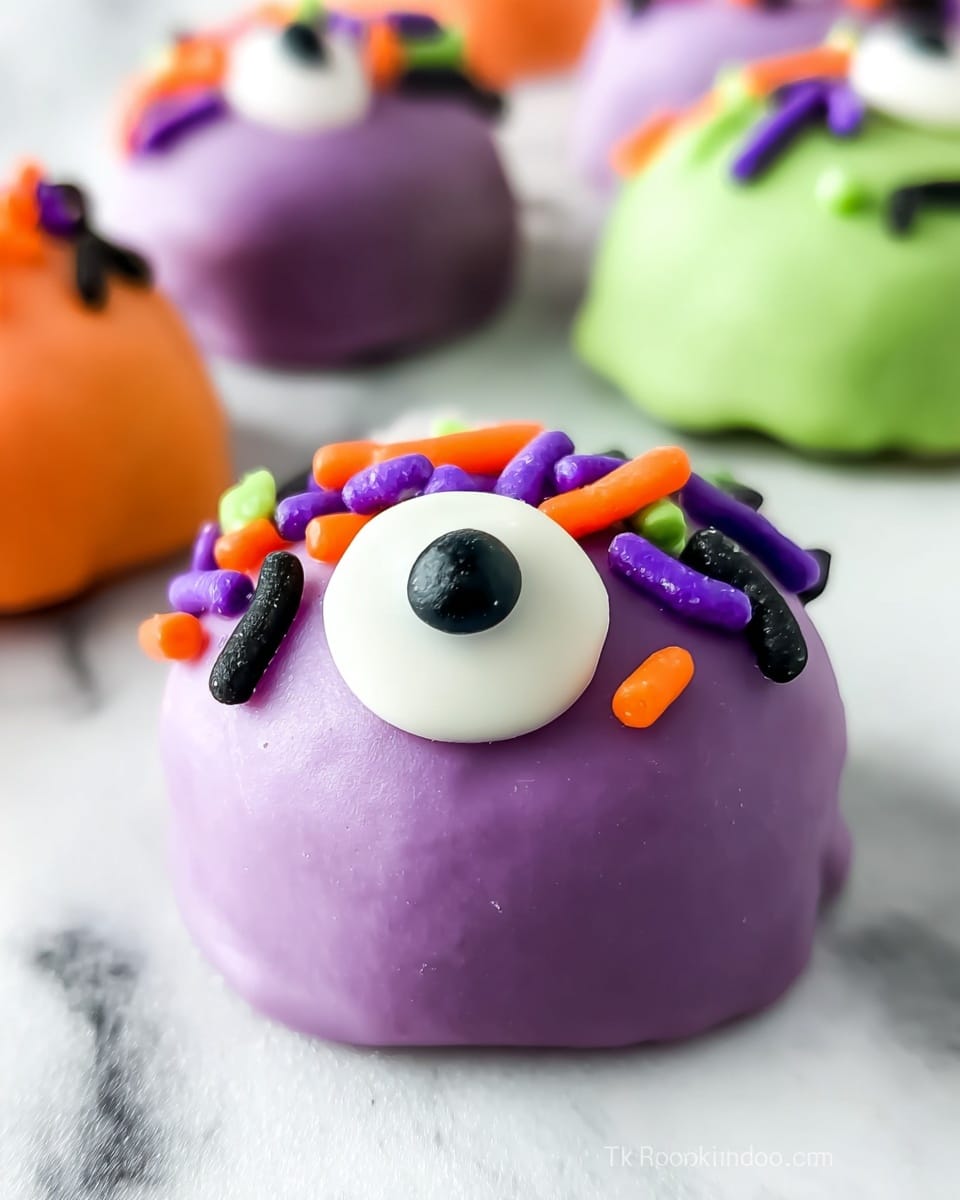
Right after dipping, press a candy eye or two onto the ball—this is the fun part that brings your monsters to life. I also sprinkle a bit of colored sugar or festive sprinkles on top to mimic “hair” or texture. Let everything set completely at room temp or pop back into the fridge to speed things up.
Pro Tips for Making Monster Oreo Balls Recipe
- Room Temperature Cream Cheese: Make sure your cream cheese is really soft—not cold—to avoid lumps in your Oreo dough.
- Freeze Before Dipping: Chilling ensures the balls don’t fall apart when dipped and helps candy melt coat evenly.
- Use Parchment Paper: It keeps the balls from sticking and saves you a big mess during drying.
- Microwave Candy Melts Gently: Melt them in short bursts, stirring well to prevent burning or clumping.
How to Serve Monster Oreo Balls Recipe
Garnishes
I love using candy eyes for that playful monster look, but sprinkles and colored sugar add that extra bit of whimsy and texture. Sometimes, I’ll dust them lightly with edible glitter when hosting kids—it’s such a simple way to make them sparkle!
Side Dishes
These treats shine best on their own, but I like pairing them with a cold glass of milk or a light fruit salad for a balanced snack platter. They also work wonderfully alongside other Halloween-themed desserts like pumpkin cookies or caramel apples.
Creative Ways to Present
For parties, I set mine out on a spooky-themed tray surrounded by candy corn and mini pumpkins. You can also arrange the Monster Oreo Balls on sticks like cake pops — dipping them is the same, but they’re easier to grab when mingling!
Make Ahead and Storage
Storing Leftovers
Leftover Monster Oreo Balls keep fabulously in an airtight container in the fridge for up to a week. I always make extra because my family can’t stop snacking on them — just be sure to keep them cool to maintain that creamy texture.
Freezing
If you want to save them longer, freezing is your friend! Lay them out on parchment in a single layer, freeze until solid, then transfer to a sealed bag. They hold up really well frozen for up to 3 months.
Reheating
Since these are best served chilled, I usually just let frozen Monster Oreo Balls thaw in the fridge overnight. If you’re in a hurry, 10-15 minutes at room temperature works too. Avoid microwaving—they can get too soft and lose their shape.
FAQs
-
Can I use other Oreo flavors for the Monster Oreo Balls Recipe?
Absolutely! While the classic Oreo gives the best traditional flavor, I’ve experimented with mint, golden, and even peanut butter Oreos for a fun twist. Just keep in mind that flavored Oreos may change the overall sweetness and color of your balls, so adjust the candy melts accordingly.
-
What can I substitute for cream cheese?
You can try using mascarpone or even vegan cream cheese alternatives if you need a dairy-free version. Just make sure it’s soft enough to blend smoothly with the Oreo crumbs to hold the mixture together well.
-
How long does it take for the candy coating to set?
At room temperature, it typically takes about 20-30 minutes for the candy coating to fully harden. If you’re short on time, placing them in the fridge speeds up the process — mine usually set completely within 15 minutes.
-
Can I make these ahead for a party?
Yes! Monster Oreo Balls actually taste better when made a day or two in advance because the flavors meld beautifully. Just store them in an airtight container in the refrigerator and decorate with eyes and sprinkles right before serving for the freshest look.
Final Thoughts
When I first tried the Monster Oreo Balls Recipe, I was amazed at how such simple ingredients could come together to create something so irresistible. Whether you’re gearing up for Halloween or just want a fun snack, these balls will become your go-to treat. I hope you enjoy making and sharing these as much as I do with my family—happy baking, and don’t forget to have fun decorating your monsters!
Print
Monster Oreo Balls Recipe
- Prep Time: 30 minutes
- Cook Time: 0 minutes
- Total Time: 90 minutes
- Yield: 48 Oreo balls
- Category: Dessert
- Method: No-Cook
- Cuisine: American
Description
Monster Oreo Balls are an easy and fun Halloween treat made by combining crushed Oreo cookies with softened cream cheese, then dipping the mixture into vibrant colored candy melts and decorating with candy eyes and sprinkles for a spooky monster look. These no-bake, bite-sized delights are perfect for parties and festive gatherings.
Ingredients
Oreo Ball Mixture
- 36 Oreo Cookies (1 package, regular)
- 8 ounces Cream Cheese (softened)
Coating and Decoration
- 1 cup Vibrant Green Candy Melts
- 1 cup Lavender Candy Melts
- 1 cup Orange Candy Melts
- Candy Eyes
- Sprinkles for decoration
Instructions
- Crush Oreos: Place the Oreo cookies in a food processor and pulse until they become fine crumbs. Alternatively, put them in a large ziplock bag and crush thoroughly using a rolling pin.
- Mix with Cream Cheese: Transfer the Oreo crumbs to a mixing bowl and add the softened cream cheese. Stir until combined, or use a stand mixer on low speed until a soft dough forms.
- Form Balls: Use a cookie scoop to portion the mixture into equal-sized balls. Arrange them in a single layer on a parchment-lined baking sheet.
- Freeze: Place the tray in the freezer and chill the balls for 1 hour or until firm.
- Melt Candy Coatings: Pour each color of candy melts into separate microwave-safe bowls. Microwave one bowl at a time in 20-second intervals, stirring after each session until smooth and fully melted.
- Dip and Decorate: Dip each chilled Oreo ball into the melted candy coating until fully covered, allowing excess to drip off. Immediately add a candy eye on the side and sprinkle ‘monster hair’ on top. Place back on the parchment paper.
- Set the Coating: Allow the candy coating to harden completely before serving or storing.
Notes
- Use a cookie scoop to ensure uniform-sized balls for even freezing and coating.
- You can substitute cream cheese with a dairy-free alternative to make these vegan-friendly.
- If you don’t have a food processor, crushing Oreos in a sealed bag with a rolling pin works perfectly.
- Store leftover Oreo balls in an airtight container in the refrigerator for up to 5 days.
- These treats are ideal for Halloween parties but can be customized with different colors and decorations for other occasions.
Nutrition
- Serving Size: 1 Oreo ball
- Calories: 61 kcal
- Sugar: 4 g
- Sodium: 50 mg
- Fat: 3 g
- Saturated Fat: 1.5 g
- Unsaturated Fat: 1 g
- Trans Fat: 0 g
- Carbohydrates: 7 g
- Fiber: 0.5 g
- Protein: 1 g
- Cholesterol: 5 mg

