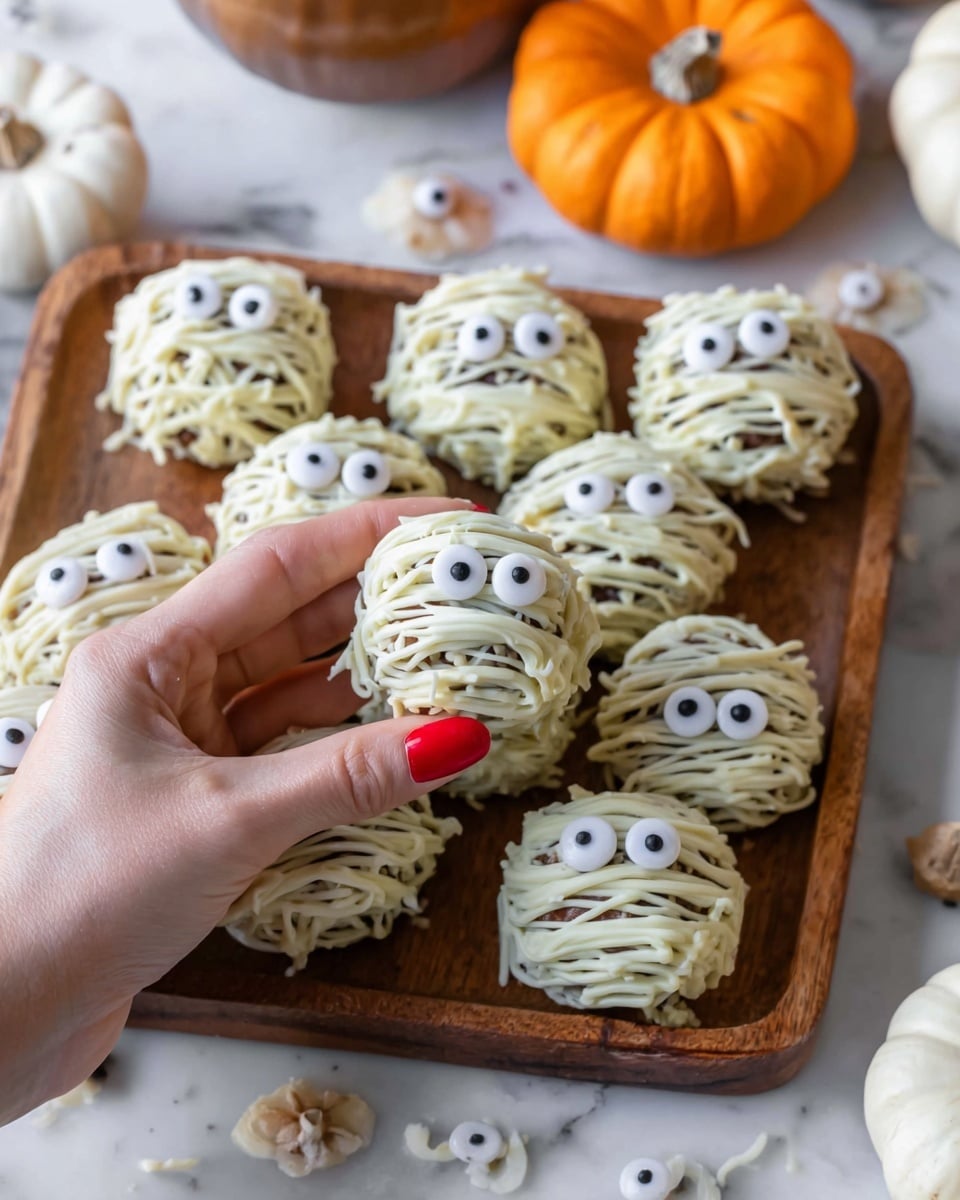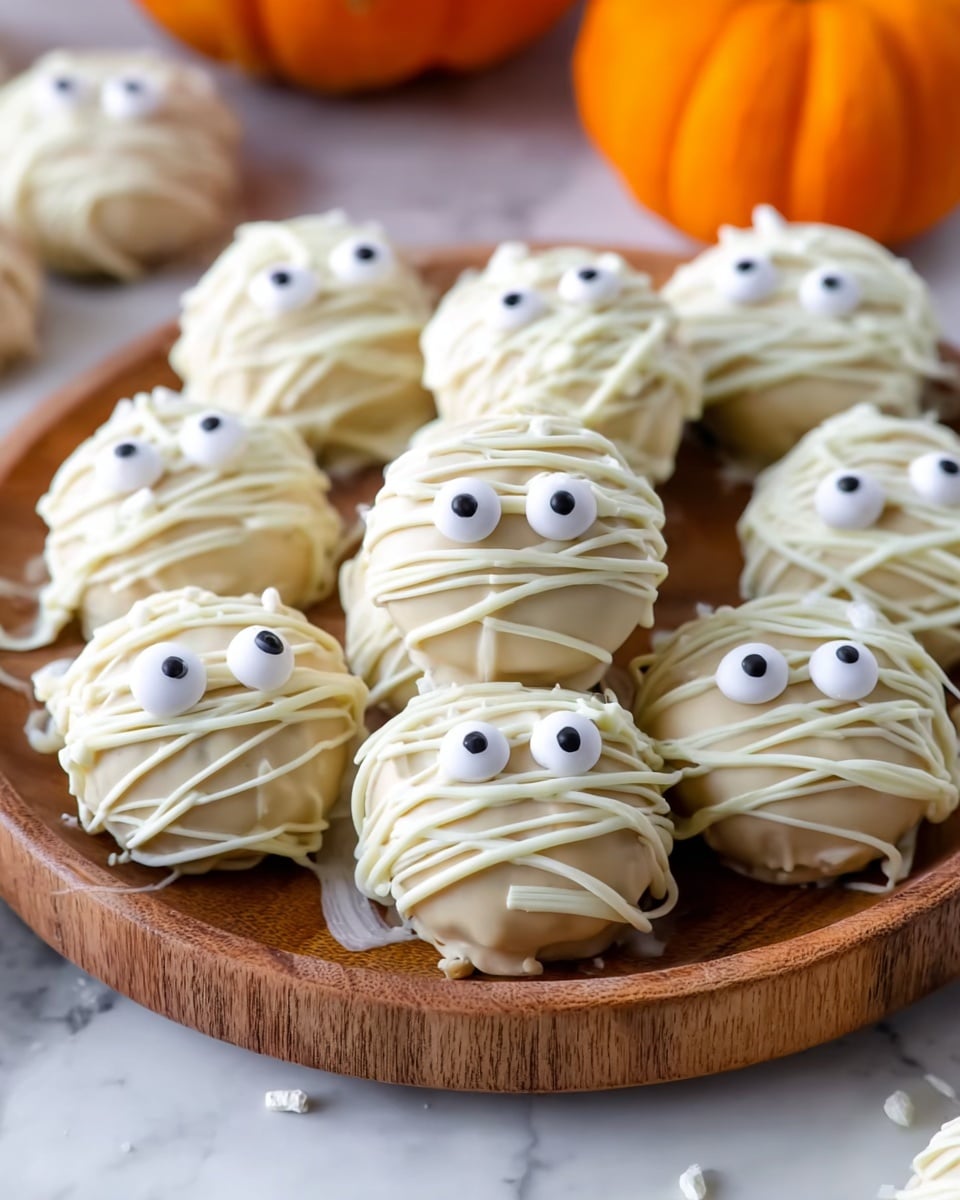
If you’re looking for a Halloween treat that’s as fun to make as it is to eat, I’ve got just the thing for you — my Mummy Cake Pops Recipe. These adorable little cake pops wrapped like mummies are guaranteed to be a hit at any party or family gathering. They come together really fast and use just a handful of ingredients, but they look impressively festive and taste downright delicious. Stick with me, and I’ll share all my best tips to make sure your mummy cake pops come out perfect every time!
Why You’ll Love This Recipe
- Effortless and Quick: You can whip these up in under 30 minutes, which is perfect when you’re pressed for time.
- Kid-Friendly Fun: Wrapping the cake pops like mummies is a creative and easy project to do with the little ones.
- Delicious Crowd-Pleaser: The creamy Oreo-cream cheese base with white chocolate coating is irresistibly tasty.
- Customizable Decoration: You can use different eyes or chocolate colors to make them uniquely yours.
Ingredients You’ll Need
The magic of this Mummy Cake Pops Recipe lies in simple, quality ingredients that combine beautifully for both taste and texture. Each component plays a special role, so choose good-quality Oreos and full-fat cream cheese for the best results.
- Classic Oreo cookies: Use whole Oreos with the filling intact; removing the filling will make the texture too dry.
- Full-fat cream cheese: Room temperature cream cheese blends perfectly for a smooth base.
- White chocolate chips or chopped white chocolate: High-quality chocolate melts better and gives a silky finish.
- Vegetable or canola oil: Just a splash helps the chocolate coating stay glossy and smooth.
- Eyeball sprinkles: These add the fun, spooky touch that brings the mummy look to life.
Variations
I love how flexible this Mummy Cake Pops Recipe is — you can easily switch things up to match your taste or dietary needs, and still end up with a crowd-pleaser. Here are some of my favorite twists.
- Chocolate coating alternative: I once used dark chocolate instead of white chocolate, and the contrast with the Oreo base made it feel extra indulgent.
- Gluten-free variation: If you can find gluten-free sandwich cookies, this recipe works just as well for gluten-free treats.
- Festive colors: Use colored candy melts to make pink or orange mummy wraps — my niece loved the bright colors last Halloween!
- Nutty addition: Finely crushed nuts mixed into the cake pop base add a subtle crunch, something I tried when hosting friends and it was a big hit.
How to Make Mummy Cake Pops Recipe
Step 1: Crush the Oreos into fine crumbs
Pop the Oreos into your food processor and pulse until you get fine crumbs — no big chunks here! If you don’t have a food processor, you can place them in a ziplock bag and crush with a rolling pin. I usually reserve a few crumbs to sprinkle on top later for extra texture.
Step 2: Mix in the cream cheese until smooth
Transfer the Oreo crumbs to a mixing bowl and add the room-temp cream cheese. Use a spatula or your hands to mix everything together until you get a consistent dough that holds its shape. When I first made these, I underestimated how soft the cream cheese needs to be — it really makes the mixture smoother and easier to handle.
Step 3: Form the mummy shapes
Use a tablespoon-sized cookie scoop to portion out the dough, and then roll each portion into an oval or ball shape, whichever you prefer for your mummy look. Place them on a parchment-lined plate, and pop them in the fridge for about 10 minutes to firm up. This step helps a lot because cold pops won’t melt the chocolate too fast when dipping.
Step 4: Dip and decorate
Melt the white chocolate chips gently with the vegetable oil in a microwave-safe bowl, stirring every 20 seconds until silky smooth. Dip each chilled cake pop into the chocolate, gently tapping off extra, then place back on the parchment. For that mummy wrap effect, use a small piping bag or Ziplock bag filled with more melted chocolate and pipe thin lines left and right to mimic bandages. Before the white chocolate sets, place two eyeball sprinkles on each pop – trust me, this little detail makes the mummies come to life.
Step 5: Chill and serve
Once decorated, pop the pops back in the fridge for about 15 minutes to allow the coating to harden completely. Then, they’re ready for your Halloween party or to be handed out to excited little ones at home.
Pro Tips for Making Mummy Cake Pops Recipe
- Cool the Dough First: Chilling the cake balls before dipping prevents them from falling apart in the melted chocolate.
- Use Vegetable Oil in Chocolate: Adding a bit of oil thins the chocolate for smoother coating and a shiny finish.
- Pipe the Bandages While Chocolate Is Settable: Let the dipped chocolate harden slightly so your piped lines don’t sink in but still stick well.
- Avoid Overhandling: Use two forks to dip and lift your cake pops gently to keep the coating even.
How to Serve Mummy Cake Pops Recipe
Garnishes
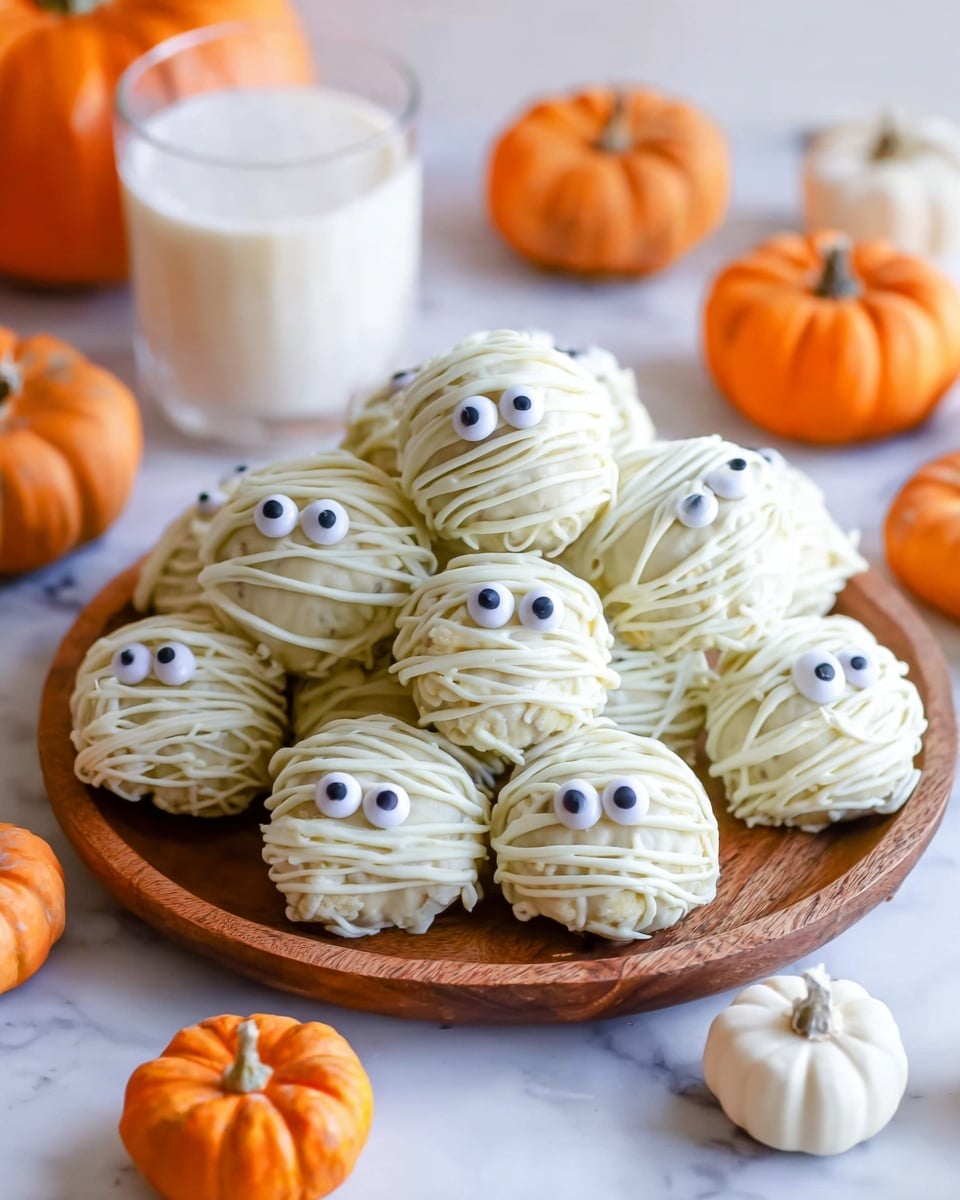
I’m a big fan of keeping these cute mummies minimal — that lets the creepy eyes and the white chocolate wraps shine. You could add a dusting of edible glitter or some colored sugar for sparkle, but honestly, the eyeball sprinkles make them fun enough on their own.
Side Dishes
These cake pops pair wonderfully with warm apple cider or a spooky punch. I like to serve them alongside popcorn tossed with a bit of cinnamon sugar for a light, crunchy contrast that keeps the dessert table balanced.
Creative Ways to Present
One of my favorite presentation ideas is to insert the mummy cake pops into a pumpkin-shaped floral foam block covered with black tissue paper – it looks like a mummy graveyard! Another time, I wrapped the pops in little treat bags tied with orange and black ribbon to hand out at a Halloween party, which guests loved.
Make Ahead and Storage
Storing Leftovers
Once made, I keep the mummy cake pops in an airtight container in the refrigerator. They stay fresh for up to 5 days, and the chocolate coating stays nice and firm — just remember to bring them to room temperature a few minutes before serving for the best flavor.
Freezing
I’ve frozen leftover cake pops a couple of times, wrapping each one individually in plastic wrap before placing them in a sealed container. They freeze well for up to 3 months, though the eyes might get a little dull after thawing, so I suggest adding fresh sprinkles if you want them to look their best.
Reheating
Since these are no-bake, reheating isn’t necessary. Just let frozen pops thaw overnight in the fridge, then bring to room temp before serving. If the coating looks a bit dull, a gentle warm-up near (not on) a stove or in indirect sunlight helps brighten the shine.
FAQs
-
Can I make the mummy cake pops without a food processor?
Absolutely! If you don’t have a food processor, just place the Oreo cookies in a sturdy ziplock bag and use a rolling pin to crush them finely. It takes a bit more elbow grease, but the results are just as tasty.
-
What’s the best way to melt the white chocolate for coating?
I recommend melting the white chocolate gently in short bursts (about 20 seconds) in the microwave, stirring well after each session to avoid burning. Adding a teaspoon or two of vegetable oil helps keep the chocolate smooth and shiny.
-
Can the mummy cake pops be made ahead of time?
Yes, they’re perfect make-ahead treats! You can assemble and decorate the cake pops a day in advance and store them in the fridge until serving. Just cover them so they don’t absorb any fridge odors.
-
What if I don’t have eyeball sprinkles?
No worries! You can use small chocolate chips, edible googly eyes, or even color melted chocolate for the pupils. Get creative — the spooky vibe comes from the idea more than the exact sprinkles.
-
How do I prevent the chocolate from cracking after it sets?
Make sure to add a bit of oil when melting the chocolate for a flexible coating. Also, keep the pops at a cool, stable temperature and avoid rapid changes between cold and warm environments.
Final Thoughts
These mummy cake pops have become one of my go-to festive desserts because they hit that perfect spot of being simple, fun, and absolutely delicious. I remember the first time I made them with my kids — we all got such a kick out of creating those little “bandages” and placing the googly eyes. Once you try this Mummy Cake Pops Recipe, I’m sure you’ll want to make them year after year. So grab those Oreos, and get ready for a Halloween treat that’s as delightfully spooky as it is scrumptious!
Print
Mummy Cake Pops Recipe
- Prep Time: 5 min
- Cook Time: 0 min
- Total Time: 20 min
- Yield: 30 cake pops
- Category: Dessert
- Method: No-Cook
- Cuisine: American
- Diet: Vegetarian
Description
Mummy Cake Pops are a spooky and delightful Halloween treat made by blending Oreo cookies with cream cheese, then coating them in white chocolate and decorating with cute eyeball sprinkles. These simple, no-bake cake pops come together quickly, making them perfect for parties and festive celebrations.
Ingredients
Base
- 36 classic Oreo cookies – centers and all (400g)
- 1 cup (8 oz) full-fat cream cheese, room temperature (226g)
Coating and Decoration
- 3 cups good-quality white chocolate chips or chopped-up white chocolate (525g)
- 2 tsp vegetable or canola oil (12g)
- 60 small eyeball sprinkles
Tools
- Large, flat plate
- Food processor
- 1 Tbsp cookie scoop
- Parchment paper
- 2 forks
- Small piping bag or Ziplock bag
Instructions
- Prepare the crumb mixture: Place the Oreo cookies into a food processor and pulse until they turn into fine crumbs. Then add the full-fat cream cheese at room temperature and blend until well combined into a smooth dough-like mixture.
- Form cake pops: Using a tablespoon cookie scoop, scoop out the mixture and roll into small balls between your hands. Place each ball onto a sheet of parchment paper on a large flat plate and chill in the refrigerator for about 10 minutes to firm up.
- Prepare the coating: Melt the white chocolate chips with vegetable or canola oil in a microwave-safe bowl in short bursts, stirring between each, until smooth and fully melted.
- Dip the cake pops: Using the forks, dip each chilled cake ball into the melted white chocolate, coating it completely. Allow the excess chocolate to drip off, then place the coated cake pop back onto the parchment paper to set slightly.
- Decorate as mummies: Transfer some of the melted white chocolate into a small piping bag or Ziplock bag with a tiny corner snipped off. Pipe thin lines over the coated cake pops to create a mummy bandage effect. Before the chocolate sets, place two small eyeball sprinkles on each cake pop to complete the mummy look.
- Set and serve: Let the cake pops fully set by chilling them in the fridge for about 10 minutes. Once set, they are ready to serve and enjoy!
Notes
- These delicious, 5-ingredient mummy cake pops come together in a flash and are such a crowd-pleaser.
- They are the perfect Halloween dessert and great for parties.
- Make sure the cream cheese is at room temperature for easy blending.
- Use a good-quality white chocolate for best flavor and smooth coating.
- You can store the cake pops in the refrigerator for up to 3 days in an airtight container.
Nutrition
- Serving Size: 1 cake pop (approx. 20g)
- Calories: 183 kcal
- Sugar: 18 g
- Sodium: 78 mg
- Fat: 10 g
- Saturated Fat: 5 g
- Unsaturated Fat: 4 g
- Trans Fat: 0 g
- Carbohydrates: 22 g
- Fiber: 1 g
- Protein: 2 g
- Cholesterol: 5 mg

