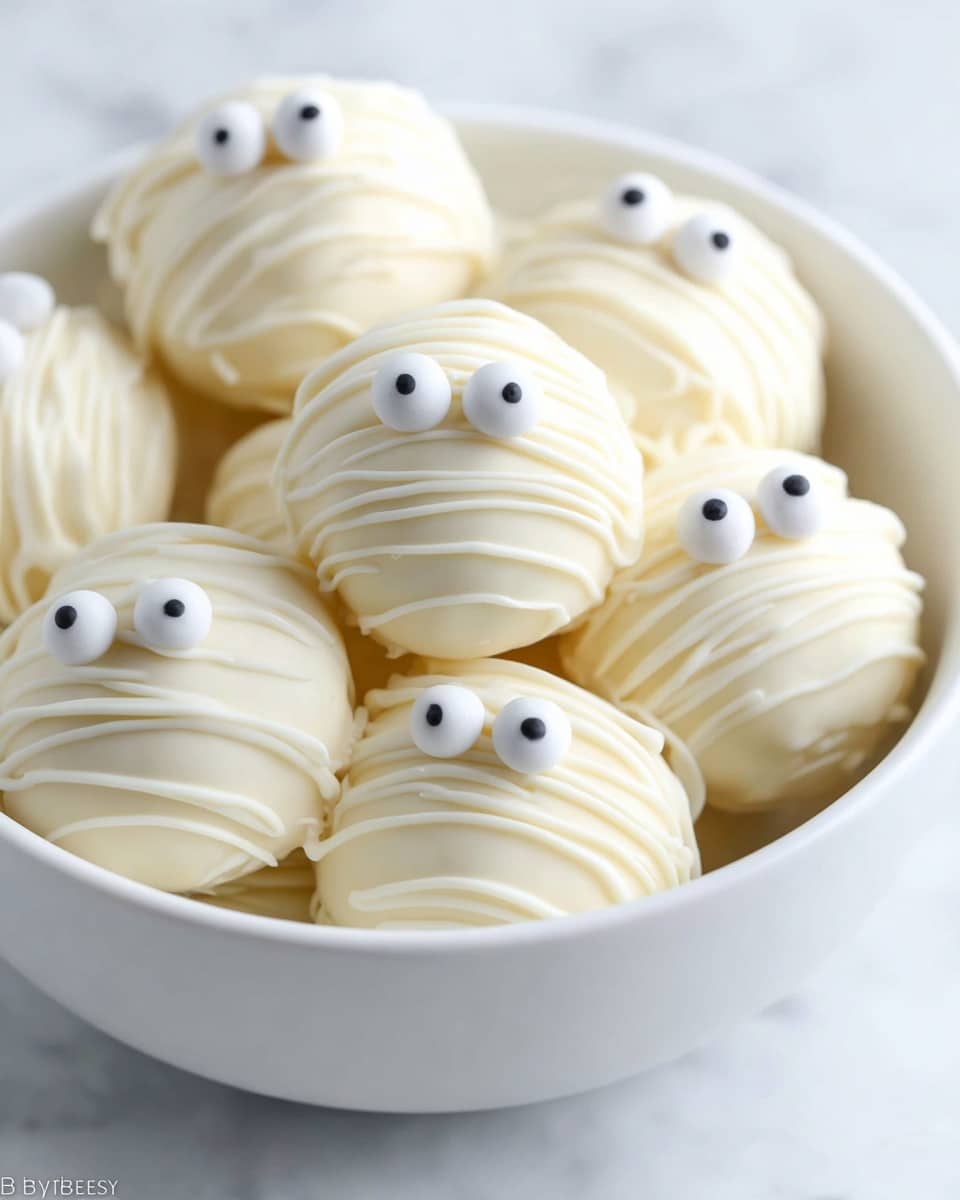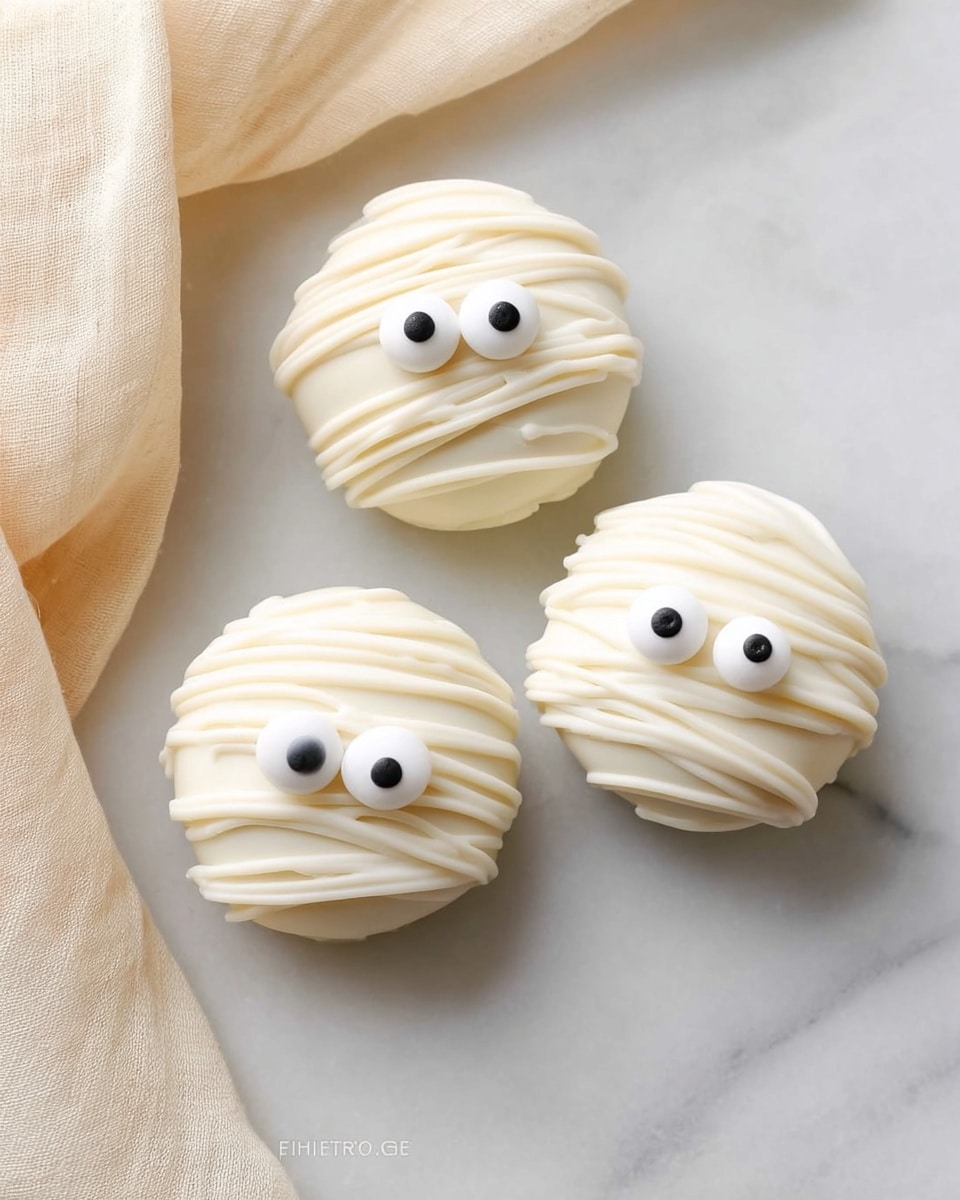
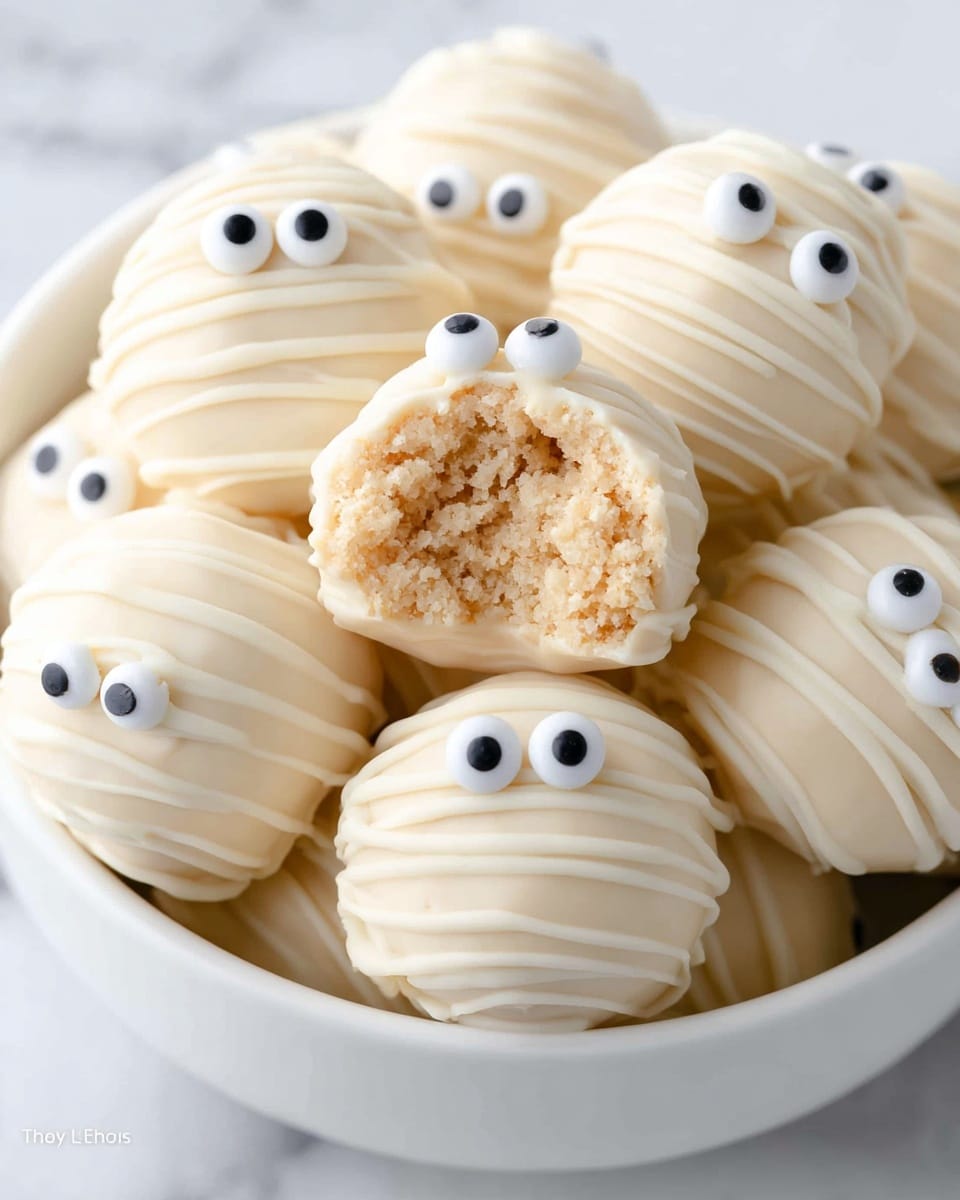
If you’re looking for a quick, fun, and absolutely adorable treat to impress your friends or family, I’ve got just the thing for you. This Mummy Oreo Balls Recipe is one of my all-time favorites—super easy to make and perfect for Halloween parties or anytime you want a playful dessert. Trust me, once you try these, the creamy center and hard chocolate shell combo will have you making them again and again!
Why You’ll Love This Recipe
- Super Simple Ingredients: Just four easy-to-find items come together to make magic.
- No-Bake Fun: Perfect for when you want a dessert but not the oven heat.
- Kid-Friendly Activity: Little helpers will love assembling the mummies and placing the candy eyes.
- Eye-Catching Presentation: These spooky treats look fantastic on any Halloween table.
Ingredients You’ll Need
The ingredients are straightforward, but they come together in a way that’s seriously delicious. The golden Oreos give a lovely color and buttery flavor that makes these mummy balls extra special. I always recommend using softened cream cheese because it mixes so much easier with the crumbs, resulting in that perfect smooth texture.
- Golden Oreos: I like the vanilla flavor they add; plus, they blend into a beautiful crumb for the base.
- Cream cheese: Make sure it’s softened to room temperature to avoid lumps and help your mixture come together smoothly.
- Vanilla candy melts or dipping wafers: These melt beautifully and give the mummy balls their hard, glossy shell.
- Candy eyes: These give the mummies character — plus, you can find them easily at most craft or grocery stores during Halloween.
Variations
I like to mix things up with this Mummy Oreo Balls Recipe depending on the occasion or what ingredients I have on hand. Feel free to get creative! You’ll find that small tweaks can completely change the vibe of this treat.
- Chocolate Oreos: I once swapped in chocolate Oreos for the classic golden ones, and it gave a richer, more intense flavor that my family loved.
- Peanut Butter Cream Cheese: For a twist, stirring in a bit of peanut butter makes these slightly savory and even more indulgent.
- Colored Candy Melts: Using orange or green candy melts instantly turns these into festive fall or Halloween treats.
- Dairy-Free Option: I’ve used vegan cream cheese and dairy-free candy melts successfully if you’re catering to dietary needs.
How to Make Mummy Oreo Balls Recipe
Step 1: Crush those Golden Oreos to Perfection
Pop the golden Oreos into a food processor and pulse them until you get really fine crumbs—no big bits here! If you don’t have a food processor, placing the cookies in a zip-top bag and smashing them with a rolling pin works too. I’ve done this on a whim with good results, just try to get those crumbs as fine as possible for a smooth mixture.
Step 2: Mix Oreo Crumbs and Cream Cheese to Form a Dough
Transfer the crumbs into a big bowl and add softened cream cheese. Stir everything until it’s combined and smooth—it’s okay if it looks a little sticky. The cream cheese binds everything together, and this is when you’ll know if the texture is just right: it should hold when rolled into balls without crumbling. If it’s too dry, a tiny splash of milk can help!
Step 3: Form Balls and Chill
Grab a cookie scoop or spoon and portion out about 1-inch balls. Roll them between your palms for a nice smooth finish—this always makes me feel like I’m shaping little treasures! Place them on parchment-lined baking sheets and pop them in the freezer for around 30 minutes. This quick chill helps them hold their shape when dipped later on.
Step 4: Melt the Candy Melts
Follow the package directions to melt your vanilla candy melts or dipping wafers. I usually heat them in short bursts in the microwave, stirring in between to get a smooth, lump-free consistency. You’ll want the chocolate warm but not too hot to avoid melting your chilled Oreo balls.
Step 5: Dip Those Mummies
One at a time, carefully drop each Oreo ball on top of a fork (the tines don’t poke into the ball — it sits on top). Dip it into the melted white chocolate, turning gently to coat completely. Tap off excess chocolate by tapping the fork on the bowl’s edge — trust me, this little trick keeps the coating just right! Lay the dipped mummies back on the parchment paper.
Step 6: Decorate Your Mummy
Pour the remaining melted chocolate into a ziploc bag and snip a tiny corner. Use it to drizzle thin “bandages” across the mummy balls—this is where the fun and creativity come in! Before the drizzle sets, gently press two candy eyes onto each ball. If the chocolate hardens too quickly, a dot of melted chocolate on the back of the eyes helps them stick perfectly.
Step 7: Chill and Serve
Pop the finished mummies into the fridge for 15-20 minutes to let the chocolate set completely. Once ready, serve these charming treats and watch the compliments roll in. I love how they look both spooky and irresistible!
Pro Tips for Making Mummy Oreo Balls Recipe
- Don’t Skip Chilling: Freezing your Oreo balls before dipping really helps them keep their shape without melting the chocolate coating.
- Smooth Rolling: Rolling the balls between your hands until they’re perfectly smooth helps avoid cracks and uneven surfaces after dipping.
- Use a Fork for Easy Dipping: It’s a simple tool but makes coating the balls tidy and less messy.
- Fixing Eyes Adhesion: If the candy eyes don’t stick well, a dab of melted candy melt on their backs acts like edible glue.
How to Serve Mummy Oreo Balls Recipe
Garnishes
I usually keep garnishes simple—just the candy eyes and the drizzle of white chocolate. Sometimes, I sprinkle a little edible glitter on top for a festive touch that makes these look like shiny little spirits. You could also add tiny candy spiders or bats around them for a full Halloween party vibe!
Side Dishes
These mummy balls pair beautifully with a cold glass of milk or a hot cup of coffee or tea. For a party, I like to offer some fresh fruit or a light salad to balance the sweetness. They’re also great alongside other Halloween treats like caramel popcorn or pumpkin cupcakes to really amp up the spooky spread.
Creative Ways to Present
One year, I arranged the mummy Oreo balls in a shallow treat tray lined with edible “spiderweb” lace made of spun sugar. It was such a hit! You can also stand them up around a fake pumpkin or tombstone décor for a themed centerpiece. Wrapping each ball in clear cellophane with a ribbon makes for adorable party favors too.
Make Ahead and Storage
Storing Leftovers
I like to keep leftover mummy Oreo balls in an airtight container in the fridge. They stay fresh and maintain that perfect creamy texture for about a week. Whenever I grab one later, it’s still as delightful as day one—no sogginess, just that soft inside and firm chocolate shell.
Freezing
If I’m making a big batch ahead of time, I freeze these little guys on a baking sheet first, then transfer them to a freezer-safe container. When frozen properly, they last up to 2 months. When you want a treat, just thaw them in the fridge overnight—easy and convenient!
Reheating
These are best enjoyed cold or at room temperature, so reheating isn’t really necessary. But if you like your chocolate a little softer, letting them sit out for 10 minutes works beautifully to soften the shell without losing any of their charm.
FAQs
-
Can I use regular Oreos instead of Golden Oreos for this recipe?
Absolutely! Regular Oreos will work just fine and give a chocolatey twist to the mummy balls. The filling still mixes well with cream cheese, but keep in mind the color and flavor will be different—darker and richer.
-
What can I substitute for candy eyes if I can’t find them?
If candy eyes aren’t available, you can use mini chocolate chips, decorating gel dots, or even small white and dark chocolate buttons. Another fun option is drawing eyes with an edible food marker on white chocolate discs.
-
How do I store Mummy Oreo Balls to keep them fresh?
Store them in an airtight container in the refrigerator. They last about a week and maintain their texture well. For longer storage, freezing is a great option.
-
Can I make the chocolate drizzle using regular chocolate?
You can use regular white chocolate, but it may not melt as smoothly as candy melts and could seize if overheated. Candy melts are designed for dipping and drizzle, giving that silky finish we all love in this Mummy Oreo Balls Recipe.
Final Thoughts
I absolutely love how this Mummy Oreo Balls Recipe comes together with minimal fuss but maximum impact. When I first tried it, my kids couldn’t stop giggling over how cute the mummies looked, and my husband was sneaking them all before the party even started. Whether you want a quick Halloween treat or a fun project to share with the kids, this recipe ticks all the boxes. Give it a try—I promise it’ll become one of your go-to festive favorites!
Print
Mummy Oreo Balls Recipe
- Prep Time: 20 minutes
- Cook Time: 0 minutes
- Total Time: 50 minutes
- Yield: 14 Oreo balls
- Category: Dessert
- Method: No-Cook
- Cuisine: American
Description
Mummy Oreo Balls are a fun and festive Halloween dessert made with just 4 simple ingredients. These no-bake treats feature Oreo cookie crumbs mixed with cream cheese to create a smooth, creamy center, coated in a hard white chocolate shell decorated with candy eyes and drizzled chocolate to resemble cute mummies. Easy to prepare and perfect to share at parties or with kids, they combine a delicious contrast of textures and flavors.
Ingredients
Base
- 20 Golden Oreos
- 4 ounces cream cheese (softened to room temperature)
Coating & Decoration
- 10 ounces vanilla candy melts or dipping wafers
- 1 package candy eyes
Instructions
- Prepare baking sheet: Line a large baking sheet with parchment paper and set it aside to place your finished balls on later.
- Crush Oreos: Pulse the Golden Oreos in a food processor until they become a very fine crumb, which will be the base texture for the filling.
- Mix cream cheese and crumbs: In a large mixing bowl, combine the cookie crumbs with the softened cream cheese and stir until the mixture is smooth and evenly combined.
- Form balls: Use a cookie scoop to form approximately 1-inch balls. Roll each ball between the palms of your hands until smooth, then place them on the parchment-lined baking sheet.
- Freeze balls: Transfer the tray of Oreo balls into the freezer for 30 minutes to help them set and firm up for dipping.
- Melt chocolate: Melt the vanilla candy melts according to package directions until smooth and ready for coating.
- Dip balls: Using a fork, one at a time, dip each Oreo ball into the melted white chocolate to coat completely. Tap off excess chocolate on the side of the bowl, then return the coated ball to the parchment paper.
- Decorate with eyes and drizzle: Pour remaining melted chocolate into a ziplock bag, cut a small hole in one corner to create a piping bag. Drizzle chocolate over the coated balls to create the mummy wrap effect. Stick two candy eyes onto each ball—if the chocolate has hardened, use a small dot of melted chocolate on the back of the eyes to adhere them securely.
- Chill to set: Place the decorated Oreo balls in the refrigerator for 15-20 minutes to allow the chocolate to harden completely.
- Serve: Once set, serve the mummy Oreo balls and enjoy the festive treat!
Notes
- A simple Halloween dessert made with only 4 ingredients.
- The contrast of the hard chocolate shell and creamy Oreo-cream cheese center is delicious.
- These treats are no-bake and easy to prepare.
- Great activity to make with children to involve them in holiday cooking.
- Store leftovers in an airtight container in the refrigerator to maintain freshness.
Nutrition
- Serving Size: 1 Oreo ball
- Calories: 111 kcal
- Sugar: 7 g
- Sodium: 86 mg
- Fat: 6 g
- Saturated Fat: 2 g
- Unsaturated Fat: 3 g
- Trans Fat: 0 g
- Carbohydrates: 13 g
- Fiber: 1 g
- Protein: 1 g
- Cholesterol: 9 mg

