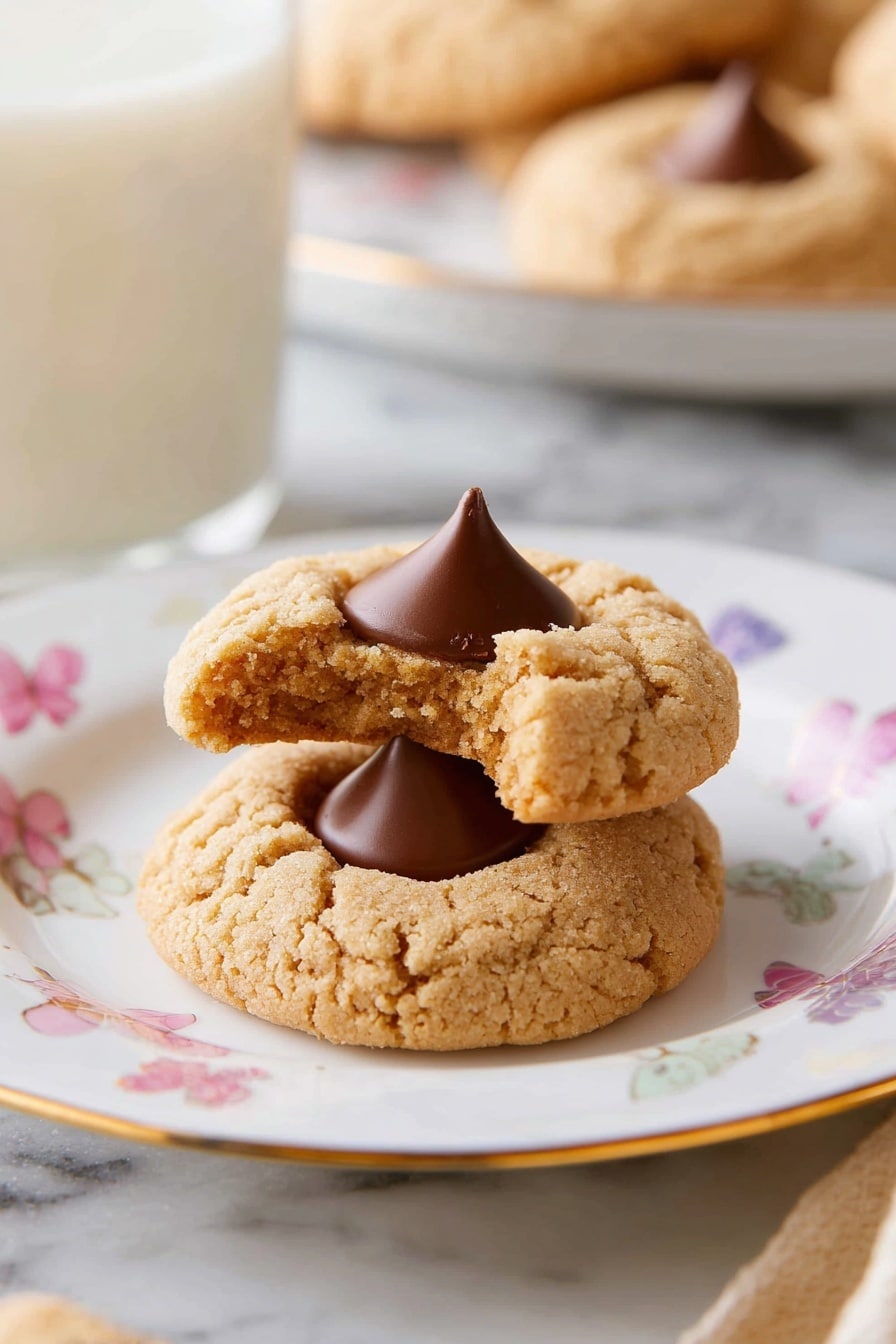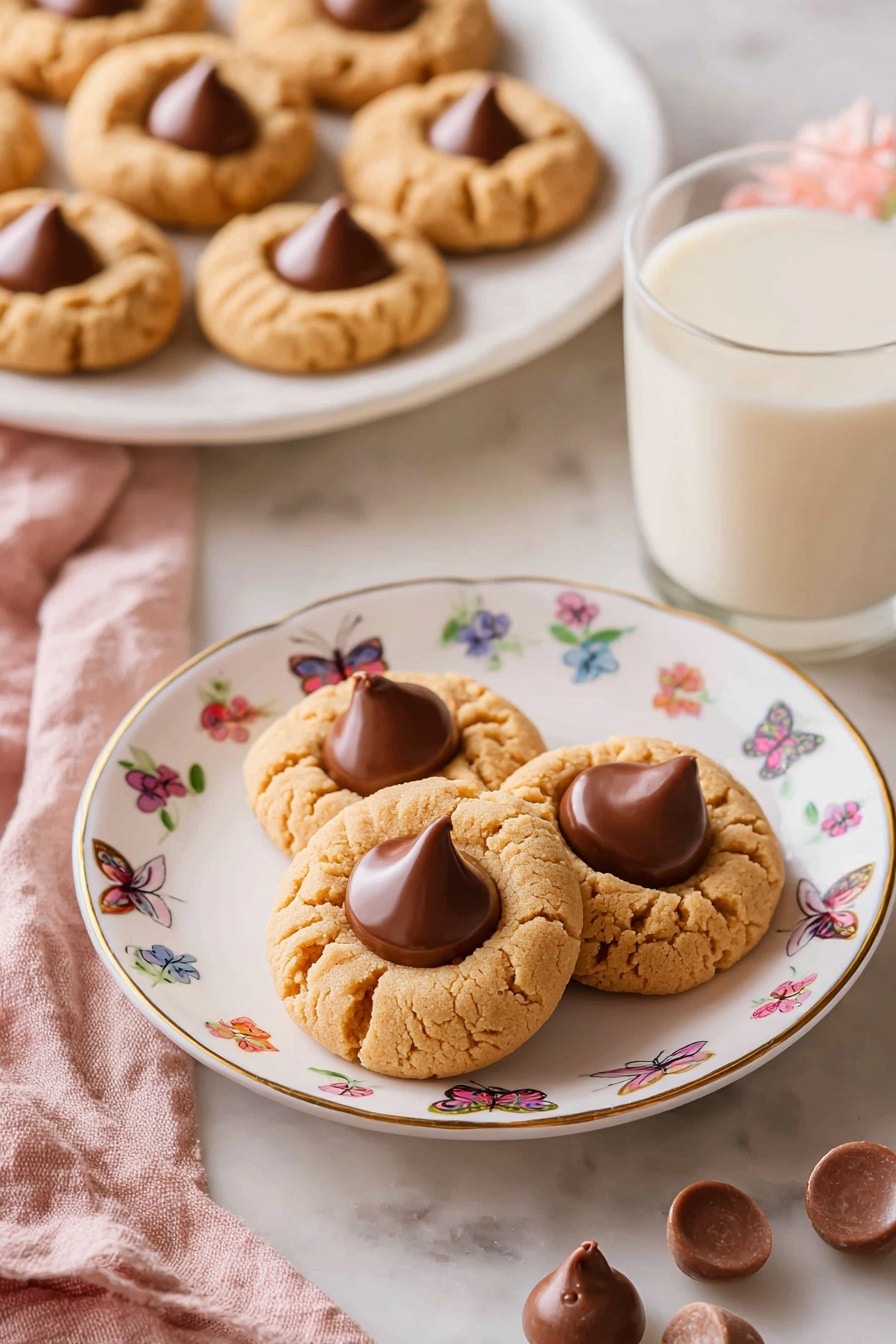
If you’re anything like me, you know that classic cookies have a special place in your heart, especially ones that bring a pinch of nostalgia with every bite. This Peanut Butter Blossom Cookies Recipe is absolutely fan-freaking-tastic, combining the rich creaminess of peanut butter with the gooey, melty goodness of a chocolate kiss right on top. Trust me, these cookies are easier to make than they look, and the way they balance sweet and salty isn’t just delightful — it’s addictive. Keep reading, and I’ll share tips to nail these every single time!
Why You’ll Love This Recipe
- Quick & Simple: You don’t need fancy tools or hours in the kitchen to make these beauties come to life.
- Perfect Texture: Tender, moist inside with lightly crisp edges and a luscious chocolate center every time.
- Kid-Approved: My family goes crazy for these, and they’re a huge hit at school bake sales and holiday treats.
- Nostalgic & Classic: This recipe brings back all those warm memories, but with an easy-to-follow, fail-proof twist.
Ingredients You’ll Need
These Peanut Butter Blossom Cookies are all about simple pantry staples coming together just right — nothing complicated here. I recommend using creamy peanut butter for the best texture and flavor, and don’t skip the extra sugar coat before baking, it adds that perfect little crunch.
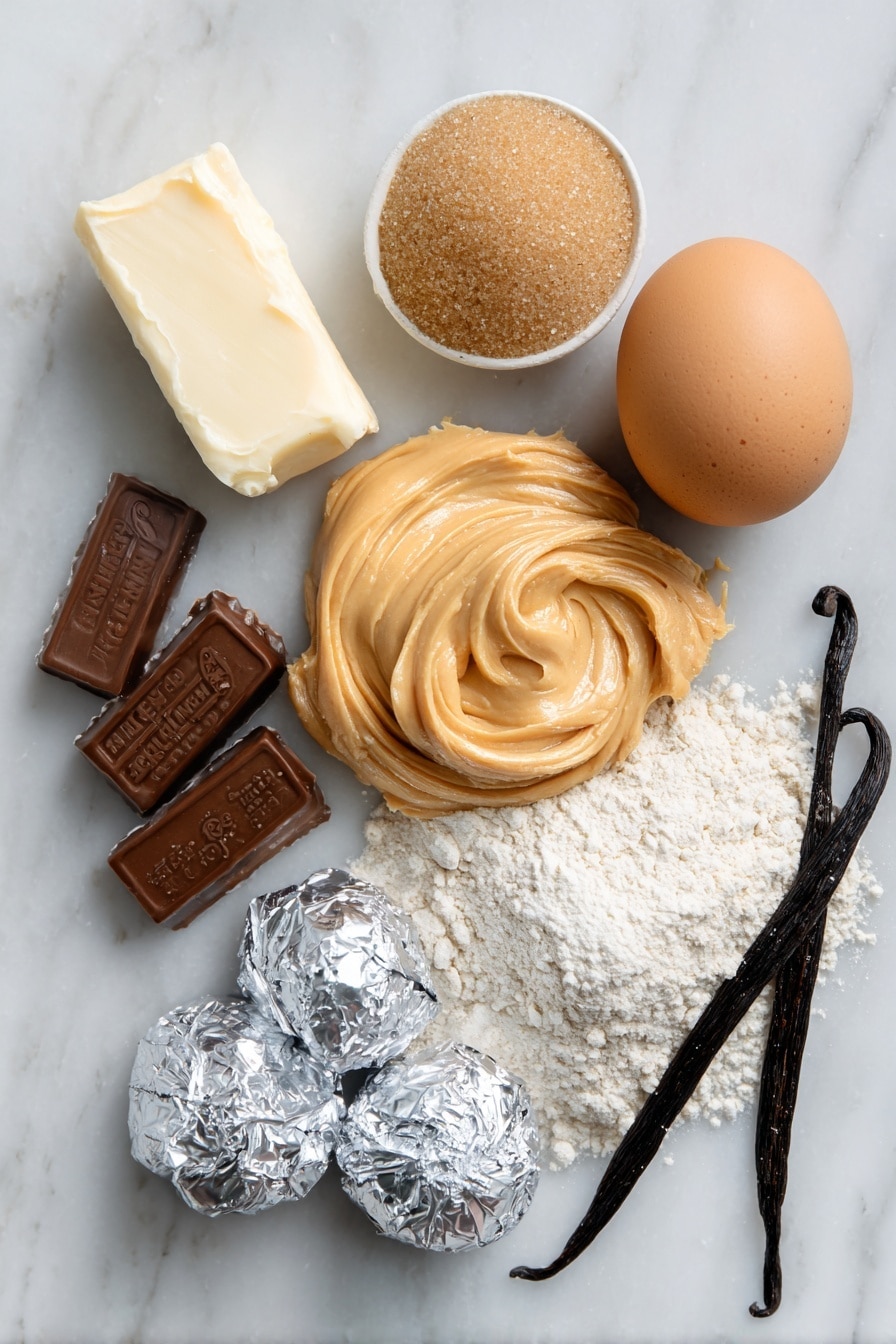
- Creamy Peanut Butter: Opt for natural or regular, but creamy works best to keep the dough smooth and soft.
- Unsalted Butter: Softened to room temperature for easy creaming and better texture.
- Granulated Sugar: Part is for the dough, and extra for rolling to give a subtle crunch and sparkle.
- Light Brown Sugar: Adds moisture and a hint of caramel flavor, essential for that rich cookie taste.
- Salt: Just a pinch to balance the sweetness and enhance the peanut butter flavor.
- Egg: Brings the dough together and keeps cookies tender.
- Vanilla Extract: A splash brightens everything and rounds out the peanut butter flavor.
- All-Purpose Flour: Make sure it’s measured correctly (fluffed, spooned, leveled) to keep cookies soft yet sturdy.
- Baking Soda: Helps the cookies rise and crack perfectly on top.
- Hershey’s Chocolate Kisses: Unwrapped and set on top just after baking for that iconic chocolate center.
Variations
I love to make this Peanut Butter Blossom Cookies Recipe my own by switching things up once in a while — it’s fun to play around with little tweaks that brighten or customize the flavor. Feel free to experiment and find your perfect twist!
- Crunchy Peanut Butter: I like adding crunchy peanut butter sometimes for extra texture, which gives the cookies a fun surprise.
- Chocolate Types: Swap Hershey’s Kisses for dark chocolate or even peanut butter cups chopped in halves — yes, it’s that flexible and yummy.
- Nut-Free Option: Try sunflower seed butter instead of peanut butter if you’re avoiding nuts, and it still works beautifully.
- Seasonal Spices: During holidays, I add a pinch of cinnamon or pumpkin spice for warmth and depth.
How to Make Peanut Butter Blossom Cookies Recipe
Step 1: Cream the Butters and Sugars
This first step is key for that melt-in-your-mouth texture you’re craving. Using a stand mixer or even a trusty hand mixer, beat the creamy peanut butter, softened unsalted butter, granulated sugar, light brown sugar, and salt together on medium speed. You want a light, fluffy mixture with no lumps. It usually takes about 2 to 3 minutes. Don’t rush—creaming properly is what makes the cookies tender and sweetly satisfying.
Step 2: Add the Egg and Vanilla
Next, crack in the egg (room temperature is best to avoid the dough seizing up) and pour in the vanilla extract. Beat again until everything is well combined — it should look glossy and smooth. I like scraping the sides of the bowl after this to make sure no flour pockets sneak in later.
Step 3: Mix in Dry Ingredients
Now, add the all-purpose flour and baking soda to the bowl. Switch to low speed or stir by hand to prevent overmixing, which can make cookies tough. You’re looking for just combined dough with no visible flour. If you’re worried about overbeating, stop when you no longer see dry flour on the sides.
Step 4: Roll, Coat, and Bake
This is the fun part — scoop dough and roll into 1-inch balls. I like to use a small cookie scoop for consistency. Roll each ball in extra granulated sugar before placing on a parchment-lined baking sheet spaced about 2 inches apart. Bake at 375°F for 8 to 10 minutes, watching for the classic puffed and cracked tops and a lightly browned bottom. Resist the urge to overbake — those few minutes make all the difference!
Step 5: Press in the Kisses
Right after the cookies come out of the oven, gently press an unwrapped Hershey’s Kiss into the center of each cookie. Don’t worry if the cookie cracks a bit around it — that’s part of their signature look and charm. Let them cool completely on the baking sheet until the chocolate sets perfectly. Patience here pays off!
Pro Tips for Making Peanut Butter Blossom Cookies Recipe
- Use Room Temperature Ingredients: This helps everything blend smoothly and ensures a soft, tender cookie every time.
- Don’t Skip the Sugar Roll: The extra sugar coating gives an irresistible texture contrast and a sparkly finish.
- Watch Your Oven Carefully: Every oven bakes differently, so check at 8 minutes to avoid overbaking—cookies should look just set and still soft.
- Press the Kiss While Warm: This not only melts the chocolate slightly but also ensures it sticks perfectly to your cookie.
How to Serve Peanut Butter Blossom Cookies Recipe

Garnishes
Honestly, these cookies shine just as they are—but if you want to jazz them up, a light dusting of powdered sugar or a sprinkle of sea salt over the kisses adds an elegant touch. I sometimes throw a few crushed peanuts around the edges for extra crunch and that double peanut punch.
Side Dishes
These Peanut Butter Blossom Cookies are perfect alongside a cold glass of milk, but I also love serving them with a scoop of vanilla ice cream or a cup of rich hot chocolate for a cozy dessert spread. They also pair well with fresh fruit like sliced strawberries to cut through the richness.
Creative Ways to Present
For holidays or parties, I arrange them in festive tins lined with parchment and add colorful ribbons for gifting. Another fun idea is stacking them in small towers tied with twine for tablescapes. I once made a cookie platter where I arranged the kisses side up in a heart shape — it was a hit at Valentine’s Day!
Make Ahead and Storage
Storing Leftovers
After they’ve cooled completely, I store my cookies in an airtight container at room temperature. They stay fresh and soft for about a week, but I swear, they rarely last that long with my crew around.
Freezing
If you want to freeze these, I recommend freezing the dough balls first on a tray, then transferring them to a freezer bag. When you’re ready, bake straight from frozen—just add a couple more minutes to baking time. It’s a lifesaver for last-minute cookie cravings!
Reheating
Reheating works like a charm! Pop a cookie in the microwave for 10 to 15 seconds to get the chocolate melty and the cookie soft again. It’s almost like a fresh-baked experience—trust me, that quick warm-up will win you over every time.
FAQs
-
Can I use natural peanut butter instead of creamy?
You can substitute natural peanut butter, but I’d recommend mixing it well first as it tends to separate. Keep in mind the texture might be a bit denser, and you may want to add a touch less flour since natural peanut butter usually has more oil.
-
Why do the cookies crack on top when baking?
The cracking on top is actually a sign that your cookies are baking perfectly! It happens because the outside sets while the inside expands, creating that signature “blossom” look that makes these cookies so charming.
-
Can I use a different type of chocolate than Hershey’s Kisses?
Absolutely! While Hershey’s Kisses are traditional, feel free to swap in mini peanut butter cups, chocolate chips pressed in after baking, or even flavored kisses like caramel or mint for a unique twist.
-
How do I prevent my cookies from spreading too much?
Make sure your butter is softened but not melted, and chill your dough briefly if your kitchen is warm. Also, avoid overmixing once you add the flour, as overworked dough can lead to flat cookies.
Final Thoughts
Honestly, this Peanut Butter Blossom Cookies Recipe has become a staple in my house and one of my go-to treats when I want something both comforting and impressive without too much fuss. It’s the kind of recipe you’ll treasure for holidays, birthdays, or just a guilty pleasure on a random Tuesday. Give it a try — I’m confident you’ll fall in love with these tender, chocolatey bites as much as my family and I do. Baking is all about joy and sharing, and this recipe delivers on both.
Print
Peanut Butter Blossom Cookies Recipe
- Prep Time: 20 minutes
- Cook Time: 10 minutes
- Total Time: 30 minutes
- Yield: 36 cookies
- Category: Dessert
- Method: Baking
- Cuisine: American
Description
Peanut Butter Blossoms are classic cookies featuring a tender, moist peanut butter base topped with a signature Hershey’s chocolate kiss. These delightful treats combine the creamy richness of peanut butter with a sweet, slightly crunchy sugar coating and a smooth chocolate center, perfect for any occasion.
Ingredients
Cookie Dough
- ¾ cup creamy peanut butter (188g)
- ½ cup unsalted butter, softened (113g)
- ½ cup granulated sugar (plus more for rolling) (100g)
- ½ cup packed light brown sugar (110g)
- ¼ teaspoon salt
- 1 large egg, room temperature
- 1 teaspoon vanilla extract
- 1½ cups all-purpose flour (180g)
- ½ teaspoon baking soda
Topping
- 36 Hershey’s chocolate kisses, unwrapped
Instructions
- Preheat Oven and Prepare Baking Sheets: Preheat the oven to 375°F (190°C). Line cookie sheets with parchment paper to prevent sticking and ensure easy cleanup.
- Cream Ingredients: In a large mixing bowl or the bowl of a stand mixer equipped with a paddle attachment, combine the creamy peanut butter, softened unsalted butter, granulated sugar, light brown sugar, and salt. Beat on medium speed until the mixture is smooth and well combined.
- Add Egg and Vanilla: Add the egg and vanilla extract to the mixture. Continue beating until fully incorporated, scraping down the sides of the bowl to ensure an even mix.
- Add Dry Ingredients: Gradually add the all-purpose flour and baking soda to the wet mixture. Beat on low speed just until combined, being careful not to overmix to maintain a tender cookie texture.
- Form Cookie Balls: Scoop the dough and roll into 1-inch balls. If desired, roll each ball in additional granulated sugar for a sweet, crunchy coating. Place the cookie balls 2 inches apart on the prepared baking sheet to allow room for spreading.
- Bake Cookies: Bake the cookies for 8 to 10 minutes, or until they are puffy and cracked, and the bottoms begin to turn a light golden brown.
- Add Chocolate Kisses: Immediately after removing the cookies from the oven, press one unwrapped Hershey’s chocolate kiss into the center of each cookie. The cookies will crack slightly, which is normal and part of their charm.
- Cool and Set: Allow the cookies to cool completely on the pan so the chocolate can set. Once cooled, serve immediately or store in an airtight container for up to one week to maintain freshness.
Notes
- For best results, use room temperature ingredients to ensure even mixing and a consistent texture.
- Rolling the dough balls in granulated sugar before baking adds a nice texture and sweetness to the cookie exterior.
- Press the chocolate kisses in immediately after baking while the cookies are still warm to allow them to slightly melt and adhere without breaking.
- Store cookies in an airtight container at room temperature to keep them fresh and chewy.
- This recipe yields 36 cookies, making it perfect for sharing during holidays or special occasions.
Nutrition
- Serving Size: 1 cookie
- Calories: 121 kcal
- Sugar: 9 g
- Sodium: 62 mg
- Fat: 7 g
- Saturated Fat: 3 g
- Unsaturated Fat: 3 g
- Trans Fat: 0.1 g
- Carbohydrates: 14 g
- Fiber: 1 g
- Protein: 2 g
- Cholesterol: 13 mg

