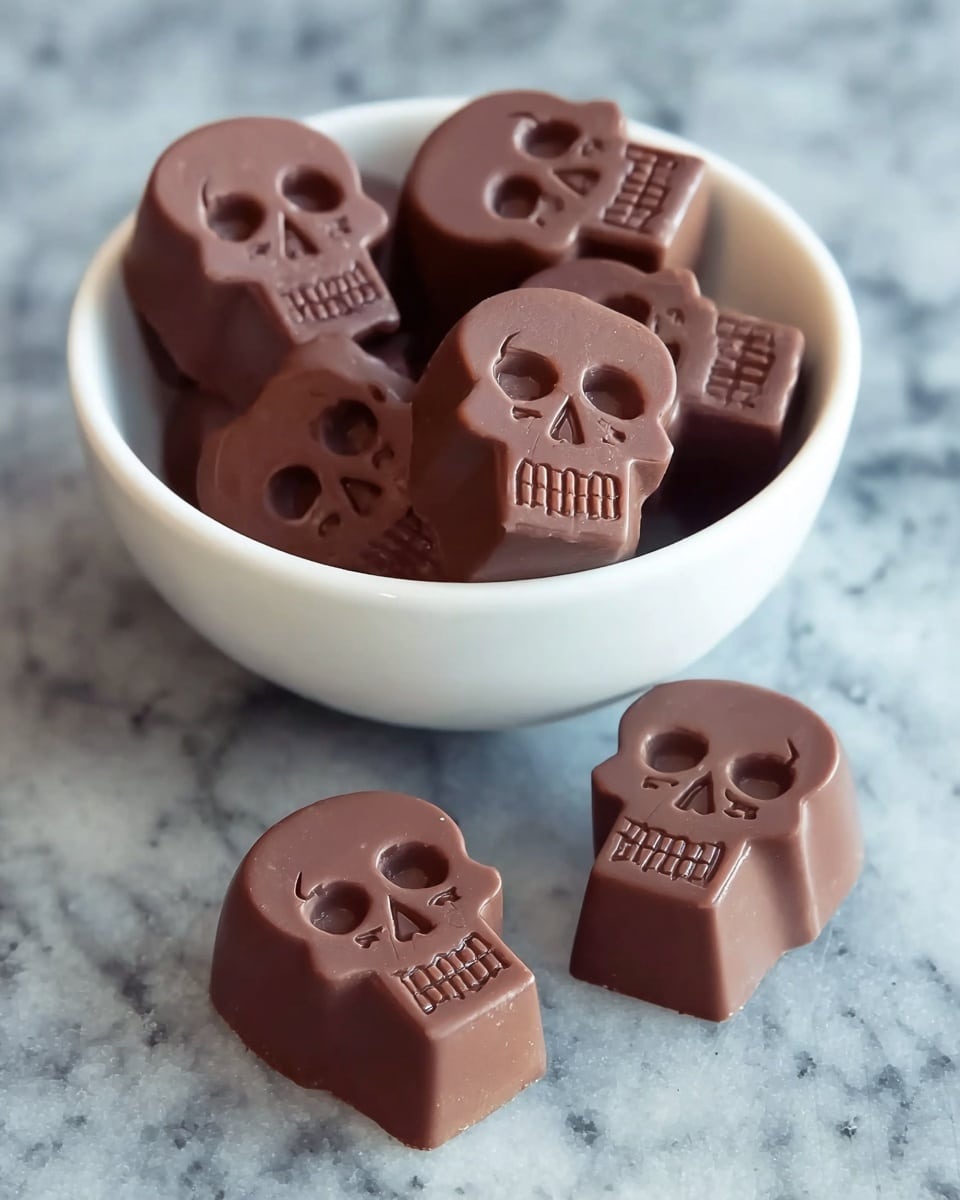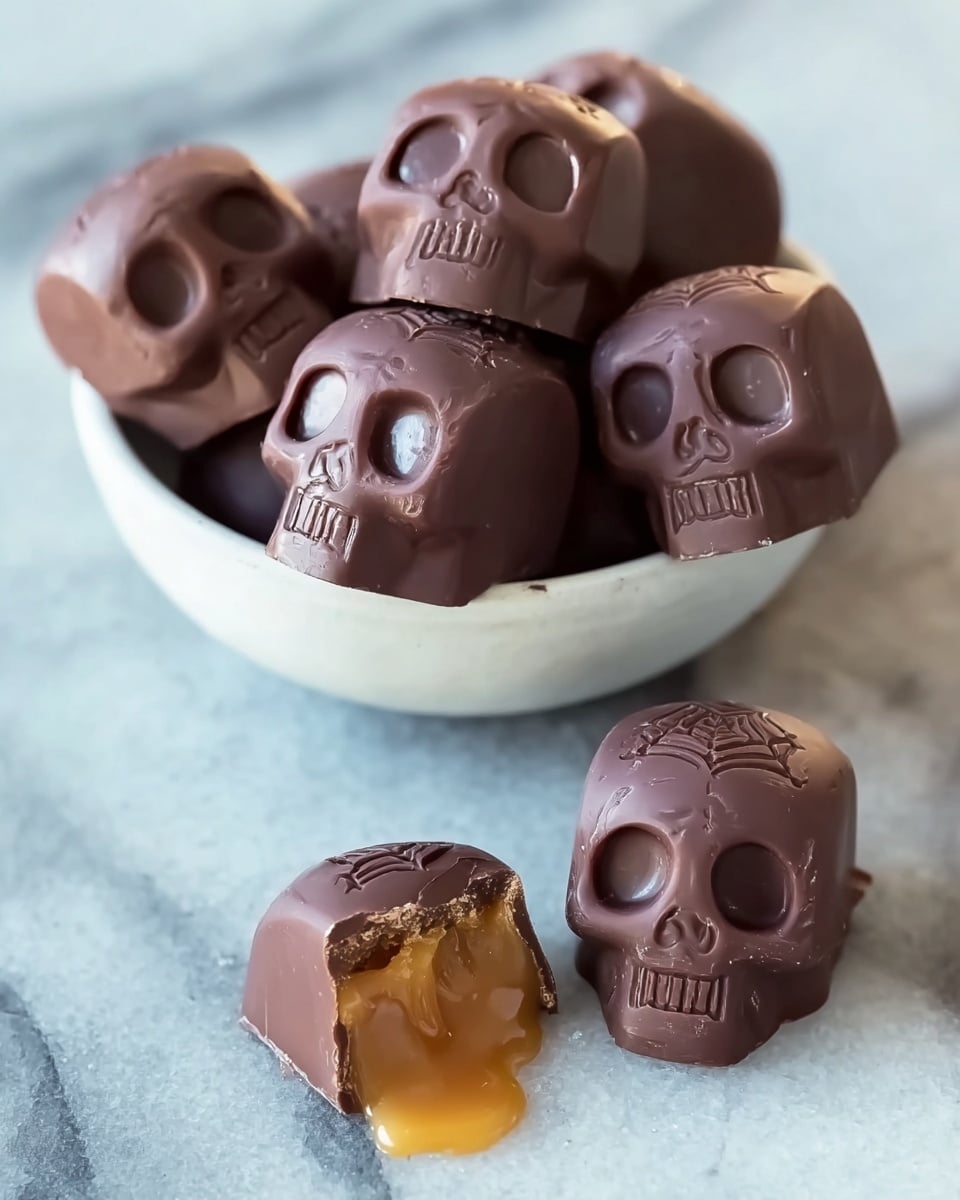
If you love the rich, cozy flavors of fall wrapped up in a sweet treat, then this Pumpkin Caramel Chocolates Recipe is going to become your new obsession. I absolutely love how these little gems balance the spiced pumpkin caramel with smooth chocolate — they’re like tiny bites of autumn magic. Whether you’re making them for Halloween, a special gift, or just to indulge yourself, this recipe is sure to wow both your taste buds and anyone lucky enough to try them.
Why You’ll Love This Recipe
- Richly Seasonal Flavor: The warmly spiced pumpkin caramel filling makes these chocolates perfect for fall celebrations.
- Simple Ingredients, Big Impact: You only need a few pantry staples, but the end result tastes gourmet.
- Great Make-Ahead Treat: Prepare the caramel sauce ahead of time, so assembly is quick and stress-free.
- Perfect Gift or Party Favor: These chocolates impress and delight without requiring fancy tools.
Ingredients You’ll Need
It’s amazing how just a couple of key ingredients come together to make such an indulgent treat. For the chocolate, I like semi-sweet or dark for that rich balance, and the pumpkin caramel brings a lovely seasonal twist that’s not too sweet but packed with cozy flavor. If you’re buying chocolate specifically for these, choose good quality baking chocolate but don’t worry about using fancy couverture chocolate — this recipe is foolproof!
- Semi-sweet or dark chocolate: Opt for a high-quality chocolate that melts smoothly and has a nice cocoa content for depth.
- Pumpkin Coconut Caramel Sauce: Homemade is best here, since that warm pumpkin spice combined with coconut caramel is what makes these truly special.
Variations
I love how this Pumpkin Caramel Chocolates Recipe adapts to your taste and occasion. Over time, I’ve found some simple tweaks and additions that make it just right for different events or dietary preferences. Feel free to experiment so you end up with your signature batch!
- Using Milk Chocolate: I sometimes swap semi-sweet for milk chocolate when I want an extra creamy, sweeter chocolate shell — it’s a crowd-pleaser with kids!
- Vegan Version: Try dark chocolate that’s dairy-free and use a coconut-based caramel sauce; I’ve had great results making this fully plant-based.
- Adding a Pinch of Sea Salt: Sprinkle a tiny bit of flaky sea salt on top right after filling the molds — it brings out the caramel flavor beautifully.
- Spice Mix Tweaks: Play with the pumpkin caramel spice blend by adding a touch of cardamom or ginger to customize your fall vibe.
How to Make Pumpkin Caramel Chocolates Recipe
Step 1: Prepare Your Pumpkin Caramel Sauce
This step takes the longest, so it’s best to make your pumpkin coconut caramel sauce a day ahead if you can — trust me, it’s worth the wait! The flavors deepen over time and it thickens perfectly for the filling. Make sure you let it fully cool before adding it to your chocolate molds; hot caramel can melt the chocolate shell and ruin that crisp edge you’re after.
Step 2: Melt and Temper Your Chocolate
Gently melt your chopped chocolate in a small saucepan over low heat, stirring constantly so it doesn’t scorch. Once smooth, remove from heat. I like to spoon a small amount into each chocolate mold, then use a tiny paintbrush or the back of a spoon to coat the entire inside evenly. This technique creates a nice shell that holds the caramel filling securely. Pop the molds into the fridge for about 5 minutes to set this first layer.
Step 3: Fill with Pumpkin Caramel
Once the chocolate shells are firm, fill each mold with your cooled pumpkin caramel sauce. Be sure to leave a little space at the top to seal with chocolate later. This step is where the magic happens — I find that filling the molds before the caramel is fully cool leads to a melted mishmash, so patience is key here!
Step 4: Seal with More Chocolate
Rewarm the remaining chocolate gently if it’s hardened. Pour or spoon the chocolate on top of each filled mold, sealing your pumpkin caramel inside. Tap the molds lightly on your counter to release bubbles and get a smooth top. Then, chill them in the refrigerator until completely set — about 30 minutes does the trick.
Step 5: Store and Enjoy
Once firm, pop your pumpkins caramel chocolates out of the molds and keep them stored in the fridge. They’re best enjoyed within 10 days, but I have to confess — mine never last that long around here!
Pro Tips for Making Pumpkin Caramel Chocolates Recipe
- Chocolate Melting: Use a double boiler or low heat to avoid burning your chocolate and getting a grainy texture.
- Cooling the Filling: Always cool your pumpkin caramel completely so it doesn’t melt the chocolate shell during filling.
- Mold Selection: Silicone molds are my favorite because they make popping out the chocolates easy without cracking.
- Avoiding Air Bubbles: Tapping the mold after adding chocolate helps prevent holes or bubbles in the finished chocolates.
How to Serve Pumpkin Caramel Chocolates Recipe
Garnishes
I love adding a sprinkle of flaky sea salt on top right after sealing the chocolates — it balances the sweetness and adds a nice crunch. Sometimes I also dust a pinch of cinnamon or finely crushed candied ginger for an extra burst of fall flavor.
Side Dishes
These chocolates pair wonderfully with a warm spiced cider or a cup of pumpkin latte. For a party, I like serving them alongside soft ginger cookies or candied nuts for a cozy fall dessert board.
Creative Ways to Present
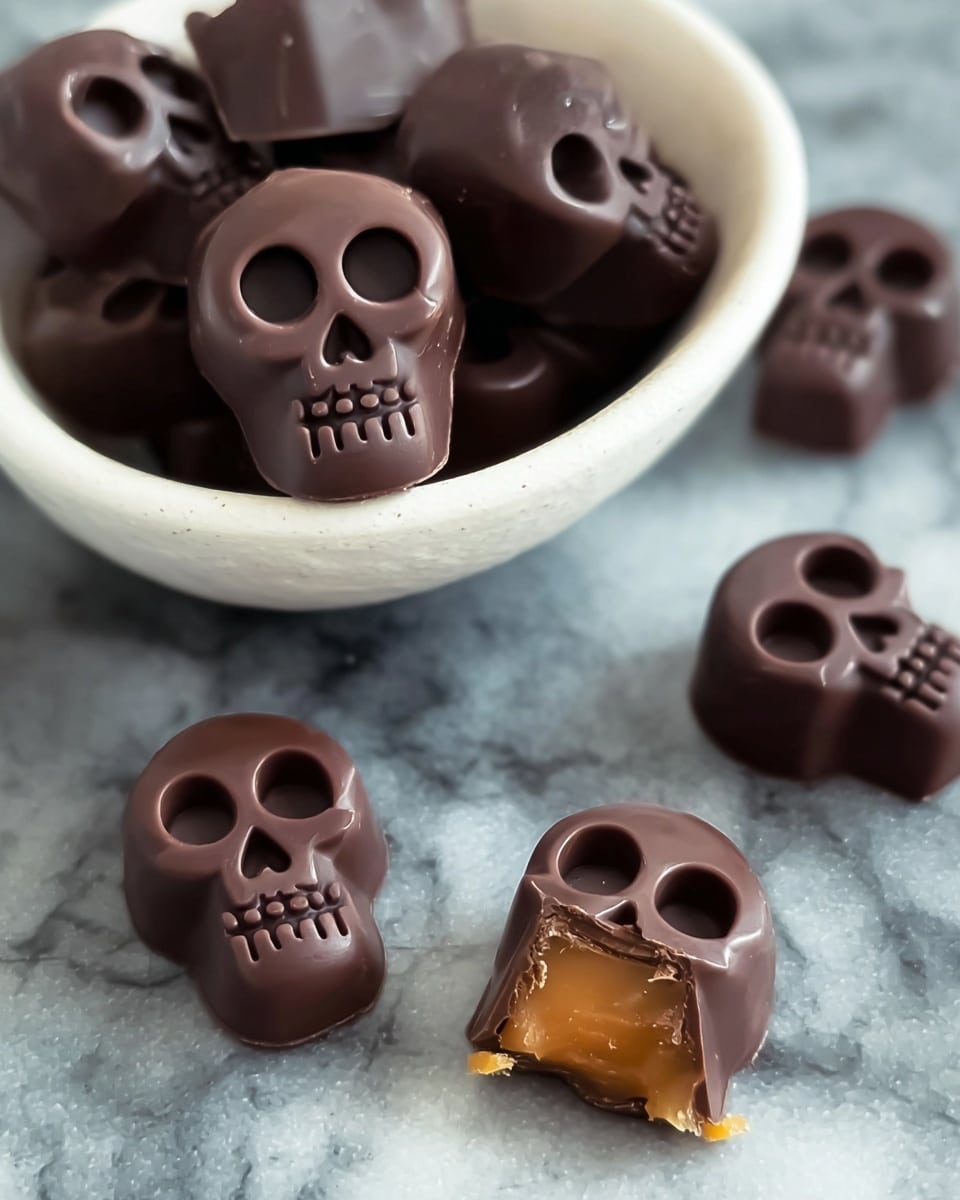
For Halloween, I’ve filled themed silicone molds like pumpkins and ghosts, and wrapped them in clear cellophane tied with an autumn ribbon — such a simple but impressive gift. On a more adult occasion, sprinkle edible gold leaf or cacao nibs on top for a fancy touch.
Make Ahead and Storage
Storing Leftovers
I keep my Pumpkin Caramel Chocolates stored in an airtight container in the fridge to maintain that perfect snap of the chocolate shell. If they start to sweat or soften, just chill them again before serving.
Freezing
Freezing works well if you want to stash these away for the holidays. I wrap them individually in parchment paper before placing them in a sealed freezer bag to avoid moisture build-up. Thaw in the fridge slowly to keep texture and flavor intact.
Reheating
Generally, I don’t reheat chocolates, but if you want to soften the filling, place them at room temperature for 10-15 minutes to take the chill off. Avoid direct heat to prevent melting your shells.
FAQs
-
Can I use store-bought caramel sauce instead of homemade pumpkin caramel?
You can, but I recommend mixing in pumpkin puree and warm spices into your store-bought caramel to keep that authentic pumpkin caramel flavor. Straight caramel alone won’t give you the same seasonal depth in this Pumpkin Caramel Chocolates Recipe.
-
What chocolate molds work best for these chocolates?
Silicone molds are my go-to because they’re flexible and make it so easy to pop the chocolates out without cracking. Just make sure your molds are completely dry and clean before use to get a smooth finish.
-
How long can I store these Pumpkin Caramel Chocolates?
Stored in an airtight container in the fridge, these chocolates are best eaten within 10 days to enjoy perfect texture and flavor. After that, they may start to sweat or soften.
-
Can I make these chocolates ahead for a party?
Absolutely! Since the pumpkin caramel sauce takes several hours to make, I prepare it the day before and assemble the chocolates the same day as the party. They keep well refrigerated until serving.
Final Thoughts
When I first tried making this Pumpkin Caramel Chocolates Recipe, I was blown away by how something so simple could taste so decadent and cozy. They’ve since become a staple for me every fall — whether I’m impressing guests or just sneaking a few after dinner. I can’t recommend giving this recipe a try enough. You’ll enjoy the process nearly as much as the incredible flavors when you bite into these luscious, spiced little treats. So go on, treat yourself to a batch — it just might become your favorite way to celebrate autumn.
Print
Pumpkin Caramel Chocolates Recipe
- Prep Time: 5 minutes
- Cook Time: 5 minutes
- Total Time: 55 minutes
- Yield: 13 chocolates
- Category: Dessert
- Method: Stovetop
- Cuisine: American
Description
These Pumpkin Caramel Chocolates combine rich semi-sweet dark chocolate with a warmly spiced pumpkin coconut caramel center, perfect for fall and Halloween treats. The recipe involves melting chocolate, coating molds, filling with pumpkin caramel sauce, and sealing with more chocolate to create decadent bite-sized confections.
Ingredients
Chocolate Coating
- 8 ounces semi-sweet or dark chocolate, chopped
Filling
- 1/3 to 1/2 cup Pumpkin Coconut Caramel Sauce (prepared in advance)
Instructions
- Prepare Pumpkin Coconut Caramel Sauce: Make the pumpkin coconut caramel sauce ahead of time, ideally the day before, as it takes several hours to prepare and cool properly for best results.
- Melt Chocolate: In a small saucepan over low heat, gently melt the chopped chocolate until smooth and fully melted. Remove from heat to prevent burning.
- Coat Molds: Spoon a small amount of the melted chocolate into each chocolate mold cavity. Using a small paintbrush or spoon, evenly coat the inner walls of each mold completely with chocolate. This creates a shell for the caramel filling. Place the molds in the refrigerator for about 5 minutes or until the chocolate sets firmly.
- Fill Molds with Caramel: Once the chocolate shell has set, fill each mold cavity with the cooled pumpkin coconut caramel sauce. Leave space at the top of each mold for sealing with more chocolate. Ensure the caramel is fully cooled if prepared the same day to prevent melting the chocolate shells.
- Seal Chocolates: Reheat any remaining chocolate gently until smooth. Spoon the melted chocolate over the caramel filling in each mold to completely cover and seal the chocolates.
- Remove Air Bubbles and Set: Carefully tap the molds on the counter to remove any air bubbles inside the chocolates. Return the molds to the refrigerator to allow the chocolates to fully set and harden.
- Store and Serve: Store the finished pumpkin caramel chocolates in the refrigerator. Consume within 10 days for optimal freshness and flavor.
Notes
- Perfect for fall, these warmly spiced pumpkin caramel chocolates are great for Halloween and seasonal celebrations.
- Ensure the caramel sauce is fully cooled before filling the molds to avoid melting the chocolate coating.
- Use a paintbrush for an even chocolate shell coating in the molds.
- Keep chocolates refrigerated to maintain texture and freshness.
Nutrition
- Serving Size: 1 chocolate
- Calories: 107
- Sugar: 10 grams
- Sodium: 18 milligrams
- Fat: 4 grams
- Saturated Fat: 4 grams
- Unsaturated Fat: 2 grams
- Trans Fat: 0 grams
- Carbohydrates: 8 grams
- Fiber: 1 gram
- Protein: 1 gram
- Cholesterol: 0 milligrams

