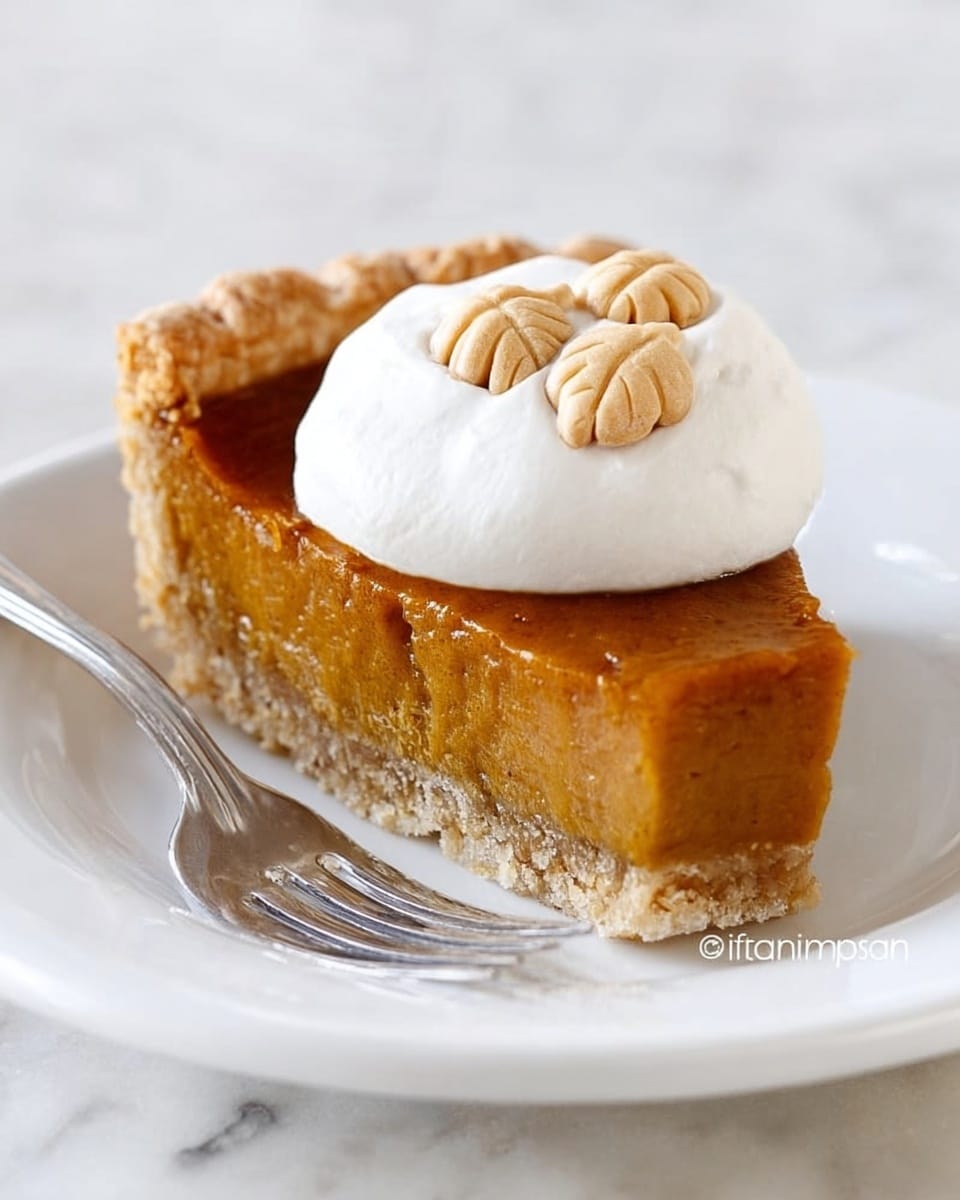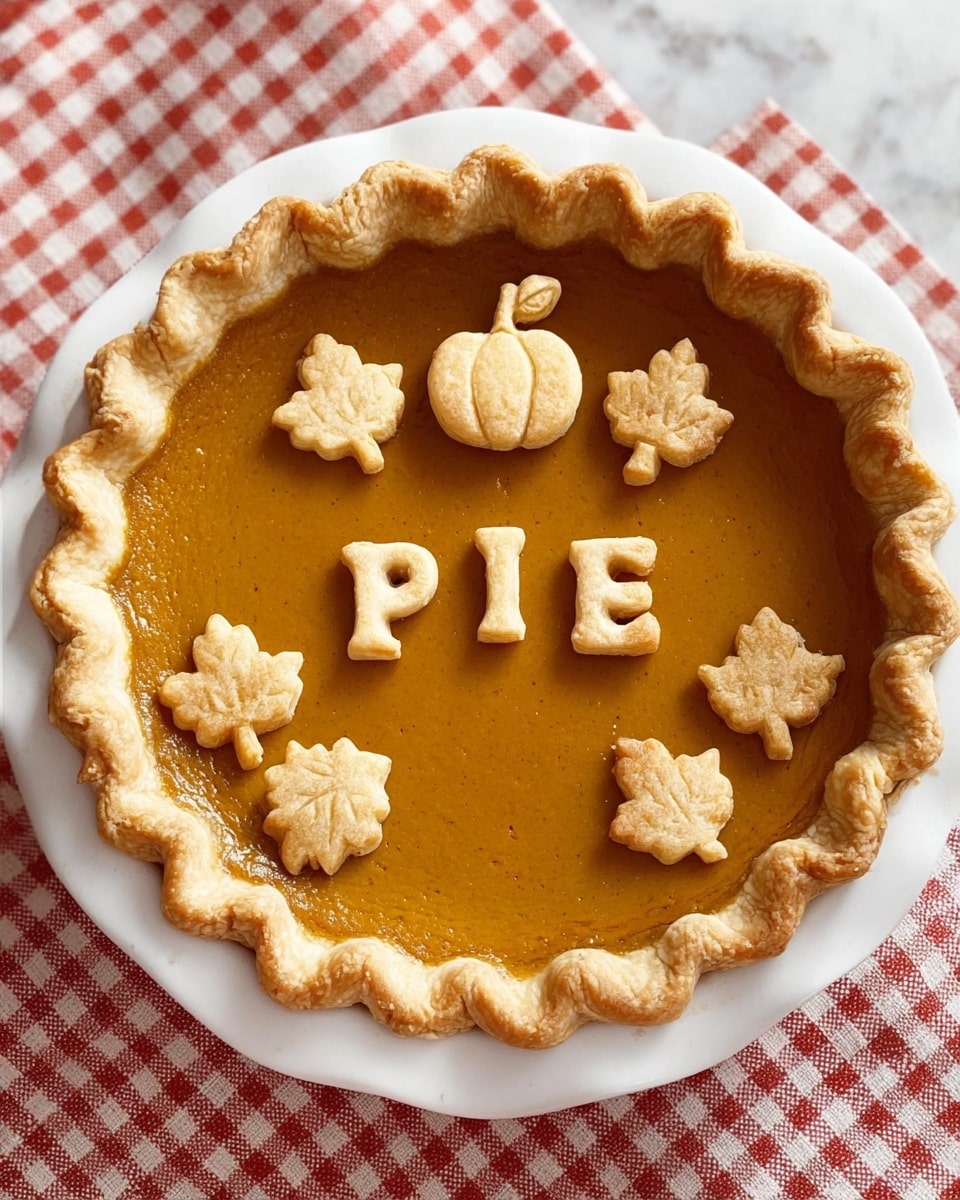
If you’re looking to indulge in pumpkin pie without the heavy guilt, this Skinny Pumpkin Pie Recipe is a total game changer. I absolutely love how this version manages to capture all those cozy fall flavors with way fewer calories than your traditional pie. It’s perfect whether you’re baking for a holiday dinner or just craving a little autumnal comfort any time of the year.
When I first tried this recipe, I was amazed at how moist and flavorful it turned out despite swapping out some of the usual heavy ingredients. You’ll find that this skinny pumpkin pie still has that creamy texture and warm spice blend you adore, but it’s much lighter on the waistline. Trust me, your friends and family won’t even notice it’s a “skinny” pie!
Why You’ll Love This Recipe
- Light but Flavorful: Uses fat-free milk and less butter without sacrificing rich pumpkin pie flavor.
- Simple Ingredients: You probably already have everything in your pantry.
- Easy to Follow: Straightforward steps make it great for bakers at any level.
- Perfect Portions: Makes 10 slices so everyone can enjoy a guilt-free treat.
Ingredients You’ll Need
Each ingredient in this Skinny Pumpkin Pie Recipe plays a role in keeping it light yet delicious, from the canned pumpkin to the lean milk and egg whites. Pro tip: using a frozen pie crust sheet saves time, but you can try a homemade crust if you want even more control.
- Canned pumpkin: Prefer 100% pure pumpkin, not pumpkin pie filling, for the right texture and flavor.
- Whipped butter: Softened makes it easier to blend smoothly into the filling without weighing it down.
- Light brown sugar: Adds sweetness and depth without excess calories; unpacked for accurate measurement.
- Fat-free milk: Keeps the pie creamy without the fat of whole milk or cream.
- Large egg and egg whites: Together they provide structure and moisture while reducing fat.
- Pumpkin pie spice, cinnamon, nutmeg: The essential warm spices that deliver that unmistakable pumpkin pie aroma.
- Vanilla extract: A splash really enhances the overall flavor.
- Frozen pie crust sheet: Thawed to room temperature and trimmed to keep calories in check.
Variations
I love making this Skinny Pumpkin Pie Recipe my own by playing with flavors and crust options, so feel free to personalize it to your taste. Whether you want to make it vegan or add nuts for texture, it’s easy to adjust.
- Gluten-Free Crust: I’ve swapped the crust for a gluten-free version and it still turned out perfectly sturdy and tasty.
- Vegan Version: Use a non-dairy milk like almond and replace eggs with a flax egg; it’s surprisingly good!
- Spice it Up: Sometimes I add a pinch of ground ginger or cloves for an extra warm spice kick.
- Nut Topping: Toasted pecans or walnuts sprinkled on top add a nice crunch and protein boost.
How to Make Skinny Pumpkin Pie Recipe
Step 1: Prepare and Trim the Crust
Start by preheating your oven to 350°F so it’s ready when you need it. Lightly flour a clean surface or cutting board and roll your thawed pie crust sheet out thinly—trimming off about 30% so you end up with a 5 oz crust. This little trimming trick helps keep the calories in check while still giving you that flaky base we all love. Then gently press the crust into a 9-inch pie dish and cut away any excess dough along the edges.
Step 2: Mix the Filling Ingredients
In a large bowl, scoop in the canned pumpkin puree and add your softened whipped butter. Mix those together until creamy—I like using a fork or spatula at first to get things moving. Then grab your electric mixer and blend in the brown sugar, fat-free milk, eggs, egg whites, pumpkin pie spice, cinnamon, nutmeg, and vanilla extract. Beat on medium speed until the mixture is smooth and luscious. This is when the magic happens, and you can smell all those holiday vibes coming alive!
Step 3: Bake Until Perfect
Pour your silky filling into the prepared unbaked pie crust and slide that beauty into your preheated oven. Bake for about 70 to 75 minutes, but start checking around 65 minutes just in case. You’ll know it’s done when a knife inserted into the center comes out clean. The edges might puff up a bit but will settle as it cools—don’t worry, it’s supposed to look that way. Letting it cool completely before slicing helps everything set perfectly for those clean, beautiful pie slices.
Pro Tips for Making Skinny Pumpkin Pie Recipe
- Room Temperature Ingredients: I always bring eggs and butter to room temp first—it helps the filling blend smoothly without lumps.
- Don’t Overbake: Check the pie at 65 minutes; pulling it out too late can dry out the filling.
- Crust Trimming: Trimming the crust not only cuts calories but prevents thick edges that can get doughy during baking.
- Cooling Time: Patience is key—chill the pie thoroughly before slicing so it holds its shape beautifully.
How to Serve Skinny Pumpkin Pie Recipe
Garnishes
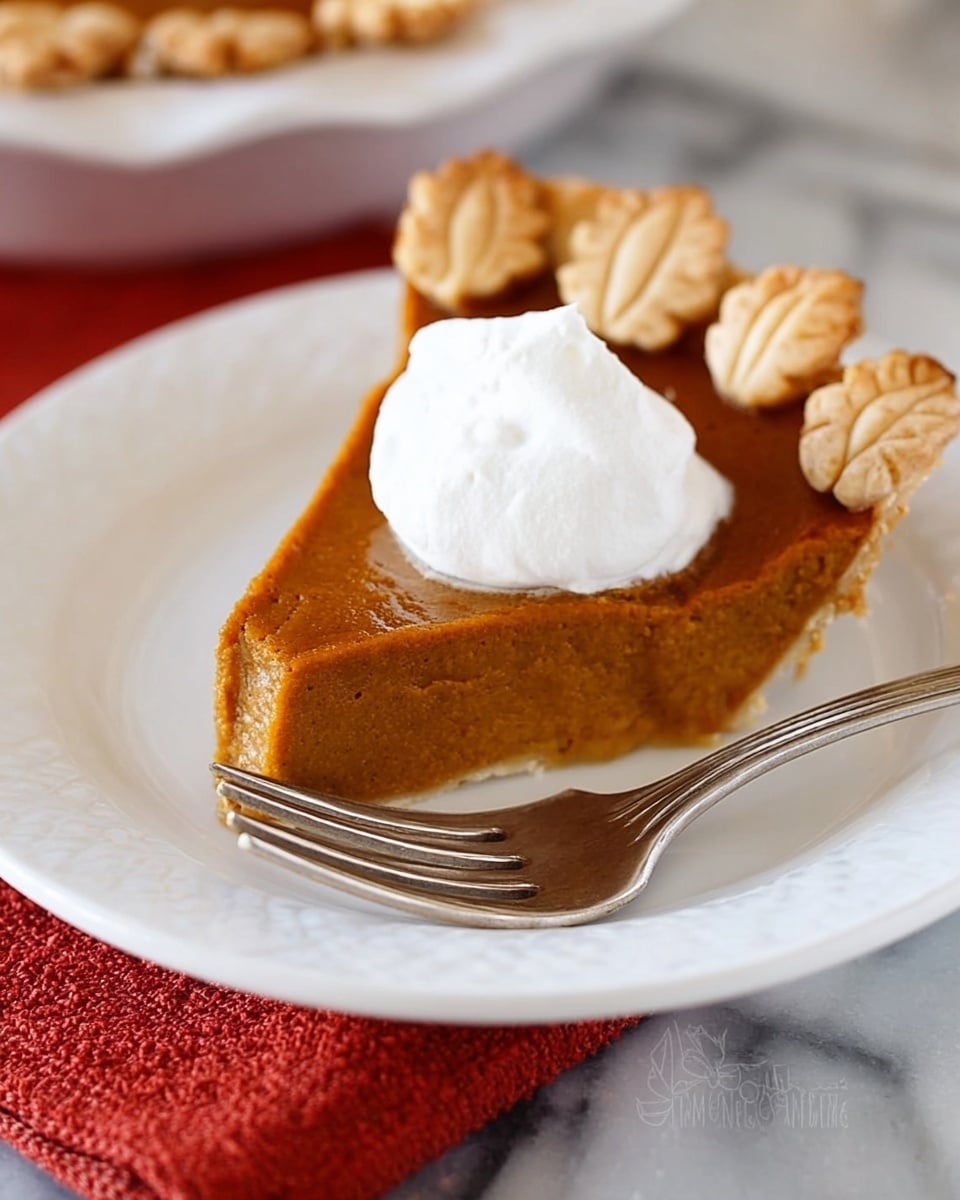
I usually keep it simple with a dollop of whipped coconut cream for a dairy-free option, but classic whipped cream works wonderfully too. Sometimes I sprinkle a bit of cinnamon on top just before serving—it adds a lovely aroma and looks pretty. If I’m feeling fancy, a few toasted pecans on the side offer a fantastic contrast in texture and flavor.
Side Dishes
Though this pie stands on its own, my family loves pairing it with cozy drinks like hot apple cider or a lightly spiced chai latte. For holiday dinners, it’s great alongside roasted veggies or a crisp green salad to balance the sweetness.
Creative Ways to Present
One year, I made mini versions of this Skinny Pumpkin Pie Recipe using muffin tins and topped each with a swirl of whipped cream and a tiny cinnamon stick—everyone at the party was obsessed! For a more rustic look, I’ve also laid out thin apple slices in a decorative fan on top before baking; it adds a subtle fruitiness and looks stunning.
Make Ahead and Storage
Storing Leftovers
After it’s cooled, I cover the pie tightly with plastic wrap or foil and keep it in the fridge. It stays fresh and flavorful for up to 4 days, which is perfect because it rarely lasts that long in my house! Just make sure it’s sealed well to avoid picking up any fridge odors.
Freezing
If you want to freeze leftovers, I recommend freezing individual slices wrapped in plastic wrap and then placed in a freezer bag. When you’re ready, thaw overnight in the fridge to keep the texture intact. I’ve found freezing the whole pie isn’t as reliable, but slices freeze and reheat beautifully.
Reheating
Reheat leftover slices gently in a 300°F oven for about 10-15 minutes so they warm through without drying out. You can also microwave a slice for 30-45 seconds if you’re in a hurry, but the oven method retains the best texture.
FAQs
-
Can I use fresh pumpkin instead of canned in this Skinny Pumpkin Pie Recipe?
Absolutely! If you prefer fresh pumpkin, roast it and puree it until smooth. Just make sure to cook and cool the puree fully before using it in the recipe to avoid excess moisture affecting your pie.
-
Is it possible to make this recipe gluten-free?
Yes! Swap the frozen pie crust sheet for a gluten-free crust option—either store-bought or homemade. The filling is already gluten-free, so it’s an easy adjustment.
-
How do I know when the pumpkin pie is fully baked?
Insert a clean knife or toothpick into the center of the pie. If it comes out clean or with just a little moist filling (not liquid), your pie is done. Also, the edges might puff up slightly but will settle as the pie cools.
-
Can I make this pie ahead of time?
Definitely! You can bake it the day before and store it in the refrigerator overnight. Just bring it to room temperature before serving, or reheat gently in the oven if you prefer it warm.
-
What topping do you recommend for this Skinny Pumpkin Pie Recipe?
My favorite is whipped coconut cream for a dairy-free option, but classic whipped cream or even a sprinkle of toasted nuts work beautifully to complement the pie’s spices.
Final Thoughts
This Skinny Pumpkin Pie Recipe has become one of my go-to desserts especially when I want all the joys of traditional pumpkin pie without feeling weighed down. I’m confident you’ll enjoy how approachable and satisfying it is, whether you’re baking for a cozy family gathering or simply treating yourself to a slice with coffee. Give it a try—you might just find your new favorite holiday tradition!
Print
Skinny Pumpkin Pie Recipe
- Prep Time: 10 min
- Cook Time: 1 hr 10 min
- Total Time: 1 hr 20 min
- Yield: 10 servings
- Category: Dessert
- Method: Baking
- Cuisine: American
- Diet: Low Fat
Description
This Skinny Pumpkin Pie recipe offers a lightened-up version of the classic fall favorite, using a reduced-fat filling and a thinner crust to keep calories in check without sacrificing flavor. Perfectly spiced with cinnamon, nutmeg, and pumpkin pie spice, it’s baked in a flaky pie crust and yields 10 satisfying slices, ideal for holiday gatherings or year-round dessert.
Ingredients
Filling
- 15 oz canned pumpkin
- 2 tbsp whipped butter, softened
- 3/4 cup light brown sugar, unpacked
- 1/2 cup fat free milk
- 1 large egg
- 2 large egg whites
- 1/2 teaspoon pumpkin pie spice
- 1/2 teaspoon ground cinnamon
- 1/4 teaspoon ground nutmeg
- 1 tsp vanilla extract
Crust
- 1 frozen pie crust sheet (Pillsbury, thawed to room temperature)*
Instructions
- Preheat the oven: Set your oven to 350°F (175°C) to prepare for baking the pie.
- Prepare the pie crust: Lightly dust a large cutting board or flat surface with flour. Roll the room temperature pie crust sheet thin enough to trim about 30% off, ending with a 5 oz crust. Place the trimmed dough into a 9-inch pie dish, cutting off any excess dough along the edges.
- Mix the pumpkin filling: In a large bowl, combine the canned pumpkin and softened whipped butter, mixing thoroughly until well blended.
- Incorporate remaining ingredients: Using an electric mixer, add brown sugar, fat-free milk, whole egg, egg whites, pumpkin pie spice, ground cinnamon, ground nutmeg, and vanilla extract to the pumpkin mixture. Beat on medium speed until the mixture is smooth and evenly combined.
- Fill and bake: Pour the pumpkin filling into the unbaked pie crust. Bake in the preheated oven for 70 to 75 minutes, or until a knife inserted into the center comes out clean, indicating the pie is fully cooked.
- Serve: Remove the pie from the oven and let it cool. Cut into 10 slices and serve each slice with whipped coconut cream or whipped cream, if desired.
Notes
- The crust weight was reduced to 5 oz by trimming down the original pie crust sheet to create a lower calorie pie.
- For a dairy-free option, substitute whipped coconut cream for traditional whipped cream as a topping.
- Ensure the pie is fully cooled before slicing to allow the filling to set properly.
- Storage: Keep leftovers covered in the refrigerator for up to 3 days.
Nutrition
- Serving Size: 1 slice (1/10 of pie)
- Calories: 137 kcal
- Sugar: 16.5 g
- Sodium: 114 mg
- Fat: 5 g
- Saturated Fat: 1.5 g
- Unsaturated Fat: 3.5 g
- Trans Fat: 0 g
- Carbohydrates: 25 g
- Fiber: 1.5 g
- Protein: 3 g
- Cholesterol: 23.5 mg

