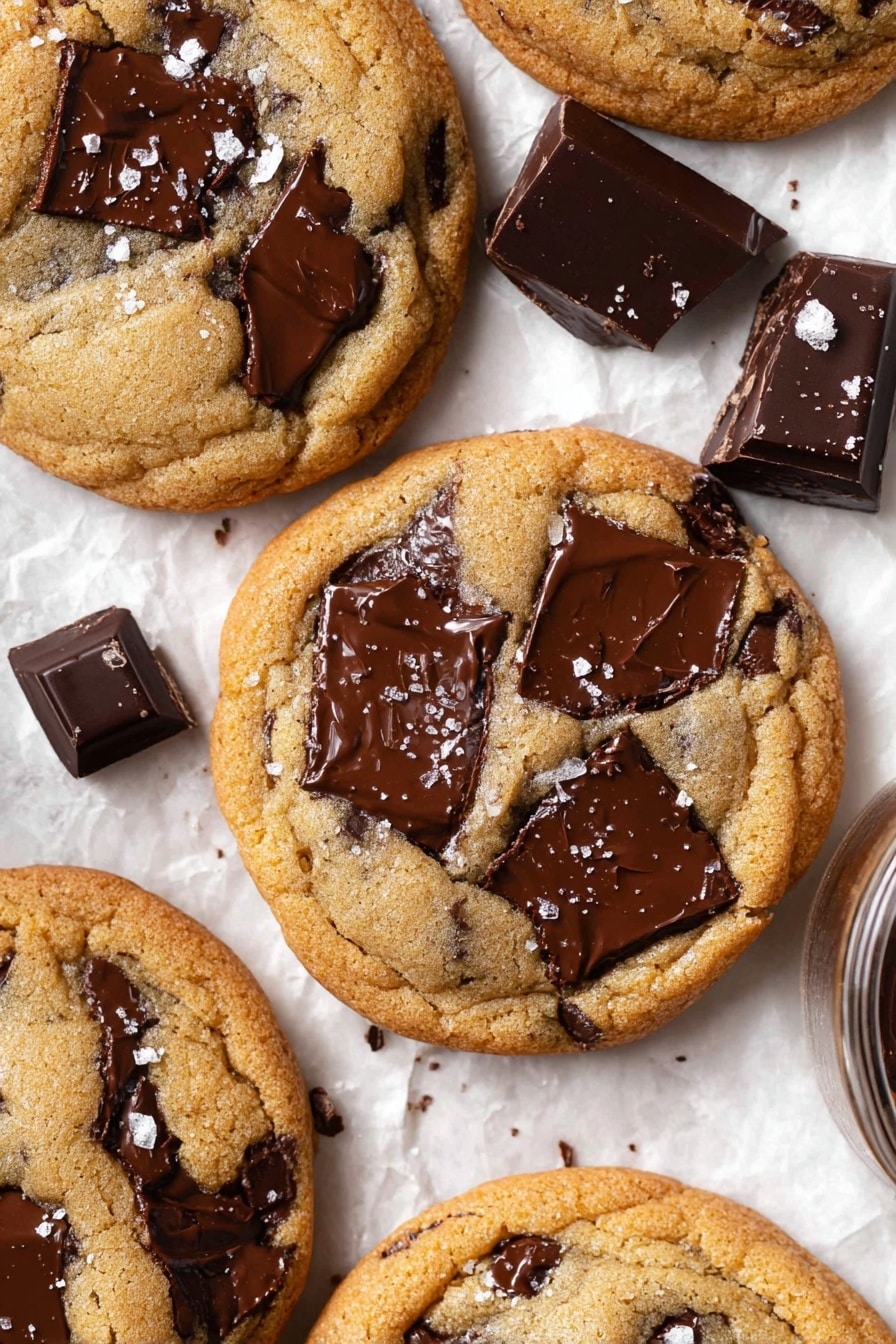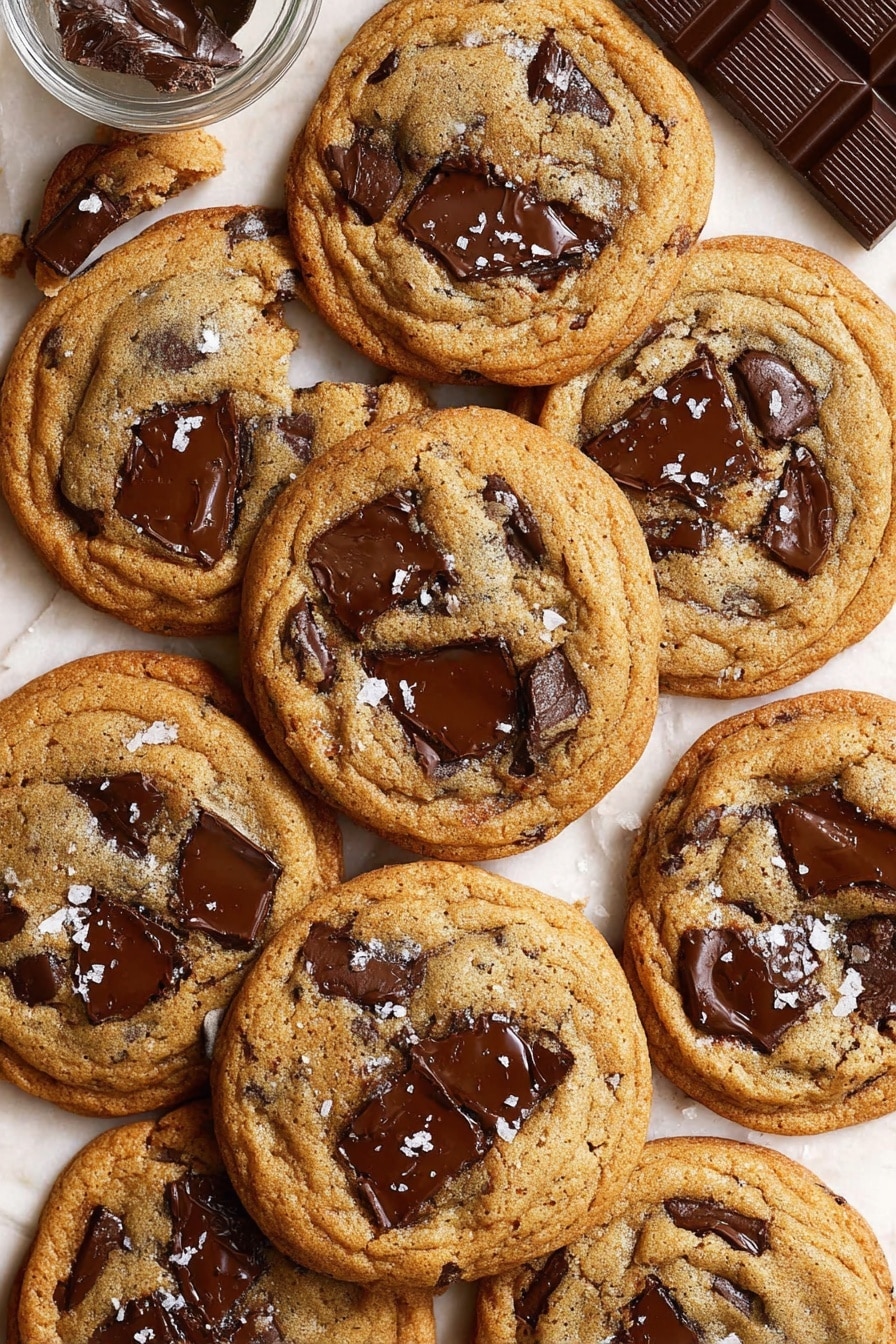
If you’ve ever found yourself hunting for that perfect cookie recipe that hits every note—crispy edges, chewy centers, and pockets of melty chocolate—you’re going to want to stick around for this one. I’m about to share The BEST Chocolate Chip Cookies (Bakery Style) Recipe that I’ve ever made. Seriously, these cookies have become a family classic in my house, and I promise once you bake these, you’ll understand why. They strike that perfect balance of rich, buttery flavor and just the right texture that makes them taste like they came from your favorite bakery (without the price tag!). So grab your mixing bowl, and let me walk you through every step to cookie bliss.
Why You’ll Love This Recipe
- Perfect Texture: You’ll get crispy edges with soft, chewy middles every single time.
- Deep Flavor: The combination of brown sugar, honey, and real vanilla creates that classic, butterscotch-y bakery taste.
- Chunky Chocolate Goodness: Big, rustic chunks of dark chocolate melt beautifully in every bite.
- Easy Prep with a Rewarding Chill: The dough just needs some patience in the fridge to develop amazing flavor and texture—not complicated steps.
Ingredients You’ll Need
These ingredients come together harmoniously to create that bakery-style charm we all crave in chocolate chip cookies. And trust me, using good-quality butter and chocolate really makes a world of difference—don’t skimp!
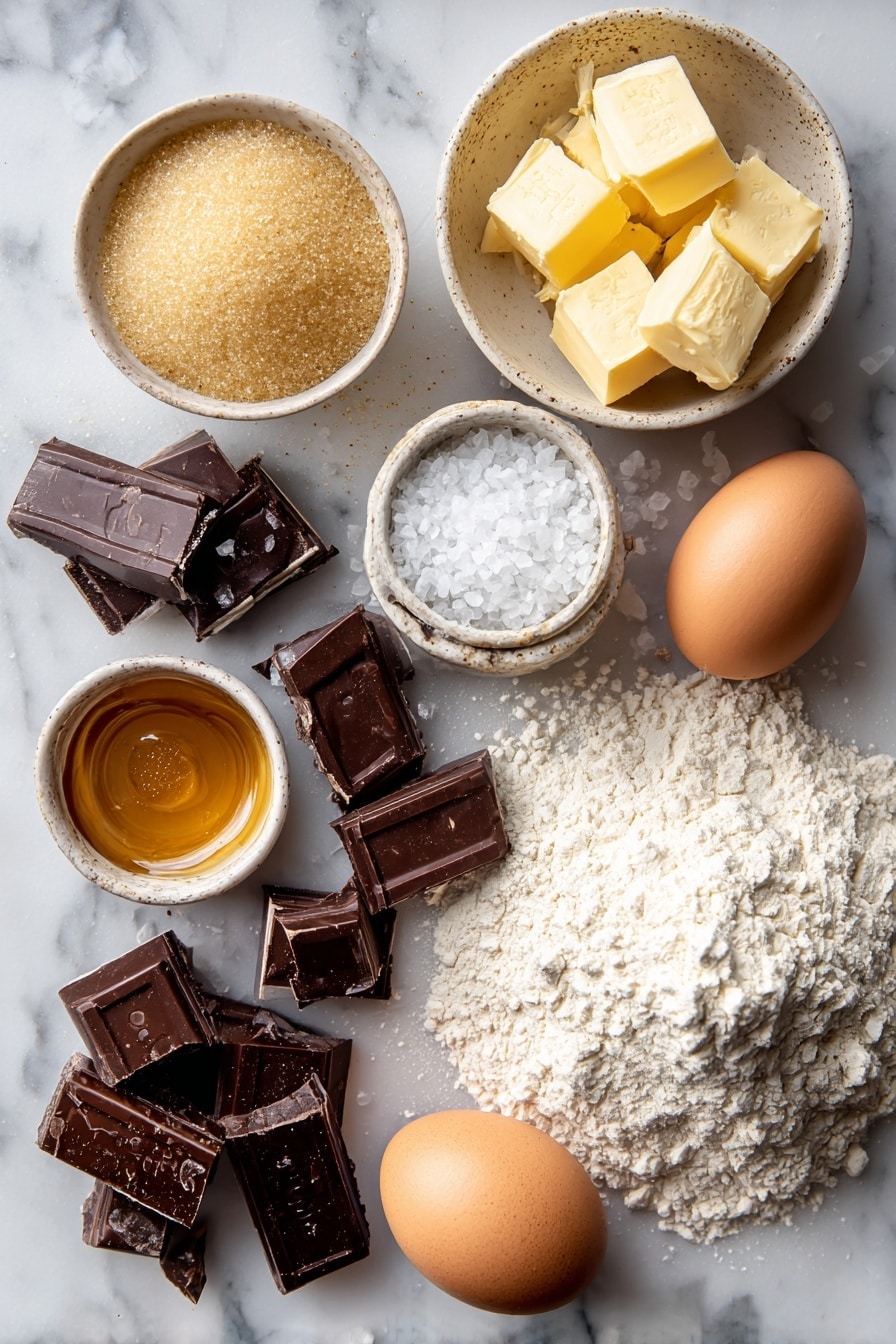
- All-purpose flour: Provides the classic cookie structure—nothing fancy, just reliable.
- Baking soda: Helps the cookies rise and get that slightly chewy texture you love.
- Salt: Enhances the sweetness and balances the flavor—especially important if you’re using unsalted butter.
- Salted butter: The stars of the show—creamy and flavorful, makes your cookies irresistibly rich.
- Dark brown sugar: Adds moisture and that deep, caramel-like flavor.
- Granulated sugar: Provides sweetness and helps with the crisp edges.
- Pure vanilla extract: Bring in those warm, sweet notes that scream bakery-quality.
- Honey or corn syrup: A little secret ingredient to keep things chewy and add depth to sweetness.
- Large egg: Binds everything together and gives the dough body.
- Dark chocolate (55-70% cocoa): I love big chunks over chips—they melt unevenly for that gooey texture.
- Flaky sea salt: To sprinkle on top and take the flavor to the next level.
Variations
While I adore this classic version, I also love how easy it is to switch things up depending on my mood or what’s in the pantry. Here are a few tweaks I’ve made that you might want to try too.
- Adding chopped nuts: I like tossing in toasted pecans or walnuts for a little crunch, which pairs wonderfully with the soft cookie texture.
- White chocolate and macadamia nuts: This combo changes the flavor profile but keeps the bakery feel—perfect for a twist to surprise guests.
- Salted caramel drizzle: Once baked, a little drizzle of caramel sauce takes these cookies into indulgence territory.
- Gluten-free version: Substitute the flour with your favorite gluten-free blend and adjust the liquid slightly; it still works wonderfully with a bit more resting time.
How to Make The BEST Chocolate Chip Cookies (Bakery Style) Recipe
Step 1: Mix the Dry Ingredients
Start by whisking together the all-purpose flour, baking soda, and salt in a medium bowl. I find this step helps ensure the baking soda is evenly distributed, so your cookies rise perfectly and don’t get any weird salty clumps. Set this aside while you move on to the fun part—making the dough!
Step 2: Cream the Butter and Sugars
This is where you build flavor and texture. I usually soften my salted butter to room temperature but not melted—it should be soft enough to press with a finger without being oily. I either use a handheld mixer or stand mixer fitted with a paddle attachment, but mixing by hand with a spatula works great too. You want to smear the butter and sugars together vigorously until they look like damp sand—this isn’t about fluffing up air, so don’t over-mix. After this, mix in the vanilla and honey for that extra depth of flavor.
Step 3: Add the Egg
Beat in the large egg until just incorporated. Make sure your egg is at room temperature—it helps it blend smoothly without creating a greasy dough. This egg functions as the glue that holds everything together.
Step 4: Combine Dry and Wet Ingredients, Then Fold in Chocolate
Add all the flour mixture at once into the butter mixture and gently stir until mostly combined—that’s the key here because we want a soft, slightly sticky dough, not overworked. Before finishing mixing in the flour, fold in your chunky dark chocolate. This adds those iconic gooey pockets of melty chocolate you’re going to love.
Step 5: Chill the Dough
This step is a game-changer. Cover the dough tightly with plastic wrap pressed right onto the surface to stop it from drying out, and stick it in the fridge for at least 8 hours—overnight is perfect. Honestly, I used to skip this, but once I tried it, I saw a huge improvement in flavor and texture. If you’re in a hurry, 4 hours is okay, but patience definitely pays off here.
Step 6: Scoop and Bake
Preheat your oven to 350°F (175°C) and line your cookie sheets with parchment paper—trust me, this keeps cookies from sticking and makes cleanup a breeze. Use a 1 ½-ounce cookie scoop (about the size of a golf ball) to portion the dough—if your dough is too stiff after chilling, let it sit at room temperature for 20-30 minutes to soften. Arrange the balls spaced 2 inches apart, and don’t flatten them; they’ll spread beautifully on their own. For a final bakery touch, press a few extra chunks of chocolate onto the top of each cookie before baking.
Bake for 9-11 minutes until the edges are golden and the centers look just slightly underdone, then remove from the oven. They’ll continue baking on the hot tray, so don’t overbake! Smaller cookies (dividing dough into 18 balls) can bake 1-2 minutes less.
Once out of the oven, sprinkle each warm cookie with flaky sea salt—it’s my favorite little trick that takes the flavor from great to unforgettable.
Pro Tips for Making The BEST Chocolate Chip Cookies (Bakery Style) Recipe
- Butter Temperature Matters: Room temperature but not melted butter creates the perfect creamy base—too cold and it won’t mix well; too warm and the dough gets greasy.
- Don’t Overmix Your Dough: Once you add the flour, fold gently to keep your cookies tender and prevent toughness.
- Chill for Flavor and Texture: The chilling step isn’t just about convenience—it deepens the flavor and keeps the dough from spreading too thin during baking.
- Watch Your Oven Time: Pull cookies out when edges are golden and centers look soft—a few minutes too long means losing that gooey middle everyone loves.
How to Serve The BEST Chocolate Chip Cookies (Bakery Style) Recipe
Garnishes
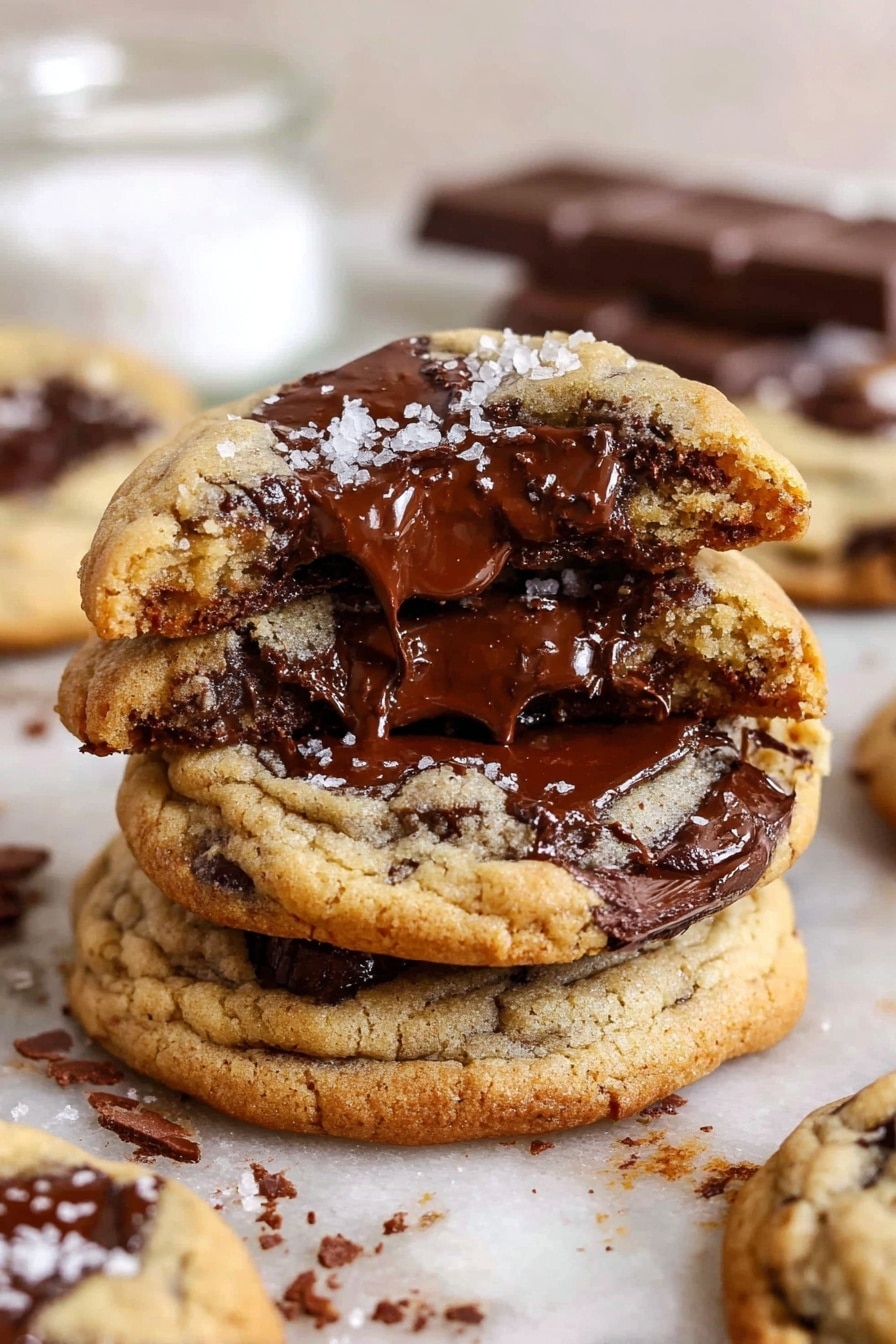
I always sprinkle flaky sea salt on the warm cookies straight out of the oven because it adds that brilliant contrast of salty to sweet. Sometimes, if I’m feeling fancy, I drizzle a little melted dark chocolate or even a smidge of caramel, but flaky salt is my go-to because it really makes those chocolate chunks pop.
Side Dishes
I love pairing these cookies with a cold glass of milk—classic for a reason. For grown-ups, a scoop of vanilla ice cream on the side or a warm cup of coffee balances the richness perfectly. Sometimes, I even warm a cookie just enough to serve alongside my afternoon tea for an indulgent treat.
Creative Ways to Present
For special occasions, I arrange these cookies on a tiered stand with sprigs of fresh mint or edible flowers for color. You can also sandwich two cookies with a generous scoop of ice cream or cream cheese frosting for a decadent twist. If you’re gifting them, stack a few in a pretty box with parchment paper and a spritz of vanilla-scented sachet—guaranteed to impress.
Make Ahead and Storage
Storing Leftovers
I store any leftover cookies in an airtight container at room temperature. They stay soft and delicious for about 3-4 days. Placing a slice of bread in the container helps maintain moisture—I discovered this trick after some trial and error, and it really works wonders!
Freezing
This dough freezes beautifully. I usually scoop the cookie balls onto a baking sheet, freeze them until firm, then transfer to a zip-lock bag. When I want fresh cookies, I bake them straight from frozen—just add an extra minute or two to the baking time. This makes busy days so much easier, and you get fresh-baked cookies anytime.
Reheating
I reheat leftover cookies in a 300°F oven for about 5 minutes to revive that fresh-baked softness and melty chocolate center. Just watch closely so they don’t dry out. You can also microwave them in 10-second bursts but I prefer the oven for texture.
FAQs
-
Can I use unsalted butter instead of salted butter?
Absolutely! If you switch to unsalted butter, be sure to increase the salt in the recipe to maintain that perfect flavor balance—about ¾ teaspoon instead of ¼ teaspoon of salt works well. Salt really enhances the overall taste, so don’t skip it.
-
Why do you recommend chilling the dough?
Chilling the dough actually enhances both flavor and texture. It allows the flour to fully hydrate and the sugars and butter to meld, resulting in a cookie that’s rich, chewy, and less prone to spreading too thin in the oven. I’ve tried baking without chilling, and the difference is noticeable, so I highly recommend this step.
-
Can I substitute the dark chocolate with chocolate chips?
You can, though I prefer using chopped dark chocolate because it melts unevenly and creates those luscious gooey pockets. Chocolate chips tend to keep their shape more, which changes the texture slightly. But if that’s what you have, it’ll still taste delicious!
-
How do I make smaller or larger cookies?
If you want smaller cookies, divide the dough into 18 balls instead of 16, and reduce the baking time by 1-2 minutes. For larger cookies, stick to 16 or even 12 balls and bake a little longer. Just keep an eye on the edges—they should be golden, and centers still soft.
-
What’s the best way to store leftover cookies?
Store them airtight at room temperature with a slice of bread inside the container to keep them soft for up to 4 days. For longer storage, cookies freeze well and thaw easily with no loss in flavor or texture.
Final Thoughts
I absolutely love how this recipe delivers on every front—texture, flavor, and that unbeatable homemade charm that reminds you of your favorite bakery. When I first tried these cookies, I couldn’t believe how simple ingredients and just a bit of patience turned into something so special. My family goes crazy whenever I bring out a batch, and I’m sure you and yours will too. So go ahead, try The BEST Chocolate Chip Cookies (Bakery Style) Recipe for yourself—you might just find your new go-to cookie that everyone asks for again and again.
Print
The BEST Chocolate Chip Cookies (Bakery Style) Recipe
- Prep Time: 10 minutes
- Cook Time: 10 minutes
- Total Time: 8 hours 20 minutes (including chilling time)
- Yield: 16 cookies
- Category: Dessert
- Method: Baking
- Cuisine: American
Description
These bakery-style chocolate chip cookies are rich, buttery, and flavored with vanilla and a hint of honey for a butterscotch undertone. Featuring crisp, caramelized edges and a chewy, gooey center, these cookies are the perfect balance between crunchy and soft. With dark chocolate chunks folded throughout and a sprinkle of flaky sea salt on top, they deliver an irresistible gourmet cookie experience right from your oven.
Ingredients
Dry Ingredients
- 1 ¾ cups (250g) all-purpose flour
- ¾ tsp baking soda
- ¼ tsp salt (or ¾ tsp salt if using unsalted butter)
Wet Ingredients
- 10 tbsp (140g) salted butter, at room temperature
- ¾ cup (165g) packed dark brown sugar
- ⅓ cup plus 1 tbsp (80g) granulated sugar
- 1 tsp (5ml) pure vanilla extract
- 1 tsp (5ml) honey or corn syrup
- 1 large egg, at room temperature
Chocolate & Toppings
- 7 oz (200g) dark chocolate (55-70% cocoa), chopped into chunks
- Flaky sea salt, for sprinkling
Instructions
- Combine Dry Ingredients: In a medium bowl, whisk together the all-purpose flour, baking soda, and salt until evenly blended. Set aside.
- Cream Butter and Sugars: In a large bowl or stand mixer bowl, combine softened salted butter, dark brown sugar, granulated sugar, and vanilla extract. Using a wide rubber spatula, vigorously cream the mixture by hand until smooth and slightly fluffy, resembling damp sand rather than fluffy aerated mixture. Alternatively, use a stand mixer with paddle attachment on medium-low speed for 1-2 minutes, scraping sides as needed.
- Add Honey and Egg: Mix in the honey or corn syrup, then add the large egg and mix well until fully incorporated.
- Incorporate Dry Ingredients and Chocolate: Add the entire flour mixture to the butter mixture at once. Stir until most of the flour is absorbed, then fold in the dark chocolate chunks evenly throughout the dough. The dough should be soft and moderately moist.
- Chill the Dough: Cover the dough surface directly with plastic wrap and refrigerate for 8 to 24 hours for maximum flavor and texture. You may bake after 4 hours if pressed for time, but 8 hours is ideal.
- Prepare for Baking: Preheat your oven to 350°F (175°C). Line two large baking sheets with parchment paper.
- Portion and Shape Dough: Using a 1 ½-ounce cookie scoop (or divide into 16 balls), form smooth dough balls. If dough is too firm, let soften at room temperature for 20-30 minutes. Place dough balls at least 2 inches apart on baking sheets without flattening. For smaller cookies, divide into 18 balls.
- Add Extra Chocolate Chunks: Press a few additional chocolate chunks onto the top of each dough ball for an attractive finish and extra chocolate pockets.
- Bake the Cookies: Bake 6 cookies per sheet for 9-11 minutes, until the cookies are puffed, golden around the edges, but still soft in the middle. If making smaller cookies, bake for 8-10 minutes. Avoid over-baking as residual heat will continue cooking the cookies on the hot sheet.
- Cool and Serve: Transfer baking sheets to wire racks and cool cookies on sheets for 2 minutes. Carefully move each cookie to the wire rack and let cool completely. Sprinkle flaky sea salt over warm cookies if desired for a gourmet touch.
Notes
- These cookies boast a rich, buttery flavor enhanced with vanilla and honey for subtle butterscotch notes.
- The texture contrast features crisp, caramelized edges with soft, chewy, and gooey centers.
- Refrigerating dough for 8-24 hours dramatically improves cookie flavor and texture.
- If you prefer smaller cookies, divide dough into 18 balls and reduce baking time by 1-2 minutes.
- Flaky sea salt topping adds a sophisticated touch and balances sweetness perfectly.
Nutrition
- Serving Size: 1 cookie (based on 16 cookies)
- Calories: 210 kcal
- Sugar: 15 g
- Sodium: 110 mg
- Fat: 12 g
- Saturated Fat: 7 g
- Unsaturated Fat: 4 g
- Trans Fat: 0 g
- Carbohydrates: 26 g
- Fiber: 2 g
- Protein: 3 g
- Cholesterol: 30 mg

