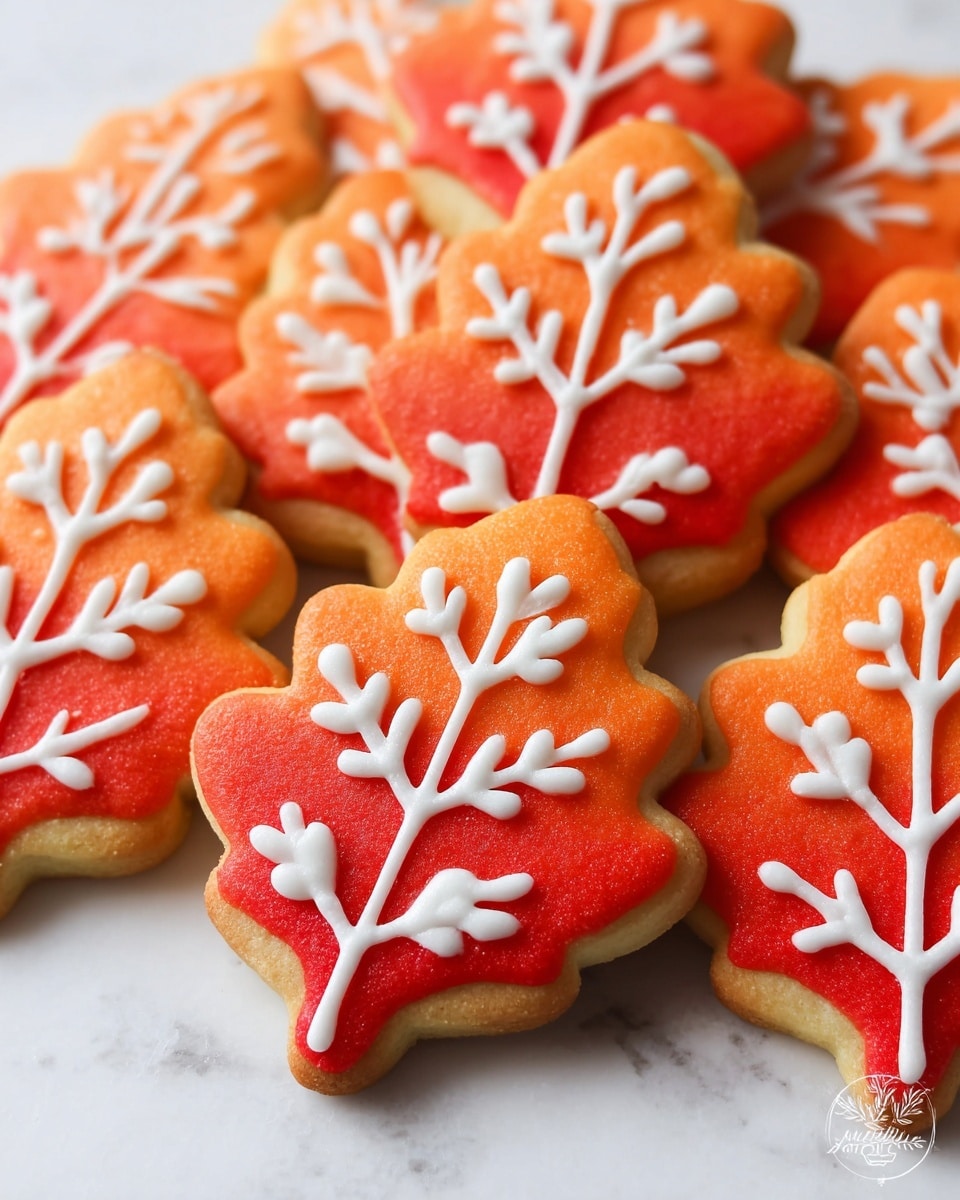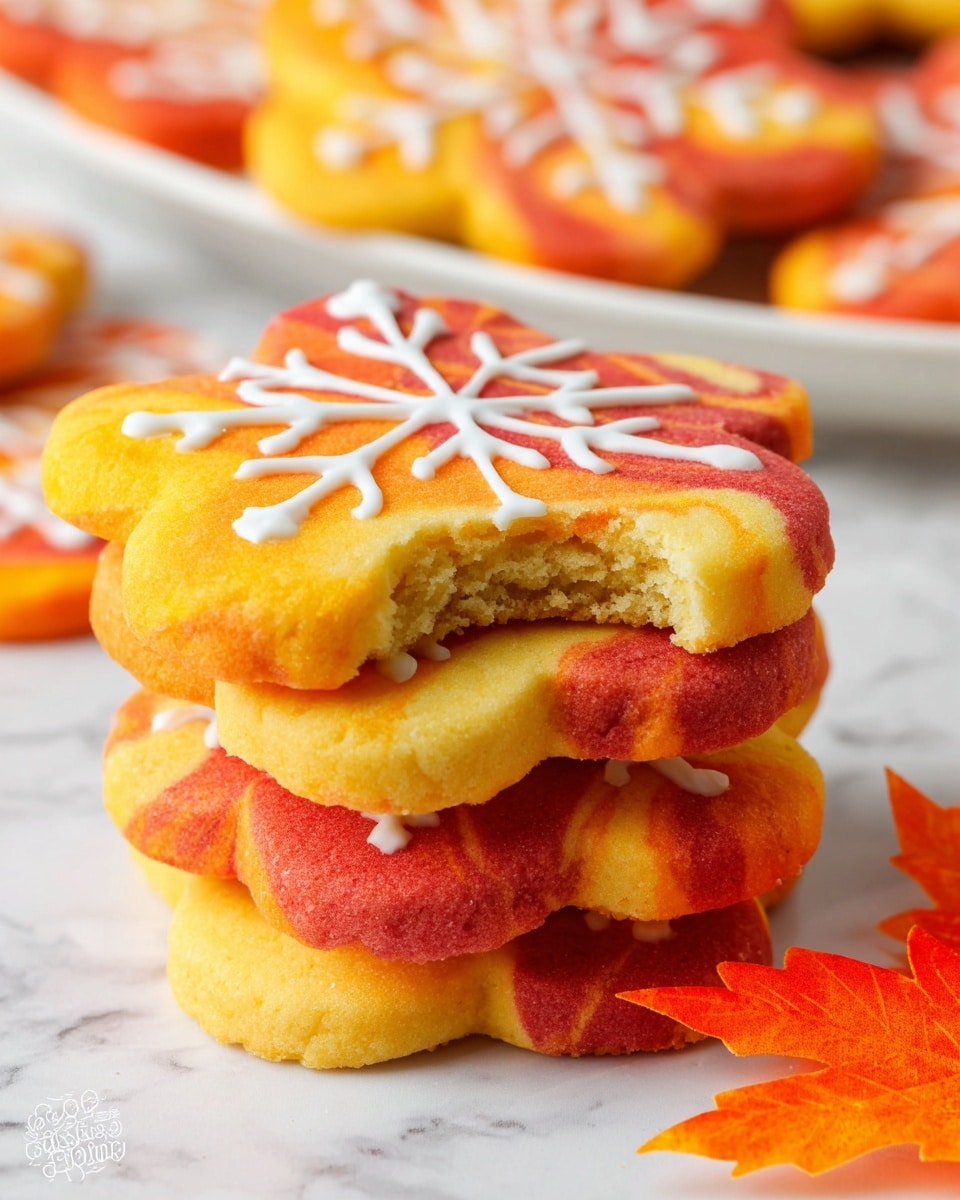
If you’re looking for a cozy, festive treat this season, you’re going to adore this Fall Leaf Cookies Recipe. These cookies are not only beautiful with their marbled orange, red, and yellow hues, but they also taste buttery soft with just the right amount of sweetness. I absolutely love how this recipe turns out every time — it’s perfect for sharing with family or gifting to friends during those crisp autumn days. Stick around, because I’m going to walk you through all the tips and tricks I’ve learned that help these cookies come out just right!
Why You’ll Love This Recipe
- Beautiful Autumn Colors: The marbled effect with food coloring creates stunning fall leaf shapes that look as good as they taste.
- Soft Yet Sturdy Cookies: These hold their shape perfectly for decorating without being dry or hard.
- Easy to Customize: You can decorate with royal icing or leave them plain — both ways are winners.
- Perfect for Fall Gatherings: Whether it’s a cozy coffee morning or a seasonal party, these cookies are always a hit.
Ingredients You’ll Need
Once you gather these simple ingredients, you’ll see why this Fall Leaf Cookies Recipe is so approachable. Each one plays an important role in achieving that tender texture and beautiful color combo we’re aiming for.
- Unsalted butter: Softened butter makes the dough tender and flavorful without overpowering sweetness or saltiness.
- Granulated sugar: Just the right amount for sweetness and contributes to a slight crisp on the edges.
- Pure vanilla extract: A little vanilla elevates the flavor without overshadowing the buttery base.
- Egg: Room temperature for smooth mixing and helps bind the dough properly.
- All purpose flour: The structure-builder that keeps the cookies soft but firm.
- Baking powder: Just a touch for lightness without puffing the cookies up too much.
- Salt: Balances the sweetness and intensifies overall flavor.
- Gel food coloring: Orange, red, and yellow gels create that gorgeous fall leaf marbled effect.
- Royal icing: Optional for decorations, adding that classic crisp contrast and elegance.
Variations
I love making this Fall Leaf Cookies Recipe just as it is, but sometimes I like to play around to suit different occasions or dietary preferences. It’s super forgiving and fun to customize — your kitchen, your rules!
- Gluten-Free: I swapped all-purpose flour for a gluten-free blend once with great results for a friend’s allergy – just make sure your blend doesn’t have xanthan gum for best texture.
- Spiced Variation: Adding a pinch of cinnamon or pumpkin spice to the dough gave a lovely cozy twist one year, and it was a huge crowd-pleaser.
- Vegan Version: I sometimes substitute the butter with vegan margarine and use a flax egg; the texture is slightly different but still delicious.
- Food Coloring Swap: I’ve used natural colorants like beet powder or turmeric if you want to keep it all-natural — those colors come out more muted but still charming.
How to Make Fall Leaf Cookies Recipe
Step 1: Creaming Butter and Sugar
Start by preheating your oven to 350°F (180°C) and lining your baking sheet with parchment or a silicone mat. Then, using a stand mixer fitted with a paddle attachment, cream together your softened butter and sugar until the mixture is light, fluffy, and smooth — about 2 to 3 minutes. This step really sets the stage for tender cookies, so don’t hurry it! You’ll know it’s ready when the color lightens and the texture feels creamy.
Step 2: Mixing in Egg and Vanilla
Add your vanilla extract and the room temperature egg to the creamed butter mixture. Mix gently just until everything is combined—don’t whip too long here! I discovered this trick after noticing my cookies coming out puffed instead of flat; over-whipping the egg can cause them to rise undesirably.
Step 3: Adding Dry Ingredients
Next, whisk together your flour, baking powder, and salt in a separate bowl. Gradually add these to your wet mixture and stir on low speed until just combined. Scrape the bowl sides with a spatula to ensure every bit of flour is incorporated. If your dough feels too sticky or isn’t pulling away from the bowl sides, sprinkle in an extra half cup of flour little by little — this dough needs to be soft but manageable.
Step 4: Coloring and Marbling the Dough
Divide your dough into three equal portions and knead a few drops of orange, red, and yellow gel food coloring into each separately — wear gloves or use clean hands! Then, take a quarter of each colored dough, tear into chunks, and press them together gently on a floured surface. Roll the combined pieces into a ¼ to ½ inch thick slab. This gives you the gorgeous marbled pattern, like a swirling autumn leaf. It’s a bit like making tie-dye in dough form and so satisfying!
Step 5: Cutting and Baking
Use a flour-dusted leaf-shaped cookie cutter to cut out your cookies. Pro tip: dip your cookie cutter in flour before each cut to prevent sticking. Pick up the cut cookies carefully with an offset spatula and place them on your prepared sheet. Bake one sheet at a time for even heat distribution — somewhere between 8 to 9 minutes should do it, but rotate the pan at the 6-minute mark so they brown evenly. Once done, let them rest on the sheet for 5 minutes before moving to a wire rack to fully cool.
Step 6: Decorating (Optional)
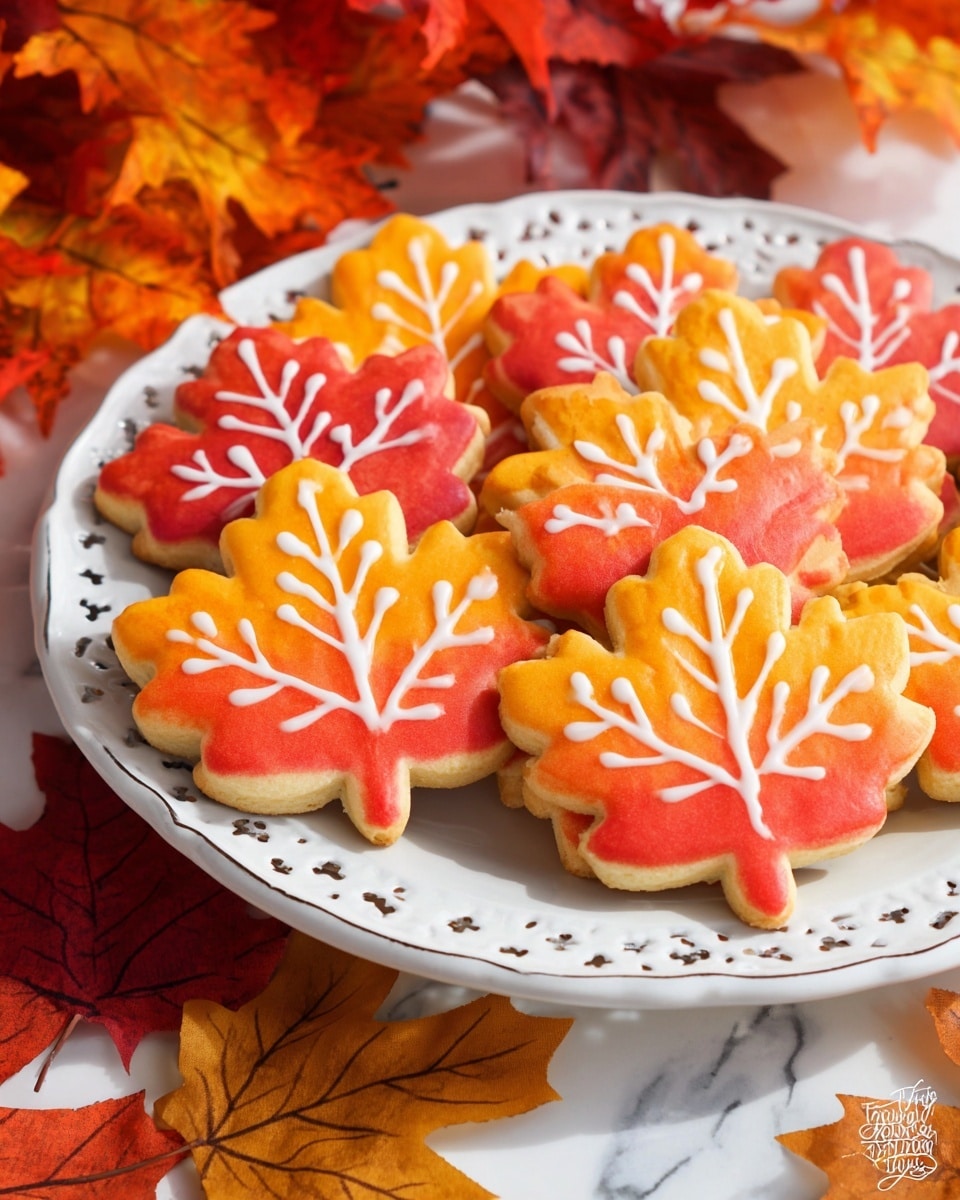
Once cooled, you can decorate your Fall Leaf Cookies with white royal icing for that pretty contrast and a classic fall vibe. I usually keep my icing simple but adding delicate veins or dots highlights the leaf shapes beautifully. If you’re not into decorating, these cookies are still delightful plain or dusted lightly with powdered sugar.
Pro Tips for Making Fall Leaf Cookies Recipe
- Use Room Temperature Ingredients: Soft butter and egg at room temp combine smoothly for a consistent dough.
- Don’t Overmix After Adding Egg: Keeps the cookies from puffing up or becoming cakey instead of tender.
- Flour Your Workspace and Tools Generously: Prevents sticky dough from sticking and tearing your leaf shapes.
- Bake One Sheet at a Time and Rotate Midway: Your oven might heat unevenly, so this ensures perfect color and texture.
How to Serve Fall Leaf Cookies Recipe
Garnishes
I usually keep garnishes simple — a drizzle of royal icing or just a dusting of powdered sugar does the trick and keeps the focus on those beautiful autumn colors. Sometimes, I toss in a sprinkle of edible gold dust when I want to dress them up for a special occasion. It’s subtle but adds a lovely shimmer.
Side Dishes
These cookies go wonderfully alongside a warm cup of apple cider, spiced chai latte, or even a creamy pumpkin spice latte. For fall gatherings, I like to serve them with a cheese board full of sharp cheddar and fresh fruit — the sweet and savory combo has my family going crazy every time.
Creative Ways to Present
If you’re gifting these, I’ve learned that wrapping a small stack tied with twine and a sprig of fresh rosemary feels so cozy and handmade. For parties, arranging them on a wooden tray lined with parchment and scattered with dried autumn leaves sets a seasonal scene that guests love. Trust me, the presentation makes as much of an impression as the taste!
Make Ahead and Storage
Storing Leftovers
I store leftover Fall Leaf Cookies in an airtight container at room temperature for up to a week. I learned the hard way that storing them without a lid causes them to dry out quickly, so airtight is key to keeping them soft and fresh.
Freezing
This dough freezes beautifully! I like to roll and cut the shapes, flash freeze the cookie cutouts on a tray, and then transfer them to a freezer bag for up to 3 months. When I want fresh cookies later, I just bake them straight from the freezer, adding a minute or two to the baking time.
Reheating
If the cookies get a little soft or lose that freshly baked feel, a quick 5-7 minute reheat in a 300°F (150°C) oven revives their crisp edges while warming them through. Just keep an eye to avoid over-browning!
FAQs
-
Can I make these Fall Leaf Cookies Recipe without food coloring?
Absolutely! The dough will be a classic buttery cookie color, which still tastes fantastic. If you want to keep them festive without artificial colors, consider using natural dyes like turmeric for yellow or beet powder for a reddish hue, but expect a more subtle color.
-
Why does my dough get too sticky to work with?
This recipe should yield a dough that’s soft yet manageable. If it feels sticky, try chilling it for 15-30 minutes. Also, be generous with flour on your workspace and tools. If it’s still sticky, you can add a little more flour, but add gradually to avoid drying the dough out.
-
Can I use another shape cutter besides leaves?
Definitely! While leaf shapes fit the theme perfectly, this dough works well with any cookie cutter you like. Stars, pumpkins, or simple circles work great, especially if you want to decorate for different occasions.
-
How thick should I roll the dough for these cookies?
Rolling the dough to about ¼ to ½ inch thickness ensures the cookies bake evenly with a tender texture. Too thick and the centers won’t bake properly; too thin and they may over-bake and crisp up more than desired.
-
Is royal icing necessary to decorate these cookies?
Not at all! Royal icing makes for beautiful, detailed designs and crisp decorations, but these cookies are delightful just as they are with their vibrant marbled colors. Choose your favorite style – simple or fancy!
Final Thoughts
This Fall Leaf Cookies Recipe has become a staple in my kitchen every autumn. It fills the house with comforting smells and offers a fun creative outlet with the marbling and decorating. I love how easy it is to get perfectly soft, flavorful cookies that look stunning on any platter or gift box. If you’re craving something seasonal and special, I really encourage you to try this recipe — I promise it’ll become one of your favorites too!
Print
Fall Leaf Cookies Recipe
- Prep Time: 20 minutes
- Cook Time: 9 minutes
- Total Time: 29 minutes
- Yield: 36 cookies (approximately 4-inch size each)
- Category: Dessert
- Method: Baking
- Cuisine: American
Description
Delightfully marbled fall leaf cookies bursting with warm autumn colors and a soft, buttery texture. These festive sugar cookies are easy to make and perfect for seasonal celebrations, decorated beautifully with royal icing.
Ingredients
Cookie Dough
- 1 cup (225g) unsalted butter, softened
- 1 cup (200g) granulated sugar
- 1 teaspoon pure vanilla extract
- 1 large egg, at room temperature
- 3 ½ cups (420g) all purpose flour
- 1 ½ teaspoons baking powder
- ½ teaspoon salt
- Gel food coloring in orange, red, and yellow
Decoration
- Royal icing (for decorating)
Instructions
- Preheat Oven: Preheat your oven to 350°F (180°C), or 160°C if using a fan oven. Line a cookie sheet with parchment paper or a silicone baking mat and set aside.
- Cream Butter and Sugar: In a stand mixer fitted with the paddle attachment, cream the softened butter and granulated sugar together for 2-3 minutes until the mixture is smooth, light in color, and creamy.
- Add Vanilla and Egg: Mix in the vanilla extract and then add the egg. Combine until just incorporated, being careful not to overmix to avoid a soufflé effect that can cause the cookies to rise undesirably.
- Incorporate Dry Ingredients: Add the all purpose flour, baking powder, and salt to the wet mixture. Mix until just combined. Scrape down the sides with a spatula to ensure no flour remains unmixed. If the dough doesn’t pull away from the bowl sides, add an additional ½ cup of flour.
- Color the Dough: Divide the dough into three equal balls. Add a few drops of gel food coloring to each ball creating yellow, red, and orange dough. Knead the colors in by hand until evenly distributed.
- Create Marbled Dough: Take about a quarter of each colored dough and break into pieces. On a lightly floured surface, press these pieces gently together and roll out with a rolling pin to between ¼ and ½ inch thickness. The result will be a softly swirled, marbled slab of dough.
- Cut the Leaves: Use a leaf-shaped cookie cutter dipped in flour to cut out the leaf shapes from the marbled dough. Use an offset spatula to carefully lift the cookies from the surface to the prepared baking sheet.
- Bake: Bake the cookies for 8-9 minutes, rotating the sheet halfway through at about 6 minutes to ensure even browning. Bake one sheet at a time for best results.
- Cool: Let cookies cool for 5 minutes on the baking sheet, then transfer them to a wire rack to cool completely before decorating.
- Decorate: Once fully cooled, decorate the cookies with white royal icing as desired to enhance the fall leaf effect.
Notes
- This sugar cookie recipe is foolproof and produces soft, buttery cookies that hold their detailed shape perfectly, making them ideal for intricate designs.
- The addition of gel food coloring to the dough creates a festive and visually stunning marbled effect perfect for fall celebrations.
- Be careful not to overmix the egg to maintain the flat cookie shape rather than a puffier rise.
- For uniform baking, rotate the baking sheet midway through the baking time.
- Allow cookies to cool completely before decorating to prevent the icing from melting.
Nutrition
- Serving Size: 1 cookie
- Calories: 236 kcal
- Sugar: 26 g
- Sodium: 57 mg
- Fat: 6 g
- Saturated Fat: 3 g
- Unsaturated Fat: 2 g
- Trans Fat: 1 g
- Carbohydrates: 44 g
- Fiber: 1 g
- Protein: 3 g
- Cholesterol: 19 mg

