

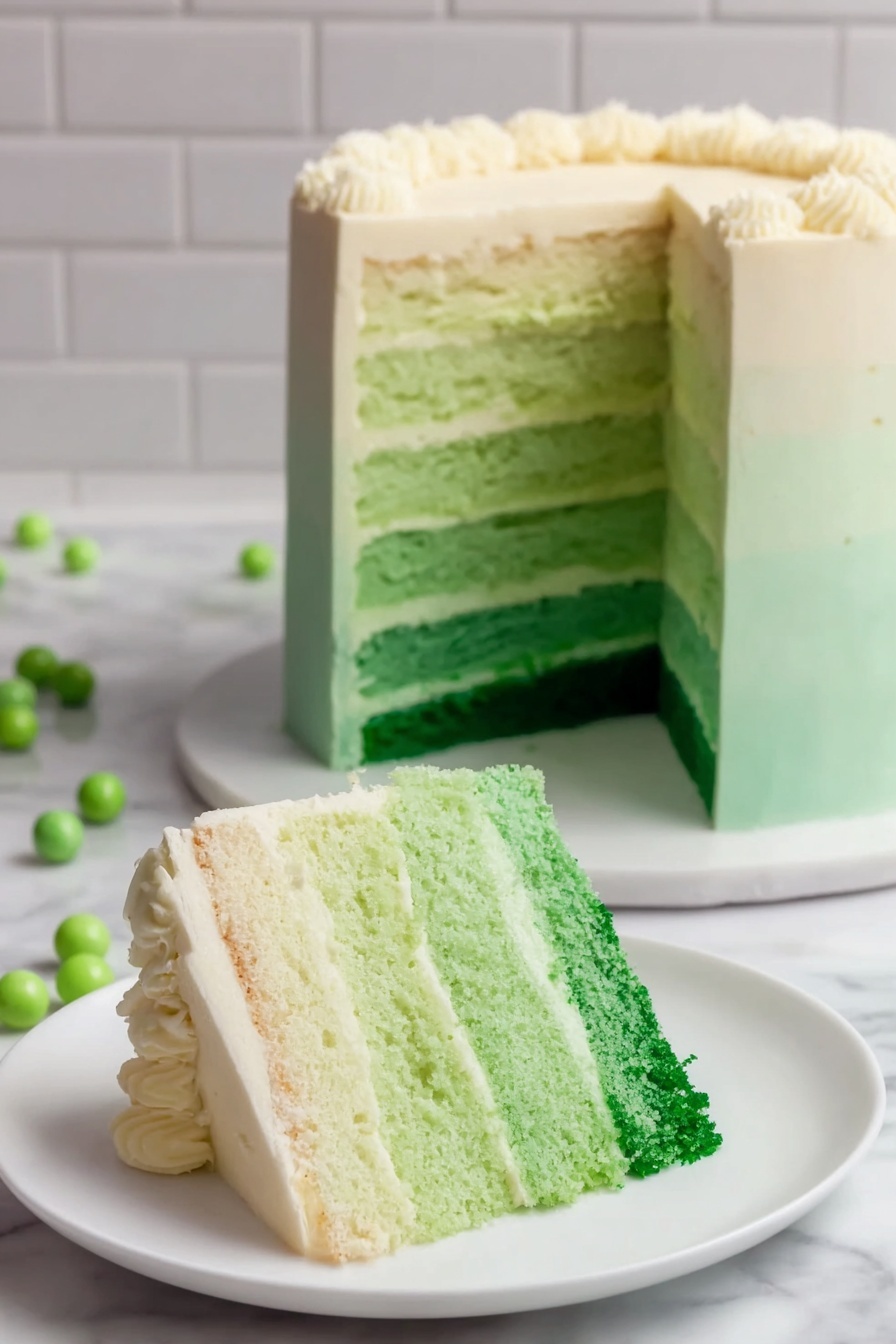
If you’re on the hunt for a show-stopping dessert that’s perfect for celebrating St. Patrick’s Day, you have to try this St. Patrick’s Day Ombre Cake Recipe. I absolutely love how each layer fades from a deep green to a soft pastel, making it as delightful to look at as it is to eat. Whether you’re hosting a festive party or just want to surprise your family with something special, this cake is fan-freaking-tastic and surprisingly doable!
Why You’ll Love This Recipe
- Gorgeous Gradient Effect: The carefully layered greens create a stunning visual that really wows guests.
- Light and Fluffy Texture: Using egg whites makes the cake incredibly airy and tender, perfect for celebrating.
- Deliciously Simple Frosting: The smooth buttercream is easy to tint and blend, creating that signature ombre without fuss.
- Fun to Make Together: I’ve found this recipe turns into a great activity for the family, especially layering and coloring the batter.

Ingredients You’ll Need
This recipe uses classic cake ingredients that come together seamlessly. My tip? Make sure your butter and egg whites are at room temperature—it really helps everything blend perfectly.
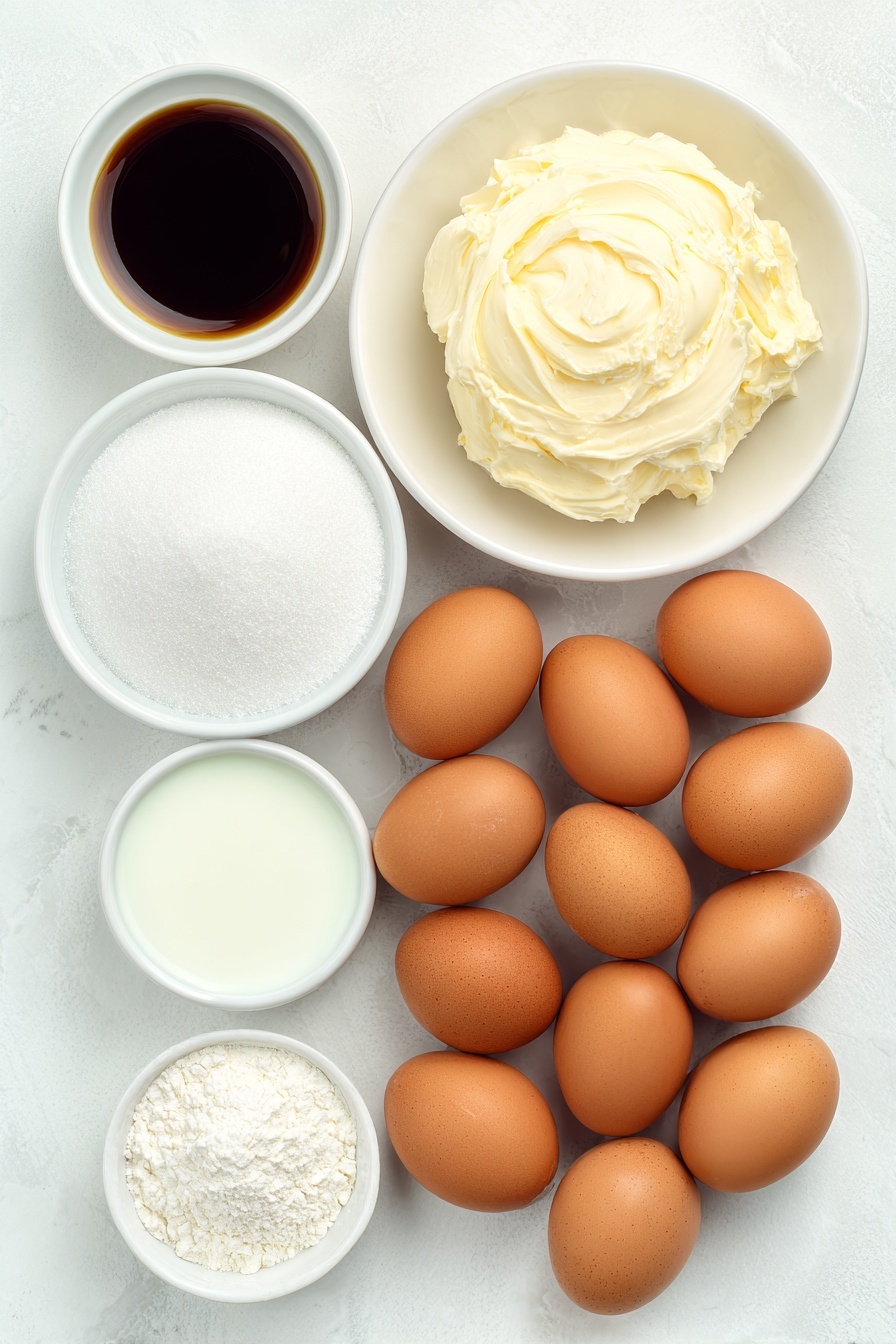
- Unsalted Butter: Softened to room temperature for easy creaming and smooth cake texture.
- Vegetable Shortening: Helps create a tender crumb and prolongs cake freshness.
- Granulated Sugar: Essential for sweetness and structure.
- Egg Whites: Only whites are used to keep the cake light and airy.
- Vanilla Extract: Pure vanilla adds rich flavor to both cake and frosting.
- All-Purpose Flour: Provides the perfect balance of structure without heaviness.
- Baking Powder: The rise agent that makes the layers fluffy.
- Salt: Enhances all the flavors without being overpowering.
- Milk: Adds moisture and helps the batter reach the right consistency.
- Green Food Coloring: Used to create beautiful ombre shades—feel free to experiment with intensity.
- Powdered Sugar: For that silky, sweet frosting texture.
Variations
I love making this St. Patrick’s Day Ombre Cake Recipe my own, and you can too! Whether you’re tweaking for dietary needs or just want to add a fun twist, don’t hesitate to experiment—it’s forgiving!
- Gluten-Free Version: I’ve swapped all-purpose flour with a blend of gluten-free flours and it worked beautifully, just be sure to add a binder like xanthan gum.
- Dairy-Free Alternative: Replacing butter with coconut oil and using almond milk can still give you a moist, tasty cake.
- Flavor Boost: Add a splash of Irish cream liqueur to the batter or frosting for an adult-friendly touch—my family loves that kick!
- Different Colors: Not limited to green—you can use this layering technique to create a rainbow or pastel ombre cake for other occasions.
How to Make St. Patrick’s Day Ombre Cake Recipe
Step 1: Cream, Combine, and Colorize
First off, preheat your oven to 350°F (175°C). Then, in a large mixing bowl, cream together the softened butter, vegetable shortening, and sugar until it’s light and fluffy—this takes about 3-5 minutes with a stand mixer. Next, gradually add the room temperature egg whites and vanilla extract, mixing until smooth and just combined. Meanwhile, whisk together the flour, baking powder, and salt in another bowl.
Now, alternate adding your dry ingredients and milk into the creamed mixture, mixing gently to keep that batter light and smooth. Here’s the fun part: divide your batter evenly into 5 separate bowls. Add varying drops of green food coloring into four of them to create shades from light to dark green. Don’t be shy with the coloring—it looks so pretty when baked!
Step 2: Bake Layers and Cool
Prepare five 8-inch round cake pans by spraying them with non-stick cooking spray and lining the bottoms with parchment paper rounds—this prevents sticking and makes removal a breeze. Pour each shade of batter into a separate pan, spreading evenly. Pop them into your preheated oven and bake for 18-22 minutes. The best way to check is by inserting a toothpick into the center—it should come out clean when done.
Once baked, cool the layers completely on wire racks. I know it’s tempting to dive right in, but trust me, frosting warm cakes makes a mess and your layers might crumble—patience pays off!
Step 3: Whip Up Your Ombre Buttercream
For the frosting, beat the softened butter until it’s perfectly smooth and creamy. Slowly add in the sifted powdered sugar and continue beating until silky. Stir in vanilla, then drizzle in milk until you reach a spreadable consistency. Divide the frosting into 5 bowls and tint four of them with green food coloring to match the cake layers’ shades. This layering of frosting shades takes the ombre effect to the next level, making your cake visually delightful.
Step 4: Assemble and Frost the Cake
Use a cake leveler or a serrated knife to slice off the domed tops of each layer—this gives you flat, stackable cakes. Start with the darkest green cake layer and place it top side down on your cake plate. Spread a thin layer of the matching darkest green frosting over the surface.
Repeat layering each cake with the next lighter shade of cake and frosting, placing each layer top side down. This helps achieve that pristine ombre inside and out. Once all layers are stacked, pipe a broad line of frosting around the outside edge of each layer, then use a frosting scraper to carefully blend the shades together—don’t rush this part, it really highlights the ombre effect beautifully. This recipe makes about 12 slices of dreamy, festive cake!
Pro Tips for Making St. Patrick’s Day Ombre Cake Recipe
- Room Temperature Ingredients: Always start with butter and egg whites at room temp; it ensures your batter is smooth and mixes evenly.
- Piping Before Smoothing: Piping frosting around layers helps you gradually build a smooth surface, making it easier to blend the ombre effect perfectly.
- Consistent Layer Thickness: Use a kitchen scale or measure your batter evenly between bowls to get uniform layers that stack beautifully.
- Cooling Completely: Never frost warm cakes—waiting for the layers to cool keeps your frosting from melting and sliding.
How to Serve St. Patrick’s Day Ombre Cake Recipe
Garnishes
I often finish my Ombre Cake with a sprinkle of edible gold glitter or shamrock-shaped sprinkles to bring that festive St. Patrick’s Day spirit. A few fresh mint leaves also add a pop of natural green and a hint of freshness that pairs so well with the sweet cake.
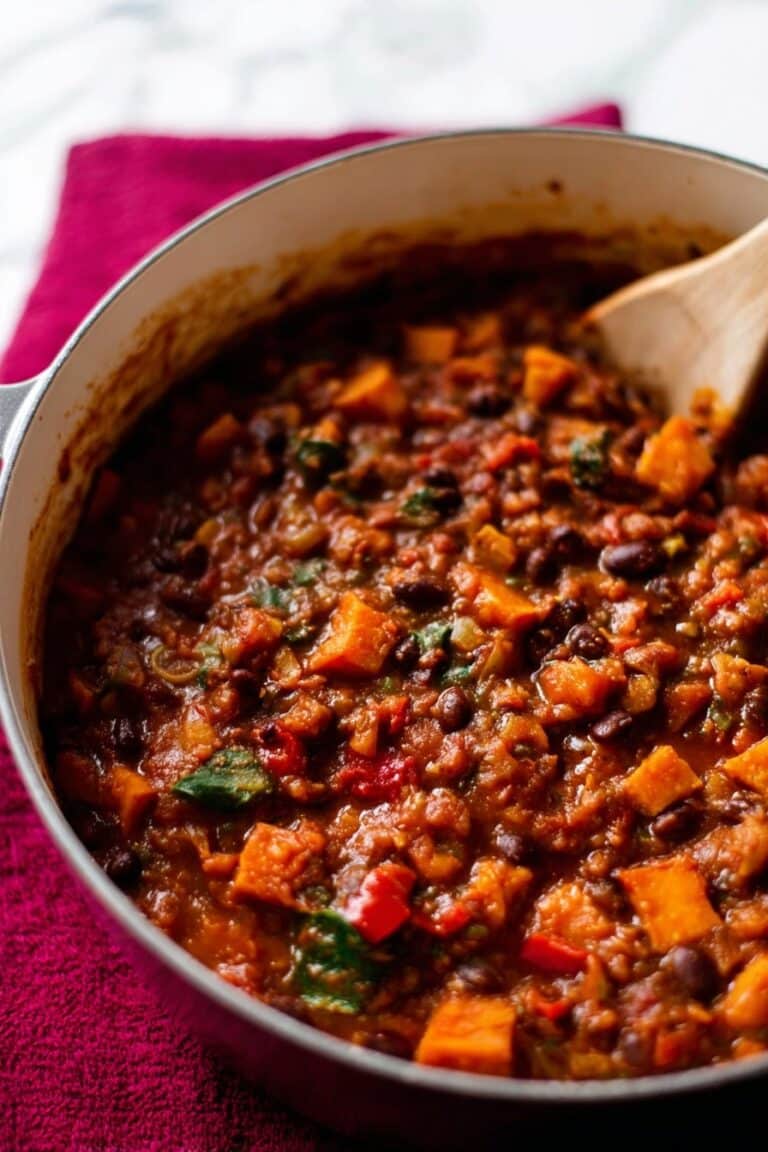
Side Dishes
My go-to sides are simple but delightful—think a light bowl of fruit salad with citrus accents or even some homemade lemon sorbet. These help balance the richness of the cake while keeping the celebration light and fresh.
Creative Ways to Present
Once, I turned this cake into mini individual servings by baking the batter in cupcake liners and frosting them in ombre layers—guests loved how fun and portable they were. For a big bash, I’ve arranged slices on a platter with a little sprinkling of pistachios and tiny shamrock picks for a whimsical touch.
Make Ahead and Storage
Storing Leftovers
I usually cover any leftover cake with plastic wrap and store it in the fridge. Wrapped well, it stays moist and fresh for up to 4 days. Before serving again, I like to let it sit at room temperature for about 30 minutes—makes the frosting taste like it’s fresh out of the kitchen.
Freezing
If you have more cake than you can handle, freeze slices individually wrapped in plastic and then foil to prevent freezer burn. Thaw overnight in the fridge, then let them warm up slightly on the counter before serving. The texture holds up nicely, which is always a win!
Reheating
I recommend avoiding reheating cake slices with frosting as it can melt. Instead, serve chilled or at room temperature—the flavors and texture are best enjoyed this way for this particular cake.
FAQs
-
Can I use whole eggs instead of egg whites in this St. Patrick’s Day Ombre Cake Recipe?
Using whole eggs will make the cake denser and less light since egg yolks add fat and richness. I’ve tried substituting whole eggs, and while still tasty, you lose some of the fluffy texture that makes this recipe so special. If you want to experiment, consider reducing the butter slightly to balance the extra fat.
-
Is there a way to make this cake less sweet?
Definitely! You can slightly reduce the granulated sugar in the cake batter and powdered sugar in the frosting. Just be cautious not to cut too much, as it can affect texture and stability, especially in the frosting. Starting by reducing the powdered sugar by about 1 cup is a gentle way to tone down sweetness without losing that creamy frosting consistency.
-
Can I make this St. Patrick’s Day Ombre Cake Recipe gluten-free?
Yes! I’ve had success swapping out the all-purpose flour for a good quality gluten-free flour blend. Just ensure your blend contains xanthan gum or another binder, or add it separately to help replicate the cake’s structure and texture. Bake times might vary a bit, so keep an eye on your layers.
-
How do I get even color layers in the frosting?
To get those smooth ombre gradients, start with a small amount of food coloring and gradually add more to each successive bowl. Using gel-based food colors gives you more control and vibrancy without adding extra liquid. When blending the frosting on the cake, use a light hand with your scraper to gently mix the shades and create a seamless look.
Final Thoughts
This St. Patrick’s Day Ombre Cake Recipe has become my go-to for making celebrations feel extra special. It’s not just about the colors, but the light, fluffy layers and creamy buttercream that bring everyone together. I remember the first time I made it—my kids couldn’t stop giggling over the colors and begged for “just one more slice.” Honestly, I think you’ll find the process enjoyable and the results absolutely rewarding. Give it a shot this year; your St. Patrick’s Day will never be the same!
Print
St. Patrick’s Day Ombre Cake Recipe
- Prep Time: 40 min
- Cook Time: 22 min
- Total Time: 1 hr 2 min
- Yield: 12 servings
- Category: Dessert
- Method: Baking
- Cuisine: American
Description
Celebrate St. Patrick’s Day with this beautiful Ombre Cake featuring five layers of moist white cake tinted in varying shades of green, layered and covered with matching green buttercream frosting. This festive and elegant cake is perfect for parties and will impress with both its look and delicious flavor.
Ingredients
White Cake
- 3/4 cup unsalted butter, softened to room temperature
- 3/4 cup vegetable shortening
- 3 cups granulated sugar
- 12 egg whites, room temperature
- 1 1/2 tablespoon vanilla extract
- 4 1/2 cups all-purpose flour
- 1 1/2 tablespoon baking powder
- 1/2 teaspoon salt
- 1 1/2 cup milk
- Green food coloring, as needed
Buttercream Frosting
- 2 cups unsalted butter, room temperature
- 8 cups powdered sugar, sifted
- 4 teaspoons vanilla extract
- 1/2 cup milk
- Green food coloring, as needed
Instructions
- Preheat Oven: Set your oven to 350 degrees Fahrenheit to ensure it is hot and ready to bake the cakes evenly.
- Cream Butter, Shortening, and Sugar: In a large mixing bowl, beat together the softened unsalted butter, vegetable shortening, and granulated sugar until the mixture is light and fluffy. This step is crucial for creating a tender cake texture.
- Add Egg Whites and Vanilla: Incorporate the egg whites and vanilla extract into the mixture, mixing until you achieve a smooth and consistent batter.
- Combine Dry Ingredients: In a separate bowl, sift together the all-purpose flour, baking powder, and salt to ensure even distribution and avoid lumps.
- Mix Wet and Dry Ingredients: Gradually add the dry ingredient mixture and milk into the wet mixture, blending until the batter is smooth and homogeneous.
- Divide and Color Batter: Split the batter evenly into five separate bowls. Add green food coloring drops to four of the bowls, creating a gradient from light to dark green in each bowl.
- Prepare Cake Pans: Spray five 8-inch round cake pans with non-stick cooking spray and line the bottoms with parchment paper rounds for easy cake removal.
- Pour Batter into Pans: Evenly distribute each colored batter into the prepared cake pans.
- Bake Cakes: Place the pans into the preheated oven and bake for 18-22 minutes, or until a toothpick inserted in the center comes out clean.
- Cool Cakes: Remove the cakes from the oven and allow them to cool completely on wire racks before frosting.
- Prepare Buttercream Frosting: Beat the unsalted butter until smooth. Gradually add sifted powdered sugar and mix until fully incorporated and creamy.
- Add Vanilla and Milk: Stir in vanilla extract and add milk slowly while mixing to reach a smooth, spreadable consistency.
- Color Frosting: Divide the frosting into five bowls. Add green food coloring to four bowls to create shades that coordinate with the cake layers, forming an ombre effect.
- Level Cake Layers: Use a cake leveler or a serrated knife to slice off the rounded tops of each cake layer to create flat surfaces for stacking.
- Assemble Cake: Starting with the darkest green cake layer, place it top side down on a cake plate. Spread a thin layer of the matching darkest shade of frosting on top. Continue layering each cake with corresponding frosting, working from darkest to lightest green layers.
- Frost the Outside: Pipe frosting around the outside edges of each cake layer. Use a frosting scraper to smooth and blend the frosting, achieving a seamless ombre effect on the sides of the cake.
Notes
- This Lucky St. Patrick’s Day Ombre Cake is perfect for festive gatherings and celebrations.
- Use gel food coloring for more vibrant shades without altering the batter consistency.
- Ensure cake layers are completely cool before frosting to prevent melting or sliding.
- A cake leveler yields the best results for uniform flat layers but a serrated knife can also be used.
- To achieve a smooth finish, chill the cake briefly between frosting layers if needed.
Nutrition
- Serving Size: 1 slice
- Calories: 610
- Sugar: 63g
- Sodium: 188mg
- Fat: 29g
- Saturated Fat: 16g
- Unsaturated Fat: 11g
- Trans Fat: 0g
- Carbohydrates: 84g
- Fiber: 1g
- Protein: 5g
- Cholesterol: 62mg


